Cisco SR224 User Guide
Cisco SR224 - Small Business Unmanaged Switch Manual
 |
UPC - 745883556526
View all Cisco SR224 manuals
Add to My Manuals
Save this manual to your list of manuals |
Cisco SR224 manual content summary:
- Cisco SR224 | User Guide - Page 1
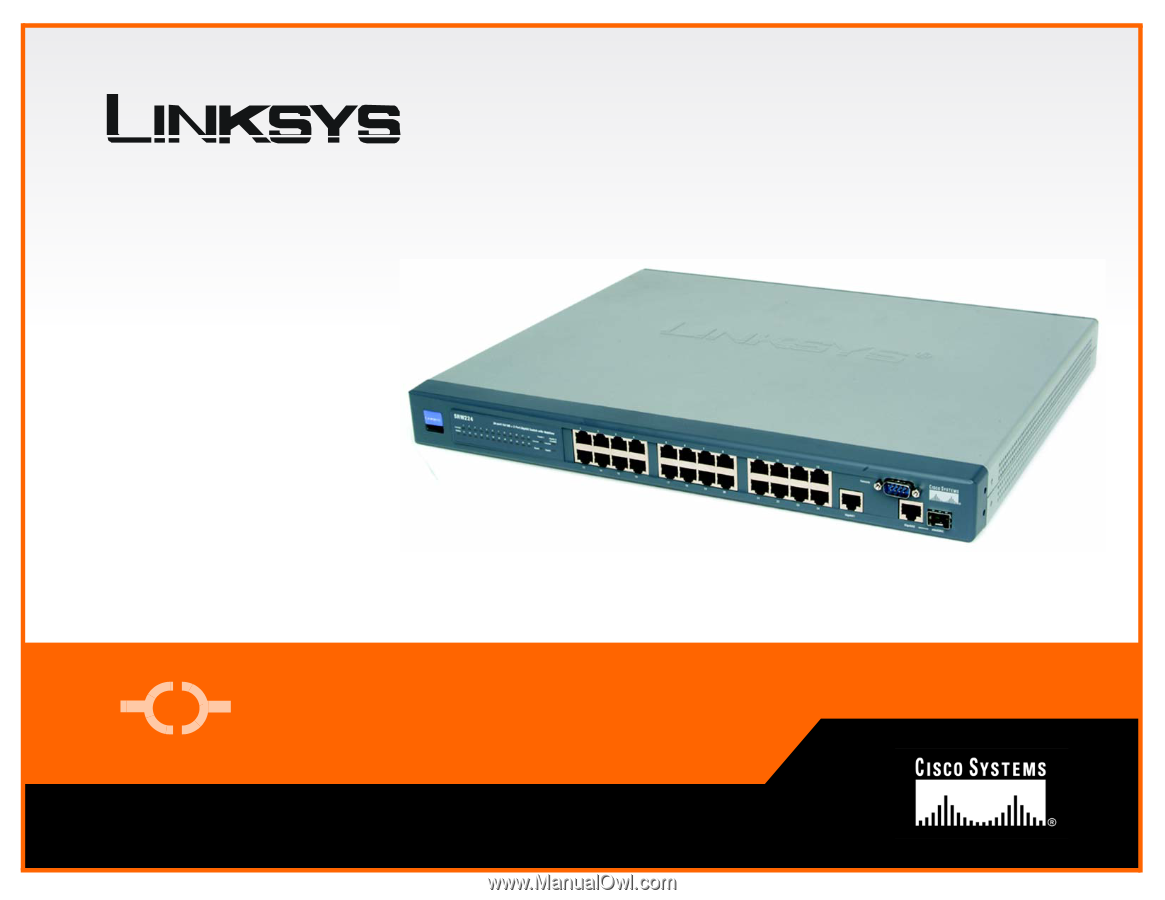
® A Division of Cisco Systems, Inc. 24 Port 10/100 + 2-Port Gigabit Switch with WebView User Guide WIRED Model No. SRW224 - Cisco SR224 | User Guide - Page 2
24-port 10/100 + 2-Port Gigabit Switch with WebView Copyright and Trademarks Specifications are subject to change without notice. Linksys is a registered trademark or trademark of Cisco Systems, Inc. and/or its affiliates in the U.S. and certain other countries. Copyright © 2004 Cisco Systems, Inc. - Cisco SR224 | User Guide - Page 3
Application 11 Configuring the Switch through the Console Interface 12 Chapter 5: Configuring the Switch through the Web Utility 19 Overview 19 System Tab 20 Port Tab 22 Trunk Tab 23 VLAN Tab 23 Appendix A: Fast Ethernet and Gigabit Ethernet 27 About Fast Ethernet 27 About - Cisco SR224 | User Guide - Page 4
24-port 10/100 + 2-Port Gigabit Switch with WebView Appendix E: Specifications 38 Appendix F: Warranty Information 39 Appendix G: Regulatory Information 40 Appendix H: Contact Information 41 - Cisco SR224 | User Guide - Page 5
Figure 4-9: Advanced Switch Configuration 14 Figure 4-10: Password Setting 14 Figure 4-11: IP Configuration 15 Figure 4-12: Firmware Update 15 Figure 4-13: Main Menu 15 Figure 4-14: Send File 16 Figure 4-15: Xmodem File Send for SRW224 16 Figure 4-16: Restore System Default Setting 16 - Cisco SR224 | User Guide - Page 6
24-port 10/100 + 2-Port Gigabit Switch with WebView Figure 5-1: Addrees Field 19 Figure 5-2: Password Screen 19 Figure 5-3: Welcome Screen 19 Figure 5-4: System Tab-System Information 20 Figure 5-5: System Tab-MISC Configuration 20 Figure 5-6: System Tab-Username/Password Setting 21 - Cisco SR224 | User Guide - Page 7
forward switching prevents damaged packets from being passed on into the network. Use the instructions in this User Guide to help you connect the Switch, set it up, and configure it to bridge your different networks. These instructions should be all you need to get the most out of the 24-port 10/100 - Cisco SR224 | User Guide - Page 8
This chapter instructs you on how to use the Switch's console interface for configuring the Switch. • Chapter 5: Configuring the Switch through the Web Utility This chapter shows you how to configure the Switch usign the Web Utility. • Appendix A: Fast Ethernet and Gigabit Ethernet This appendix - Cisco SR224 | User Guide - Page 9
24-port 10/100 + 2-Port Gigabit Switch with WebView • Appendix H: Contact Information This appendix provides contact information for a variety of Linksys resources, including Technical Support. Chapter 1: Introduction 3 What's in this Guide? - Cisco SR224 | User Guide - Page 10
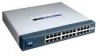
24-port 10/100 + 2-Port Gigabit Switch with WebView Chapter 2: Getting to Know the Switch The Front Panel The Switch's LEDs and ports are located on the front panel. Figure 2-1: Front Panel LEDs System Green. Lights to indicate the power is being supplied to the Switch. LINK/ACT Green. Lights - Cisco SR224 | User Guide - Page 11
24-port 10/100 + 2-Port Gigabit Switch with WebView The Back Panel The power port is located on the back panel of the Switch. Power Figure 2-2: Back Panel The Power port is where you will connect the power cord. The Side Panel The security slot is located on a side panel. Figure 2-3: Side Panel - Cisco SR224 | User Guide - Page 12
24-port 10/100 + 2-Port Gigabit Switch with WebView RJ-45 Ports The Switch is equipped with twenty-four auto-sensing RJ-45 ports. These RJ-45 ports support network speeds of either 10Mbps or 100Mbps, and can operate in half and full-duplex modes. Auto-sensing technology enables each port to - Cisco SR224 | User Guide - Page 13
24-port 10/100 + 2-Port Gigabit Switch with WebView Chapter 3: Connecting the Switch Overview This chapter will explain how to connect network devices to the Switch. For an example of a typical network configuration, see the application diagram shown in Figure 3-1. Figure 3-1: Typical Network - Cisco SR224 | User Guide - Page 14
24-port 10/100 + 2-Port Gigabit Switch with WebView Pre-Installation Considerations Fast Ethernet Considerations If you will be using the Switch for Fast Ethernet (100Mbps) applications, you must observe the following guidelines: Full-Duplex Considerations As previously mentioned, the Switch - Cisco SR224 | User Guide - Page 15
24-port 10/100 + 2-Port Gigabit Switch with WebView 4. Repeat steps 2 and 3 to connect additional devices. 5. If you are using the Gigabit port, connect a Category 5e Ethernet network cable to the Gigabit port on the Switch, and connect the other end to a Gigabit server or other network device. 6. - Cisco SR224 | User Guide - Page 16
the Hardware Installation instructions. Uplinking the Switch To uplink the Switch, connect one end of a Cat5 (or better) cable into one of the 24 10/100 ports, and then connect the other end of the cable into the peripheral device's uplink port. MDI/MDIX will automaticlaly detect the speed and cable - Cisco SR224 | User Guide - Page 17
24-port 10/100 + 2-Port Gigabit Switch with WebView Chapter 4: Configuration using the Console Interface Overview The Switch features a menu-driven console interface for basic switch configuration. You can easily manage your network from the screens through the console port. Before you can use the - Cisco SR224 | User Guide - Page 18
24-port 10/100 + 2-Port Gigabit Switch with WebView Configuring the Switch through the Console Interface Login When you finish configuring the Hyper Terminal, the Login screen will appear. The first time you open the WebBased Utility, use the default username admin, and leave the password blank. - Cisco SR224 | User Guide - Page 19
24-port 10/100 + 2-Port Gigabit Switch with WebView System Configuration System Configuration displays: 1. System Information 2. Advanced Switch Configuration 3. Password Setting 4. IP Configuration 5. Firmware Update 6. Restore System Default Setting 7. Reboot System 0. Return to Main Menu. System - Cisco SR224 | User Guide - Page 20
the feature. Web Auto Logout Time. The Web interface will log out after the chosen time. Select 5 min, 10 min, or 20 min. Password Configuration This screen allows you to set a password for your Switch. Password Protection. To set a password for your network, select Enable. Enter your user name in - Cisco SR224 | User Guide - Page 21
24-port 10/100 + 2-Port Gigabit Switch with WebView IP Configuration IP information is displayed here. • MAC Address. The MAC Address of the Switch is displayed. • IP Address. This IP Address of the network is displayed. (The default IP address is 192.168.1.254.) Verify that the address you enter is - Cisco SR224 | User Guide - Page 22
24-port 10/100 + 2-Port Gigabit Switch with WebView The Send File screen will appear. Click Browse to locate the firmware file. Select the Xmodem protocol from the Protocol drop-down menu. Click Send to send the firmware. The Xmodem File Send for SRW224 screen will appear to display the status of - Cisco SR224 | User Guide - Page 23
24-port 10/100 + 2-Port Gigabit Switch with WebView Reboot System If you would like to reboot the Switch, select Reboot System and press Enter. Return to Main Menu Select Return to Main Menu if you want to return to the main menu. Chapter 4: Configuration using the Console Interface Configuring the - Cisco SR224 | User Guide - Page 24
24-port 10/100 + 2-Port Gigabit Switch with WebView Port Status This screen allows you to view the status of a port. The Port, Enable, Link Status, Spd/Dpx, and Flow Control are displayed. Port Configuration This screen allows you to change the status of a port. Select the port, then Enable the port - Cisco SR224 | User Guide - Page 25
24-port 10/100 + 2-Port Gigabit Switch with WebView Chapter 5: Configuring the Switch through the Web Utility Overview Open your web browser and enter 192.168.1.254 into the address field. Press the Enter key and the Password screen will appear. The first time you open the Web-Based Utility, use - Cisco SR224 | User Guide - Page 26
10/100 + 2-Port Gigabit Switch with WebView System Tab The System tab displays the system information. • Firmware version. The current firmware version is displayed. • MAC Address. The MAC Address of the Switch is displayed. • IP Address. This IP Address of the network is displayed. (The default IP - Cisco SR224 | User Guide - Page 27
Web interface will log out after the chosen time. Select 5 min, 10 min, or 20 min from the drop-down menu. Password Setting This screen allows you to set a password for your Switch. Password Protection. To set a password for your network, select Enable from the drop-down menu. Enter your user name - Cisco SR224 | User Guide - Page 28
24-port 10/100 + 2-Port Gigabit Switch with WebView Port Tab This tab allows you to view the status of a port. The Port, Enable, Link Status, Spd/Dpx, and Flow Control are displayed. Click Click here to configure Speed/Duplex of each Port, which is located at the bottom of the screen, to configure - Cisco SR224 | User Guide - Page 29
24-port 10/100 + 2-Port Gigabit Switch with WebView Trunk Tab This tab allows you to configure the trunk group. Select the port, then select if it is a normal port, then select the group you want to add the port to. Click Apply when finished with your changes. VLAN Tab VLAN Configuration This tab - Cisco SR224 | User Guide - Page 30
24-port 10/100 + 2-Port Gigabit Switch with WebView Advanced 802.1Q VLAN Setting For each port, select Drop or Forward for Nonmember and Untagged. Figure 5-11: Advanced 802.1Q VLAN Setting Edit a 802.1Q VLAN Group To add an 802.1QVLAN group, enter an identifying number between 1 and 255 in the VLAN - Cisco SR224 | User Guide - Page 31
24-port 10/100 + 2-Port Gigabit Switch with WebView If you change from an 802.1q VLAN mode to a Port-based VLAN mode, this screen will appear. PortBased VLAN Mode The VLAN Group list will display the existing VLAN groups.To add a VLAN group, click Add New. To delete a group from the list, click - Cisco SR224 | User Guide - Page 32
24-port 10/100 + 2-Port Gigabit Switch with WebView QoS Configuration This screen allows you to configure the QoS. Select the QoS Mode of High Low = 3:1, Disable QoS Priority, High Empty Then Low, High Low = 3:1, High Low = 5:1, High Low = 7:1 from the drop-down menu. Select the Static Port Ingress - Cisco SR224 | User Guide - Page 33
24-port 10/100 + 2-Port Gigabit Switch with WebView Appendix A: Fast Ethernet and Gigabit Ethernet About Fast Ethernet 1. As the demand for desktop video, multimedia development, imaging, and other speed-intensive applications continues to rise, the need for high performance, fault tolerant LAN - Cisco SR224 | User Guide - Page 34
24-port 10/100 + 2-Port Gigabit Switch another hub (there is an exception: some hubs have a built-in uplink port that is crossed internally, which allows you to link or connect hubs the cable so that the end of the plastic RJ-45 tip (the part that goes into a wall jack first) is facing away from you. - Cisco SR224 | User Guide - Page 35
24-port 10/100 + 2-Port Gigabit Switch with WebView Figure B-2: Straight-Through Cable Figure B-3: Crossed-Over Cable Appendix B: Cabling 29 Twisted Pair Cabling - Cisco SR224 | User Guide - Page 36
24-port 10/100 + 2-Port Gigabit Switch with WebView Fiber Optic Cabling Fiber optic cabling is use the Linksys MGBT1, MGBSX1, or MGBLH1 miniGBIC modules with the Linksys SRW224. The MGBSX1 and the MGBLH1 require fiber cabling with LC connectors. The MGBT1 requires a Category 5 Ethernet Cable with - Cisco SR224 | User Guide - Page 37
24-port 10/100 + 2-Port Gigabit Switch with WebView Appendix D: Glossary Adapter - A device that adds network functionality to your PC. AES (Advanced Encryption Standard) - A security method that uses symmetric 128-bit block data encryption. Backbone - The part of a network that connects most of - Cisco SR224 | User Guide - Page 38
24-port 10/100 + 2-Port Gigabit Switch with WebView DDNS (Dynamic Domain Name System) - Allows the hosting of a website, FTP server, or e-mail server with a fixed domain name (e.g., www.xyz.com) and a dynamic IP address. Default Gateway - A device that forwards users from other networks. Firmware - Cisco SR224 | User Guide - Page 39
24-port 10/100 + 2-Port Gigabit Switch with WebView FTP (File Transfer Protocol) - A protocol used to transfer files over a TCP/IP network. Full Duplex - The ability of a networking device to receive and transmit data simultaneously. Gateway - A device that interconnects networks with different, - Cisco SR224 | User Guide - Page 40
24-port 10/100 + 2-Port Gigabit Switch with WebView NAT (Network Address Translation) - NAT technology translates IP addresses of a local area network to a different IP address for the Internet. NAT (Network Address Translation) Traversal -A method of enabling specialized applications, such as - Cisco SR224 | User Guide - Page 41
24-port 10/100 + 2-Port Gigabit Switch with WebView RTS (Request To Send) - A networking method of coordinating large packets through the RTS Threshold setting. Server - Any computer whose function in a network is to provide user access to files, printing, communications, and other services. SMTP ( - Cisco SR224 | User Guide - Page 42
24-port 10/100 + 2-Port Gigabit Switch with WebView Topology - The physical layout of a network. TX Rate - Transmission Rate. UDP (User Datagram Protocol) - A network protocol for transmitting data that does not require acknowledgement from the recipient of the data that is sent. Upgrade - To - Cisco SR224 | User Guide - Page 43
24-port 10/100 + 2-Port Gigabit Switch with WebView Appendix C: Windows Help All wireless products will not be able to utilize wireless networking without having TCP/IP enabled. Windows Help provides complete instructions on enabling TCP/IP. Shared Resources If you wish to share printers, folder, - Cisco SR224 | User Guide - Page 44
24-port 10/100 + 2-Port Gigabit Switch with WebView Appendix E: Specifications Standards IEEE 802.3, IEEE 802.3u, IEEE 802.3ab Ports 24 - 10/100 , 2 - 10/100/1000, 1 - MiniGBIC, 1-Console Cabling Type UTP CAT 5e or better LEDs System, Link/Act, Gigabit, Gigabit 1, Gigabit 2/miniGBIC - Cisco SR224 | User Guide - Page 45
24-port 10/100 + 2-Port Gigabit Switch with WebView Appendix F: Warranty Information LIMITED WARRANTY Linksys warrants to You that, for a period of one year (the "Warranty Period"), your Linksys Product will be substantially free of defects in materials and workmanship under normal use. Your - Cisco SR224 | User Guide - Page 46
24-port 10/100 + 2-Port Gigabit Switch with WebView Appendix G: Regulatory Information FCC STATEMENT This product has been tested and complies with the specifications for a Class B digital device, pursuant to Part turning the equipment off and on, the user is encouraged to try to correct the - Cisco SR224 | User Guide - Page 47
24-port 10/100 + 2-Port Gigabit Switch with WebView Appendix H: Contact Information Need to contact Linksys? Visit us online for information on the latest products and updates to your existing products at: Can't find information about a product you want to buy on the web? Do you want to know more
-
 1
1 -
 2
2 -
 3
3 -
 4
4 -
 5
5 -
 6
6 -
 7
7 -
8
-
9
-
10
-
11
-
12
-
13
-
14
-
15
-
16
-
17
-
18
-
19
-
20
-
21
-
22
-
23
-
24
-
25
-
26
-
27
-
28
-
29
-
30
-
31
-
32
-
33
-
34
-
35
-
36
-
37
-
38
-
39
-
40
-
41
-
42
-
43
-
44
-
45
-
46
-
47
 |
 |
A Division of Cisco Systems, Inc.
®
Model No.
WIRED
with WebView
24 Port 10/100 + 2-Port Gigabit Switch
SRW224
User Guide