Coby CAM5000 Instruction Manual
Coby CAM5000 - SNAPP Camcorder - 720p Manual
 |
UPC - 716829650004
View all Coby CAM5000 manuals
Add to My Manuals
Save this manual to your list of manuals |
Coby CAM5000 manual content summary:
- Coby CAM5000 | Instruction Manual - Page 1
CAM5000 EN Snapp™ HD Digital Video Camera Instruction Manual Page 2 ES Snapp™ Videocámara Digital de HD Manual de la instrucción Pagina 48 FR Snapp™ Caméscope Numérique HD Manuel d'instruction Page 94 Please read carefully before use • Léa el manual antes de usar • Veuillez lire ce livret avant - Coby CAM5000 | Instruction Manual - Page 2
English ÂÂ Table of Contents Package Contents 4 Features 5 Camcorder at a Glance 6 Display Overview 8 Video Mode 8 Playback Mode 12 Getting Started 13 Battery 13 Installing the Battery 13 Battery Indicator 14 Charging the Battery 14 Turning the Video Camera On/Off 14 Using a Memory Card - Coby CAM5000 | Instruction Manual - Page 3
& Additional Features 29 USB Mode 29 Webcam Mode 30 Working Mode 30 Charge Mode 31 Transferring Files 31 Uploading Videos to YouTube 32 About the Software CD 33 Web Camera Driver 34 ArcSoft MediaImpression 36 User Manual 36 Troubleshooting 37 Specifications 40 Safety Notices 42 Page - Coby CAM5000 | Instruction Manual - Page 4
your purchase of the Coby SNAPP CAM5000 HD Digital Video Camera. Please read this manual before operating your video camera, and keep it for future reference. This package contains: SNAPP CAM5000 unit AV cable USB cable Installation CD Lithium-ion battery Hand strap HDMI cable - Coby CAM5000 | Instruction Manual - Page 5
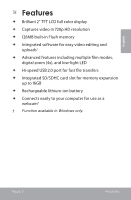
ÂÂ Features Brilliant 2" TFT LCD full color display Captures video in 720p HD resolution 128MB built-in Flash memory Integrated software for easy video editing and uploads† Advanced features including multiple film modes, digital zoom (4x), and low-light LED Hi-speed USB 2.0 port - Coby CAM5000 | Instruction Manual - Page 6
. 3 MODE Switch the function mode. 4 Up Down Left Right Record 5 Speaker Audio output during video review. 6 Battery/ Load SD or SDHC memory cards to increase SD card the camcorder's storage capacity. The CAM5000 supports up to 16GB capacity cards. 7 MENU Access the setup menu to adjust - Coby CAM5000 | Instruction Manual - Page 7
TV. 9 HDMI jack Connect an HDMI cable to this jack to display video on an HDTV. 10 Battery charge Indicates battery charging status. indicator 11 Power: press and hold to turn on; press to turn off. 12 Lens lamp light situations. 15 Tripod socket 16 Strap mount Page 7 Camcorder At A Glance - Coby CAM5000 | Instruction Manual - Page 8
Display Overview Video Mode English Video Mode icon Battery Level Indictor Full Half Low Empty Memory card icon Page 8 Camcorder At A Glance - Coby CAM5000 | Instruction Manual - Page 9
English White Balance Indicator Auto Sunny Cloudy Flourescent Tungsten Resolution Indicator 320 x 240 640 x 480 1280 x 720 Digital zoom indicator Duration of recording AWB QVGA VGA HD [30:30] Page 9 Camcorder At A Glance - Coby CAM5000 | Instruction Manual - Page 10
English Photo Mode Photo Mode icon Battery Level Indictor Full Half Low Empty Memory card icon Page 10 Camcorder At A Glance - Coby CAM5000 | Instruction Manual - Page 11
English White Balance Indicator Auto Sunny Cloudy Flourescent Tungsten Resolution Indicator 4032 x 3024 3400 x2550 2592 x 1944 1600 x 1200 Digital zoom indicator Photos remaining AWB 12M 8M 5M 2M [1270] Page 11 Camcorder At A Glance - Coby CAM5000 | Instruction Manual - Page 12
Playback Mode English Playback Mode icon Battery Level Indictor Full Half Low Empty Memory card icon Sequence of current file / Total number of files [12/12] Page 12 Camcorder At A Glance - Coby CAM5000 | Instruction Manual - Page 13
only the size and type of batteries specified. Do not mix old with new batteries, or mix different types of batteries. Do not charge batteries that are not intended to be recharged. Follow the battery manufacturer's directions. Do not install the batteries with their polarities reversed; this may - Coby CAM5000 | Instruction Manual - Page 14
conditions. Please refer to the table below for more information. Charging the Battery Your video camera will charge when connected to a PC via the supplied USB cable or directly through the USB plug. To begin charging: 1. Power OFF - Coby CAM5000 | Instruction Manual - Page 15
Card To maximize your video camera's recording time, you may wish to use a memory card. Your video camera supports SD/SDHC card formats. To insert a memory card: 1. Open the battery/SD compartment door. 2. Insert the SD card with the frontispiece of the card facing toward the LCD screen. 3. Close - Coby CAM5000 | Instruction Manual - Page 16
the lighting conditions, you may wish to adjust the video camera's white balance setting before you begin filming. Press to change the white balance. Options include: Auto, Sunny,Cloudy, Fluorescent, and Tungsten. Page 16 Video Mode - Coby CAM5000 | Instruction Manual - Page 17
Size To maximize your video camera's available memory, you may wish to record video at a lower resolution. Press to change the movie size. Options include: HD (1280 x 720), VGA (640 x 480), and QVGA (320 x 240). For more information on Video Mode setup options, please see the Setup Options section - Coby CAM5000 | Instruction Manual - Page 18
Mode . 3. Press to take a picture. DO NOT attempt to remove the memory card or battery when the video camera is saving images. Doing so may cause data corruption. Additional Features Zoom change the white balance. Options include: Auto, Sunny,Cloudy, Fluorescent, and Tungsten. Page 18 Photo Mode - Coby CAM5000 | Instruction Manual - Page 19
maximize your video camera's available memory, you may wish to take photos at a lower resolution. Press to change the image size. Options include: 1600x1200 (2M), 2592x1944 (5M), 3400x2550 (8M by interpolation), and 4032x3024 (12M by interpolation). For more information on Photo Mode setup options - Coby CAM5000 | Instruction Manual - Page 20
English ÂÂ Playback Mode NOTE: If there are no files, the [no file] icon will be displayed on the LCD screen. Power on the video camera and press the MODE button to select Playback Mode. Your recorded files will be displayed as thumbnails. Use the and buttons to select your desired file. Playback - Coby CAM5000 | Instruction Manual - Page 21
English Playback of Video Files Video files are denoted by the Video icon in the top lefthand corner of the thumbnail image. 1. Press to access the desired video file. Press it again to begin playback. 2. During playback, press to pause. Press it again to continue. 3. Press to rewind through your - Coby CAM5000 | Instruction Manual - Page 22
mode. 4. Select Video Mode if you want to use your television to preview content as you record it. 5. Select Playback Mode if you want to review the video and/or image files you have already taken. Page 22 Tv Playback - Coby CAM5000 | Instruction Manual - Page 23
connected to a television, the LCD screen will automatically turn off. Connecting to a television will not charge the video camera's battery; your video camera will continue to operate on battery power. If the image is not displayed correctly in the center of the screen, you may need to adjust your - Coby CAM5000 | Instruction Manual - Page 24
HDTV Playback Your video camera is capable of playback at HD (720p) resolution on a compatible HDTV. To view your video files in HD: 1. Power off the video camera. 2. Use the HDMI cable to connect the HDMI output jack on your video camera to your HDTV's HDMI input. 3. Power - Coby CAM5000 | Instruction Manual - Page 25
English ÂÂ Setup Options Your video camera offers additional setup options in Video, Photo, and Playback modes, as well as a general setup menu for the camera. Access the Setup menu in each mode by pressing the MENU button. Use the directional keypad to navigate the setup menus. Press to - Coby CAM5000 | Instruction Manual - Page 26
English Photo Mode Setup Enter the Photo Mode Setup menu to adjust image size, set the self-timer, or change photo settings. Feature Description Quality Setup Adjust the image quality. Finer quality images will use more memory. Image Size Take photos at a lower resolution to maximize the video - Coby CAM5000 | Instruction Manual - Page 27
Set the camera to automatically turn off when not in use for a designated time period. This feature helps to maximize the video camera's battery life. Set the sound effect for the video camera's controls. Set the display brightness. PAL / NTSC Format the video camera. CAUTION: Selecting YES - Coby CAM5000 | Instruction Manual - Page 28
English Feature Flicker Default Setup Language Version Description Adjust the video camera's frequency depending upon your location. NOTE: US setting is 60Hz. Restore your video camera to its factory default settings. CAUTION: Selecting YES will delete all custom settings from your video camera. - Coby CAM5000 | Instruction Manual - Page 29
& Additional Features Connect your video camera directly to your computer's USB port to transfer files, use the webcam feature, or continue shooting video and photos without draining the battery. (You may also connect the video camera using the supplied USB extension cable.) Make sure the video - Coby CAM5000 | Instruction Manual - Page 30
video camera as a computer webcam. (Driver installation required.) The webcam feature is available in Windows only. To use the webcamera, select the Webcam Mode icon, then: 1. Double-click the "My Computer" icon on your Windows desktop. 2. Double-click the camera icon. The CAM5000 is now ready for - Coby CAM5000 | Instruction Manual - Page 31
English Charge Mode Select this mode to charge the video camera's battery. The video camera will automatically power off when Charge Mode is selected. Transferring Files To transfer files from the video camera to your computer: • Connect - Coby CAM5000 | Instruction Manual - Page 32
with family, friends, or the world with the YouTube web service. The CAM5000 comes with the Arscoft Upload to YouTube application that makes sharing your videos easy and convenient. The Upload to YouTube application is installed on the camcorder and will start automatically when you connect it to - Coby CAM5000 | Instruction Manual - Page 33
use the included software, Microsoft Windows Vista, 2000, or XP Service Pack 2 is required. Insert the CD into your CD-ROM drive. The autorun menu will appear. English Click on one of the following to launch the installation routine. Install Driver: Installs software to use the CAM5000 as a web - Coby CAM5000 | Instruction Manual - Page 34
start the program. Web Camera Driver To use the CAM5000 as a web camera with your PC, you must first install the driver from the CD. After the CD driver has been installed: 1. Connect the camera to the computer with the USB cable. Turn on the camcorder and select the Webcam Mode icon. 2. The "Found - Coby CAM5000 | Instruction Manual - Page 35
to finish installation. 4. The "Found New Hardware Wizard" will launch again. Follow the instructions again to finish installation. The CAM5000 is now ready for use as a web camera. Note: If the Hardware Installation screen appears, click "Continue Anyway". Page 35 About The Software Cd - Coby CAM5000 | Instruction Manual - Page 36
software, please refer to the help file included with the application (click on the "?" symbol in the top right corner of the application screen, or press "F1" on your keyboard). User Manual To read the user manual, you may need to download and install the free Adobe Acrobat reader from the Adobe - Coby CAM5000 | Instruction Manual - Page 37
this device, please read the troubleshooting guide below and check our website at www.cobyusa.com for Frequently Asked Questions (FAQs) and firmware updates. If these resources do not resolve the problem, please contact Technical Support. Address COBY Electronics Technical Support 56-65 Rust Street - Coby CAM5000 | Instruction Manual - Page 38
before data has finished processing. Be sure to allow adequate time for the image to save completely before turning off the video camera. Page 38 Troubleshooting - Coby CAM5000 | Instruction Manual - Page 39
I cannot access the pictures on my camera or memory card from my computer. • Ensure that the camera has been placed in USB mode when connected to your computer. For more information, see the Transferring Files section of this manual. English Page 39 Troubleshooting - Coby CAM5000 | Instruction Manual - Page 40
Image: JPEG (EXIF 2.2 compatible) Video: MP4 with Audio (WAV) Still Image: 1600x1200 (2M) / 2592x1944 (5M) 3400x2550 (8M) / 4032x3024 (12M) Video: 1280x720 HD / 640x480 / 320x240 Auto Auto / Daylight / Tungsten / Fluorescent / Cloudy 5 sec / 10 sec 128MB SD / SDHC PAL / NTSC Page 40 Specifications - Coby CAM5000 | Instruction Manual - Page 41
Power Supply Operating Temperature Storage Temperature Microphone Speaker Dimension Weight Lithium Battery 0°C up to 40°C -20°C up to +60°C Built-in Built-in Camera Body: 4.7" x 2.28" x 0.91" Camera Body w/o battery: approx. 3 ounces Specifications are subject to change without notice. Page 41 - Coby CAM5000 | Instruction Manual - Page 42
of electric shock. The exclamation point within an equilateral triangle is intended to alert the user to the presence of important operation and servicing instructions in the literature accompanying the appliance. For Customer Use: Enter below the serial number that is located on the rear of the - Coby CAM5000 | Instruction Manual - Page 43
an electrostatic discharge may be the cause. In this circumstance, please follow the procedures below for recovery: • Remove the batteries and wait for 30 seconds. • Replace the batteries and turn the unit on again. For recycling or disposal information about this product, please contact your local - Coby CAM5000 | Instruction Manual - Page 44
accept any interference received, including interference that may cause installation. This equipment generates, uses and can radiate radio frequency energy and, if not installed and used in accordance with the instructions unless otherwise specified in the manual. If such changes or modifications should - Coby CAM5000 | Instruction Manual - Page 45
be placed in a built-in installation such as a bookcase or rack unless proper ventilation is provided or the manufacturer instructions have been adhered to. 9. For products intended to operate from battery power or other sources, refer to the operating instructions. 10. Overloading: Do not overload - Coby CAM5000 | Instruction Manual - Page 46
to this product, ask the service technician to perform safety checks to ensure that the product is in proper operating condition. 16. Heat: The product should be situated away from heat sources such as radiators, heat registers, stoves, or other products (including amplifiers) that produce heat - Coby CAM5000 | Instruction Manual - Page 47
Page 47 Safety Notices English - Coby CAM5000 | Instruction Manual - Page 48
Español ÂÂ Índice de Contenidos Contenidos del Paquete 50 Características 51 Panorama de la CAM5000 52 Generalidades de la Pantalla 54 Modo Video 54 Modo Foto 56 Modo Reproducción 58 Para Empezar 59 Batería...59 Instalación de la batería 59 - Coby CAM5000 | Instruction Manual - Page 49
Modo de trabajo 77 Modo de carga 78 Transferencia de archivos 78 Subida de Videos a YouTube 79 Acerca del CD con Software 80 Controlador de Cámara Web 81 ArcSoft MediaImpression 83 Manual de Usuario 83 Solución de Problemas 84 Especificaciones 87 Avisos de Seguridad 89 Page 49 Índice De - Coby CAM5000 | Instruction Manual - Page 50
Gracias por adquirir la cámara de video digital de alta definición Coby SNAPP CAM5000. Lea este manual antes de usar la cámara de video y guárdelo para consultarlo en el futuro. Este paquete contiene: Unidad SNAPP CAM5000 Cable AV Cable USB CD de instalación Batería de ion-litio - Coby CAM5000 | Instruction Manual - Page 51
color de 2" Captura el video en una resolución de alta definición de 720p Posee una memoria Flash de 128MB Software integrado para editar y cargar de las características avanzadas que posee son varios modos de filmación, zoom digital (4x) e indicador LED de luz baja Puerto USB 2.0 para - Coby CAM5000 | Instruction Manual - Page 52
6 Cubierta de la Coloque tarjetas de memoria SD o SDHC para batería/ aumentar la capacidad de almacenamiento de tarjeta SD la grabadora de video. La CAM5000 es compatible con tarjetas con capacidad de hasta 16 GB. 7 MENU Acceda al menú de configuración para ajustar las opciones de la videocámara - Coby CAM5000 | Instruction Manual - Page 53
/ retraer el conector USB USB 14 Compensar a Mejora la calidad de la imagen en situala luz ciones con poca iluminación. Page 53 Panorama De La Cam5000 - Coby CAM5000 | Instruction Manual - Page 54
15 Conexión de trípode 16 Montaje de la correa Generalidades de la Pantalla Modo Video Español Icono del modo video Indicador del nivel de batería Lleno Medio Bajo Vacío Icono de la tarjeta de memoria Page 54 Panorama De La Cam5000 - Coby CAM5000 | Instruction Manual - Page 55
Español Indicador de Balance de Blancos Autom. Soleado Nublado Fluorescente Tungsteno Indicador de la resolución 320 x 240 640 x 480 1280 x 720 Indicador de zoom digital Duración de la grabación AWB QVGA VGA HD [30:30] Page 55 Panorama De La Cam5000 - Coby CAM5000 | Instruction Manual - Page 56
Español Modo Foto Icono del modo de Fotos Indicador del nivel de batería Lleno Medio Bajo Vacío Icono de la tarjeta de memoria Page 56 Panorama De La Cam5000 - Coby CAM5000 | Instruction Manual - Page 57
Español Indicador de Balance de Blancos Autom. Soleado Nublado Fluorescente Tungsteno Indicador de la resolución 320 x 240 640 x 480 1280 x 720 Indicador de zoom digital Digital zoom indicator Fotos restantes AWB QVGA VGA HD [1270] Page 57 Panorama De La Cam5000 - Coby CAM5000 | Instruction Manual - Page 58
Modo Reproducción Español Icono del modo reproducción Indicador del nivel de batería Lleno Medio Bajo Vacío Icono de la tarjeta de memoria Secuencia del archivo actual / Cantidad total de archivos [12/12] Page 58 Panorama De La Cam5000 - Coby CAM5000 | Instruction Manual - Page 59
baterías diferentes. No cargue baterías que no han sido diseñadas para recarga. Siga las indicaciones del fabricante de las baterías. No instale las baterías con las polaridades invertidas, ya que esto podría dañar la unidad. Si no se utiliza la unidad durante un período - Coby CAM5000 | Instruction Manual - Page 60
Español Indicador de la batería La pantalla de LCD de la cámara de video muestra 3 estados diferentes de la batería. Consulte la tabla que aparece a continuación para obtener más información. Carga de la batería La cámara de video se cargará cuando esté conectada a una computadora con el cable USB - Coby CAM5000 | Instruction Manual - Page 61
Español Uso de una tarjeta de memoria Para maximizar el tiempo de grabación de la cámara de video, puede utilizar una tarjeta de memoria. La cámara de video admite formatos de tarjeta SD/SDHC. Para insertar una tarjeta de memoria: 1. Abra la puerta del compartimiento SD/de la batería. 2. Inserte la - Coby CAM5000 | Instruction Manual - Page 62
Español ÂÂ Modo Video Grabación de películas de video Encienda la cámara de video. 1. Presione el botón MODE (modo) para seleccionar el modo Video. 2. Presione (obturador) para comenzar a grabar. 3. Presione nuevamente para detener la grabación del video. Características adicionales Zoom ( - Coby CAM5000 | Instruction Manual - Page 63
de la cámara de video, puede grabar videos con una resolución menor. Presione para cambiar la dimensión de la película. Las opciones son: HD (1280 x 720), VGA (640 x 480) y QVGA (320 x 240). Para obtener más información sobre las opciones de configuración del modo Video, consulte la sección Opciones - Coby CAM5000 | Instruction Manual - Page 64
Español ÂÂ Modo Foto Tomar una fotografía Puede usar la cámara de video para capturar imágenes fijas. Para tomar fotografías: 1. Encienda la cámara de video. 2. Presione el botón MODE (modo) para seleccionar el modo Video . 3. Presione para tomar una fotografía. NO intente extraer la tarjeta de - Coby CAM5000 | Instruction Manual - Page 65
por interpolación) y 4032x3024(12M por interpolación). Para obtener más información sobre las opciones de configuración del modo Foto, consulte la sección Opciones de configuración en este manual. Español Page 65 Modo Foto - Coby CAM5000 | Instruction Manual - Page 66
ÂÂ Modo Reproducción NOTA: Si no hay archivos, el icono [no file] (inexistencia de archivos) aparecerá en la pantalla de LCD. Encienda la cámara de video y presione el botón MODE (modo) para seleccionar al modo reproducción. Los archivos grabados se verán como imágenes en miniatura. Use los botones - Coby CAM5000 | Instruction Manual - Page 67
Español Reproducción de archivos de video Los archivos se muestran con el icono Video en la esquina superior izquierda de la imagen en miniatura. 1. Presione para acceder al archivo de video deseado. Presiónelo nuevamente para comenzar la reproducción. 2. Durante la reproducción, presione para - Coby CAM5000 | Instruction Manual - Page 68
Español ÂÂ Reproducción en la TV Reproducción en un TV estándar Conecte la cámara de video a un televisor para visualizar archivos o para grabar nuevos en una pantalla más grande. 1. Apague la cámara de video y conéctela a un televisor con el cable AV suministrado. 2. Encienda el televisor y coló - Coby CAM5000 | Instruction Manual - Page 69
batería. Si la imagen no se muestra correctamente en el centro de la pantalla, es posible que necesite ajustar la configuración del televisor. Consulte el manual del uso del televisor para obtener asistencia. Page 69 Reproducción En La Tv - Coby CAM5000 | Instruction Manual - Page 70
Reproducción en un TV de alta definición La cámara de video admite la reproducción en alta definición (720p) en un televisor de alta definición compatible. Para visualizar los archivos de video en alta resolución: 1. Apague la cámara de video. 2. Use el cable HDMI - Coby CAM5000 | Instruction Manual - Page 71
ÂÂ Opciones de Configuración La cámara de video ofrece opciones de configuración adicionales en los modos video, foto y reproducción, como un menú de configuración general para la cámara. Acceda al menú Configuraciones de cada modo presionado el botón MENU (menú). Use el teclado direccional - Coby CAM5000 | Instruction Manual - Page 72
Español Función Descripción Balance de blanco Ajusta el balance de blanco según las diferentes condiciones de luz. Configuración Ajusta la exposición según las de EV diferentes condiciones de luz. Tecla de acceso directo -- Configuración del modo foto Ingrese en el menú Configuración del - Coby CAM5000 | Instruction Manual - Page 73
Español Función Descripción Tecla de acceso directo Temporizador Configura el temporizador au- -- automático tomático de la cámara de video. Sello Muestra un sello de la fecha -- y la hora en sus fotografías. NOTA: La hora y fecha internas de la cámara de video se deben configurar con el - Coby CAM5000 | Instruction Manual - Page 74
Español Configuración general Puede acceder al menú de configuración general de la cámara de video desde cualquier modo. Presione el botón MENU y luego use el teclado direccional para seleccionar icono Configuración. Función Descripción Apagado automático Configura la cámara de video para que - Coby CAM5000 | Instruction Manual - Page 75
Español Función Descripción Fecha/hora Configura la fecha y hora internas de la cámara de video. • Use / para alternar entre los campos hora: minuto y día: mes: año. • Use / para modificar los valores de estos campos. Parpadeo Ajusta la frecuencia de la cámara de video según su ubicación. NOTA - Coby CAM5000 | Instruction Manual - Page 76
Español ÂÂ Transferencia de Archivos y Características Adicionales Conecte la cámara de video directamente al puerto USB de la computadora para transferir archivos, para usar la función cámara Web o para continuar tomando fotografías o grabando videos sin agotar la batería. (Además puede conectar - Coby CAM5000 | Instruction Manual - Page 77
y, a continuación: 1. Haga doble clic en el icono "My Computer" (Mi PC) en el escritorio de Windows. 2. Haga doble clic en el icono de cámara. El CAM5000 está listo para su uso como una cámara web. Modo de trabajo Use la cámara de video para grabar videos, tomar fotografías o para reproducir - Coby CAM5000 | Instruction Manual - Page 78
Español Modo de carga Seleccione este modo para cargar la batería de la cámara de video. La cámara de video automáticamente se apagará cuando se seleccione el modo de carga. Transferencia de archivos Para transferir archivos de la cámara de video a la computadora: • Conecte la cámara de video al - Coby CAM5000 | Instruction Manual - Page 79
familia, amigos o el mundo con el servicio Web de YouTube. La CAM5000 viene con el software Arscoft Upload to YouTube que permite compartir sus videos to YouTube, es necesario contar con Windows Vista, 2000, o XP Service Pack 2 de Microsoft. Proporcione sus credenciales de nombre de usuario - Coby CAM5000 | Instruction Manual - Page 80
o XP Service Pack 2 de Microsoft. Inserte el CD en la unidad lectora de CD-ROM. Aparecerá el menú de autoejecución. Español Haga clic en una de las siguientes opciones para iniciar la rutina de instalación. Install Driver (Instalar controlador): Instala el software para usar la CAM5000 como - Coby CAM5000 | Instruction Manual - Page 81
para editar video y fotografías. User Manual (Manual de Usuario): Lea el manual de usuario de CAM5000. Si el menú de autoejecución no aparece Controlador de Cámara Web Para usar la CAM5000 como cámara Web con su PC, debe instalar primero el controlador del CD. Después de instalar el controlador: - Coby CAM5000 | Instruction Manual - Page 82
la instalación. 4. The "Found New Hardware Wizard" will launch again. Follow the instructions again to finish installation. 5. El "Found New Hardware" aparecerá de nuevo. Siga las instrucciones para finalizar la instalación. La CAM5000 ya está listo para su uso como una cámara web. Note: Si - Coby CAM5000 | Instruction Manual - Page 83
cada aplicación (haga clic en el símbolo "?" que se encuentra en la esquina superior derecha de la pantalla de la aplicación). Manual de Usuario Para leer el manual del usuario, es posible que tenga que descargar e instalar el programa gratuito "Adobe Acrobat Reader" desde el sitio Web de Adobe en - Coby CAM5000 | Instruction Manual - Page 84
en www.cobyusa.com para obtener respuestas a preguntas frecuentes (FAQs) y las actualizaciones de firmware. Si estos recursos no resuelven el problema, comuníquese con el Soporte técnico. Dirección Soporte Técnico Coby Electronics 56-65 Rust Street Maspeth, NY 11378 Email [email protected] Web - Coby CAM5000 | Instruction Manual - Page 85
Español La cámara no toma fotografías/video. • La memoria de la cámara o de la tarjeta puede estar llena. Borre varios archivos e intente nuevamente. • Es posible que se haya insertado una tarjeta de memoria incompatible. Verifique que la tarjeta de memoria se encuentre en un formato compatible. • - Coby CAM5000 | Instruction Manual - Page 86
que la cámara de video estaba en modo USB cuando la conectó a la computadora. Para obtener más información, vea la sección Transferencia de archivos en este manual. Español Page 86 Solución De Problemas - Coby CAM5000 | Instruction Manual - Page 87
Imagen fija: JPEG (compatible con EXIF 2.2) Video: MP4 con Audio (WAV) Imagen fija: 1600x1200 (2M) / 2592x1944 (5M)3400x2550 (8M) / 4032x3024 (12M) Video: 1280x720 HD / 640x480 / 320x240 Autom. Autom. / Luz de día / Tungsteno / Fluorescente / Nublado 5 seg. / 10 seg. 128MB Page 87 Especificaciones - Coby CAM5000 | Instruction Manual - Page 88
Español Almacenamiento externo SD / SDHC Sistema de TV PAL / NTSC Fuente de alimentación Batería de litio Temperatura de funcio- 0°C hasta 40°C namiento Temperatura de almace- -20 °C hasta +60 °C namiento Micrófono Incorporado Altavoz Incorporado Dimensiones Cuerpo de la cámara: 4.7" x - Coby CAM5000 | Instruction Manual - Page 89
ÂÂ Avisos de Seguridad Español La figura de relámpago que termina en punta de flecha dentro de un triángulo equilátero tiene por finalidad alertar al usuario de la presencia de "voltaje peligroso" sin aislamiento dentro de la caja del producto que podría tener potencia suficiente para constituir - Coby CAM5000 | Instruction Manual - Page 90
ADVERTENCIA: Para prevenir el riesgo de descarga eléctrica, no exponga este dispositivo a la lluvia ni a la humedad. Adentro del gabinete se encuentra alto voltaje peligroso. No lo abra. Nota: Si el producto repentinamente no responde o se apaga, es posible que la causa sea una descarga electrostá - Coby CAM5000 | Instruction Manual - Page 91
la Parte 15 de las normas de la FCC. No efectúe cambios ni modificaciones al equipo, excepto en caso de que así lo especifique el manual. Si se deben efectuar tales cambios o modificaciones, se le solicitará que detenga el funcionamiento del equipo. Page 91 Avisos De Seguridad - Coby CAM5000 | Instruction Manual - Page 92
Español Instrucciones de Seguridad Importantes 1. Lea las instrucciones: Deberá leer todas las instrucciones de seguridad y funcionamiento, antes de poner en funcionamiento este producto. 2. Conserve las instrucciones: Deberá conservar las instrucciones de seguridad y funcionamiento para referencia - Coby CAM5000 | Instruction Manual - Page 93
Español 11. Entrada de objetos y líquido: Nunca introduzca objetos de ningún tipo dentro de este producto a través de las aberturas, ya que pueden ponerse en contacto con puntos de voltaje peligrosos o provocar cortocircuitos que ocasionarían incendios o descargas eléctricas. No derrame nunca lí - Coby CAM5000 | Instruction Manual - Page 94
des Matières Contenu de la boîte 96 Caractéristiques 97 La CAM5000 en un coup d'oeil 98 Vue d'Ensemble d'Affichage 100 Mode Vidéo 100 Mode Photo 102 Mode de Lecture 104 Comment Démarrer 105 Pile...105 Installation de la Pile 105 Indicateur de Pile 106 Charger la Pile 106 Eteindre - Coby CAM5000 | Instruction Manual - Page 95
éra 123 Mode de Marche 123 Mode de Charge 124 Transférer des Fichiers 124 Téléverser des Vidéos sur YouTube 125 A Propos du CD de Logiciel 126 Pilote de Webcaméra 127 ArcSoft MediaImpression 129 Manuel de L'utilisateur 129 Dépannage 130 Spécifications 133 Avis de Sécurit 135 Page 95 - Coby CAM5000 | Instruction Manual - Page 96
achat de la Caméra Vidéo Numérique SNAPP CAM5000 HD de Coby. Veuillez lire ce manuel avant d'utiliser votre caméra vidéo, et conservez-le pour référence future. Ce paquet contient : Unité SNAPP CAM5000 Câble AV Câble USB CD d'installation Pile au lithium-ion Dragonne Câble HDMI - Coby CAM5000 | Instruction Manual - Page 97
Écran couleur LCD TFT 2" brillant Capture vidéo avec une résolution HD de 720p Mémoire Flash intégrée de 128MB Logiciel intégré pour montage connecte facilement à votre ordinateur pour utilisation comme webcaméra† † Fonction disponible sous Windows uniquement. Français Page 97 Caract - Coby CAM5000 | Instruction Manual - Page 98
ÂÂ La CAM5000 en un coup d'oeil Français 1 Port USB Couvre le connecteur USB. couvercle 2 Ecran ACL Affichage de viseur. 3 / Chargez les cartes mémoire SD ou SDHC Carte SD pour augmenter la capacité de stockage du caméscope. Le CAM5000 supporte des cartes jusqu'à 16GB de capacité. Page 98 La - Coby CAM5000 | Instruction Manual - Page 99
7 MENU Access the setup menu to adjust camcorder options. 8 Prise de Connect the AV cable to this jack to display sortie AV video on a TV. 9 Prise HDMI compensation des situations de faible éclairage. Français 15 Articulation du Trépied 16 Monture de Dragonne Page 99 La Cam5000 En Un Coup D'oeil - Coby CAM5000 | Instruction Manual - Page 100
Vue d'Ensemble d'Affichage Mode Vidéo Français Icône de Mode Vidéo Indicateur de Niveau de Pile Plein A Moitié Faible niveau Vide Icône de Carte Mémoire Page 100 La Cam5000 En Un Coup D'oeil - Coby CAM5000 | Instruction Manual - Page 101
Indicateur de Equilibre des Blancs Automatique Ensoleillé Nuageux Fluorescent Tungstène Indicateur de Résolution 320 x 240 640 x 480 1280 x 720 Indicateur de Zoom Numérique Durée d'enregistrement AWB QVGA VGA HD [30:30] Français Page 101 La Cam5000 En Un Coup D'oeil - Coby CAM5000 | Instruction Manual - Page 102
Mode Photo Icône de Mode Photo Indicateur de Niveau de Pile Plein A Moitié Faible niveau Vide Icône de Carte Mémoire Français Page 102 La Cam5000 En Un Coup D'oeil - Coby CAM5000 | Instruction Manual - Page 103
Indicateur de Equilibre des Blancs Automatique Ensoleillé Nuageux Fluorescent Tungstène Indicateur de Résolution 4032 x 3024 3400 x2550 2592 x 1944 1600 x 1200 Indicateur de Zoom Numérique Photos restantes AWB 12M 8M 5M 2M [1270] Français Page 103 La Cam5000 En Un Coup D'oeil - Coby CAM5000 | Instruction Manual - Page 104
Mode de Lecture Français Icône de Mode Lecture Indicateur de Niveau de Pile Plein A Moitié Faible niveau Vide Icône de Carte Mémoire Séquence de fichier actuel / Nombre total de fichiers [12/12] Page 104 La Cam5000 En Un Coup D'oeil - Coby CAM5000 | Instruction Manual - Page 105
lithium rechargeable est utilisée dans cette caméra vidéo. Français Installation de la Pile 1. Faites glisser le couvercle de pile dans la qui ne sont pas destinées à être rechargées. Suivez les instructions du fabricant de piles. N'installez pas les piles avec les polarités inversées car - Coby CAM5000 | Instruction Manual - Page 106
Français Si l'appareil ne va pas être utilisé pendant une longue période de temps, enlevez les piles pour éviter l'endommagement ou des blessures provenant d'une fuite possible. Indicateur de Pile L'écran ACL de votre caméra vidéo affiche 3 conditions de pile différentes. Veuillez consulter le - Coby CAM5000 | Instruction Manual - Page 107
d'une Carte Mémoire Pour maximiser le temps d'enregistrement de votre caméra vidéo, vous pouvez souhaiter utiliser une carte mémoire. Votre caméra vidéo supporte les formats de carte SD/SDHC. Pour insérer une carte mémoire : 1. Ouvrez le cache de compartiment à piles/SD. 2. Insérez la carte SD - Coby CAM5000 | Instruction Manual - Page 108
ÂÂ Mode Vidéo Enregistrer un Clip Vidéo Mettez votre caméra vidéo sous tension. 1. Appuyez sur le bouton MODE pour sélectionner le Mode Vidéo. 2. Appuyez sur (Obturateur) pour commencer l'enregistrement. 3. Appuyez de nouveau sur pour arrêter l'enregistrement vidéo. Caractéristiques supplémentaires - Coby CAM5000 | Instruction Manual - Page 109
vous pouvez souhaiter enregistrer une vidéo à une résolution inférieure. Appuyez sur le bouton pour changer la taille de film. Les options comprennent : HD (1280 x 720), VGA (640 x 480), et QVGA (320 x 240). Pour plus d'informations sur les options de configuration du Mode Vidéo, veuillez voir la - Coby CAM5000 | Instruction Manual - Page 110
ÂÂ Mode Photo Prendre une Photo Vous pouvez utiliser votre caméra vidéo pour capturer des photos fixes. Pour prendre des photos : 1. Mettez votre caméra vidéo sous tension. 2. Appuyez sur le bouton MODE pour sélectionner le Mode Photo . 3. Appuyez sur le bouton (Obturateur) pour prendre une photo. - Coby CAM5000 | Instruction Manual - Page 111
Taille d'image Pour maximiser la mémoire disponible de votre caméra vidéo, vous pouvez souhaiter prendre des photos à une résolution inférieure. Appuyez sur le bouton pour changer la taille de l'image. Les options comprennent : 1600x1200 (2M), 2592x1944 (5M), 3400x2550 (8M par interpolation) , et - Coby CAM5000 | Instruction Manual - Page 112
ÂÂ Mode de Lecture REMARQUE : S'il n'y a pas de fichiers, l'icône [no file (pas de fichier)] sera affichée sur l'écran ACL. Allumez la caméra vidéo et appuyez sur le bouton MODE pour sélectionner le Mode Lecture. Vos fichiers enregistrés seront affichés en tant que vignettes. Utilisez les boutons et - Coby CAM5000 | Instruction Manual - Page 113
Français Lecture de Fichiers Vidéo Les fichiers vidéos sont signalés par l'icône Vidéo dans le coin supérieur gauche de l'image vignette. 1. Appuyez sur le bouton pour accéder au fichier vidéo souhaité. Appuyez de nouveau pour commencer la lecture. 2. Pendant la lecture, appuyez sur le bouton pour - Coby CAM5000 | Instruction Manual - Page 114
ÂÂ Visualisation de Fichiers Vidéo sur un Téléviseur Lecture Standard Téléviseur Connectez votre caméra vidéo à un téléviseur pour visualiser des fichiers ou en enregistrer de nouveaux sur un écran plus grand. 1. Éteignez la caméra vidéo et connectez-la à votre téléviseur à l'aide du câble AV fourni - Coby CAM5000 | Instruction Manual - Page 115
Français En Mode Vidéo : 1. Utilisez les commandes de la caméra vidéo pour enregistrer une vidéo comme vous le feriez normalement. Votre écran de télévision fera fonction d'écran ACL de la caméra vidéo. En Mode Lecture : 1. Appuyez sur ou pour sélectionner votre fichier souhaité. 2. Appuyez sur le - Coby CAM5000 | Instruction Manual - Page 116
Lecture HDTV Votre caméra vidéo est capable de lecture en résolution HD (720p) sur un HDTV compatible. Pour visualiser des fichiers vidéo en HD : 1. Eteignez la caméra vidéo. 2. Utilisez le câble HDMI fourni pour relier la prise de sortie HDMI sur votre caméra vidéo à la prise d'entrée - Coby CAM5000 | Instruction Manual - Page 117
Français ÂÂ Options de Configuration Votre caméra vidéo offre des options de configuration supplémentaires dans les modes Vidéo, Photo, et Lecture, ainsi qu'un menu de configuration général pour la caméra. Accédez au menu de Configuration dans chaque mode en appuyant sur le bouton MENU. - Coby CAM5000 | Instruction Manual - Page 118
Caractéristique Description Touche Rapide Equilibre des Blancs Ajustez l'équilibre des blancs pour tenir compte des différentes conditions d'éclairage. Configura- Ajustez l'exposition pour tenir compte -- tion EV des différentes conditions d'éclairage. Français Configuration de Mode Photo - Coby CAM5000 | Instruction Manual - Page 119
Caractéristique Description Déclencheur à Réglez le déclencheur à retardement Retardement de la caméra vidéo. Timbre Affichez une date et un timbre de l'heure sur vos photos. REMARQUE : La date et l'heure internes de la caméra vidéo devraient être réglées à l'aide du menu de Configuration Géné - Coby CAM5000 | Instruction Manual - Page 120
Configuration Générale Vous pouvez accéder au menu de configuration général de la caméra vidéo à partir de n'importe quel mode de fonctionnement. Appuyez sur le bouton MENU, puis utilisez le pavé directionnel pour sélectionner l'icône de Configuration (Setup). Caractéristique Description - Coby CAM5000 | Instruction Manual - Page 121
Caractéristique Description Date/Heure Réglez la date et l'heure internes de la caméra vidéo. • Utilisez les boutons / pour commuter entre les champs pour l'heure : minute et jour : mois : année. • Utilisez les boutons / pour changer les valeurs dans ces champs. Flicker (Clignotement) Ajustez - Coby CAM5000 | Instruction Manual - Page 122
éristiques Supplémentaires Connectez votre caméra vidéo directement au port USB de votre ordinateur pour transférer des fichiers, utiliser la fonction de webcaméra, ou pour continuer à prendre des vidéos et des photos sans vider la pile. (Vous pouvez également connecter la caméra vidéo à l'aide - Coby CAM5000 | Instruction Manual - Page 123
éra Utilisez la caméra vidéo comme webcaméra d'ordinateur. (Installation de pilote requis.) La fonction de webcaméra est disponible dans Windows seulement. Pour utiliser le Webcamera, sélectionnez le mode Webcam icône, puis: 1. Double-cliquez sur l'icône "My Computer" (Mon Ordinateur) sur votre - Coby CAM5000 | Instruction Manual - Page 124
Français Mode de Charge Sélectionnez ce mode pour recharger la pile de la caméra vidéo. La caméra vidéo s'éteindra automatiquement lorsque le Mode de Charge est sélectionné. Transférer des Fichiers Pour transférer des fichiers de la caméra vidéo à votre ordinateur : • Connectez la caméra vidéo au - Coby CAM5000 | Instruction Manual - Page 125
avec votre famille, vos amis, ou le monde avec le service internet YouTube. Le CAM5000 est fourni avec l'application Arscoft Upload to YouTube qui permet un partage facile et pratique de vos vidéos. Le logiciel Upload to YouTube est installé sur le caméscope, et se lance automatiquement lorsque vous - Coby CAM5000 | Instruction Manual - Page 126
cessaire. Insérez le CD dans votre lecteur de CD-ROM. Le menu de lancement automatique apparaîtra. Français Cliquez sur l'un des suivants pour lancer la routine d'installation. Install Driver (Installer Pilote) : Installe le logiciel pour utiliser le CAM5000 comme webcaméra. Page 126 A Propos - Coby CAM5000 | Instruction Manual - Page 127
-cliquez sur le fichier s'appelant [autorun.exe] pour commencer le programme. Pilote de Webcaméra Pour utiliser le CAM5000 comme webcaméra avec votre PC, vous devez d'abord installer le pilote à partir du CD. Après l'installation du pilote : 1. Branchez la caméra à l'ordinateur au moyen du câble USB - Coby CAM5000 | Instruction Manual - Page 128
«Found New Hardware Wizard" apparaît de nouveau. Suivez les instructions pour terminer l'installation. Le CAM5000 est maintenant prêt pour l'utiliser comme une webcam Note: Si l'écran ci-dessous apparaît, cliquez sur "Continue Anyway" (Continuer). Français Page 128 A Propos Du Cd De Logiciel - Coby CAM5000 | Instruction Manual - Page 129
peut être nécessaire de télécharger et installez le logiciel gratuit Adobe Acrobat Reader à partir du site Web Adobe à www.adobe.com. Page 129 A Propos Du Cd De Logiciel - Coby CAM5000 | Instruction Manual - Page 130
mises à jour microprogrammes. Si ces ressources ne vous aident pas à résoudre le problème, veuillez contacter le service d'assistance technique. Adresse Coby Electronics : Support Technique 56-65 Rust Street Maspeth, NY 11378 Courriel [email protected] Internet www.cobyusa.com Téléphone 800 - Coby CAM5000 | Instruction Manual - Page 131
Français La caméra ne prend pas de photos/vidéos. • La mémoire de la caméra ou la carte mémoire peut être pleine. Supprimez plusieurs fichiers et essayez à nouveau. • Une carte mémoire incompatible est peut être insérée. Vérifiez que la carte mémoire est dans un format compatible. • Si la carte mé - Coby CAM5000 | Instruction Manual - Page 132
Les images prises ne sont pas sauvegardées dans la mémoire. • Les images ne seront pas sauvegardées si la caméra est éteinte avant la fin du traitement des données. Assurez-vous de laisser suffisamment de temps pour que l'image se sauvegarde complètement avant d'éteindre la caméra vidéo. Je ne peux - Coby CAM5000 | Instruction Manual - Page 133
(compatible avec EXIF 2.2) Vidéo : MP4 avec Audio (WAV) Image Fixe : 1600x1200 (2M) / 2592x1944 (5M)3400x2550 (8M) / 4032x3024 (12M) Vidéo : 1280x720 HD / 640x480 / 320x240 Auto (Automatique) Automatique / Ensoleillé / Tungstène / Fluorescent / Nuageux 5 sec / 10 sec 32 MB / 64MB / 128MB pour option - Coby CAM5000 | Instruction Manual - Page 134
Stockage Externe SD / SDHC Système TV (TV System) PAL / NTSC Alimentation Pile au Lithium Température de Fonctionnement 0°C jusqu'à 40°C Température de Stockage -20°C jusqu'à +60°C Micro Intégré Haut-parleur Intégré Dimensions Corps de Caméra : 10,16 x 29,9 x 30,5 cm (4,7" x 2,28" x 0, - Coby CAM5000 | Instruction Manual - Page 135
peut constituer un risque de décharge électrique. Le point d'exclamation placé dans un triangle équilatéral informe l'utilisateur que des instructions d'utilisation et de maintenance importantes sont fournies dans la documentation qui accompagne le produit. Information client : Notez ci-après le num - Coby CAM5000 | Instruction Manual - Page 136
Avertissement : Afin d'éviter tout risque d'incendie ou de décharge électrique, n'exposez pas cet appareil à la pluie ou à l'humidité. Le boîtier renferme des tensions élevées dangereuses. N'ouvrez pas le boîtier de l'appareil. Remarque : Si ce produit s'éteint soudainement ou ne fonctionne plus, il - Coby CAM5000 | Instruction Manual - Page 137
résidentielle. Cet équipement génère, utilise et peut émettre de l'énergie de fréquence radio, qui, si non installée et utilisée correctement pourrait causer des interférences néfastes aux communications radio. Cependant, il n'y a aucune garantie qu'il n'y aura pas d'interférences. Si cet - Coby CAM5000 | Instruction Manual - Page 138
consignes de sécurité et d'utilisation avant de mettre l'appareil en service. 2. Conservez ces directives : Vous devriez conserver ce manuel pour être posé sur une installation murale, comme une étagère, à moins que la ventilation ne soit adéquate et que les instructions du fabricant n'aient été - Coby CAM5000 | Instruction Manual - Page 139
la pluie ou de l'eau ; d) l'appareil ne fonctionne pas correctement bien que les consignes d'installation aient été respectées. Effectuez uniquement les réglages indiqués dans les consignes d'installation car d'autres réglages incorrects risquent de provoquer des dommages nécessitant la plupart du - Coby CAM5000 | Instruction Manual - Page 140
, NY 11042 www.cobyusa.com www.ecoby.com IB v1.01 Coby is a registered trademark of Coby Electronics Corporation. Printed in China. COBY es la marca registrada de COBY Electronics Corporation. Imprimido en China. Coby est une marque de fabrique de Coby Electronics Corporation. Imprimé en Chine.
-
 1
1 -
 2
2 -
 3
3 -
 4
4 -
 5
5 -
 6
6 -
 7
7 -
8
-
9
-
10
-
11
-
12
-
13
-
14
-
15
-
16
-
17
-
18
-
19
-
20
-
21
-
22
-
23
-
24
-
25
-
26
-
27
-
28
-
29
-
30
-
31
-
32
-
33
-
34
-
35
-
36
-
37
-
38
-
39
-
40
-
41
-
42
-
43
-
44
-
45
-
46
-
47
-
48
-
49
-
50
-
51
-
52
-
53
-
54
-
55
-
56
-
57
-
58
-
59
-
60
-
61
-
62
-
63
-
64
-
65
-
66
-
67
-
68
-
69
-
70
-
71
-
72
-
73
-
74
-
75
-
76
-
77
-
78
-
79
-
80
-
81
-
82
-
83
-
84
-
85
-
86
-
87
-
88
-
89
-
90
-
91
-
92
-
93
-
94
-
95
-
96
-
97
-
98
-
99
-
100
-
101
-
102
-
103
-
104
-
105
-
106
-
107
-
108
-
109
-
110
-
111
-
112
-
113
-
114
-
115
-
116
-
117
-
118
-
119
-
120
-
121
-
122
-
123
-
124
-
125
-
126
-
127
-
128
-
129
-
130
-
131
-
132
-
133
-
134
-
135
-
136
-
137
-
138
-
139
-
140
 |
 |

CAM5000
EN
Snapp™ HD Digital Video Camera
Instruction Manual
.......................................
Page 2
ES
Snapp™ Videocámara Digital de HD
Manual de la instrucción
...........................
Pagina 48
FR
Snapp™
Caméscope Numérique HD
Manuel d’instruction
...................................
Page 94
Please read carefully before use • Léa el manual antes de usar •
Veuillez lire ce livret avant utilisation