Compaq Evo D510 Compaq Evo D510 Convertible Minitowerr Hardware Reference Guid
Compaq Evo D510 - Convertible Minitower Manual
 |
View all Compaq Evo D510 manuals
Add to My Manuals
Save this manual to your list of manuals |
Compaq Evo D510 manual content summary:
- Compaq Evo D510 | Compaq Evo D510 Convertible Minitowerr Hardware Reference Guid - Page 1
b Hardware Reference Guide Convertible Minitower Models Compaq Evo Desktop Family Document Part Number: 243845-003 May 2002 This book provides basic information for upgrading this series of computers. - Compaq Evo D510 | Compaq Evo D510 Convertible Minitowerr Hardware Reference Guid - Page 2
Compaq Computer Corporation Compaq, the Compaq logo, and Evo are trademarks of Compaq Information Technologies Group, L.P. Microsoft, MS-DOS, Windows, Windows NT and Windows for upgrading this series of DDR memory-based computers. Compaq Guide Third Edition May 2002 Document Part Number: 243845-003 - Compaq Evo D510 | Compaq Evo D510 Convertible Minitowerr Hardware Reference Guid - Page 3
the Easy Access Buttons 1-5 Using the Windows Logo Key 1-6 Special Mouse Functions 1-6 Serial Number Location 1-7 Changing from a Minitower to a Desktop Configuration 1-7 Changing from a Desktop to a Minitower Configuration 1-10 2 Hardware Upgrades Installation Sequence 2-1 Smart Cover Lock - Compaq Evo D510 | Compaq Evo D510 Convertible Minitowerr Hardware Reference Guid - Page 4
Hard Drive 2-26 Windows 2000 Professional, Windows XP Professional, or Windows XP Home 2-26 Ultra ATA Devices B-1 Guidelines for Installing Ultra ATA Devices B-2 SCSI Devices B-3 Guidelines for Using SCSI Devices B-3 Guidelines for Installing Optional SCSI Devices B-5 SCSI Controllers - Compaq Evo D510 | Compaq Evo D510 Convertible Minitowerr Hardware Reference Guid - Page 5
Preventing Electrostatic Damage E-1 Grounding Methods E-1 F Routine Computer Care and Shipping Preparation Routine Computer Care F-1 Optical Drive Precautions F-2 Operation F-2 Cleaning F-2 Safety F-2 Shipping Preparation F-3 Index Hardware Reference Guide v - Compaq Evo D510 | Compaq Evo D510 Convertible Minitowerr Hardware Reference Guid - Page 6
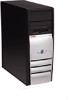
Minitower computer can be easily converted to a desktop. Features may vary depending on your model. For a complete listing of the hardware and software installed in your computer, run Compaq Diagnostics for Windows. Instructions for using these utilities are provided in the Troubleshooting Guide - Compaq Evo D510 | Compaq Evo D510 Convertible Minitowerr Hardware Reference Guid - Page 7
2 Dual-State Power Button 3 Power-On Light 4 Optical Eject Button 5 Optical Drive Busy Indicator 6 Diskette Eject Button 7 Hard Drive Activity Light 8 Optional Headphone Connector 9 Optional USB Connector - Optional Microphone Connector 1-2 Hardware Reference Guide - Compaq Evo D510 | Compaq Evo D510 Convertible Minitowerr Hardware Reference Guid - Page 8
4 Keyboard Connector q Line-in Audio Connector 5 Universal Serial Bus (USB) Connector w Microphone Connector 6 Serial Connector (COM1) e Serial Connector (COM2) 7 Ethernet RJ-45 Connector *Arrangement and to the correct connector, it will not function properly. Hardware Reference Guide 1-3 - Compaq Evo D510 | Compaq Evo D510 Convertible Minitowerr Hardware Reference Guid - Page 9
functions, depending on the software application being used. Provides quick access to your favorite Web sites, services, and applications. Includes the following: Insert, Home, Page Up, Delete, End, and Page Down , up, and down, using the keyboard instead of the mouse. 1-4 Hardware Reference Guide - Compaq Evo D510 | Compaq Evo D510 Convertible Minitowerr Hardware Reference Guid - Page 10
, complete the following steps: 1. Double-click the keyboard icon in the notification area (lower right corner) of the Windows taskbar. The Keyboard Properties dialog box is displayed. 2. Click the Help button on the Keyboard Properties dialog box for instructions. Hardware Reference Guide 1-5 - Compaq Evo D510 | Compaq Evo D510 Convertible Minitowerr Hardware Reference Guid - Page 11
Key + d Windows Logo Key + m Shift + Windows Logo Key + m Windows Logo Key + e Windows Logo Key + f Windows Logo Key + Ctrl + f Windows Logo Key + F1 Windows Logo Key + l Windows Logo Key + r Windows Logo Key + u Windows Logo Key + Tab Displays or hides the Start menu Displays the Desktop Minimizes - Compaq Evo D510 | Compaq Evo D510 Convertible Minitowerr Hardware Reference Guid - Page 12
unit 2. Keep this number available for use when contacting Compaq customer service for assistance. Serial Number Location Changing from a Minitower to a Desktop Configuration 1. Shut down the operating system properly, then from the drives in the 5.25-inch drive bays. Hardware Reference Guide 1-7 - Compaq Evo D510 | Compaq Evo D510 Convertible Minitowerr Hardware Reference Guid - Page 13
should be parallel to the green drivelock. ✎ The diskette drive should always be placed in the bay nearest the top of the chassis in the desktop configuration for proper drive clearance and access. 1-8 Hardware Reference - Compaq Evo D510 | Compaq Evo D510 Convertible Minitowerr Hardware Reference Guid - Page 14
Product Features Installing a Drive in the Desktop Configuration 8. Gently slide the drive into the bay. When Bezel Blanks" and reposition it with the bezel blanks in the proper orientation for the desktop configuration. 11. Remove the chrome logo plate from the subpanel and reposition it (rotate - Compaq Evo D510 | Compaq Evo D510 Convertible Minitowerr Hardware Reference Guid - Page 15
an angle could damage the pins that align it within the front bezel. Changing from a Minitower to a Desktop Configuration 12. Replace the subpanel, front bezel, and the computer access panel. 13. Reconnect the as described in the section "Removing the Front Bezel." 1-10 Hardware Reference Guide - Compaq Evo D510 | Compaq Evo D510 Convertible Minitowerr Hardware Reference Guid - Page 16
shown. Activating the Drivelocks (Shown from the Rear of the Chassis) 6. While pressing the drivelock, pull the drives out of the drive bay. Hardware Reference Guide 1-11 - Compaq Evo D510 | Compaq Evo D510 Convertible Minitowerr Hardware Reference Guid - Page 17
in the bay nearest the internal 3.5-inch drives in the minitower configuration for proper clearance within the chassis. Installing a Drive in the Minitower Configuration 8. Gently slide the drive into the bay. When cables to the drives in the 5.25-inch drive bays. 1-12 Hardware Reference Guide - Compaq Evo D510 | Compaq Evo D510 Convertible Minitowerr Hardware Reference Guid - Page 18
reposition it with the bezel blanks in the proper orientation for the minitower configuration. Ä CAUTION: Hold the subpanel straight when you pull it orientation for the minitower configuration, then snap it back into the subpanel. Changing from a Desktop to a Minitower Configuration 12. Replace - Compaq Evo D510 | Compaq Evo D510 Convertible Minitowerr Hardware Reference Guid - Page 19
Upgrades more information about Computer Setup, refer to the Computer Setup (F10) Utility Guide. 2. If the computer is already on, turn it off and disconnect the telecommunications or telephone connectors into the network interface controller (NIC) receptacles. Ä CAUTION: Static electricity can - Compaq Evo D510 | Compaq Evo D510 Convertible Minitowerr Hardware Reference Guid - Page 20
cover lock, controlled by the setup password. This lock prevents unauthorized access to the internal components. The computer ships with the Smart Cover Lock in the unlocked position. For more information about locking the Smart Cover Lock, refer to the Desktop Management guide. Using the - Compaq Evo D510 | Compaq Evo D510 Convertible Minitowerr Hardware Reference Guid - Page 21
Upgrades Ä CAUTION: The Smart Cover FailSafe Key is a specialized tool available from Compaq. Be prepared; order this key before you need one. To obtain a FailSafe Key: I Contact your authorized Compaq reseller or service provider. I Refer to the Compaq Web site (www.compaq Reference Guide 2-3 - Compaq Evo D510 | Compaq Evo D510 Convertible Minitowerr Hardware Reference Guid - Page 22
Hardware Upgrades To reattach the Smart Cover Lock, secure the lock in place with the tamper-proof screws. Removing the Computer Access Panel Before to the computer chassis. 4. Slide the access panel back about 1 inch (2.5 cm), then lift it up and off the unit. 2-4 Hardware Reference Guide - Compaq Evo D510 | Compaq Evo D510 Convertible Minitowerr Hardware Reference Guid - Page 23
Hardware Upgrades Removing the Computer Access Panel To replace the access panel, reverse steps 1-4. Removing the Front Bezel 1. If you have locked the Smart . 3. Push up on the two release tabs 1, then rotate the front bezel away from the chassis to release it 2. Hardware Reference Guide 2-5 - Compaq Evo D510 | Compaq Evo D510 Convertible Minitowerr Hardware Reference Guid - Page 24
Hardware Upgrades Removing the Front Bezel ✎ When replacing the front bezel, ensure that the bottom hinge points are properly placed in the chassis before rotating the front bezel back into its original position. 2-6 Hardware Reference Guide - Compaq Evo D510 | Compaq Evo D510 Convertible Minitowerr Hardware Reference Guid - Page 25
Hardware Upgrades Removing Bezel Blanks 1. If you have locked the Smart Cover Lock, use damage the pins that align it within the front bezel. Removing Bezel Blanks from the Subpanel (Desktop Shown) ✎ When replacing the subpanel, ensure that the aligning pins and any remaining bezel blanks are - Compaq Evo D510 | Compaq Evo D510 Convertible Minitowerr Hardware Reference Guid - Page 26
module. To achieve the maximum memory support, you may be required to replace the preinstalled DIMM with a higher capacity DIMM. DDR-SDRAM DIMMs For proper system operation, if your system supports DDR-SDRAM DIMMs, the DIMMs must be industry-standard 184-pin, unbuffered PC 1600 200 Mhz- or PC2100 - Compaq Evo D510 | Compaq Evo D510 Convertible Minitowerr Hardware Reference Guid - Page 27
memory module sockets have gold metal contacts. When upgrading your memory, it is important to use memory ," for more information. Ä CAUTION: When handling a memory module, be careful not to touch any of the 3. Remove the access panel and locate the memory module sockets. Å WARNING: To reduce risk of - Compaq Evo D510 | Compaq Evo D510 Convertible Minitowerr Hardware Reference Guid - Page 28
Upgrades 4. Open both latches of the memory module socket 1, and insert the memory module into the socket 2. Installing a DIMM 5. Begin by installing a module into the socket nearest the preinstalled module, and install the modules following the numerical order of the sockets. 6. A memory memory - Compaq Evo D510 | Compaq Evo D510 Convertible Minitowerr Hardware Reference Guid - Page 29
Installing or Removing an Expansion Card Your computer contains expansion slots that can be used to upgrade or add components to your computer. Removing an Expansion Slot Cover 1. If you have from the slot as illustrated. Removing the Screw and Expansion Slot Cover Hardware Reference Guide 2-11 - Compaq Evo D510 | Compaq Evo D510 Convertible Minitowerr Hardware Reference Guid - Page 30
Hardware Upgrades Removing or Installing an Expansion Card 1. If you have locked the Smart Cover Lock, use Computer Setup to unlock the lock. 2. Shut remove the expansion slot cover. 12. Slide the expansion card into the expansion slot and press it firmly into place. 2-12 Hardware Reference Guide - Compaq Evo D510 | Compaq Evo D510 Convertible Minitowerr Hardware Reference Guid - Page 31
Hardware Upgrades Removing or Installing an Expansion Card ✎ When you install an expansion card, make sure you press firmly on the card internal cables to the system board, if needed. 15. Replace the computer access panel. 16. Reconfigure the computer, if necessary. Hardware Reference Guide 2-13 - Compaq Evo D510 | Compaq Evo D510 Convertible Minitowerr Hardware Reference Guid - Page 32
Hardware Upgrades Drive Positions Desktop and Minitower Drive Positions 1 Two 5.25-inch, half-height bays for size of the storage devices installed in your computer, run Compaq Computer Setup. Refer to the Computer Setup (F10) Utility Guide for more information. ✎ Drive bay numbers are stamped on - Compaq Evo D510 | Compaq Evo D510 Convertible Minitowerr Hardware Reference Guid - Page 33
, to the secondary controller using an 80-conductor IDE cable. I You may install either a third-height or a half-height drive into a half-height bay. I You must install guide screws to ensure the drive will line up correctly in the drive cage. Compaq has provided extra guide screws, installed in - Compaq Evo D510 | Compaq Evo D510 Convertible Minitowerr Hardware Reference Guid - Page 34
front of the drive cage 2; the drivelock automatically secures the drive in the bay. ✎ Be sure the guide screws line up with the guide slots in the drive cage. Aligning the Guide Screws and Installing an Optional 5.25-Inch Drive on a Minitower (top) and a Desktop (bottom) 2-16 Hardware Reference - Compaq Evo D510 | Compaq Evo D510 Convertible Minitowerr Hardware Reference Guid - Page 35
Hardware Upgrades 5. Connect the drive power 1 and signal 2 cables and, if it is an optical drive and if analog audio is preferred to digital audio, connect the audio cable 3. The other end of the audio cable 3 should be connected to the embedded audio connector on the system board. Connecting the - Compaq Evo D510 | Compaq Evo D510 Convertible Minitowerr Hardware Reference Guid - Page 36
Hardware Upgrades 5. Insert the drive into the adapter 2 so that the guide screw aligns in the slot, and then attach with two retaining screws. 6. Snap on the brace 1, and attach the drive bezel 3 to the front of - Compaq Evo D510 | Compaq Evo D510 Convertible Minitowerr Hardware Reference Guid - Page 37
Hardware Upgrades 7. Install two guide screws on each side of the adapter 1. 8. Install the adapter bay 3. Bay 3 is the topmost bay in the desktop configuration. Aligning the Guide Screws and Installing an Adapter with a 3.5-Inch Drive on a Minitower (top) and a Desktop (bottom) Hardware Reference - Compaq Evo D510 | Compaq Evo D510 Convertible Minitowerr Hardware Reference Guid - Page 38
Hardware Upgrades 9. Connect the drive power 1 and signal Installation Sequence" for more information. Installing a Hard Drive into a 3.5-inch Drive Bay ✎ Compaq does not support mixing IDE and SCSI hard drives in the same system. If you are replacing a front bezel. 2-20 Hardware Reference Guide - Compaq Evo D510 | Compaq Evo D510 Convertible Minitowerr Hardware Reference Guid - Page 39
Hardware Upgrades 4. Install two guide screws on each side of the drive 1. 5. Install a hard drive into the 3.5-inch bay, refer to the following illustration. the power cable 1 and signal cable 2 to the hard drive. Connecting the Signal Cable and Power Cable Hardware Reference Guide 2-21 - Compaq Evo D510 | Compaq Evo D510 Convertible Minitowerr Hardware Reference Guid - Page 40
Hardware Upgrades 7. Connect the opposite end of the cables to the appropriate system board connector. 8. Replace the computer access panel. 9. front bezel. 4. Disconnect the drive power and signal cables and, if it is an optical drive, disconnect the audio connector. 2-22 Hardware Reference Guide - Compaq Evo D510 | Compaq Evo D510 Convertible Minitowerr Hardware Reference Guid - Page 41
Hardware Upgrades 5. Press drivelock mechanisms (1 or 2) to unlock the drive in the drive bay. Drivelock 1 Secures the 5.25-Inch Drives in the Desktop and 2 Secures All Drives in the Minitower (Shown from the Rear of the Chassis) Hardware Reference Guide 2-23 - Compaq Evo D510 | Compaq Evo D510 Convertible Minitowerr Hardware Reference Guid - Page 42
store in anti-static packaging. Working with the MultiBay The MultiBay is pre-installed in some models of the Evo D500 Series computer. It is a special drive bay that supports a variety of optional 12.7-mm removable drives, including: I MultiBay 24X Max Optical Drive I MultiBay 8X Optical Drive with - Compaq Evo D510 | Compaq Evo D510 Convertible Minitowerr Hardware Reference Guid - Page 43
not in Standby, turn the computer on, then shut it down. I If the computer is running a retail version of Windows 98 or Windows NT 4.0 without software enhancements from Compaq, shut down the computer before inserting or removing any drive. If the computer is running a preinstalled operating system - Compaq Evo D510 | Compaq Evo D510 Convertible Minitowerr Hardware Reference Guid - Page 44
Hardware Upgrades Partitioning and Formatting a MultiBay Hard Drive the computer. Follow directions for your operating system, below: Windows 2000 Professional, Windows XP Professional, or Windows XP Home 1. Right-click the My Computer icon, then screwdriver (provided). 2-26 Hardware Reference Guide - Compaq Evo D510 | Compaq Evo D510 Convertible Minitowerr Hardware Reference Guid - Page 45
Hardware Upgrades Uninstalling the MultiBay Security Screw Inserting a Drive into the MultiBay 1. Exit all software applications, shut down the operating system the drive into the MultiBay and push firmly to ensure that the electrical connector is properly seated. Hardware Reference Guide 2-27 - Compaq Evo D510 | Compaq Evo D510 Convertible Minitowerr Hardware Reference Guid - Page 46
Upgrades Inserting a Drive into the MultiBay If the device does not start, ensure that the necessary device drivers are installed on the system. If they are not available, they may be downloaded, at no cost, from the Compaq Web site at www.compaq Screw" section for instructions on removing the - Compaq Evo D510 | Compaq Evo D510 Convertible Minitowerr Hardware Reference Guid - Page 47
Hardware Upgrades Removing a Drive from the MultiBay Hardware Reference Guide 2-29 - Compaq Evo D510 | Compaq Evo D510 Convertible Minitowerr Hardware Reference Guid - Page 48
Compaq Evo Convertible Minitower Desktop Dimensions Height Width Depth 6.6 in 17.65 in 16.8 in Tower Dimensions Height Width Depth 17.65 in 6.6 in 16.8 in Approximate Weight 20.0 lb Weight Supported kg 45.5 kg 10° to 35°C -30° to 60°C 10-90% 5-95% 3048 m 9144 m Hardware Reference Guide A-1 - Compaq Evo D510 | Compaq Evo D510 Convertible Minitowerr Hardware Reference Guid - Page 49
Specifications Compaq Evo Convertible Minitower (Continued) Heat Dissipation Maximum Nominal 1154 Input Current (maximum)* 6 A @ 100VAC 3 A @ 200VAC ✎ *This system utilizes a passive power factor corrected power supply when used in the 230V mode. This allows the system to pass the CE mark - Compaq Evo D510 | Compaq Evo D510 Convertible Minitowerr Hardware Reference Guid - Page 50
-Select Feature with Ultra ATA Devices Optional drives are available from Compaq in kits that include for Installing Ultra ATA Devices" in this appendix for an example of an Ultra ATA cable. Compaq hard drives device on the primary controller, you must use an 80-conductor Ultra ATA cable for optimal - Compaq Evo D510 | Compaq Evo D510 Convertible Minitowerr Hardware Reference Guid - Page 51
between Device 0 and Device 1. 80-Conductor Ultra ATA Cable 1 Device 0 (master drive) controller. I Install either a third-height or a half-height drive into a half-height bay. I Install guide screws to ensure that the drive lines up correctly in the drive cage. Compaq has provided extra guide - Compaq Evo D510 | Compaq Evo D510 Convertible Minitowerr Hardware Reference Guid - Page 52
Ultra SCSI, Ultra-Wide SCSI, Wide Ultra2 SCSI, Ultra 320 SCSI, or Ultra 160 SCSI controller supports up to 15 SCSI devices per channel. I If using multiple SCSI devices, Compaq Small Form Factor models, a single device cable is the only cable that is supported. I The SCSI controller the controller and - Compaq Evo D510 | Compaq Evo D510 Convertible Minitowerr Hardware Reference Guid - Page 53
. This action enables the SCSI controller to recognize the external devices. , and optical drives. I Compaq does not recommend mixing different- is acceptable to mix Wide-Ultra2, Ultra 160, and Ultra 320 devices on a single channel contact your Compaq authorized dealer, reseller, or service provider. - Compaq Evo D510 | Compaq Evo D510 Convertible Minitowerr Hardware Reference Guid - Page 54
Ultra ATA and SCSI hard drives in the same system, the Ultra ATA drive will be the boot drive unless the boot . This enables the system board controller to recognize the external SCSI device Controllers Select models such as workstations ship with an integrated single channel Ultra 160 SCSI controller - Compaq Evo D510 | Compaq Evo D510 Convertible Minitowerr Hardware Reference Guid - Page 55
✎ For Small Form Factor models, a single device cable is the only cable that is supported. For additional information about installing optional SCSI devices, refer to the documentation included with the device option kit or contact your Compaq authorized dealer, reseller, or service provider. Using - Compaq Evo D510 | Compaq Evo D510 Convertible Minitowerr Hardware Reference Guid - Page 56
N Boot Device Options N SCSI Device Configuration N Advanced Configuration Options I SCSI Disk Utilities Lists all SCSI devices and SCSI ID numbers ✎ For additional information about configuring POST message display status, refer to the Computer Setup (F10) Utility Guide on the Compaq Documentation - Compaq Evo D510 | Compaq Evo D510 Convertible Minitowerr Hardware Reference Guid - Page 57
the computer. If you are in Windows, click Start > Shut Down > Restart the Computer. 2. When the F10 = Setup message displays in the lower-right corner of displayed, your computer does not contain a Quiet drive. 7. To apply and save changes, select File > Save Changes. B-8 Hardware Reference Guide - Compaq Evo D510 | Compaq Evo D510 Convertible Minitowerr Hardware Reference Guid - Page 58
battery only with the Compaq spare designated for this product. Ä CAUTION: Before replacing the battery, it is important to back up the computer CMOS settings. When the battery is removed or replaced, the CMOS settings will be cleared. Refer to the Troubleshooting Guide for information on backing - Compaq Evo D510 | Compaq Evo D510 Convertible Minitowerr Hardware Reference Guid - Page 59
. 3. Locate the battery and battery holder on the system board. 4. Depending on the type of battery holder on your system board, complete the following instructions to replace the battery. Type 1 a. Lift the battery out of its holder. Removing a Coin Cell Battery (Type 1) C-2 Hardware Reference - Compaq Evo D510 | Compaq Evo D510 Convertible Minitowerr Hardware Reference Guid - Page 60
metal clamp that extends above one edge of the battery. b. When the battery pops up, lift it out. Removing a Coin Cell Battery (Type 2) Hardware Reference Guide C-3 - Compaq Evo D510 | Compaq Evo D510 Convertible Minitowerr Hardware Reference Guid - Page 61
and turn on power to the computer. 7. Reset the date and time, your passwords, and any special system setups, using Compaq Computer Setup. Refer to the Computer Setup (F10) Utility Guide. If you normally lock the Smart Cover Lock, use Computer Setup to relock the lock and enable the Smart Cover - Compaq Evo D510 | Compaq Evo D510 Convertible Minitowerr Hardware Reference Guid - Page 62
may be sharp. Be sure to install the bracket so that sharp edges do not extend from the edges of the computer chassis. Hardware Reference Guide D-1 - Compaq Evo D510 | Compaq Evo D510 Convertible Minitowerr Hardware Reference Guid - Page 63
security loop which vary by model. Because of chassis differences, the slots may be located in a different position than shown. Installing a Security Loop D-2 Hardware Reference Guide - Compaq Evo D510 | Compaq Evo D510 Convertible Minitowerr Hardware Reference Guid - Page 64
straps with a minimum of 1 megohm +/- 10 percent resistance in the ground cords. To provide proper ground, wear the strap snug against the skin. Hardware Reference Guide E-1 - Compaq Evo D510 | Compaq Evo D510 Convertible Minitowerr Hardware Reference Guid - Page 65
work mat. If you do not have any of the suggested equipment for proper grounding, contact your Compaq authorized dealer, reseller, or service provider. ✎ For more information on static electricity, contact your Compaq authorized dealer, reseller, or service provider. E-2 Hardware Reference Guide - Compaq Evo D510 | Compaq Evo D510 Convertible Minitowerr Hardware Reference Guid - Page 66
keyboard, with the keyboard feet down, directly against the front of the desktop unit as this also restricts airflow. I Keep the computer away from excessive ranges for your computer, refer to Appendix A, "Specifications," in this guide. I Keep liquids away from the computer and keyboard. I Never - Compaq Evo D510 | Compaq Evo D510 Convertible Minitowerr Hardware Reference Guid - Page 67
the drive to sudden changes in temperature, as condensation may form inside the unit. If the temperature suddenly changes while the drive or direct sunlight. Cleaning I Clean the panel and controls with a soft, dry cloth or a soft cloth Compaq service provider. F-2 Hardware Reference Guide - Compaq Evo D510 | Compaq Evo D510 Convertible Minitowerr Hardware Reference Guid - Page 68
Preparation Follow these suggestions when preparing to ship your computer: 1. Back up the hard drive files on PD discs, tape cartridges, or diskettes. Be sure that the backup media is not . ✎ For environmental nonoperating ranges, see Appendix A, "Specifications," in this guide. Hardware Reference - Compaq Evo D510 | Compaq Evo D510 Convertible Minitowerr Hardware Reference Guid - Page 69
computer access panel removing 2-4 computer care F-1 Configuration desktop 1-7 minitower 1-10 Configuration Features 1-1 D Drive Positions 2-14 DVD 1-4 identifying keys 1-4 Windows Logo Key 1-6 M memory DIMMs 2-10 illustration 2-10 installing additional memory 2-8 Hardware Reference Guide Index-1 - Compaq Evo D510 | Compaq Evo D510 Convertible Minitowerr Hardware Reference Guid - Page 70
dynamic random access memory) 2-8 security Smart Cover Lock 2-2 security lock provisions D-1 serial number 1-7 shipping preparation F-1 Smart Cover FailSafe Key 2-2 Smart Cover Lock 2-2 SMART hard drive 2-24 specifications A-1 SuperDisk LS-120 drive 2-24 U Ultra ATA devices B-1 W Windows Logo Key
-
 1
1 -
 2
2 -
 3
3 -
 4
4 -
 5
5 -
 6
6 -
 7
7 -
8
-
9
-
10
-
11
-
12
-
13
-
14
-
15
-
16
-
17
-
18
-
19
-
20
-
21
-
22
-
23
-
24
-
25
-
26
-
27
-
28
-
29
-
30
-
31
-
32
-
33
-
34
-
35
-
36
-
37
-
38
-
39
-
40
-
41
-
42
-
43
-
44
-
45
-
46
-
47
-
48
-
49
-
50
-
51
-
52
-
53
-
54
-
55
-
56
-
57
-
58
-
59
-
60
-
61
-
62
-
63
-
64
-
65
-
66
-
67
-
68
-
69
-
70
 |
 |

b
Hardware Reference Guide
Convertible Minitower Models
Compaq Evo Desktop Family
Document Part Number: 243845-003
May 2002
This book provides basic information for upgrading this series of
computers.