Compaq LA36N User Manual
Compaq LA36N - Digital Dot Matrix B/W Dot-matrix Printer Manual
 |
View all Compaq LA36N manuals
Add to My Manuals
Save this manual to your list of manuals |
Compaq LA36N manual content summary:
- Compaq LA36N | User Manual - Page 1
Compaq Matrix Printer LA36 User Manual Compaq Computer Corporation - Compaq LA36N | User Manual - Page 2
- Compaq LA36N | User Manual - Page 3
of Contents Preface v About This Manual ...v Printer Models and Options v Organization ...vi The LA36N and LA36W Model Specifications vi Notes, Cautions and Warnings vii 1. Introduction 1-1 Features ...1-1 Options ...1-2 2. Paper Handling 2-1 Getting to Know the Printer's Major Parts and the - Compaq LA36N | User Manual - Page 4
Works ...4-2 Entering the Set-Up Mode 4-2 Overview of the Set-Up Mode 4-5 Set-Up Mode Functions 4-5 Points to Remember 4-11 Printing the Printer Configuration 4-11 Deciding Which Options to Change 4-13 Changing Macro 1 and Macro 2 Options 4-14 Macro 1 and Macro 2 Options List 4-15 Changing - Compaq LA36N | User Manual - Page 5
Print Head 5-3 Replacing the Ribbon Cartridge 5-3 Replacing the Print Head 5-5 6. Trouble-Shooting 6-1 Solving Problems ...6-1 Print Quality Problems and Solutions 6-1 Paper Handling Problems and Solutions 6-4 Operating Problems and Solutions 6-5 Printer Failures ...6-6 Diagnostic Functions - Compaq LA36N | User Manual - Page 6
E. Character Sets E-1 DEC PPL2 Protocol ...E-1 Common to IBM Proprinter X24 and XL24E Protocol and Epson ESC/P2 Protocol ..... E-18 Default Sets ...E-18 IBM Proprinter X24 and XL24E Protocol E-24 IBM Set 1/2 ...E-24 Epson ESC/P2 Protocol ...E-25 National Character Sets E-25 F. Resident Fonts F-1 - Compaq LA36N | User Manual - Page 7
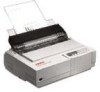
(80-column printer) and to the Compaq LA36W Companion printer (136-column printer). However, illustrations are of LA36N Companion Printer. This guide explains how you can use your printer to full advantage. It is written for both new and experienced printer users. This manual consists of two parts - Compaq LA36N | User Manual - Page 8
LA36W is the "print span". The LA36N is an 80-column printer and the LA36W a 136-column printer. As shown in the following figure, the physical specifications are thus different (size, weight, ...). Compaq Matrix Printer LA36N Compaq Matrix Printer LA36W Some minor differences concern mechanical - Compaq LA36N | User Manual - Page 9
compatibility. Refer to this chapter as indicated in the part Installation Guide or as required. 5 - Maintenance This chapter explains basic maintenance procedures for this printer. 6 - Trouble-Shooting This chapter describes problem with the instructions given may result in injury to the operator - Compaq LA36N | User Manual - Page 10
viii - Compaq LA36N | User Manual - Page 11
business, office, and home environments. This printer is also easy to install and use. Compaq Matrix Printer LA36N Features Key printer features and options are listed in the next two sections. • Euro Currency Symbol. This Compaq Matrix Printer supports the Euro currency symbol. This character is - Compaq LA36N | User Manual - Page 12
9, Industrial 2 of 5, Interleaved 2 of 5, Matrix 2 of 5, EAN 8, EAN 13, UPC-A, printer only requires periodic cleaning and changing of the ribbon cartridge. • Windows printer driver. Printer drivers for Windows 3.x, Windows 98 and Windows 95 are delivered with your printer. The printer driver - Compaq LA36N | User Manual - Page 13
handling are given at the end of this chapter. Check that section if you are using multipart forms, envelopes, or labels. Getting to Know the Printer’s Major Parts and the Control Panel This section describes the major parts and controls of the - Compaq LA36N | User Manual - Page 14
Paper Handling Parts of the Printer 9 8 7 18 17 10 11 1 2 3 4 5 6 12 13 16 14 15 Front and Rear Views 2-2 - Compaq LA36N | User Manual - Page 15
4. Platen knob (to manually advance the paper) 5. Platen (to support the paper) 6. Interface connector (to connect the printer to the host system) guide (to insert single sheets and envelopes) 14. Rating label (to indicate the printer power specifications) 15. Power connector (to connect the printer - Compaq LA36N | User Manual - Page 16
Normal mode operations and required user response. Operations are listed by functions. Basic States of the Printer Indicator Ready Fault Status Printer Status On The printer is ready for printing or The printer is receiving or printing data. Blinking The printer is not ready and holds - Compaq LA36N | User Manual - Page 17
FF/Load. On Press FF/Load if single sheet load is switched from AUTO to MANUAL in Set-Up mode. Off Press FF/Load. Off Press LF. Off Press Pause if TEAR option is switched from AUTO to MANUAL in Set-Up mode, or press FF/Load. Off Press FF/Load or Park or turn the printer off and on again. Off Press - Compaq LA36N | User Manual - Page 18
or Value Select a Set-Up Value and move cursor to SAVE&EXIT Quit Set-Up mode without saving values Clear software-detected errors Initialize the printer Off Not printing Off Not printing Off Not printing Off Not printing Off Not printing —— —— Off Press or button. Off Press Set-Up/Quit. Off - Compaq LA36N | User Manual - Page 19
the Fault indicator lights, the printer also makes a longer beep. Selecting Paper The printer can handle either single sheets or consult your dealer. Paper Specifications Paper Size Continuous forms Cut sheets Width Length Width Length LA36N LA36W 102 to 267 mm (4 to 10.5 in) 102 to 420 mm (4 - Compaq LA36N | User Manual - Page 20
Fault DEC EP2 PPX24 M1 M2 Exit/Save Paper select lever 1 Paper thickness lever 2 Control panel 3 6 Font indicators 4 Macro indicators 5 Buttons 6 Printer Levers and Buttons The following table summarizes the use of levers and buttons in paper handling. More detailed information is provided - Compaq LA36N | User Manual - Page 21
or number of number of copies (including the original). copies Vary the setting upward or downward (including A to D) to optimize printing. Select D when replacing ribbon or clearing a paper jam. * The following graphics are engraved on the casing. Continuous forms Single sheets 2-9 - Compaq LA36N | User Manual - Page 22
up to five parts (original plus four copies). For details on paper thickness specifications, see Appendix B “Printer and Paper Specifications.” The paper thickness lever, located at the top right corner of the printer, allows you to adjust for different paper thicknesses. Be sure to adjust the paper - Compaq LA36N | User Manual - Page 23
position. Caution: If printing is messy, the ribbon misfeeds, or the paper jams, move the lever cut sheet stand allows paper to be loaded manually, one sheet at a time. Loading a Single Sheet part of the printer.) 4. Raise the cut sheet stand. Position the left paper guide in accordance with the - Compaq LA36N | User Manual - Page 24
the top cover 2 of the printer. The gradations on the ruler are for 10 columns per inch. 2 1 Setting Paper Select Lever and Left Paper Guide 5. Adjust the right paper guide 3 to the width of paper detection. If you set this option to manual, you will have to press FF/Load to feed the paper. 2-12 - Compaq LA36N | User Manual - Page 25
as necessary: • Horizontal alignment. Readjust the paper guides if required. • Top-of-form setting. Use the printer Set-Up mode (see Chapter 4 “Using Set ejected automatically upon the completion of the page printing. To manually eject sheets of paper: • Press the FF/Load button to execute a forward - Compaq LA36N | User Manual - Page 26
it pulls paper from the bottom or rear of the printer to the platen. This is called pulltractor feeding. Caution: When using continuous forms with the cut sheet stand in up position, always spread the cut sheet stand paper guides to their extreme position before feeding the paper. This will prevent - Compaq LA36N | User Manual - Page 27
, bottom feed. Caution: When using paper-stapled multipart forms in push feed, raise the cut sheet stand 3. After the paper is installed in the printer, the paper path should look like this: Good placement 3 1 Push-feed, from rear slot Push-feed, from rear slot with paper-stapled multipart forms - Compaq LA36N | User Manual - Page 28
continuous forms. (See the section “Adjusting for Paper Thickness” earlier in this chapter.) 3. Move the paper select lever 1 to the rear of the printer. 3 4 2 1 Preparing to Load Continuous Forms Paper 4. To access the forms tractors 2, lock the cut sheet stand 3 and the back cover 4 together and - Compaq LA36N | User Manual - Page 29
6. Position the right forms tractor (as seen from the rear of the printer) in accordance with the Note below. Push the right locking lever down to secure the tractor. Center the middle forms support. Note: The tractor guide 7 can be found below the right forms tractor, as seen from the back. This - Compaq LA36N | User Manual - Page 30
Handling 8. Fit the paper feed holes onto the left and right tractor pins. Adjust the left forms tractor (as seen from the rear of the printer) to accommodate the width of the form. Close the paper holders 6. 6 Adjusting Paper Tension 9. Pull the left tractor (as seen from the rear) to extend - Compaq LA36N | User Manual - Page 31
pull on plastic parts (below the forms tractors) in order to avoid printing problems (such as printing on the platen at the end of the paper in push forms when the forms tractor unit is installed at the top of the printer. The forms tractor unit pulls continuous forms. This is called pull-tractor - Compaq LA36N | User Manual - Page 32
Paper Handling 2. Pull up both ends of the tractor unit to detach the catches 1 of the tractor unit from the support studs 2. Then pull the tractor unit. 1 2 Removing the Tractor Unit 3. Set the cut sheet stand and the back cover to the down position. 2-20 - Compaq LA36N | User Manual - Page 33
the acoustic cover and the top cover 3 to access the top of the printer. 5. Position the catches 1 of the tractor unit on the support studs 4 near the platen shaft. A. Push the forms tractor unit toward the front of the printer. B. Snap down the tractor unit into place so that the catches click on - Compaq LA36N | User Manual - Page 34
below the table and pass the paper through the slot of the table then through the bottom slot of the printer up to the platen. 1 Passing Continuous Forms Paper From Under the Printer 6. Close the front cover 1 and open the top cover. 7. Open the two holders of the left and right tractors - Compaq LA36N | User Manual - Page 35
the top cover against the tractor unit. 11. Adjust the paper thickness lever to the appropriate position. 12. Press the Pause button to place the printer in the Ready state. Print a sample page and check the first line and the page margins. Make the following adjustments, as necessary: – Horizontal - Compaq LA36N | User Manual - Page 36
, set the paper thickness lever to D, then remove the paper manually. Recovering from an Unexpected Unloading Operation If you have accidentally pressed cannot be torn off in the following way. Automatic-Tear-Off Advancing Your printer has a special “tear bar” that allows you to tear off printed - Compaq LA36N | User Manual - Page 37
the next paper perforation in front of the tear bar. The paper is automatically retracted when the printer receives the next data. For tearing off the paper, see the next subsection “Manual Tear-Off Advancing”. Manual Tear-Off Advancing If you have set the TEAR option of the INSTALL function to - Compaq LA36N | User Manual - Page 38
corresponding Set-Up option (FORM LENGH) according to the actual physical page length (distance between two perforations for continuous forms). This will allow the printer to know exactly where the print head is and to position it at the same position when a form feed occurs. • Top line 1: This is - Compaq LA36N | User Manual - Page 39
1 2 3 4 5 6 ... ... 3 1 2 3 4 5 6 7 8 4 48 49 50 51 52 5 ABCDEFGHIJ ··· ABCDEFGHIJ ··· ABCDEFGHIJ ··· 1 2 3 4 5 6 ... Paper Handling TOF 1 L 2 TOF ... Print Area Definition 2-27 - Compaq LA36N | User Manual - Page 40
to execute “reverse” feed from the control panel. To feed paper backward, manually rotate the platen knob. Remember that the Top-of-Form will slip from by pressing the Set-Up/Quit and Top buttons at the same time. The printer beeps and the M1 and M2 indicators flash alternately with the DEC and PPX24 - Compaq LA36N | User Manual - Page 41
and single sheets. This section explains how to switch between paper types. It is not necessary to remove the continuous forms paper from the printer. Caution: This function is not available for continuous forms paper that is fed by the pulltractor. Switching from Continuous Forms to Single Sheets - Compaq LA36N | User Manual - Page 42
Paper Handling To switch from continuous forms to single sheets: 1. Tear off your printed pages. 2. Retract the forms paper to the park position by pressing the Park button. The Fault indicator turns on. Caution: Retracting many pages by using the Park button without tearing off will cause paper - Compaq LA36N | User Manual - Page 43
on plastic parts (below the forms tractors) in order to avoid printing problems (such as printing on the platen at the end of the paper in unit are in front of the inner support studs 2 of the printer. 5. Push the tractor unit toward the front of the printer until the top catches snap into the inner - Compaq LA36N | User Manual - Page 44
forms, raise the cut sheet stand to support the forms. Envelopes When printing envelopes, use . • Do not leave labels loaded in the printer. If labels curl around the platen, jamming may the paper thickness lever to a wider position. If jamming problems continue, try a different type of label. • We - Compaq LA36N | User Manual - Page 45
this section. For a summary of the operation of these buttons, see the section “Getting to Know the Printer’s Major Parts and the Control Panel” in Chapter 2 “Paper Handling”. Instructions for loading and handling paper are also given in Chapter 2 “Paper Handling”. Selecting Print Features The print - Compaq LA36N | User Manual - Page 46
software packages offer a wide variety of print features, including some features that are not supported by this printer. For example, software often provides a wider range of font sizes than the printer can accommodate. Software also allows you to specify multiple fonts on a single page and - Compaq LA36N | User Manual - Page 47
three seconds, press the M1 or M2 button 2. The lighted indicator (M1 or M2) shows the macro selected. This selection is permanently retained in the printer. Draft HSDraft HiDraft Courier 10 Comp. 17 Ready Nimb. PS M1 Soft Ctrl. M2 Set-up/Quit Top Fault DEC EP2 PPX24 M1 M2 1 2 Control - Compaq LA36N | User Manual - Page 48
Printing 3. To change to a resident font, see the next section. Otherwise, press the Pause button to return the printer to the Ready state. You are ready to print using the selected macro. Note: The active Macro at power-off remains active at next power- - Compaq LA36N | User Manual - Page 49
Printing Print Feature DEC mode DEC printer ID Auto wrap EOT disconnect Initial report Auto answerback Answerback on ENQ DEC G0 character set DEC user preference character set IBM&Epson mode Default Character set IBM mode IBM set 1 or 2 IBM double height IBM AGM Epson mode Epson national character - Compaq LA36N | User Manual - Page 50
switch time Baud rate Bits and parity Buffer control Disconnected on fault Adjustments Settings Print Feature Fanfold adjust (continuous forms) Manual adjust (single sheets) Reserved 1 Reserved 2 Menu Access Settings Print Feature Menu access Factory Settings English Auto, 1 second Auto, 2 second - Compaq LA36N | User Manual - Page 51
a resident font other than the font specified in the selected macro or by commands from the computer. To select a resident font: 1. Switch the printer to the Pause state if you are currently printing. 2. Repeatedly press the Font button 1. The lighted indicator 2 shows the font selected. 2 w Draft - Compaq LA36N | User Manual - Page 52
Indicator Status DEC lit PPX24 lit Both lit (EP2) Flashing alternately Active Protocol DEC PPL2 protocol – IBM Proprinter X24E protocol (LA36N) – IBM Proprinter XL24E protocol (LA36W) Epson ESC/P2 protocol According to Set-Up settings, the printer waits for data to switch to a proper protocol. 3-8 - Compaq LA36N | User Manual - Page 53
the current and next lines. You can also use your software to stop printing, but there will be a slight delay before printing stops. After the printer enters the Pause state, it still receives data until the print buffer becomes full of new data. The data in the print buffer will be - Compaq LA36N | User Manual - Page 54
tear bar. Tear the paper off. The paper will automatically return to the Top-of-Form position when the printer receives data to print. If you have set the TEAR option to MANUAL, you have to press the Pause button to move the paper to the tear bar, and then to return - Compaq LA36N | User Manual - Page 55
Top-of-Form adjustments for paper feed control. – To help diagnose your printer for trouble-shooting by printing test and hexadecimal dump. – To recall all the factory settings (including both user environments, installation parameters, and adjustment parameters). – To define what kind of settings - Compaq LA36N | User Manual - Page 56
control panel in the following order: – Navigating through the option menu structure. – Selecting a new value for an option. – Saving your new printer configuration (permanently or temporarily). For information on using the printing test and hex dump functions, see the section “Using the Diagnostic - Compaq LA36N | User Manual - Page 57
Using Set-Up Mode 2. Turn the printer off. 3. Turn the printer back on while pressing the Set-Up/Quit button until the printer beeps. 4. Remove the acoustic cover in order to see the printed text. OFF ON Set-Up/Quit Entering the Set-Up Mode 4-3 - Compaq LA36N | User Manual - Page 58
printer enters the Set-Up mode, it prints the following information. During the Set-Up mode, the M1 and M2 indicators flash alternatel 1 4 Set-Up Mode LA36N mode. Generally speaking, the red cursor 3 on the plastic print guide 4 indicates the function or value to be selected. When entering the Set - Compaq LA36N | User Manual - Page 59
the button or the button to position the red cursor on the plastic print guide under the function you require. 2. Press the button or the button to select the function. If the function has options and values, the printer prints the first option and its values. The MACRO 1, MACRO 2, INSTALL - Compaq LA36N | User Manual - Page 60
set of pre-determined values. To select such a value: 1. Repeatedly press the button or the button to position the red cursor on the plastic print guide under the value you require. 2. Press the button to select the value. The printer prints the next option and its values. 4-6 - Compaq LA36N | User Manual - Page 61
is the current default value (the value currently saved in the printer’s permanent memory). In the previous example, the default values are printer beeps. 2. Select the Macro 2 function. Wait for the printer to stop printing and press the button once to position the red cursor on the plastic guide - Compaq LA36N | User Manual - Page 62
Press the button or the button (the printer beeps) as many times as you decrease the button pressed continuously; the printer beeps at intervals of 0.2 second printer off and back on while pressing the Set-Up/Quit button until the printer beeps. 2. Select the Macro 2 function. Wait for the printer - Compaq LA36N | User Manual - Page 63
margin from column 1 to column 20. Press and hold the button until the printer beeps nineteen times. When the button is released, the new value is printed next as the new power-on defaults in Macro 2 and exit Macro 2. The printer then exits the Set-Up mode and returns ready. These settings remain in - Compaq LA36N | User Manual - Page 64
(PRINT TEST and HEXDUMP) Select values: Press or to position cursor, then press or SAVE&EXIT Press Exit/Save *1 Printer exits Set-Up mode without saving changes Press or *2 Printer saves changes and exits Set-Up mode : Functions having options and/or values *1 Changes are valid, but will be - Compaq LA36N | User Manual - Page 65
The preselected factory settings are shown on the opposite page. When the printer finishes printing the list of values, it reprints the menu. off at the perforation. In the Set-Up mode, you cannot use the printer tear-off feature (Pause button). Select another function or exit the Set-Up - Compaq LA36N | User Manual - Page 66
Using Set-Up Mode 4-12 Printout of Factory Settings Using the PRINT Function - Compaq LA36N | User Manual - Page 67
means that the active protocol depends on what port is actually used by the printer. The protocol for the serial port (PRTCL SERL) is factory set to Changing Macro 1 and Macro 2 Options” later in this chapter. FNFOLD ADJ MANUAL ADJ You can separately adjust the origin of the Top-ofForm for both - Compaq LA36N | User Manual - Page 68
have a serial interface, the serial interface options selected on the printer must be the same as the settings you selected using your software will vary with the protocol. To determine which features your software supports, refer to your software documentation. The following table describes the - Compaq LA36N | User Manual - Page 69
18 Paper Source ...4-19 Print Direction ...4-19 DEC Defaults ...4-20 DEC Printer ID ...4-20 Auto Wrap ...4-20 End of Transmission Disconnect 4-20 4-20 ANSWERBACK on ENQ 4-20 DEC G0 Character Set 4-21 User Preference ...4-22 IBM & Epson Defaults ...4-23 Default Character Set 4-23 - Compaq LA36N | User Manual - Page 70
to Your Host System” in the Installation Guide for information on selecting a protocol. DEC PPL2 printers – IBM Proprinter X24E printers (LA36N) – IBM Proprinter XL24E printers (LA36W) Epson printers using the ESC/P2 protocol Printer automatically senses the active protocol. This is useful when - Compaq LA36N | User Manual - Page 71
when PORT DEPND is not selected for the option. DEC PPL2 printers – IBM Proprinter X24E printers (LA36N) – IBM Proprinter XL24E printers (LA36W) (Either is selected as factory setting for Macro 1.) Epson printers using the ESC/P2 protocol (factory setting for Macro 2) Select a font to - Compaq LA36N | User Manual - Page 72
Using Set-Up Mode MACRO 1 and MACRO 2 Options Values (Form Length) ## INCHES No of LINE (Left Margin) No of COLM (Top-of-Form) 8 IN 13.2 IN 13.6 IN ## /60 IN (Top Margin) ## LINES (Bottom Margin) ## LINES - Compaq LA36N | User Manual - Page 73
follows the setting of the paper select lever. Continuous forms selected MANUAL RSVD 1 RSVD 2 RSVD 1/2 Single sheets selected Reserved Reserved is slower than bidirectional printing. BIDIR Bidirectional printing. The printer prints in either direction while seeking the next print direction - Compaq LA36N | User Manual - Page 74
ignored. DTR signal turns low for five seconds when the EOT character is detected. Specify whether the status is sent to the computer when the printer is turned on. (DEC-423 serial interface only) Status is not sent. Status is sent. Specify whether the ANSWERBACK message is sent to the computer - Compaq LA36N | User Manual - Page 75
Using Set-Up Mode MACRO 1 and MACRO 2 Options Values (DEC G0 Charac- US ASCII ter Set) BRITISH D-FINNISH FRENCH D-FRENCH-C GERMAN I-ITALIAN J-ROMAN D-NORW/DAN I-SPANISH D-SWEDISH NORW/DAN D-DUTCH D-SWISS D-PORTGU LEGAL D-SUPPL D-GRAPHICS D-TECH D-7 HEBREW D-HEBREW-S D- - Compaq LA36N | User Manual - Page 76
Using Set-Up Mode MACRO 1 and MACRO 2 Options Values Description (User Preference) D-SUPPL D-GRAPHICS D-TECH D-7 HEBREW Select a character set (language) for the DEC User Preference supplement. DEC Supplemental DEC Special Graphics DEC Technical DEC 7-bit Hebrew D-HEBREW-S DEC - Compaq LA36N | User Manual - Page 77
Using Set-Up Mode MACRO 1 and MACRO 2 Options Values Description =IBM&EPSON ========= The following are the Set-Up options common to IBM Proprinter X24E and XL24E protocol and Epson ESC/ P2 protocol. (Default Character CP 210 Set) CP 220 CP 437 CP 850 CP 851 CP 852 CP 857 - Compaq LA36N | User Manual - Page 78
the vertical pitch also. Standard character height Double character height Specify whether the Alternate Graphics Mode (AGM) is used, that is, the printer is compatible with the IBM Graphics printers. The base of line spacing is 1/72 inch or 1/216 inch. The base of line spacing is 1/60 inch or 1/180 - Compaq LA36N | User Manual - Page 79
allocation of the input buffer. If you are using the DEC-423 serial interface, you must set the serial interface options properly for the printer to function correctly with your system hardware. The following table describes the INSTALL options and values . Options are listed in the order in which - Compaq LA36N | User Manual - Page 80
sheet is set on the platen. AUTO 5 SEC 5 seconds after a single sheet is set on the platen. MANUAL Load a single sheet when the FF/Load button is pressed. Enable or disable the printer status buzzer when a fault condition occurs. ONE One beep for a period of about 500 ms CONTINUOUS Buzzer on - Compaq LA36N | User Manual - Page 81
. Select the type of interface to the computer. Centronics parallel interface DEC-423 serial interface Both interfaces are ready for communication. The printer communicates with the interface from which it first receives data. The interface is active until the input buffer becomes empty. Specify the - Compaq LA36N | User Manual - Page 82
Using Set-Up Mode INSTALL Options Values 600 BPS 1200 BPS 2400 BPS 4800 BPS 9600 BPS 19200 BPS 7 EVEN 7 ODD 7 SPACE 7 MARK 8 EVEN 8 ODD 8 NONE (Buffer Control) (Disconnect on Fault) DTR XON/XOF NO DROP DTR PULSE DTR Description Setting of - Compaq LA36N | User Manual - Page 83
Form Origin Print positions often change gradually when you use the printer over long periods of time. The ADJUST function allows you values are the factory settings. ADJUST Options (Fanfold Adjustment) (Manual Adjustment) Values ###/60 IN ###/60 - Compaq LA36N | User Manual - Page 84
press the button or the button. Any settings changed while in the Set-Up mode are saved as the new power-on defaults for the printer. The new defaults remain active until you change them again. Caution: To temporarily use your changes, press the Set-Up/Quit button. These changes are - Compaq LA36N | User Manual - Page 85
dump) These functions are used for checking print quality and diagnosing printer problems. Hex dump also provides useful information for programmers. There are the printer. The printing test prints all of the characters available in the ASCII character set. For color printers having a color ribbon, - Compaq LA36N | User Manual - Page 86
the Hex Dump mode, make sure that continuous forms paper is loaded into the printer. Enter the Set-Up mode and follow these steps: 1. Start the Hex . To start hex dump printing, send your file or program to the printer. The printer goes online and prints the hex dump. Press the Pause button to pause - Compaq LA36N | User Manual - Page 87
Using Set-Up Mode Sample Hex Dump 4-33 - Compaq LA36N | User Manual - Page 88
LINES BOTTOM MRG: 1 LINES* 2 LINES 3 LINES 256 LINES LINE MODE: LF=LFCR=CR* LF=LF+CR CR=LF+CR LFCR=LF+CR PAPER SRC: TRACTOR* MANUAL RESVD 1 RESVD 2 PRINT DIR: UNIDIR BIDIR SOFT CNTRL* DEC PRT ID: PPL2* LA50 ID LA120 ID LA210 ID DEC DEFLTS AUTO WRAP: TRUNCATE WRAP* DEC - Compaq LA36N | User Manual - Page 89
3 SEC AUTO 4 SEC AUTO 5 SEC MANUAL NO TEAR S-SHEET LD: AUTO 1 SEC AUTO 2 SEC* AUTO 3 SEC AUTO 4 SEC AUTO 5 SEC MANUAL ERROR BEEP: ONE* CONTINUOUS OFF BUFFER: DROP DTR PULSE DTR w DEC G0 CST: US ASCII* D-SUPPL USER PREF: D-SUPPL* BRITISH D-GRAPHICS D-GRAPHICS D-FINNISH D-TECH D-TECH - Compaq LA36N | User Manual - Page 90
Using Set-Up Mode 4-36 - Compaq LA36N | User Manual - Page 91
cleaning and replacement of the ribbon cartridge are all that is required. Lubrication of the printer is not usually necessary. If the print head carriage does not move smoothly back and forth, clean the printer in the manner described in this chapter. If the problem continues, contact your dealer - Compaq LA36N | User Manual - Page 92
the left or right when the power is off. Be careful not to press too hard on the flat ribbon cable 1 that extends from the print head carriage. 1 Printer Interior 5. Re-install the ribbon cartridge. Close the front cover. 6. Open the top cover. Vacuum the inside of the top cover, the bail rollers - Compaq LA36N | User Manual - Page 93
a dry cloth against the platen and manually rotate the platen knob. 4. Gently wipe ribbon cartridge and unpacking the purchased ribbon cartridge from the carton. The installation of the ribbon cartridge is detailed in the section “Installing the Ribbon Cartridge” in step 3 of the Installation Guide - Compaq LA36N | User Manual - Page 94
print head may be hot if you have been printing recently. 3. Move the paper thickness lever 1 located on the top right of the printer to position D. 4. To remove the ribbon cartridge, press the ribbon release levers 2 located on the sides of the cartridge and carefully lift the cartridge out of the - Compaq LA36N | User Manual - Page 95
dot is not printed for all characters, replace the print head. Warning: The print head may be hot if you have been printing recently. To remove the print head: 1. Turn off the printer. 2. Open the front cover and remove the ribbon head: 1. Carefully fit the mounting guide grooves of the print head on - Compaq LA36N | User Manual - Page 96
Maintenance 5-6 - Compaq LA36N | User Manual - Page 97
your Compaq Customer Support Center Solving problems The tables in this section describe common printer problems and their solutions. The following types of problems are considered: • Print quality problems • Paper handling problems • Operating problems • Printer failure Print Quality Problems and - Compaq LA36N | User Manual - Page 98
Trouble-Shooting Problem Printing is too light or too dark. Stains or smudges appear the Ribbon Cartridge” in step 3 of the Installation Guide, on page 1-8. Make sure that the interface cable is securely connected to both the printer and computer. Make sure that the printer protocol selected - Compaq LA36N | User Manual - Page 99
Trouble-Shooting Problem Solution The top margin is wrong. The top margin is the sum of the printer’s top-of-form setting, the software-specified top margin, and the printer’s TOP-MRGN setting. Proceed as follows: • Make sure that the top-of-form setting is correct. The factory default is 0 mm - Compaq LA36N | User Manual - Page 100
(This problem cannot occur if you use the forms tractor unit or insert a single sheet with its left edge in contact with the left paper guide.) Make “Using Continuous Forms” in Chapter 2, page 2-14. Turn off the printer and remove the jammed paper. Remove any obstructions from the paper path. Make - Compaq LA36N | User Manual - Page 101
Trouble-Shooting Problem Paper slips off the forms tractors or the perforated holes of problem is being caused by the interface, the computer, incorrect printer settings, or incorrect software settings. See step 5 “Testing the Printer” of the Installation Guide, page 1-14. Make sure that the printer - Compaq LA36N | User Manual - Page 102
Trouble-Shooting Printer Failures A user cannot generally resolve a problem involving defective printer hardware. On detecting a fatal error, the printer the printer to Turn the printer off printer hardware is functional, any problems you are having are probably caused by incorrect printer printer - Compaq LA36N | User Manual - Page 103
Trouble single sheet paper is loaded in the printer. If possible, use forms at least 216 mm (8.5 inches) wide for LA36N or 356 mm (14 inches) wide for Quit button alone when turning the printer on, to avoid initiating unexpected tests not permitted for the user. 2. Adjust the vertical print - Compaq LA36N | User Manual - Page 104
Trouble-Shooting 3. Adjust the vertical print alignment at Correspondence and Draft quality speed. Press the button and the button to switch alignment settings and exit the vertical alignment function. Note: To exit the vertical alignment function without saving changes, turn the printer off. 6-8 - Compaq LA36N | User Manual - Page 105
A Supplies and Options This appendix lists the accessories and options available for the printer. Contact your dealer for information on ordering any of these items. Supplies Supplies Ribbon cartridges Black ribbon Color ribbon Print head Order Number 126327-B21 (LA30R-KA) 126328-B21 (LA30R-KC - Compaq LA36N | User Manual - Page 106
from the print head carriage. For details, refer to the instructions shipped with the kit. To install the color ribbon, see the section entitled “Installing the Ribbon Cartridge” in Step 3 of the Installation Guide. The printer automatically senses the color kit and follows the color commands from - Compaq LA36N | User Manual - Page 107
functional, and performance specifications for the printer. It also contains detailed paper specifications. Power consumption Heat generation Interface (dual) Data buffer size Operating environment Storage environment Acoustic noise LA36N 133 mm (5.2 in) 434 mm (17 in) 330 mm (13 in) LA36W 130 - Compaq LA36N | User Manual - Page 108
Printer dot matrix with a 0.2 mm, 24-wire head Bidirectional logic-seeking or unidirectional seeking Horizontal X vertical 36 X 24 dots 30 X 24 dots 24 X 24 dots 18 X 24 dots 12 X 24 dots 9 X 24 dots holes 1-to 5-part top-glued cut sheets and envelopes LA36N 102–267 mm (4–10.5 in) 102 mm (4 in - Compaq LA36N | User Manual - Page 109
Printer and Paper Specifications Character sets DEC mode 94-character sets: 96-character sets: IBM mode Set 1/2: Boldface PS, Pica 10, OCR A, and OCR B Timeless and Nimbus Sans ® Code 3 of 9, Industrial 2 of 5, Interleaved 2 of 5, Matrix 2 of 5, EAN 8, EAN 13, UPC-A, Codabar, and Postnet B-3 - Compaq LA36N | User Manual - Page 110
Printer and Paper Specifications Line spacing Character pitch Characters per line 2, 3, 4, 6, 8, or 12 per second Ribbon service life Color: Up to 0.3 million characters per color Black: Up to 2.0 million characters (Draft printing) Certification Safety: Model LA36N-A2/LA36W-A2 LA36N-A3/LA36W- - Compaq LA36N | User Manual - Page 111
Printer and Paper Specifications Paper Specifications Print Area This section illustrates the recommended mm or more (0.2 inch or more) the paper, depending on paper setting or width. Print Area for Single Sheets LA36N LA36W Ws 102 to 267 mm (4 to 10.5 in) 102 to 420 mm (4 to 16.5 in) Hs 76 - Compaq LA36N | User Manual - Page 112
Printer and Paper Specifications Wc 102 mm (4 inches) or more Print area Perforation 25.4 Lc 5.08 mm or more paper, depending on paper (0.2 inch or more) setting or width. Print Area for Continuous Forms LA36N LA36W Wc 102 to 267 mm (4 to 10.5 in) 102 to 420 mm (4 to 16.5 in) Lc 5.08 - Compaq LA36N | User Manual - Page 113
Printer and Paper Specifications Paper Thickness Paper thickness is given by the weight of the paper in either grams per square meter (g/m2) or in pounds - Compaq LA36N | User Manual - Page 114
Printer and Paper Specifications Type of Paper Carbon-backed 2P 3P 4P 5P Carbon-interleaved Number of Parts Thickness Do not use in high humidity environments. - Compaq LA36N | User Manual - Page 115
has the following three resident command sets (protocols): • DEC PPL2 (DIGITAL ANSI Printer Protocol Level 2) • IBM Proprinter X24E (LA36N) and IBM Proprinter XL24E (LA36W) • Epson ESC/P2 Select the same protocol on the printer and in your software. If your software protocols include DEC PPL2 - Compaq LA36N | User Manual - Page 116
PFuPnLct2ionQuick Reference Guide Command This section contains basic information on the DEC PPL2 commands supported in the Compaq Matrix Printer LA36. The in conjunction with the Digital Ansi-compliant Printing Protocol Level 2 Programming Reference Manual and the Digital Ansi-compliant Printing - Compaq LA36N | User Manual - Page 117
an escape sequence provided in the following tables. Both numeric and selective parameters are interpreted as unsigned decimal integers, with the most significant digit sent first. For instance, the value 16 is coded as “16” (3/1 3/6). Leading zeros are allowed but are ignored. Plus and minus signs - Compaq LA36N | User Manual - Page 118
Command Sets PFousnictitoionning Controls Command Mnemonic Function Command Remarks BS Backspace 0/8 CR Carriage Return 0/13 C0 Control Code C0 Control Code FF Form Feed 0/12 C0 Control Code HT Horizontal Tab 0/9 C0 Control Code LF Line Feed 0/10 C0 Control Code VT Vertical - Compaq LA36N | User Manual - Page 119
Command Sets FMunnecmtioonnic Function Command HPR Horizontal Position CSI Pn a Relative VPA Vertical Position CSI Pn d Absolute VPR Vertical Position CSI Pn e Relative CoRmemmaanrdks Pn = number of columns down Pn = position to move to Pn = number of lines down Sheet Size and Margins - Compaq LA36N | User Manual - Page 120
Command Sets TFyupnectSioizne and Spacing, Managing Implicit CCuormsmoranMdotion Mnemonic Function Command Remarks DECAWM Autowrap Mode CSI ? 7 h CSI ? 7 l DECCRNLM Carriage Return CSI ? 40 h /New Line Mode CSI ? 40 l DECPSP Proportional CSI ? 27 h Spacing Mode CSI ? 27 l DECSHORP Set - Compaq LA36N | User Manual - Page 121
Ps = 53: Overline on Ps = 55: Overline off Ps = ?4: Superscript on Ps = ?5: Subscript on Ps = ?24: Script off See the Programming Reference Manual Ps = 0 or 1: Select draft Ps = 2: Select letter quality Ps = 3: Select high speed draft Ps = 4: Select near letter quality (also called correspondence - Compaq LA36N | User Manual - Page 122
Command Sets TFaubnsction Command Mnemonic Function Command Remarks DECCAHT Clear All Horizontal Tabs ESC 2 deprecated command DECCAVT Clear All Vertical Tabs ESC 4 deprecated command DECHTS Horizontal Tab Set DECSHTS Set Horizontal Tab Stops ESC 1 CSI Pn ; . . . ; Pn u deprecated - Compaq LA36N | User Manual - Page 123
SP M ESC SP N ASCII in G0 and GL. ISO Latin-1 in G1 and GR. Same as ESC SP L ASCII in G0 and GL. DECAUPSS Assign User Preference Supplemental Set ISO Latin 9 DCS Ps ! u Ps = 0: 94-char. set D . . . D ST Ps = 1: 96-char. set D . . . D: SCS designating sequence. DCS 1 ! u b ST ST = 09/12 or - Compaq LA36N | User Manual - Page 124
DEC Portuguese 7-Bit Turkish DEC 8-Bit Turkish Supplemental DEC 8-Bit Greek Supplemental User Preference Supplemental Command I2 F Designator Charactors A 4/1 B 4/2 4 3/4 5 3/5 R 5/2 9 3/9 K 4/11 "4 2/2, 3/4 %= 2/5, 3/13 Y 5/9 %4 2/5, 3/4 I 4/9 J 4/10 6 3/6 Z 5/10 - Compaq LA36N | User Manual - Page 125
ISO Latin/Cyrillic Supplemental ISO Latin-5 Supplemental User Preference Supplemental I2 F DesignatoCroCmhmaraancdtors A 4/1 B Secondary Device Attributes Report ESC [ > Ps1 ; Ps2 ; Ps3 ; Ps4 ; Ps5 c (printer to host) Ps1 = 67: model LA30N 68: model LA30W Ps2 = firmware revision x 10 - Compaq LA36N | User Manual - Page 126
Command Sets FMunnecmtioonnic Function Command RCeomamraknsd DECLANS Load ANSWERBACK With Password DCS Ps ; Pn2 ; Pn3 Ps = 1 : No password - Do not store v encoded_message_ message. string ST Ps = 2 : No password - Store message. Ps = 3 : Password - Store message : Pn2 : Old password - Compaq LA36N | User Manual - Page 127
! v Ps = 0: No change Ps = n: Tray n (reserved) Ps = 4 : Tractor feeding Ps = 99: Manual feed DECSITF Select Input Tray input Failover CSI Ps1 ; Ps2 Ps1 = 0: Disable all composite ; . . . ; Psn SP bit Process 7-bit and 8-bit Transmit 8-bit as 7-bit equivalents Transmit 8-bit (not supported) C-13 - Compaq LA36N | User Manual - Page 128
Decipoints 0, 2 : Code 39 1 : Interleaved 2 of 5 4 : EAN 8 5 : EAN 13 7 : Codabar a/t 8 : Codabar b/n 9 : Codabar c/* 10 : Codabar d/e 11 : UPC-A 13 : Postnet 14 : Industrial 2 of 5 18 : Matrix 2 of 5 Supported values : 10 (default) -15 - 20 - 25 - 30. Not applicable to UPC, EAN and Postnet systems - Compaq LA36N | User Manual - Page 129
Command Sets AFcutinvectpioonsition after printing a bar code is the same posiCtioomn masabnedfore printing bar code. After printing bar code, appropriate positioning control commands, see “Positioning Controls” earlier in this section, must be sent to print additional barcode strings, text or - Compaq LA36N | User Manual - Page 130
Command Sets SFixuencl tGiornaphics Protocol Selector Ps1 Command Ps1 Value Horizontal Grid Size (inches) Aspect Ratio (Vert : Hor)1 0, 1 or none 1/144 2 2 1/360 5 3, 4 1/180 2.5 5, 6, 7, 8 1/144 2 9 1/72 1 > 9 1/144 2 1Vertical Grid size = 1/72 in., unless modified by Pn3 or - Compaq LA36N | User Manual - Page 131
codes Parameter Separator ; (3/11) Separates parameters - used on the above control codes Sixel Data (3/15 - 7/14) Sixel printable characters. The printer substracts the offset (3F hexadecimal) from the received code, assigning each of the remaining loworder six bits to a grid position : LSB - Compaq LA36N | User Manual - Page 132
Command Sets StaFnudnacrtdion8-bit Code Table (Left Half) Command C-18 Standard 8-bit Code Table (Left Half) - Compaq LA36N | User Manual - Page 133
StaFnudnacrtidon8-bit Code Table (Right Half) Command Command Sets Standard 8-bit Code Table (Right Half) C-19 - Compaq LA36N | User Manual - Page 134
Character Sets Command Power-up configuration is as follows: GL: G0 GR: G2 G0: Value for DEC G0 CST Set-Up option G1: ASCII G2: User Preference G3: User Preference User Preference: Value for USER PREF Set-Up option Designating and Invoking Character Sets C-20 - Compaq LA36N | User Manual - Page 135
Command Sets NaFtuioncntaiolnReplacement Character Sets Command Location 2/3 4/0 5/11 5/12 5/13 5/14 6/0 7/11 7/12 7/13 7/14 US ASCII National Replacement Character Sets British £ DEC Finnish French £ à Ä ° Ö ç Å § Ü é ä é ö ù å è ü ¨ DEC French- ISO Canada German - Compaq LA36N | User Manual - Page 136
Guide This section describes the printer commands for the IBM Proprinter X24E and XL24E protocol. When there is a difference, it is identified by LA36N (X24E) and LA36W (XL24E). Asterisks in the “Function” column indicate extended commands that are not supported by the original printer - Compaq LA36N | User Manual - Page 137
Command Sets Function Command Horizontal Control Space Backspace Carriage return Elite characters on Proportionally spaced characters on/off (on: n = 1, off: n = 0) SP BS CR ESC : ESC P (n) Vertical Control Line feed LF Form feed FF Advance paper n/216 inch (1 £ n £ 255) ESC J (n) - Compaq LA36N | User Manual - Page 138
Command Sets Function Vertical tab execution Set vertical tabs The values of n1to nk in this command are the ASCII values of the lines (at the current line spacing) at which tabs are to be set. (1 £ n £ 255) (1 £ k £ 64) Clear all vertical tabs Reset tabs to default values Page Formatting Set left - Compaq LA36N | User Manual - Page 139
Code page 863 3 97 Code page 865 3 98 Code page 866* 23 27 ISO 8859-15** Clear input buffer Select printer Deselect printer (ignore input) Downloading Select resident or downloaded font Ex. n = 0: Resident Draft 2: Resident Courier 4: Downloaded Draft 6: Downloaded Courier Create download - Compaq LA36N | User Manual - Page 140
Command Sets Function Cut Sheet Feeder Control* Feed a sheet from bin 1* Feed a sheet from bin 2* Feed a sheet from bin 3* Eject a page from the printer* Miscellaneous Sound the bell Unidirectional printing on/off (on: n = 1, off: n = 0) Add a carriage return to all line feeds (on: n = 1, off: n = - Compaq LA36N | User Manual - Page 141
Guide Command This section describes the printer commands for the Epson ESC/P2 protocol. Asterisks in the “Function” column indicate extended commands that are not supported by the original printer. See the Programmer’s Reference Manual 5: Single-dotted line 6 or 7: Double-dotted line Command ESC - Compaq LA36N | User Manual - Page 142
Command Sets Function Select printing style This command allows you to combine various printing styles. The value of n is the sum of the values of the styles you want to combine. n = 0: Pica pitch 1: Elite pitch 2: Proportional spacing 4: Condensed 8: Shadow 16: Bold 32: Double-width 64: Italics - Compaq LA36N | User Manual - Page 143
ASCII values of the lines (at the current line ESC B (n1) ... (nk) NUL spacing) at which tabs are to be set. (1 £ n £ 255) (1 £ k £ 16) Move to dot line (d1 + d2 X 256)/360(*2) inch n1 = 2, n2 = 0 (0 £ d1 £ 255) (0 £ d2 £ 127) Vertical relative move by (d1 + d2 X 256)/360(*2) inch n1 = 2, n2 - Compaq LA36N | User Manual - Page 144
Command Sets Function Page Formatting Set right margin to column n (1 £ n £ 255) Set left margin to column n (0 £ n £ 255) Set top and bottom margins from top of page n1 = 4, n2 = 0 • Top margin = (t1 + t2 X 256)/360(*1) inch (0 £ t1 £ 255) (0 £ t2 £ 127) • Bottom margin = (b1 + b2 X 256)/360(*1) - Compaq LA36N | User Manual - Page 145
Command Sets Function Command Select international character set ESC R (n) n = 0: USA 1: France 2: Germany 3: United Kingdom 4: Denmark 1 5: Sweden 6: Italy 7: Spanish 1 8: Japan 9: Norway 10: Denmark 2 11: Spanish 2 12: Latin America 13: Korea 64: Legal Assign a character set to - Compaq LA36N | User Manual - Page 146
Command Sets Function Clear input buffer Delete a character Force most significant bit to 1 Force most significant bit to 0 Cancel control over most significant bit **Code page contains Euro currency symbol Font Selection and Downloading Select font n = 0: Resident character set 1: Downloaded - Compaq LA36N | User Manual - Page 147
the bell Move print head to home position Unidirectional printing on/off (on: n = 1, off: n = 0) Initialize printer Command ESC : NUL (n) (s) ESC & NUL (n1) (n2) (d0) (d1) (d2) (data) ESC * EM R BEL ESC < ESC U (n) ESC @ *1 This is an extended command not supported by the original protocol. C-33 - Compaq LA36N | User Manual - Page 148
Command Sets Function Command C-34 - Compaq LA36N | User Manual - Page 149
operates an industry standard 8-bit Centronics parallel interface. • Bidirectional This printer supports bidirectional communication per IEEE 1284 Standard Nibble mode. This printer can switch between Compatible Centronics and Nibble modes. The interface connector is 36-pin Amphenol type with - Compaq LA36N | User Manual - Page 150
Compatible signals Pin Direction 1 To printer Signal STROBE L 2 To printer DATA BIT 1 3 To printer DATA BIT 2 4 To printer DATA BIT 3 5 To printer DATA BIT 4 6 To printer DATA BIT 5 7 To printer DATA BIT 6 8 To printer DATA BIT 7 9 To printer DATA BIT 8 10 From printer - Compaq LA36N | User Manual - Page 151
mode. Pin Direction 1 To printer 2 To printer 3 To printer 4 To printer 5 To printer 6 To printer 7 To printer 8 To printer 9 To printer 10 From printer 11 From printer 12 From printer 13 From printer 14 To printer data 15 16 17 18 From printer 19-29 30 Signal HostClk - Compaq LA36N | User Manual - Page 152
L Set to high for Reverse Channel Serial Interface Use the cable that comes with the printer or the Digital BC16E cable or equivalent. If you prepare a cable separately, the cable connector at the printer side should be a male Modified Modular Jack (MMJ) or the equivalent that conforms to EIA - Compaq LA36N | User Manual - Page 153
Pin 1) Receive Data - Transmit Data - Transmit Data + Ready Out Buffer Control Buffer control is a communication protocol used by the computer terminal and the printer to secure data transmission between the two devices. The buffer control ensures that the computer does not send information to the - Compaq LA36N | User Manual - Page 154
computer must stop transmitting data within 255 (63) characters of receiving the XOFF code, or information may be lost. If the paper runs out, the printer sends an NAK code (hex 15). DTR DTR is a hardware buffer control; that is, the Ready Out signal on interface cable pin 1 (DTR) is used - Compaq LA36N | User Manual - Page 155
Character Sets This appendix provides character sets available for this printer. Available character sets depend on the protocol selected. They set are given at the end of the section “DEC PPL2 Quick Reference Guide” in Appendix C. • ASCII character set • National Replacement Character sets British, - Compaq LA36N | User Manual - Page 156
Character Sets • DEC Special Graphics Character Set • DEC Technical Character Set • ISO Latin-1 Supplemental Character Set * • ISO Latin-9 Character Set • Legal Character Set • Hebrew Character Sets – DEC 7-Bit Hebrew Character Set – DEC Hebrew Supplemental Character Set – ISO Latin-Hebrew - Compaq LA36N | User Manual - Page 157
Character Sets E-3 - Compaq LA36N | User Manual - Page 158
Character Sets E-4 - Compaq LA36N | User Manual - Page 159
Character Sets E-5 - Compaq LA36N | User Manual - Page 160
Character Sets E-6 - Compaq LA36N | User Manual - Page 161
Character Sets E-7 - Compaq LA36N | User Manual - Page 162
Character Sets E-8 - Compaq LA36N | User Manual - Page 163
Character Sets E-9 - Compaq LA36N | User Manual - Page 164
Character Sets E-10 - Compaq LA36N | User Manual - Page 165
Character Sets E-11 - Compaq LA36N | User Manual - Page 166
Character Sets E-12 - Compaq LA36N | User Manual - Page 167
Character Sets E-13 - Compaq LA36N | User Manual - Page 168
Character Sets E-14 - Compaq LA36N | User Manual - Page 169
Character Sets E-15 - Compaq LA36N | User Manual - Page 170
Character Sets E-16 - Compaq LA36N | User Manual - Page 171
Character Sets E-17 - Compaq LA36N | User Manual - Page 172
Character Sets E-18 - Compaq LA36N | User Manual - Page 173
Character Sets Common to IBM Proprinter X24 and XL24E Protocol and Epson ESC/P2 Protocol Default Sets The following thirty two character sets are available. Code pages 210, 220, 437, 850, 851, 852, 857, 858, 860, 862, 863, 865, and 866, CP DHN, Turkish, ECMA 94, ISO Latin 1, ISO Latin 2, ISO Latin - Compaq LA36N | User Manual - Page 174
Character Sets Code Page 851 Code Page 852 Code Page 857 Code Page 858 Code Page 860 Code Page 862 E-20 - Compaq LA36N | User Manual - Page 175
Code Page 863 Code Page 865 Character Sets Code Page 866 Code Page DHN Turkish ECMA 94 E-21 - Compaq LA36N | User Manual - Page 176
Character Sets ISO Latin 1 ISO Latin 2 ISO Latin 9 Hungarian Slovenian Polish E-22 - Compaq LA36N | User Manual - Page 177
Mazowian Kamenicky Character Sets Cyrillic ELOT 927 ELOT 928 Latin Polish E-23 - Compaq LA36N | User Manual - Page 178
Character Sets Lithuanian 1 Lithuanian 2 MIK Macedonian E-24 - Compaq LA36N | User Manual - Page 179
IBM Proprinter X24E and XL24E Protocol IBM Set 1/2 IBM character set 1 and IBM character set 2 IBM Set 1 Character Sets IBM Set 2 E-25 - Compaq LA36N | User Manual - Page 180
Character Sets Epson ESC/P2 Protocol National Character Sets The following fifteen character sets are available. USA, France, Germany, UK, Denmark 1, Sweden, Italy, Spain 1, Japan, Norway, Denmark 2, Spain 2, Latin America, Korea, and Legal Common Characters The following table shows characters - Compaq LA36N | User Manual - Page 181
Character Sets National Characters The following table shows “national” characters that differ with languages. Character codes correspond to NRs in the preceding table. E-27 - Compaq LA36N | User Manual - Page 182
Character Sets E-28 - Compaq LA36N | User Manual - Page 183
Resident Fonts F Resident Fonts This appendix provides print samples of the printer’s twelve resident fonts. Draft High-Speed Draft High-Impact Draft Pica 10 Courier 10 Prestige Elite 12 Compressed 17 Boldface PS F-1 - Compaq LA36N | User Manual - Page 184
Resident Fonts Timeless (outline) Nimbus Sans ® (outline) OCR A OCR B F-2 - Compaq LA36N | User Manual - Page 185
The smallest unit of information in computer memory. A bit is a single digit, either a 1 or a 0, in the binary numbering system. Eight printer. The forms tractor unit, which must be installed on the top of the printer, pulls paper through the printer. The desk or printer rack, on which the printer - Compaq LA36N | User Manual - Page 186
to the beginning of the next line. Centronics Interface A type of parallel interface. See Parallel interface. Column A vertical section on a printed page. This printer can print 80-column pages at 10-pitch (10 characters per inch). Command Set A set of print and format commands used to control the - Compaq LA36N | User Manual - Page 187
is turned on. Enter the Set-Up mode to change the defaults to ensure compatibility with your system hardware and software. Dot Matrix The grid used to print characters on a dot matrix printer. Each dot corresponds to a wire in the print head. Downloading Transferring soft fonts from the computer - Compaq LA36N | User Manual - Page 188
text is typically monospaced. Nonresident Font Fonts not present (resident) in the printer's permanent memory. Soft fonts are examples of nonresident fonts. (This printer does not support font cards.) Normal Mode One of the printer's two operating modes. In Normal mode, the control panel can be used - Compaq LA36N | User Manual - Page 189
. Sometimes designated PS, proportional spacing is the opposite of monospacing. Protocol A set of instructions that control how data is transmitted between devices such as a computer and a printer. This printer has three resident protocols: DEC PPL2 (native command set), IBM proprinter X24E, and - Compaq LA36N | User Manual - Page 190
A method for feeding continuous forms forward for printing. Holes on the sides of the forms fit over sprockets on two tractors located inside the printer. The forms are pulled for bottom feeding and pushed for rear feeding. Unidirectional Printing Printing is performed in one direction only, left to - Compaq LA36N | User Manual - Page 191
30 Tearing Off • 2-24 Unloading • 2-24 Control Panel Basic States of the Printer • 2-4 Buttons • 2-5, 2-9 Control Panel Operations • 2-5 Operations of • 2-4 Using for Selecting Print Features • 3-2 Cursor on Print Guide • 4-4, 4-6 Cut Sheet Stand Using Paper-Stapled Multipart Forms • 2-15 D DEC-423 - Compaq LA36N | User Manual - Page 192
4-32 HORZ PITCH • 4-17 I IBM AGM • 4-24 IBM Proprinter X24E and XL24E Protocol Printer Commands • C-22 Switching to • 3-8, 4-16 I-DBL HIGT • 4-24 I/F TYPE • Maintenance • 5-1 Cleaning • 5-1 Replacing the Print Head • 5-5 Replacing the Ribbon Cartridge • 5-3 Margins • 4-18 Checking • 2-13, 2-19, 2-23 - Compaq LA36N | User Manual - Page 193
• 4-32 Set-Up Options Currently Selected • 4-11 Starting, Stopping, or Resuming • 3-9 Printing Test • 4-31 Problems and Solutions • 6-1 Operating • 6-5 Paper Handling • 6-4 Printer Failures • 6-6 Print Quality • 6-1 Protocol Changing • 3-8, 4-16, 4-17 DEC PPL2 • C-2 Epson ESC/P2 • C-26 IBM - Compaq LA36N | User Manual - Page 194
Sample • F-1 Selecting • 3-7 Resident Protocols • 1-1 Printer Commands • C-1 Selecting • 3-8 Ribbon Cartridge Replacing • 5-3 S S-SHEET LD • 4- and Pull- Feed • 2-31 Tractor Locking Lever • 2-17 Trouble-Shooting • 6-1 U Unidirectional Printing • 4-19 USER PREF • 4-22 V Values of Set-Up Options • 4-6, - Compaq LA36N | User Manual - Page 195
Users This digital apparatus does no exceed the class B limits for radio noise emissions from digital Compaq Computer Corporation, declare under our sole responsibility that this printer is in conformity with the following directives and standards: • 89/336/EEC on the Electromagnetic Compatibility - Compaq LA36N | User Manual - Page 196
-
 1
1 -
 2
2 -
 3
3 -
 4
4 -
 5
5 -
 6
6 -
 7
7 -
8
-
9
-
10
-
11
-
12
-
13
-
14
-
15
-
16
-
17
-
18
-
19
-
20
-
21
-
22
-
23
-
24
-
25
-
26
-
27
-
28
-
29
-
30
-
31
-
32
-
33
-
34
-
35
-
36
-
37
-
38
-
39
-
40
-
41
-
42
-
43
-
44
-
45
-
46
-
47
-
48
-
49
-
50
-
51
-
52
-
53
-
54
-
55
-
56
-
57
-
58
-
59
-
60
-
61
-
62
-
63
-
64
-
65
-
66
-
67
-
68
-
69
-
70
-
71
-
72
-
73
-
74
-
75
-
76
-
77
-
78
-
79
-
80
-
81
-
82
-
83
-
84
-
85
-
86
-
87
-
88
-
89
-
90
-
91
-
92
-
93
-
94
-
95
-
96
-
97
-
98
-
99
-
100
-
101
-
102
-
103
-
104
-
105
-
106
-
107
-
108
-
109
-
110
-
111
-
112
-
113
-
114
-
115
-
116
-
117
-
118
-
119
-
120
-
121
-
122
-
123
-
124
-
125
-
126
-
127
-
128
-
129
-
130
-
131
-
132
-
133
-
134
-
135
-
136
-
137
-
138
-
139
-
140
-
141
-
142
-
143
-
144
-
145
-
146
-
147
-
148
-
149
-
150
-
151
-
152
-
153
-
154
-
155
-
156
-
157
-
158
-
159
-
160
-
161
-
162
-
163
-
164
-
165
-
166
-
167
-
168
-
169
-
170
-
171
-
172
-
173
-
174
-
175
-
176
-
177
-
178
-
179
-
180
-
181
-
182
-
183
-
184
-
185
-
186
-
187
-
188
-
189
-
190
-
191
-
192
-
193
-
194
-
195
-
196
 |
 |

Compaq Matrix Printer LA36
User Manual
Compaq Computer Corporation