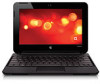
Compaq Mini CQ10-400 Getting Started Mini - Windows XP
Compaq Mini CQ10-400 - PC Manual
 |
View all Compaq Mini CQ10-400 manuals
Add to My Manuals
Save this manual to your list of manuals |
Compaq Mini CQ10-400 manual content summary:
- Compaq Mini CQ10-400 | Getting Started Mini - Windows XP - Page 1
Getting Started Mini - Compaq Mini CQ10-400 | Getting Started Mini - Windows XP - Page 2
. Microsoft and Windows are U.S. registered services. Nothing herein should be construed as constituting an additional warranty. HP shall not be liable for technical or editorial errors or omissions contained herein. First Edition: May 2010 Document Part Number: 605306-001 Product notice This guide - Compaq Mini CQ10-400 | Getting Started Mini - Windows XP - Page 3
a soft surface, such as pillows or rugs or clothing, to block airflow. Also, do not allow the AC adapter to come into contact with the skin or a soft surface, such as pillows or rugs or clothing, during operation. The computer and the AC adapter comply with the user-accessible surface temperature - Compaq Mini CQ10-400 | Getting Started Mini - Windows XP - Page 4
iv Safety warning notice - Compaq Mini CQ10-400 | Getting Started Mini - Windows XP - Page 5
icons 14 Identifying the QuickWeb notification icons 15 Configuring the network ...17 Starting Microsoft Windows ...17 Turning HP QuickWeb on and off ...17 4 Networking ...18 Using an Internet service provider (ISP 19 Connecting to a wireless network ...19 Connecting to an existing WLAN 19 - Compaq Mini CQ10-400 | Getting Started Mini - Windows XP - Page 6
battery ...27 Replacing or upgrading the hard drive 29 Removing the hard drive ...29 Installing a hard drive ...30 Adding or replacing memory modules 31 Updating programs and drivers ...36 Routine care ...36 Cleaning the display ...36 Cleaning the TouchPad and keyboard 36 7 Backup and recovery - Compaq Mini CQ10-400 | Getting Started Mini - Windows XP - Page 7
For more information, refer to the HP Notebook Reference Guide. For instructions on accessing this guide, refer to Finding information on page computer image in case of system instability or failure. For instructions, refer to Backup and recovery on page 37. ● Find installed software-Access a list - Compaq Mini CQ10-400 | Getting Started Mini - Windows XP - Page 8
Help and Support, select Start > Help and ● Software, driver, and BIOS updates Support. ● Troubleshooting tools NOTE: For country- or region-specific support, go to http://www.hp.com/support, select your country or ● How to access technical support region, and follow the on-screen instructions - Compaq Mini CQ10-400 | Getting Started Mini - Windows XP - Page 9
information about Limited Warranty* Warranty information To access this warranty: Select Start > Help and Support > HP Warranty. - or - Go to http://www.hp.com/go/orderdocuments. *You can find the expressly provided HP Limited Warranty applicable to your product in the start menu on your PC - Compaq Mini CQ10-400 | Getting Started Mini - Windows XP - Page 10
2 Getting to know your computer Top TouchPad Component (1) TouchPad zone (2) Left TouchPad button (3) Right TouchPad button Description Moves the pointer and selects or activates items on the screen. Functions like the left button on an external mouse. Functions like the right button on an - Compaq Mini CQ10-400 | Getting Started Mini - Windows XP - Page 11
Lights Component (1) (2) (3) Caps lock light Mute light Wireless light Description ● White: Caps lock is on. ● Off: Caps lock is off. ● Amber: Computer sound is off. ● Off: Computer sound is on. ● White: An integrated wireless device, such as a wireless local area network (WLAN) device, a - Compaq Mini CQ10-400 | Getting Started Mini - Windows XP - Page 12
in combination with the fn key. Executes frequently used system functions when pressed in combination with an arrow key or the esc key. Displays the Windows Start menu. Displays a shortcut menu for items beneath the pointer. Scroll the page up or down, or when pressed in combination with the fn key - Compaq Mini CQ10-400 | Getting Started Mini - Windows XP - Page 13
Front Component (1) Vents (2) (2) Speaker Description Enable airflow to cool internal components. NOTE: The computer fan starts up automatically to cool internal components and prevent overheating. It is normal for the internal fan to cycle on and off during routine operation. Produces sound. - Compaq Mini CQ10-400 | Getting Started Mini - Windows XP - Page 14
Supports the following digital card formats: ● MultiMediaCard (MMC) ● Secure Digital (SD) Memory Card ● Secure Digital Extended Capacity (SDxC) Memory Card ● Secure Digital High Capacity (SDHC) Memory has stopped responding and Windows® shutdown procedures are the HP Notebook Reference Guide. Connect - Compaq Mini CQ10-400 | Getting Started Mini - Windows XP - Page 15
port Description Connects an AC adapter. ● White: The computer is connected to external power and the battery is fully charged. ● Amber: The computer is connected to external power and the battery is charging. ● Off: The computer is not connected to external power. Connects an external VGA monitor - Compaq Mini CQ10-400 | Getting Started Mini - Windows XP - Page 16
Records video and captures still photographs. To use the webcam, select Start > HP > HP MediaSmart > HP MediaSmart Webcam. (5) Internal microphone Records sound. *The antennas are not visible or region. These notices are located in Help and Support. 10 Chapter 2 Getting to know your computer - Compaq Mini CQ10-400 | Getting Started Mini - Windows XP - Page 17
Bottom Component (1) Battery release latches (2) (2) Battery bay Description Release the battery from the battery bay. Holds the battery. Bottom 11 - Compaq Mini CQ10-400 | Getting Started Mini - Windows XP - Page 18
Web calendar ● Music Player ● Photo Viewer NOTE: For additional information about using QuickWeb, refer to the QuickWeb software Help. Enabling HP QuickWeb Follow the on-screen instructions to enable QuickWeb. After you have enabled QuickWeb, the QuickWeb Home screen appears whenever you turn on the - Compaq Mini CQ10-400 | Getting Started Mini - Windows XP - Page 19
Starting HP QuickWeb 1. Turn on the computer. The HP QuickWeb Home screen appears. 2. Click an icon on the QuickWeb Home screen to launch an application. Starting HP QuickWeb 13 - Compaq Mini CQ10-400 | Getting Started Mini - Windows XP - Page 20
the notification icons (3). Identifying the QuickWeb control icons Icon Function Launches the Windows operating system. Shuts the computer down. Returns to the QuickWeb Home screen. manage your activities using your favorite online calendar program. 14 Chapter 3 HP QuickWeb (select models only) - Compaq Mini CQ10-400 | Getting Started Mini - Windows XP - Page 21
can view your favorite photos and albums and manage your photo collection. Supports .bmp, .gif, .jpg, and .png file types. Identifying the QuickWeb notification icons Icon Function When a USB drive is inserted, the File Manager window containing a USB icon appears. Click the USB icon to open the - Compaq Mini CQ10-400 | Getting Started Mini - Windows XP - Page 22
power cord. ● When the computer is running on battery power, the icon appears as only a battery. The state of charge is indicated by the color of the battery icon: ● Green: charged ● Yellow: low ● Red: critically low Launches the QuickWeb software Help. 16 Chapter 3 HP QuickWeb (select models only) - Compaq Mini CQ10-400 | Getting Started Mini - Windows XP - Page 23
Enable Wi-Fi check box. For more information on setting up a wireless connection using QuickWeb, refer to the software Help. Starting Microsoft Windows 1. Turn on the computer. The HP QuickWeb Home screen appears. 2. Click the Start icon , at the far left of the QuickWeb LaunchBar. 3. Click Yes in - Compaq Mini CQ10-400 | Getting Started Mini - Windows XP - Page 24
hardware and software features vary depending on computer model and your location. Your computer supports two types of Internet access: ● Wireless-For mobile Internet access, you can For information on connecting to a wired network, refer to the HP Notebook Reference Guide. 18 Chapter 4 Networking - Compaq Mini CQ10-400 | Getting Started Mini - Windows XP - Page 25
specific IP address and POP3 and SMTP settings. To access the Windows Connect to the Internet Wizard and instructions for using it, select Start > Help and Support network, refer to the HP Notebook Reference Guide and information and Web site links provided in Help and Support. Connecting to an - Compaq Mini CQ10-400 | Getting Started Mini - Windows XP - Page 26
do not see the network you want to connect to, click Set up a connection or network. A list of options is displayed. You can choose to manually search for and connect to a network or to create a new network connection. 5. After the connection is made, place the mouse pointer over the wireless - Compaq Mini CQ10-400 | Getting Started Mini - Windows XP - Page 27
Setting up a new WLAN network Required equipment: ● A broadband modem (either DSL or cable) (1) and high-speed Internet service purchased from an Internet service provider (ISP) ● A wireless router (purchased separately) (2) ● Your new wireless computer (3) NOTE: Some modems have a built-in wireless - Compaq Mini CQ10-400 | Getting Started Mini - Windows XP - Page 28
by your router manufacturer or your ISP. The Windows operating system also provides tools to help you set up a new wireless network. To use the Windows tools to set up your network, select Start information on protecting your WLAN, refer to the HP Notebook Reference Guide. 22 Chapter 4 Networking - Compaq Mini CQ10-400 | Getting Started Mini - Windows XP - Page 29
actions that are assigned to specific keys at the top of Help and Support, which provides information about your Windows operating system and computer, answers to questions and tutorials, and updates to your computer. Help and Support also provides automated troubleshooting and links to support - Compaq Mini CQ10-400 | Getting Started Mini - Windows XP - Page 30
Icon Key Description f6 Plays, pauses, or resumes a track of an audio CD or a section of a DVD or a BD. f7 Stops playback. f8 Plays the next track of an audio CD or the next section of a DVD or a BD. f9 Decreases speaker volume incrementally when you hold down this key. f10 Increases - Compaq Mini CQ10-400 | Getting Started Mini - Windows XP - Page 31
(purchased separately) by connecting it to one of the USB ports on the computer. Setting pointing device preferences Use Mouse Properties in Windows® to customize settings for pointing devices, such as button configuration, click speed, and pointer options. To access Mouse Properties, select Start - Compaq Mini CQ10-400 | Getting Started Mini - Windows XP - Page 32
Selecting Use the left and right TouchPad buttons like the corresponding buttons on an external mouse. 26 Chapter 5 Keyboard and pointing devices - Compaq Mini CQ10-400 | Getting Started Mini - Windows XP - Page 33
on using the battery, refer to the HP Notebook Reference Guide. To insert the battery: ▲ Insert the battery (1) into the battery bay until it is seated. The battery release latches (2) automatically lock the battery into place. To remove the battery: CAUTION: Removing a battery that is the - Compaq Mini CQ10-400 | Getting Started Mini - Windows XP - Page 34
2. Remove the battery from the computer (2). 28 Chapter 6 Maintenance - Compaq Mini CQ10-400 | Getting Started Mini - Windows XP - Page 35
removing the battery on page 27. 6. Remove the vanity cover: a. Slide the inner release latch (1) to loosen the vanity cover. b. Pull away the vanity cover (2). 7. Remove the 4 hard drive screws (1). 8. Pull the hard drive tab (2) to the right to disconnect the hard drive. Replacing or upgrading the - Compaq Mini CQ10-400 | Getting Started Mini - Windows XP - Page 36
the hard drive tab (2) to the left until the hard drive snaps into place. 3. Replace the 4 hard drive screws (3). 4. Replace the vanity cover: a. With the battery bay toward you, position the vanity cover at a 45-degree angle from the surface of the computer so that the tabs on the underside of - Compaq Mini CQ10-400 | Getting Started Mini - Windows XP - Page 37
of the computer can be upgraded by replacing the existing memory module in the memory module slot. WARNING! To reduce the risk of electric shock and damage to the equipment, unplug the power cord and remove all batteries before installing a memory module. CAUTION: Electrostatic discharge (ESD - Compaq Mini CQ10-400 | Getting Started Mini - Windows XP - Page 38
the inner release latch (1) to loosen the vanity cover. b. Pull away the vanity cover (2). 7. Loosen the 2 memory bracket screws (1). 8. Remove the memory bracket (2). 9. If you are replacing a memory module, remove the existing memory module: a. Pull away the retention clips (1) on each side of the - Compaq Mini CQ10-400 | Getting Started Mini - Windows XP - Page 39
edges only. Do not touch the components on the memory module. To protect a memory module after removal, place it in an electrostatic-safe container. 10. Insert a new memory module: CAUTION: To prevent damage to the memory module, hold the memory module by the edges only. Do not touch the components - Compaq Mini CQ10-400 | Getting Started Mini - Windows XP - Page 40
11. Replace the memory bracket (1). 12. Tighten the 2 memory bracket screws (2). 13. Replace the vanity cover: a. With the battery bay toward you, position the vanity cover at a 45-degree angle from the surface of the computer so that the tabs on the underside of - Compaq Mini CQ10-400 | Getting Started Mini - Windows XP - Page 41
press the vanity cover (2) down, applying pressure to both the left and right edges of the panel, until it snaps into place. 14. Replace the battery. 15. Turn the computer right-side up, and then reconnect external power and external devices. 16. Turn on the computer. Adding or replacing - Compaq Mini CQ10-400 | Getting Started Mini - Windows XP - Page 42
recommends that you update your programs and drivers on a regular basis with the latest versions. Go to http://www.hp.com/support to download the latest versions. You can also register to receive automatic update notifications when they become available. Routine care Cleaning the display CAUTION: To - Compaq Mini CQ10-400 | Getting Started Mini - Windows XP - Page 43
in Help and Support. Backing up your information Successful recovery Disaster Recovery utility. Therefore, HP recommends that you download the Disaster Recovery utility window, toolbar, or menu bar by taking a screen shot of your settings. The screen shot can be a time-saver if you have to reset - Compaq Mini CQ10-400 | Getting Started Mini - Windows XP - Page 44
problem occurs. The Instant Restore utility automatically creates working states periodically. You can also define a working state by saving the current computer state manually. For more information about computer system states, refer to the BackOnTrack software Help. Using the Disaster Recovery - Compaq Mini CQ10-400 | Getting Started Mini - Windows XP - Page 45
extract it to a USB flash drive. Downloading and extracting the Disaster Recovery utility To download and extract Disaster Recovery, follow these steps: 1. Connect a USB flash drive to a USB port on your computer. 2. Open your Web browser, go to http://www.hp.com, and select your country or region - Compaq Mini CQ10-400 | Getting Started Mini - Windows XP - Page 46
by sliding the power switch off and then on. 2. When the computer logo is displayed on the screen, press the f6 key repeatedly until the Windows status bar is displayed. 3. When the Roxio BackOnTrack screen is displayed, follow the on-screen - Compaq Mini CQ10-400 | Getting Started Mini - Windows XP - Page 47
is available in English. ● E-mail HP Customer Support. ● Find HP Customer Support worldwide telephone numbers. ● Locate an HP service center. Labels The labels affixed to the computer provide information you may need when you troubleshoot system problems or travel internationally with the computer - Compaq Mini CQ10-400 | Getting Started Mini - Windows XP - Page 48
support. The serial number label is located inside the battery bay of your computer. ● Microsoft® Certificate of Authenticity-Contains the Windows® Product Key. You may need the Product Key to update or troubleshoot . ◦ The serial number of your HP Mobile Broadband Module (select models only). - Compaq Mini CQ10-400 | Getting Started Mini - Windows XP - Page 49
9 Specifications Input power The power information in this section may be helpful if you plan a DC power source supplied and approved by HP for use with this computer. The computer can operate on DC power within the following specifications. Input power Operating voltage Operating current Rating - Compaq Mini CQ10-400 | Getting Started Mini - Windows XP - Page 50
Operating environment Factor Temperature Operating (writing to optical disc) Nonoperating Relative humidity (noncondensing) Operating Nonoperating Metric 5°C to 35°C -20°C to 60°C 10% to 90% 5% to 95% U.S. 41°F to 95°F -4°F to 140°F 10% to 90% 5% to 95% 44 Chapter 9 Specifications - Compaq Mini CQ10-400 | Getting Started Mini - Windows XP - Page 51
Help and Support identifying 8 Disaster Recovery utility 38 drive Windows applications 6 Windows logo 6 L labels Microsoft Certificate of Authenticity 42 regulatory 42 serial number 41 latches, battery release 11 lights AC adapter 9 caps lock 5 drive 9 mute 5 power 8 webcam 10 wireless 5 M memory - Compaq Mini CQ10-400 | Getting Started Mini - Windows XP - Page 52
14 Home screen 13 LaunchBar icons 14 notification icons 15 setting up 12 starting 13 starting Windows 17 turning off 12 turning on 12 QuickWeb software 1 R recovery, system 38 regulatory information HP Mobile Broadband Module serial number 42 regulatory label 42 wireless 42 RJ-45 (network) jack - Compaq Mini CQ10-400 | Getting Started Mini - Windows XP - Page 53
-
 1
1 -
 2
2 -
 3
3 -
 4
4 -
 5
5 -
 6
6 -
 7
7 -
8
-
9
-
10
-
11
-
12
-
13
-
14
-
15
-
16
-
17
-
18
-
19
-
20
-
21
-
22
-
23
-
24
-
25
-
26
-
27
-
28
-
29
-
30
-
31
-
32
-
33
-
34
-
35
-
36
-
37
-
38
-
39
-
40
-
41
-
42
-
43
-
44
-
45
-
46
-
47
-
48
-
49
-
50
-
51
-
52
-
53
 |
 |

Getting Started
Mini