Compaq Presario 2500 Reference Guide - Page 25
To reset the notebook, To change the boot device, Basic Operation, Reference Guide - specifications
 |
View all Compaq Presario 2500 manuals
Add to My Manuals
Save this manual to your list of manuals |
Page 25 highlights
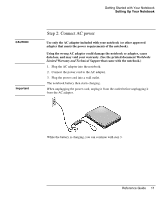
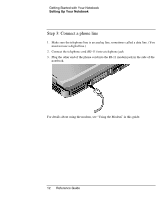
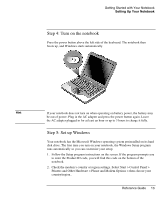
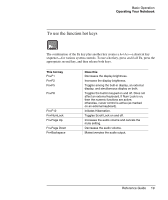
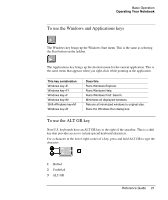
Basic Operation Operating Your Notebook To reset the notebook Occasionally, you may find that Windows or the notebook has stopped responding and will not let you turn off the notebook. If this happens, try the following in the order listed: • If possible, shut down Windows: press CTRL+ALT+DEL, and then select Shut Down, Restart. -or, if this fails- • Press the power button for at least 4 seconds until the display shuts down. Unsaved data will be lost. Press the power button again to restart. -or, if this fails- • Insert the tip of a paper clip into the reset button on the bottom of the notebook, and then press the power button to restart. To reset the notebook while it's docked in a port replicator, you can press the reset button on the left side of the port replicator. To change the boot device The notebook normally boots from its internal hard disk. You can also boot the notebook from a floppy disk drive, a CD-ROM drive, or an internal network interface card. 1. Select Start > Turn Off Computer > Restart. 2. When the logo screen appears, press ESC to display the Boot menu. 3. Use the arrow keys to select the boot device, and press ENTER. If you want to boot from a specific device whenever it is present, change the boot order using the BIOS Setup utility. See "Configuring the Notebook" in the "Troubleshooting and Maintenance" chapter in this guide. Reference Guide 17
-
 1
1 -
2
-
3
-
4
-
5
-
6
-
7
-
8
-
9
-
10
-
11
-
12
-
13
-
14
-
15
-
16
-
17
-
18
-
19
-
 20
20 -
 21
21 -
 22
22 -
 23
23 -
 24
24 -
 25
25 -
 26
26 -
 27
27 -
 28
28 -
 29
29 -
 30
30 -
31
-
32
-
33
-
34
-
35
-
36
-
37
-
38
-
39
-
40
-
41
-
42
-
43
-
44
-
45
-
46
-
47
-
48
-
49
-
50
-
51
-
52
-
53
-
54
-
55
-
56
-
57
-
58
-
59
-
60
-
61
-
62
-
63
-
64
-
65
-
66
-
67
-
68
-
69
-
70
-
71
-
72
-
73
-
74
-
75
-
76
-
77
-
78
-
79
-
80
-
81
-
82
-
83
-
84
-
85
-
86
-
87
-
88
-
89
-
90
-
91
-
92
-
93
-
94
-
95
-
96
-
97
-
98
-
99
-
100
-
101
-
102
-
103
-
104
-
105
-
106
-
107
-
108
-
109
-
110
-
111
-
112
-
113
-
114
-
115
-
116
-
117
-
118
 |
 |