Compaq Presario CQ5000 Getting Started - Page 182
Before you begin creating discs, Creating audio CDs, Windows Start Button, All Programs
 |
View all Compaq Presario CQ5000 manuals
Add to My Manuals
Save this manual to your list of manuals |
Page 182 highlights
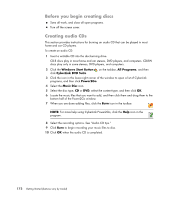
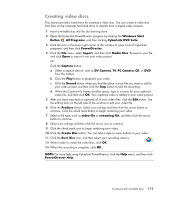
Before you begin creating discs Save all work, and close all open programs. Turn off the screen saver. Creating audio CDs This section provides instructions for burning an audio CD that can be played in most home and car CD players. To create an audio CD: 1 Insert a writable CD into the disc-burning drive. CD-R discs play in most home and car stereos, DVD players, and computers. CD-RW discs play only in some stereos, DVD players, and computers. 2 Click the Windows Start Button on the taskbar, All Programs, and then click CyberLink DVD Suite. 3 Click the icon in the lower-right corner of the window to open a list of CyberLink programs, and then click Power2Go. 4 Select the Music Disc icon. 5 Select the disc type, CD or DVD, select the content type, and then click OK. 6 Locate the music files that you want to add, and then click them and drag them to the bottom half of the Power2Go window. 7 When you are done adding files, click the Burn icon in the toolbar. NOTE: For more help using CyberLink Power2Go, click the Help icon in the program. 8 Select the recording options. See "Audio CD tips." 9 Click Burn to begin recording your music files to disc. 10 Click OK when the audio CD is completed. 172 Getting Started (features vary by model)
-
 1
1 -
2
-
3
-
4
-
5
-
6
-
7
-
8
-
9
-
10
-
11
-
12
-
13
-
14
-
15
-
16
-
17
-
18
-
19
-
20
-
21
-
22
-
23
-
24
-
25
-
26
-
27
-
28
-
29
-
30
-
31
-
32
-
33
-
34
-
35
-
36
-
37
-
38
-
39
-
40
-
41
-
42
-
43
-
44
-
45
-
46
-
47
-
48
-
49
-
50
-
51
-
52
-
53
-
54
-
55
-
56
-
57
-
58
-
59
-
60
-
61
-
62
-
63
-
64
-
65
-
66
-
67
-
68
-
69
-
70
-
71
-
72
-
73
-
74
-
75
-
76
-
77
-
78
-
79
-
80
-
81
-
82
-
83
-
84
-
85
-
86
-
87
-
88
-
89
-
90
-
91
-
92
-
93
-
94
-
95
-
96
-
97
-
98
-
99
-
100
-
101
-
102
-
103
-
104
-
105
-
106
-
107
-
108
-
109
-
110
-
111
-
112
-
113
-
114
-
115
-
116
-
117
-
118
-
119
-
120
-
121
-
122
-
123
-
124
-
125
-
126
-
127
-
128
-
129
-
130
-
131
-
132
-
133
-
134
-
135
-
136
-
137
-
138
-
139
-
140
-
141
-
142
-
143
-
144
-
145
-
146
-
147
-
148
-
149
-
150
-
151
-
152
-
153
-
154
-
155
-
156
-
157
-
158
-
159
-
160
-
161
-
162
-
163
-
164
-
165
-
166
-
167
-
168
-
169
-
170
-
171
-
172
-
173
-
174
-
175
-
176
-
 177
177 -
 178
178 -
 179
179 -
 180
180 -
 181
181 -
 182
182 -
 183
183 -
 184
184 -
 185
185 -
 186
186 -
 187
187 -
188
-
189
-
190
-
191
-
192
-
193
-
194
-
195
-
196
-
197
-
198
-
199
-
200
-
201
-
202
-
203
-
204
-
205
-
206
-
207
-
208
-
209
-
210
-
211
-
212
-
213
-
214
-
215
-
216
-
217
-
218
-
219
-
220
-
221
-
222
 |
 |