Compaq Presario CQ5000 Getting Started - Page 185
Creating data discs, Making a disc label using LightScribe Technology, What is LightScribe?
 |
View all Compaq Presario CQ5000 manuals
Add to My Manuals
Save this manual to your list of manuals |
Page 185 highlights
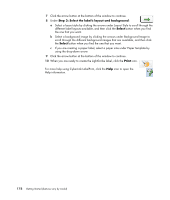
Creating data discs This section provides instructions for burning data files onto a disc. To create a data disc: 1 Insert a writable disc into the disc-burning drive. 2 Click the Windows Start Button on the taskbar, All Programs, and then click CyberLink DVD Suite. 3 Click the icon in the lower-right corner of the window to open a list of CyberLink programs, and then click Power2Go. 4 Click the Data Disc icon. 5 Select disc type, and then click OK. 6 Locate files from the hard disk drive, and then click and drag them to the lower section of the window. 7 When you are done adding files, click the Burn icon in the toolbar. NOTE: For more help using CyberLink Power2Go, click the Help icon in the program. 8 Select the recording options. 9 Click Burn to begin recording your music files to disc. 10 Click OK when the data disc is completed. Making a disc label using LightScribe Technology (Select models only) The following section provides instructions for making a disc label by using LightScribe technology. For instructions on making a paper label, refer to "Making a paper disc label." What is LightScribe? LightScribe is an innovative technology that uses a special disc drive, special media (CDs or DVDs), and label-making software to burn labels directly onto CDs and DVDs. A LightScribe-enabled CD or DVD disc drive uses the optical laser in the drive to burn a label onto a thin dye coating on the label side of the disc. There is no ink to smear or paper to curl, and there are no adhesives to loosen. Creating Audio and Data Discs 175
-
 1
1 -
2
-
3
-
4
-
5
-
6
-
7
-
8
-
9
-
10
-
11
-
12
-
13
-
14
-
15
-
16
-
17
-
18
-
19
-
20
-
21
-
22
-
23
-
24
-
25
-
26
-
27
-
28
-
29
-
30
-
31
-
32
-
33
-
34
-
35
-
36
-
37
-
38
-
39
-
40
-
41
-
42
-
43
-
44
-
45
-
46
-
47
-
48
-
49
-
50
-
51
-
52
-
53
-
54
-
55
-
56
-
57
-
58
-
59
-
60
-
61
-
62
-
63
-
64
-
65
-
66
-
67
-
68
-
69
-
70
-
71
-
72
-
73
-
74
-
75
-
76
-
77
-
78
-
79
-
80
-
81
-
82
-
83
-
84
-
85
-
86
-
87
-
88
-
89
-
90
-
91
-
92
-
93
-
94
-
95
-
96
-
97
-
98
-
99
-
100
-
101
-
102
-
103
-
104
-
105
-
106
-
107
-
108
-
109
-
110
-
111
-
112
-
113
-
114
-
115
-
116
-
117
-
118
-
119
-
120
-
121
-
122
-
123
-
124
-
125
-
126
-
127
-
128
-
129
-
130
-
131
-
132
-
133
-
134
-
135
-
136
-
137
-
138
-
139
-
140
-
141
-
142
-
143
-
144
-
145
-
146
-
147
-
148
-
149
-
150
-
151
-
152
-
153
-
154
-
155
-
156
-
157
-
158
-
159
-
160
-
161
-
162
-
163
-
164
-
165
-
166
-
167
-
168
-
169
-
170
-
171
-
172
-
173
-
174
-
175
-
176
-
177
-
178
-
179
-
 180
180 -
 181
181 -
 182
182 -
 183
183 -
 184
184 -
 185
185 -
 186
186 -
 187
187 -
 188
188 -
 189
189 -
 190
190 -
191
-
192
-
193
-
194
-
195
-
196
-
197
-
198
-
199
-
200
-
201
-
202
-
203
-
204
-
205
-
206
-
207
-
208
-
209
-
210
-
211
-
212
-
213
-
214
-
215
-
216
-
217
-
218
-
219
-
220
-
221
-
222
 |
 |
