Compaq Presario CQ5000 Getting Started - Page 85
Selecting a microphone, Configuring audio output, Adjusting microphone volume
 |
View all Compaq Presario CQ5000 manuals
Add to My Manuals
Save this manual to your list of manuals |
Page 85 highlights
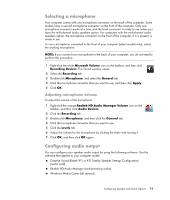
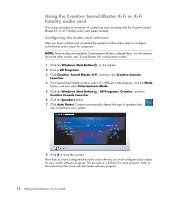
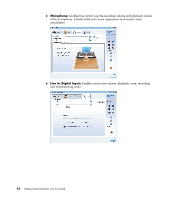
Selecting a microphone Your computer comes with one microphone connector on the back of the computer. Some models have a second microphone connector on the front of the computer. Only one microphone connector works at a time, and the back connector is ready to use unless you have the multichannel audio speakers option. For computers with the multichannel audio speakers option, the microphone connector on the front of the computer, if it is present, is ready to use. To use a microphone connected to the front of your computer (select models only), select the working microphone: NOTE: If you connect your microphone to the back of your computer, you do not need to perform this procedure. 1 Right-click the white Microsoft Volume icon on the taskbar, and then click Recording Devices. The Sound window opens. 2 Select the Recording tab. 3 Double-click Microphone, and select the General tab. 4 Click the microphone connector that you want to use, and then click Apply. 5 Click OK. Adjusting microphone volume To adjust the volume of the microphone: 1 Right-click the orange Realtek HD Audio Manager Volume icon on the taskbar, and then click Audio Devices. 2 Click the Recording tab. 3 Double-click Microphone, and then click the General tab. 4 Click the microphone connector that you want to use. 5 Click the Levels tab. 6 Adjust the volume for the microphone by clicking the slider and moving it. 7 Click OK, and then click OK again. Configuring audio output You can configure your speaker audio output by using the following software. Use the software that applies to your computer model: Creative Sound Blaster X-Fi or X-Fi Fatality Speaker Settings Configuration (audio card) Realtek HD Audio Manager (multistreaming audio) Windows Media Center (all systems) Configuring Speaker and Sound Options 75
-
 1
1 -
2
-
3
-
4
-
5
-
6
-
7
-
8
-
9
-
10
-
11
-
12
-
13
-
14
-
15
-
16
-
17
-
18
-
19
-
20
-
21
-
22
-
23
-
24
-
25
-
26
-
27
-
28
-
29
-
30
-
31
-
32
-
33
-
34
-
35
-
36
-
37
-
38
-
39
-
40
-
41
-
42
-
43
-
44
-
45
-
46
-
47
-
48
-
49
-
50
-
51
-
52
-
53
-
54
-
55
-
56
-
57
-
58
-
59
-
60
-
61
-
62
-
63
-
64
-
65
-
66
-
67
-
68
-
69
-
70
-
71
-
72
-
73
-
74
-
75
-
76
-
77
-
78
-
79
-
 80
80 -
 81
81 -
 82
82 -
 83
83 -
 84
84 -
 85
85 -
 86
86 -
 87
87 -
 88
88 -
 89
89 -
 90
90 -
91
-
92
-
93
-
94
-
95
-
96
-
97
-
98
-
99
-
100
-
101
-
102
-
103
-
104
-
105
-
106
-
107
-
108
-
109
-
110
-
111
-
112
-
113
-
114
-
115
-
116
-
117
-
118
-
119
-
120
-
121
-
122
-
123
-
124
-
125
-
126
-
127
-
128
-
129
-
130
-
131
-
132
-
133
-
134
-
135
-
136
-
137
-
138
-
139
-
140
-
141
-
142
-
143
-
144
-
145
-
146
-
147
-
148
-
149
-
150
-
151
-
152
-
153
-
154
-
155
-
156
-
157
-
158
-
159
-
160
-
161
-
162
-
163
-
164
-
165
-
166
-
167
-
168
-
169
-
170
-
171
-
172
-
173
-
174
-
175
-
176
-
177
-
178
-
179
-
180
-
181
-
182
-
183
-
184
-
185
-
186
-
187
-
188
-
189
-
190
-
191
-
192
-
193
-
194
-
195
-
196
-
197
-
198
-
199
-
200
-
201
-
202
-
203
-
204
-
205
-
206
-
207
-
208
-
209
-
210
-
211
-
212
-
213
-
214
-
215
-
216
-
217
-
218
-
219
-
220
-
221
-
222
 |
 |