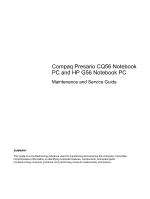
Compaq Presario CQ56-100 Compaq Presario CQ56 Notebook PC and HP G56 Notebook
Compaq Presario CQ56-100 - Notebook PC Manual
 |
View all Compaq Presario CQ56-100 manuals
Add to My Manuals
Save this manual to your list of manuals |
Compaq Presario CQ56-100 manual content summary:
- Compaq Presario CQ56-100 | Compaq Presario CQ56 Notebook PC and HP G56 Notebook - Page 1
Compaq Presario CQ56 Notebook PC and HP G56 Notebook PC Maintenance and Service Guide SUMMARY This guide is a troubleshooting reference used for maintaining and servicing the computer. It provides comprehensive information on identifying computer features, components, and spare parts; - Compaq Presario CQ56-100 | Compaq Presario CQ56 Notebook PC and HP G56 Notebook - Page 2
to change without notice. The only warranties for HP products and services are set forth in the express warranty statements accompanying such products and services. Nothing herein should be construed as constituting an additional warranty. HP shall not be liable for technical or editorial errors - Compaq Presario CQ56-100 | Compaq Presario CQ56 Notebook PC and HP G56 Notebook - Page 3
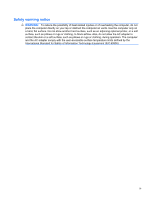
Safety warning notice WARNING! To reduce the possibility of heat-related injuries or of overheating the computer, do not place the computer directly on your lap or obstruct the computer air vents. Use the computer only on a hard, flat surface. Do not allow another hard surface, such as an adjoining - Compaq Presario CQ56-100 | Compaq Presario CQ56 Notebook PC and HP G56 Notebook - Page 4
iv Safety warning notice - Compaq Presario CQ56-100 | Compaq Presario CQ56 Notebook PC and HP G56 Notebook - Page 5
Right side ...9 Left side ...10 Display ...11 Wireless antennas ...12 Bottom ...13 Additional hardware ...14 3 Illustrated parts catalog ...15 Service tag ...15 Computer major components ...16 Display assembly components ...20 Plastics Kit ...22 Mass storage devices ...23 Miscellaneous parts ...24 - Compaq Presario CQ56-100 | Compaq Presario CQ56 Notebook PC and HP G56 Notebook - Page 6
Packaging and transporting guidelines 32 Workstation guidelines 32 Equipment guidelines 33 Component replacement procedures 34 Service tag ...34 Computer feet ...35 Battery ...36 Hard drive ...37 Optical drive ...39 WLAN module ...42 Memory module ...44 Keyboard ...46 Top cover ...49 Speaker - Compaq Presario CQ56-100 | Compaq Presario CQ56 Notebook PC and HP G56 Notebook - Page 7
DVD±RW SuperMulti Double-Layer Drive with LightScribe specifications 85 7 Backup and recovery ...86 Windows 7 backup and recovery requirements ...91 Requirements for all countries or regions 91 Requirements for specific countries or regions 92 9 Recycling ...93 Battery ...93 Display ...93 Index - Compaq Presario CQ56-100 | Compaq Presario CQ56 Notebook PC and HP G56 Notebook - Page 8
viii - Compaq Presario CQ56-100 | Compaq Presario CQ56 Notebook PC and HP G56 Notebook - Page 9
Product name Processors Chipset Graphics Description Compaq Presario CQ56 Notebook PC HP G56 Notebook PC Intel® Celeron® 900 processor (2.2 Support for BD or HD-DVD playback with HD decoder and DX10 (UMA) HP G56 AMD √ Compaq Presario CQ56 AMD √ √ √ HP G56 Intel Compaq Presario CQ56 - Compaq Presario CQ56-100 | Compaq Presario CQ56 Notebook PC and HP G56 Notebook - Page 10
2048 MB (2048 MB × 1) ● 2048 MB (1024 MB × 2) ● 1024 MB (1024 MB × 1) HP G56 AMD √ Compaq Presario CQ56 AMD √ HP G56 Intel √ √ Compaq Presario CQ56 Intel √ √ Customer accessible √ √ √ √ Supports the following 9.5-mm, 6.35-cm (2.5-in) SATA hard drives: ● 320-GB, 7200 - Compaq Presario CQ56-100 | Compaq Presario CQ56 Notebook PC and HP G56 Notebook - Page 11
15-pin) supporting 1600×1200 external resolution at 75 Hz Smart-pin AC power Pocket keyboard, 39.62-cm (15.6in) with numeric keypad HP G56 AMD √ √ √ √ √ √ √ √ TouchPad with 2 buttons and 2-way √ scroll (taps enabled as default) Compaq Presario CQ56 AMD √ √ √ √ √ √ √ √ √ √ √ HP G56 Intel - Compaq Presario CQ56-100 | Compaq Presario CQ56 Notebook PC and HP G56 Notebook - Page 12
Serviceability Description 6-cell Li-ion, 2.20-Ah, 47-Wh battery HP G56 AMD √ 6-cell Li-ion, 2.55-Ah, 55-Wh battery √ 65-W AC adapter with localized √ cable plug support √ WLAN module √ Compaq Presario CQ56 AMD √ √ √ √ √ √ √ √ √ HP G56 Intel v Compaq Presario CQ56 Intel √ √ √ - Compaq Presario CQ56-100 | Compaq Presario CQ56 Notebook PC and HP G56 Notebook - Page 13
2 External component identification Top TouchPad Component (1) TouchPad light (2) TouchPad zone (3) Left TouchPad button* (4) Right TouchPad button* *This table describes factory settings. Description To turn the TouchPad on and off, quickly double-tap the TouchPad light. ● Off: TouchPad is on. ● - Compaq Presario CQ56-100 | Compaq Presario CQ56 Notebook PC and HP G56 Notebook - Page 14
Lights NOTE: Your computer may look slightly different from the illustration in this section. Component (1) TouchPad light (2) Caps lock light (3) Power light (4) Wireless light Description ● Off: TouchPad is on. ● Amber: TouchPad is off. On: Caps lock is on. ● On: The computer is on. ● Blinking: - Compaq Presario CQ56-100 | Compaq Presario CQ56 Notebook PC and HP G56 Notebook - Page 15
Linux, select Computer > Control Center > System > Power Management *This table describes factory settings. For information about changing factory settings, press f1 to open Help and Support (Windows) or Help (Linux). Top 7 - Compaq Presario CQ56-100 | Compaq Presario CQ56 Notebook PC and HP G56 Notebook - Page 16
(1) esc key* (2) Send e-mail key (3) Media application key (4) Web browser key (5) Print key (6) Calculator key (7) fn key* (8) (9) Windows applications key (varies by model) (10) Action keys *Supported on Windows models only. Description Displays system information when pressed in combination - Compaq Presario CQ56-100 | Compaq Presario CQ56 Notebook PC and HP G56 Notebook - Page 17
Right side NOTE: Your computer may look slightly different from the illustration in this section. Component (1) Optical drive (select models only) (2) Optical drive light (select models only) (3) USB port (4) AC adapter light (5) Power connector (6) Security cable slot Description Reads and writes - Compaq Presario CQ56-100 | Compaq Presario CQ56 Notebook PC and HP G56 Notebook - Page 18
Left side NOTE: Your computer may look slightly different from the illustration in this section. Component (1) External monitor port (2) Vent (3) RJ-45 (network) jack (4) USB ports (2) (5) Audio-in (microphone) jack (6) Audio-out (headphone) jack (7) Drive light Description Connects an external - Compaq Presario CQ56-100 | Compaq Presario CQ56 Notebook PC and HP G56 Notebook - Page 19
Display Component (1) Internal microphone (select models only) (2) Webcam (select models only) (3) Webcam light (select models only) Description Records sound. Records video and captures still photographs. On: The webcam is in use. Display 11 - Compaq Presario CQ56-100 | Compaq Presario CQ56 Notebook PC and HP G56 Notebook - Page 20
, refer to the section of the Regulatory, Safety and Environmental Notices that applies to your country or region. These notices are located in Help and Support (Windows) and Help (Linux). 12 Chapter 2 External component identification - Compaq Presario CQ56-100 | Compaq Presario CQ56 Notebook PC and HP G56 Notebook - Page 21
your country or region. If you replace the module and then receive a warning message, remove the module to restore computer functionality, and then contact technical support through Help and Support. Holds the hard drive. Bottom 13 - Compaq Presario CQ56-100 | Compaq Presario CQ56 Notebook PC and HP G56 Notebook - Page 22
Additional hardware Component Description (1) Power cord* Connects an AC adapter to an AC outlet. (2) AC adapter Converts AC power to DC power. (3) Battery* Powers the computer when the computer is not plugged into external power. *Batteries and power cords vary in appearance by region or - Compaq Presario CQ56-100 | Compaq Presario CQ56 Notebook PC and HP G56 Notebook - Page 23
the product's hardware components. The part number helps a service technician to determine what components and parts are needed. The duration of the warranty period for this computer. The alphanumeric identifier you need to locate documents, drivers, and support for your computer. Service tag 15 - Compaq Presario CQ56-100 | Compaq Presario CQ56 Notebook PC and HP G56 Notebook - Page 24
Computer major components 16 Chapter 3 Illustrated parts catalog - Compaq Presario CQ56-100 | Compaq Presario CQ56 Notebook PC and HP G56 Notebook - Page 25
CCFL BrightView with microphone display assembly for HP G56 computer ● 39.6-cm (15.6-in) HD LED BrightView with webcam and microphone display assembly for Presario CQ56 computer ● 39.6-cm (15.6-in) HD LED BrightView with microphone display assembly for Presario CQ56 computer ● 39.6-cm (15.6-in) CCFL - Compaq Presario CQ56-100 | Compaq Presario CQ56 Notebook PC and HP G56 Notebook - Page 26
Item (3) (4) (5) (6) (7) (8) (9) (10) (11) (12) (13) Description ● For use in Switzerland ● For use in Turkey ● For use in United Kingdom Speaker assembly (includes cable) Power button board Top cover (includes TouchPad board) Fan/heat sink assembly (includes replacement thermal material) ● For use - Compaq Presario CQ56-100 | Compaq Presario CQ56 Notebook PC and HP G56 Notebook - Page 27
Item (14) (15) (16) (17) (18) (19) (20) Description ● 160-GB, 7200-rpm 9.5-mm, 6.35-cm (2.5-in) ● Hard Drive Hardware Kit (not illustrated; includes bracket, connector, and screws) Spare part number 599053-001 599057-001 Optical drive (includes bezel and bracket) DVD±RW SuperMulti Double-Layer - Compaq Presario CQ56-100 | Compaq Presario CQ56 Notebook PC and HP G56 Notebook - Page 28
Display assembly components Item (1) (2) (3) Description Display bezel ● Presario CQ56 with webcam and microphone modules ● Presario CQ56 with microphone module only ● HP G56 with webcam and microphone modules ● HP G56 with microphone module only Display inverter Display panel 39.6-cm (15.6-in) HD - Compaq Presario CQ56-100 | Compaq Presario CQ56 Notebook PC and HP G56 Notebook - Page 29
cable, wireless antenna module with cable, and webcam cable) ● For use with LED display panels ● For use with CCFL display panels Display back cover (includes logo): ● For use with HP G56 computer models with LED displays ● For use with Presario CQ56 computer models with LED displays ● For use - Compaq Presario CQ56-100 | Compaq Presario CQ56 Notebook PC and HP G56 Notebook - Page 30
Plastics Kit Item Description Plastics Kit (1) Hard drive cover (includes captive screws) (2) Memory module compartment cover (includes captive screw) Spare part number 595200-001 22 Chapter 3 Illustrated parts catalog - Compaq Presario CQ56-100 | Compaq Presario CQ56 Notebook PC and HP G56 Notebook - Page 31
Mass storage devices Item (1) (2) Description Optical drive (12.7 mm, SATA, fixed, includes bezel and bracket) DVD±RW SuperMulti Double-Layer Drive with LightScribe Hard drive ● 320-GB, 7200-rpm 9.5-mm, 6.35-cm (2.5-in) ● 250-GB, 7200-rpm 9.5-mm, 6.35-cm (2.5-in) ● 160-GB, 7200-rpm 9.5-mm, 6.35-cm - Compaq Presario CQ56-100 | Compaq Presario CQ56 Notebook PC and HP G56 Notebook - Page 32
cord, AC, 3 wire, black, 1.83-m ● For use in Argentina ● For use in Australia ● For use in Denmark ● For use in Europe ● For use in India ● For use in Israel ● For use in Italy ● For use in North America ● For use in South Africa ● For use in Switzerland ● For use in - Compaq Presario CQ56-100 | Compaq Presario CQ56 Notebook PC and HP G56 Notebook - Page 33
Sequential part number listing Spare part number 490371-001 490371-001 490371-021 490371-031 490371-061 490371-081 490371-111 490371-AR1 490371-BB1 490371-D01 504593-003 534419-001 591880-001 592399-001 593533-001 Description Power cord for use in North America Power cord for use in Australia - Compaq Presario CQ56-100 | Compaq Presario CQ56 Notebook PC and HP G56 Notebook - Page 34
Cable Kit for use with LED panels (includes display cable, wireless antenna module with cable, and webcam cable) Screw Kit TouchPad button board with cable Power button board USB board 160-GB, 7200-rpm adapter for use in all countries and regions except India 26 Chapter 3 Illustrated parts catalog - Compaq Presario CQ56-100 | Compaq Presario CQ56 Notebook PC and HP G56 Notebook - Page 35
-W, 3-pin Smart AC adapter for use in India AMD V140 processor (2.3 GHz, 512-MB, L2 webcam and microphone for HP G56 computer Display bezel for use with Presario CQ56 with microphone module only Display bezel for use with Presario CQ56 with webcam and microphone modules Display bezel for use with HP - Compaq Presario CQ56-100 | Compaq Presario CQ56 Notebook PC and HP G56 Notebook - Page 36
, AMD) 2-GB memory module (1333-MHz, DDR3, AMD) PCA UMA system board (Intel) PCA UMA system board (AMD) Intel Celeron T3500 processor (2.1 GHz) Webcam module Ralink RT5390 802.11b/g/n 1x1 WiFi adapter Fan/heat sink assembly (includes replacement thermal material) for use with UMA systems (AMD) 28 - Compaq Presario CQ56-100 | Compaq Presario CQ56 Notebook PC and HP G56 Notebook - Page 37
● Magnetic screwdriver ● Phillips P0 screwdriver Service considerations Before disassembly or assembly procedures, review and adhere to all service considerations. NOTE: As you remove each pressure only at the points designated in the maintenance instructions. Preliminary replacement requirements 29 - Compaq Presario CQ56-100 | Compaq Presario CQ56 Notebook PC and HP G56 Notebook - Page 38
Cables and connectors CAUTION: When servicing the computer, be sure that cables are placed in their proper locations during the reassembly process. Improper cable placement can damage the computer. Cables must - Compaq Presario CQ56-100 | Compaq Presario CQ56 Notebook PC and HP G56 Notebook - Page 39
Grounding guidelines Electrostatic discharge damage Electronic components are sensitive to electrostatic discharge (ESD). Circuitry design and structure determine the degree of sensitivity. Networks built into many integrated circuits provide some protection, but in many cases, ESD contains enough - Compaq Presario CQ56-100 | Compaq Presario CQ56 Notebook PC and HP G56 Notebook - Page 40
material. ● Use a wrist strap connected to a properly grounded work surface and use properly grounded tools and equipment. ● Use conductive field service tools, such as cutters, screwdrivers, and vacuums. ● When fixtures must directly contact dissipative surfaces, use fixtures made only of static - Compaq Presario CQ56-100 | Compaq Presario CQ56 Notebook PC and HP G56 Notebook - Page 41
with ground cords of one megohm resistance ● Static-dissipative tables or floor mats with hard ties to the ground ● Field service kits ● Static awareness labels ● Material-handling packages ● Nonconductive plastic bags, tubes, or boxes ● Metal tote boxes ● Electrostatic voltage levels and - Compaq Presario CQ56-100 | Compaq Presario CQ56 Notebook PC and HP G56 Notebook - Page 42
, replaced, or loosened when servicing the computer. Make special note of each screw size and location during removal and replacement. Service tag When you order parts identifier you need to locate documents, drivers, and support for your computer. 34 Chapter 4 Removal and replacement procedures - Compaq Presario CQ56-100 | Compaq Presario CQ56 Notebook PC and HP G56 Notebook - Page 43
Computer feet Description Rubber Kit (includes computer feet) Spare part number 600849-001 The computer feet are adhesive-backed rubber pads. The feet attach to the base enclosure in the locations illustrated below. Component replacement procedures 35 - Compaq Presario CQ56-100 | Compaq Presario CQ56 Notebook PC and HP G56 Notebook - Page 44
Battery Description 6 cell, 2.20-Ah, 47-Wh 6 cell, 2.55-Ah, 55-Wh Spare part number 593553-001 593554-001 Before removing the battery, follow these steps: 1. Shut down the computer. If you are unsure whether the computer is off or in Hibernation, turn the computer on, and then shut it down through - Compaq Presario CQ56-100 | Compaq Presario CQ56 Notebook PC and HP G56 Notebook - Page 45
Hard drive NOTE: The hard drive spare part kit includes a bracket, connector, and screws. The bracket, connector, and screws are also available in the Hard Drive Hardware Kit. Description 320-GB, 7200-rpm 9.5-mm, 6.35-cm (2.5-in) 250-GB, 7200-rpm 9.5-mm, 6.35-cm (2.5-in) 160-GB, 7200-rpm 9.5-mm, 6. - Compaq Presario CQ56-100 | Compaq Presario CQ56 Notebook PC and HP G56 Notebook - Page 46
5. Use the Mylar tab (2) to lift the hard drive out of the hard drive compartment. 6. Disconnect the hard drive cable from the system board (3) and remove the hard drive from the computer (4). 7. To replace the hard drive bracket, remove the four Phillips 3.0×3.5 screws (1) that secure the hard - Compaq Presario CQ56-100 | Compaq Presario CQ56 Notebook PC and HP G56 Notebook - Page 47
Optical drive NOTE: The optical drive spare part kit includes a bezel and bracket. Description DVD±RW SuperMulti Double-Layer Drive with LightScribe Spare part number 620604-001 Before removing the optical drive: 1. Shut down the computer. If you are unsure whether the computer is off or in - Compaq Presario CQ56-100 | Compaq Presario CQ56 Notebook PC and HP G56 Notebook - Page 48
2. Remove the optical drive screw. 3. Insert a thin tool, such as a screwdriver (1), into the release access slot in the hard drive bay, and press against the back of the optical drive. 40 Chapter 4 Removal and replacement procedures - Compaq Presario CQ56-100 | Compaq Presario CQ56 Notebook PC and HP G56 Notebook - Page 49
4. Grasp the drive (2) and remove it from the optical drive bay. Reverse this procedure to reassemble and install the optical drive. Component replacement procedures 41 - Compaq Presario CQ56-100 | Compaq Presario CQ56 Notebook PC and HP G56 Notebook - Page 50
WLAN module Description Spare part number Atheros AR9285 802.11b/g/n 1x1 WiFi adapter 605560-005 Realtek RTL8191SE 802.11b/g/n 1x1 WiFi adapter 593533-001 Broadcom 4313 802.11b/g/n 1x1 WiFi adapter 593836-001 Broadcom 4313 802.11b/g/n 1x1 WiFi and 2070 Bluetooth 2.1+EDR Combo adapter (BT3 - Compaq Presario CQ56-100 | Compaq Presario CQ56 Notebook PC and HP G56 Notebook - Page 51
you replace the module and then receive a warning message, remove the module to restore computer functionality, and then contact technical support through Help and Support (Windows) or Help (Linux). NOTE: WLAN modules are designed with a notch (5) to prevent incorrect insertion into the WLAN module - Compaq Presario CQ56-100 | Compaq Presario CQ56 Notebook PC and HP G56 Notebook - Page 52
Memory module Description 1 GB, 1066 MHz DDR2 (Intel) 2 GB, 1066 MHz DDR2 (Intel) 1 GB, 1333 MHz, DDR3 (AMD) 2 GB, 1333 MHz, DDR3, (AMD) Spare part number 619545-001 619546-001 621559-001 621566-001 Before removing a memory module: 1. Shut down the computer. If you are unsure whether the computer - Compaq Presario CQ56-100 | Compaq Presario CQ56 Notebook PC and HP G56 Notebook - Page 53
4. Spread the retaining tabs (1) on each side of the memory module slot to release the memory module. (The edge of the module opposite the slot rises away from the computer.) 5. Remove the module (2) by pulling it away from the slot at an angle. NOTE: Memory modules are designed with a notch (3) to - Compaq Presario CQ56-100 | Compaq Presario CQ56 Notebook PC and HP G56 Notebook - Page 54
Keyboard Description For use in Adriatic countries For use in Belgium For use in Canada For use in the Czech Republic For use in France For use in Germany For use in Greece For use in Hungary For International use For use in Israel For use in Italy For use in Latin America For use in North America - Compaq Presario CQ56-100 | Compaq Presario CQ56 Notebook PC and HP G56 Notebook - Page 55
Remove the keyboard: 1. Position the computer upside down, with the front toward you. 2. Remove the three Phillips 2.5×5.0 and three Phillips 2.5×6.0 screws that secure the keyboard to the computer. 3. Position the computer right-side up, with the front toward you. 4. Open the computer as far as - Compaq Presario CQ56-100 | Compaq Presario CQ56 Notebook PC and HP G56 Notebook - Page 56
7. Release the zero insertion force (ZIF) connector (1) to which the keyboard cable is attached and disconnect the keyboard cable (2) from the system board. 8. Remove the keyboard. Reverse this procedure to install the keyboard. 48 Chapter 4 Removal and replacement procedures - Compaq Presario CQ56-100 | Compaq Presario CQ56 Notebook PC and HP G56 Notebook - Page 57
Top cover Description Top cover (includes TouchPad board) Spare part number 620605-001 Before removing the top cover: 1. Shut down the computer. If you are unsure whether the computer is off or in Hibernation, turn on the computer, and then shut it down through the operating system. 2. Disconnect - Compaq Presario CQ56-100 | Compaq Presario CQ56 Notebook PC and HP G56 Notebook - Page 58
5. Remove the Phillips 2.0×5.0 screw that secures the top cover to the computer. 6. Release the speaker cable (1), power button ZIF connector (2), TouchPad ZIF connector (3), and TouchPad button ZIF connector (4). 7. Lift the rear edge of the top cover (1) until the top cover disengages from the - Compaq Presario CQ56-100 | Compaq Presario CQ56 Notebook PC and HP G56 Notebook - Page 59
8. Remove the top cover (2). NOTE: The TouchPad is glued to the top cover and is included with the top cover spare part. Reverse this procedure to install the top cover. Component replacement procedures 51 - Compaq Presario CQ56-100 | Compaq Presario CQ56 Notebook PC and HP G56 Notebook - Page 60
Speaker assembly Description Speaker assembly (includes cable) Spare part number 620607-001 Before removing the speaker assembly: 1. Shut down the computer. If you are unsure whether the computer is off or in Hibernation, turn on the computer, and then shut it down through the operating system. 2. - Compaq Presario CQ56-100 | Compaq Presario CQ56 Notebook PC and HP G56 Notebook - Page 61
6. Remove the speaker assembly by sliding the left edge (4) from beneath the bracket in the top cover. Reverse this procedure to install the speaker assembly. Component replacement procedures 53 - Compaq Presario CQ56-100 | Compaq Presario CQ56 Notebook PC and HP G56 Notebook - Page 62
Power button board Description Power button board Spare part number 595204-001 Before removing the power button board: 1. Shut down the computer. If you are unsure whether the computer is off or in Hibernation, turn on the computer, and then shut it down through the operating system. 2. Disconnect - Compaq Presario CQ56-100 | Compaq Presario CQ56 Notebook PC and HP G56 Notebook - Page 63
TouchPad button board Description TouchPad button board (with cable) Spare part number 595203-001 Before removing the TouchPad button board: 1. Shut down the computer. If you are unsure whether the computer is off or in Hibernation, turn on the computer, and then shut it down through the operating - Compaq Presario CQ56-100 | Compaq Presario CQ56 Notebook PC and HP G56 Notebook - Page 64
USB board Description USB board Spare part number 595205-001 Before removing the USB board: 1. Shut down the computer. If you are unsure whether the computer is off or in Hibernation, turn on the computer, and then shut it down through the operating system. 2. Disconnect all external devices - Compaq Presario CQ56-100 | Compaq Presario CQ56 Notebook PC and HP G56 Notebook - Page 65
Reverse this procedure to install the USB board. Component replacement procedures 57 - Compaq Presario CQ56-100 | Compaq Presario CQ56 Notebook PC and HP G56 Notebook - Page 66
Power connector Description Power connector (includes cable) Spare part number 602743-001 Before removing the power connector cable: 1. Shut down the computer. If you are unsure whether the computer is off or in Hibernation, turn on the computer, and then shut it down through the operating system. - Compaq Presario CQ56-100 | Compaq Presario CQ56 Notebook PC and HP G56 Notebook - Page 67
620591-001 39.6-cm (15.6-in) HD CCFL BrightView display assembly with microphone for HP G56 computer 620590-001 39.6-cm (15.6-in) HD LED BrightView display assembly with webcam and microphone for Presario CQ56 computer 620585-001 39.6-cm (15.6-in) HD LED BrightView display assembly with - Compaq Presario CQ56-100 | Compaq Presario CQ56 Notebook PC and HP G56 Notebook - Page 68
from the clip in the routing channel leading to the display hinge (4). 5. Disconnect the webcam cable (5) from the system board and release it from the clips that attach it to the system board. CAUTION: Support the display assembly when removing the display screws in the following steps. Failure to - Compaq Presario CQ56-100 | Compaq Presario CQ56 Notebook PC and HP G56 Notebook - Page 69
spare part numbers 620593-001 (for Presario CQ56 models with webcam and microphone modules), 620592-001 (for Presario CQ 56 models with microphone module only), 620595-001 (for HP G56 models with webcam and microphone modules), and (620594-001 for HP G56 models with microphone module only). Reverse - Compaq Presario CQ56-100 | Compaq Presario CQ56 Notebook PC and HP G56 Notebook - Page 70
module is available using spare part number 626656-001. Reverse this procedure to install the webcam module. 13. To replace the display inverter, disconnect the cables (1) on both sides of the inverter. 14. Then use a flat flexible tool (2) to pry the - Compaq Presario CQ56-100 | Compaq Presario CQ56 Notebook PC and HP G56 Notebook - Page 71
16. Remove the display hinge covers (2). The display hinge covers are available using spare part number 600650-001. Reverse this procedure to install the display hinge covers. 17. To replace the display panel, remove the eight Phillips 2.5 x 4.0 screws (1) that secure the display panel to the - Compaq Presario CQ56-100 | Compaq Presario CQ56 Notebook PC and HP G56 Notebook - Page 72
20. Remove the display panel brackets (2) from the display panel. The display panel brackets are available using spare part number 595195-001. Reverse this procedure to install the display panel brackets. 21. To replace the wireless antenna transceivers, lift up on the silver transceiver (1) and - Compaq Presario CQ56-100 | Compaq Presario CQ56 Notebook PC and HP G56 Notebook - Page 73
24. To replace the webcam cable, release the adhesive tabs (3) from the display cover and lift up on the webcam cable (4). Reverse this procedure to install the microphone and webcam cables. Component replacement procedures 65 - Compaq Presario CQ56-100 | Compaq Presario CQ56 Notebook PC and HP G56 Notebook - Page 74
System board NOTE: The system board spare part kit includes UMA graphics subsystem memory and replacement thermal material. Description PCA UMA system board (AMD) PCA UMA system board (Intel) Spare part number 623915-001 623909-001 When replacing the system board, be sure that the following - Compaq Presario CQ56-100 | Compaq Presario CQ56 Notebook PC and HP G56 Notebook - Page 75
Remove the following cables from the system board: ● Power connector cable (see Power connector on page 58) ● USB board cable (see USB board on page 56) 1. Position the computer upright with the right side toward you. 2. To remove the optical drive cable, disconnect it from the system board (1), and - Compaq Presario CQ56-100 | Compaq Presario CQ56 Notebook PC and HP G56 Notebook - Page 76
6. Pull the system board (3) away from the base enclosure at an angle. The AMD system board is shown below. The Intel system board is shown below. Reverse this procedure to install the system board. 68 Chapter 4 Removal and replacement procedures - Compaq Presario CQ56-100 | Compaq Presario CQ56 Notebook PC and HP G56 Notebook - Page 77
RTC battery Description RTC battery Spare part number 602745-001 Before removing the RTC battery: 1. Shut down the computer. If you are unsure whether the computer is off or in Hibernation, turn on the computer, and then shut it down through the operating system. 2. Disconnect all external devices - Compaq Presario CQ56-100 | Compaq Presario CQ56 Notebook PC and HP G56 Notebook - Page 78
3. Lift the battery (2) out of the computer. Reverse this procedure to install the RTC battery. 70 Chapter 4 Removal and replacement procedures - Compaq Presario CQ56-100 | Compaq Presario CQ56 Notebook PC and HP G56 Notebook - Page 79
Fan/heat sink assembly Description Spare part number Fan/heat sink assembly (includes replacement thermal material) for use with UMA systems (AMD) 630722-001 Fan/heat sink assembly (includes replacement thermal material) for use with UMA systems (Intel) 606573-001 Before removing the fan/heat - Compaq Presario CQ56-100 | Compaq Presario CQ56 Notebook PC and HP G56 Notebook - Page 80
2. Disconnect the fan cable from the system board. 3. Follow the sequence embossed on the heat sink to loosen the three Phillips 2.5 x 9.0 captive screws (1) that secure the fan/heat sink assembly to the system board. NOTE: Due to the adhesive quality of the thermal material located between the fan/ - Compaq Presario CQ56-100 | Compaq Presario CQ56 Notebook PC and HP G56 Notebook - Page 81
6. Disconnect the fan cable from the system board. 7. Loosen the two Phillips captive screws and the four Phillips spring-loaded captive screws (1) that secure the fan/heat sink assembly. NOTE: Due to the adhesive quality of the thermal material located between the fan/heat sink assembly and system - Compaq Presario CQ56-100 | Compaq Presario CQ56 Notebook PC and HP G56 Notebook - Page 82
Thermal pads and thermal paste must be installed on all surfaces before the fan/heat sink assembly is reinstalled. NOTE: Thermal pads and thermal paste are included with all fan/heat sink assembly, system board, and processor spare part kits. For computer models with the Intel processor, thoroughly - Compaq Presario CQ56-100 | Compaq Presario CQ56 Notebook PC and HP G56 Notebook - Page 83
Processor NOTE: The processor spare part kits include replacement thermal material. Description Spare part number Intel Celeron 900 processor (2.2 GHz) 534419-001 Intel Pentium T4500 processor (2.3 GHz) 591880-001 Intel Celeron T3500 processor (2.1 GHz) 625830-001 Intel Celeron T3300 - Compaq Presario CQ56-100 | Compaq Presario CQ56 Notebook PC and HP G56 Notebook - Page 84
2. Lift the processor (2) straight up and remove it. NOTE: The gold triangle (3) on the processor must be aligned with the triangle icon (4) embossed on the processor socket when you install the processor. Reverse this procedure to install the processor. 76 Chapter 4 Removal and replacement - Compaq Presario CQ56-100 | Compaq Presario CQ56 Notebook PC and HP G56 Notebook - Page 85
5 Setup Utility Computer Setup To view the drives installed on the computer, select Start > Computer. On models with a secondary hard drive (drive D), the optical drive becomes drive E. The next drive added to the system, such as a new USB drive, is assigned the next available drive letter. Starting - Compaq Presario CQ56-100 | Compaq Presario CQ56 Notebook PC and HP G56 Notebook - Page 86
> Exit Saving Changes, and then press the enter key. Changes go into effect immediately. Navigating and selecting in Setup Utility Setup Utility does not support the TouchPad. Navigation and selection are by keystroke. ● To choose a menu or a menu item, use the arrow keys. ● To choose an item in - Compaq Presario CQ56-100 | Compaq Presario CQ56 Notebook PC and HP G56 Notebook - Page 87
Restoring default settings in Setup Utility The following procedure explains how to restore Setup Utility default settings. If Setup Utility is not already running, begin at step 1. If Setup Utility is already running, begin at step 2. 1. Open Setup Utility by turning on or restarting the computer. - Compaq Presario CQ56-100 | Compaq Presario CQ56 Notebook PC and HP G56 Notebook - Page 88
Some of the Setup Utility menu items listed in this chapter might not be supported by the computer. Main menu Select System information To do this ● View date. ● View identification information about the computer. ● View specification information about the processor, memory size, system BIOS, and - Compaq Presario CQ56-100 | Compaq Presario CQ56 Notebook PC and HP G56 Notebook - Page 89
System Configuration menu Select Language Support Button Sound (select models only) Virtualization Technology ( ―Enable/disable boot from the internal network adapter. ● Boot Order―Set the boot order for: ◦ Notebook Hard Drive ◦ Internal CD/DVD ROM Drive ◦ USB Diskette on Key/USB Hard Disk ◦ USB CD - Compaq Presario CQ56-100 | Compaq Presario CQ56 Notebook PC and HP G56 Notebook - Page 90
6 Specifications Computer specifications Dimensions Depth Width Height (front to rear) Weight (lowest weight configuration) Input power Operating voltage Operating current thermal limits for plastic surfaces. The computer operates well within this range of temperatures. 82 Chapter 6 Specifications - Compaq Presario CQ56-100 | Compaq Presario CQ56 Notebook PC and HP G56 Notebook - Page 91
39.6-cm (15.6-in) display specifications Dimensions Height Width Diagonal Number of colors Contrast ratio Brightness Pixel resolution Pitch Format Configuration Backlight stripe LED or CCFL 80 × 25 4.0 W ±40° horizontal, +120/-40° vertical (typical) 39.6-cm (15.6-in) display specifications 83 - Compaq Presario CQ56-100 | Compaq Presario CQ56 Notebook PC and HP G56 Notebook - Page 92
(41°F to 131°F) (41°F to 131°F) NOTE: *1 GB = 1 billion bytes when referring to hard drive storage capacity. Actual accessible capacity is less. Actual drive specifications may differ slightly. NOTE: Certain restrictions and exclusions apply. Contact technical support for details. 84 Chapter - Compaq Presario CQ56-100 | Compaq Presario CQ56 Notebook PC and HP G56 Notebook - Page 93
SuperMulti Double-Layer Drive with LightScribe specifications Applicable disc Read Write Random access time DVD CD Cache buffer Data transfer rate 24X CD-ROM 8X DVD-ROM 24X CD-R 16X CD-RW 8X DVD+R 4X DVD+RW 8X DVD-R 4X DVD-RW 2.4X DVD+R(9) 5X DVD-RAM Transfer mode CD-DA, CD - Compaq Presario CQ56-100 | Compaq Presario CQ56 Notebook PC and HP G56 Notebook - Page 94
the computer to a previous state ● Recovering information using recovery tools NOTE: For detailed instructions, perform a search for these topics in Help and Support. NOTE: In case of system instability, HP recommends that you print the recovery procedures and save them for later use. Backing up - Compaq Presario CQ56-100 | Compaq Presario CQ56 Notebook PC and HP G56 Notebook - Page 95
NOTE: DVDs and DVDs with double-layer (DL) support store more information than CDs, so using them Backup and Restore. 2. Follow the on-screen instructions to set up your backup, create a system image also use Windows Startup Repair to fix problems that might prevent Windows from starting correctly - Compaq Presario CQ56-100 | Compaq Presario CQ56 Notebook PC and HP G56 Notebook - Page 96
(purchased separately)" section in this guide. 3. If the Windows partition and the HP Recovery partition are listed, restart the computer, and then press f8 before the Windows operating system loads. 4. Select Startup Repair. 5. Follow the on-screen instructions. NOTE: For additional information on - Compaq Presario CQ56-100 | Compaq Presario CQ56 Notebook PC and HP G56 Notebook - Page 97
. To order a Windows 7 operating system DVD, go to http://www.hp.com/support, select your country or region, and then follow the on-screen instructions. You can also order the DVD by calling technical support. For contact information, refer to the Worldwide Telephone Numbers booklet included with - Compaq Presario CQ56-100 | Compaq Presario CQ56 Notebook PC and HP G56 Notebook - Page 98
Linux backup and recovery Use the instructions in this section if SUSE Linux SLED 11 is installed on the original operating system and HP programs and drivers that were installed at the factory. Software, drivers, and updates not installed by HP must be manually reinstalled. Personal files must be - Compaq Presario CQ56-100 | Compaq Presario CQ56 Notebook PC and HP G56 Notebook - Page 99
8 Power cord set requirements The wide range input feature of the computer permits it to operate from any line voltage from 100 to 120 volts AC or from 220 to 240 volts AC. The 3-conductor power cord set included with the computer meets the requirements for use - Compaq Presario CQ56-100 | Compaq Presario CQ56 Notebook PC and HP G56 Notebook - Page 100
Requirements for specific countries or regions Country/region Accredited agency Applicable note number The Netherlands KEMA 1 Norway NEMKO 1 The People's Republic of China CCC 5 South Korea EK 4 Sweden SEMKO 1 Switzerland SEV 1 Taiwan BSMI 4 The United Kingdom BSI 1 The - Compaq Presario CQ56-100 | Compaq Presario CQ56 Notebook PC and HP G56 Notebook - Page 101
handle them carefully. NOTE: Materials Disposal. This HP product contains mercury in the backlight in the Web site at http://www.eiae.org. This section provides disassembly instructions for provided in this chapter are general disassembly instructions. Specific details, such as screw sizes, - Compaq Presario CQ56-100 | Compaq Presario CQ56 Notebook PC and HP G56 Notebook - Page 102
Perform the following steps to disassemble the display assembly: 1. Remove all screw covers (1) and screws (2) that secure the display bezel to the display assembly. 2. Lift up and out on the left and right inside edges (1) and the top and bottom inside edges (2) of the display bezel until the bezel - Compaq Presario CQ56-100 | Compaq Presario CQ56 Notebook PC and HP G56 Notebook - Page 103
4. Remove the two screws (1) that secure each hinge to the display enclosure and lift up to remove the display hinge covers (2). 5. Remove all screws (1) that secure the display panel assembly to the display enclosure. 6. Remove the display panel assembly (2) from the display enclosure. 7. Turn the - Compaq Presario CQ56-100 | Compaq Presario CQ56 Notebook PC and HP G56 Notebook - Page 104
8. Use a sharp-edged tool to cut the tape (1) that secures the sides of the display panel to the display panel frame. 9. Remove the display panel frame (2) from the display panel. 10. Remove the screws (1) that secure the backlight cover to the display panel. 11. Lift the top edge of the backlight - Compaq Presario CQ56-100 | Compaq Presario CQ56 Notebook PC and HP G56 Notebook - Page 105
14. Remove the backlight cables (1) from the clip (2) in the display panel. 15. Turn the display panel upside down. 16. Remove the backlight frame from the display panel. WARNING! The backlight contains mercury. Exercise caution when removing and handling the backlight to avoid damaging this - Compaq Presario CQ56-100 | Compaq Presario CQ56 Notebook PC and HP G56 Notebook - Page 106
17. Remove the backlight from the backlight frame. 18. Disconnect the display cable (1) from the LCD panel. 19. Remove the screws (2) that secure the LCD panel to the display rear panel. 20. Release the LCD panel (3) from the display rear panel. 21. Release the tape (4) that secures the LCD panel to - Compaq Presario CQ56-100 | Compaq Presario CQ56 Notebook PC and HP G56 Notebook - Page 107
22. Remove the LCD panel. 23. Recycle the LCD panel and backlight. Display 99 - Compaq Presario CQ56-100 | Compaq Presario CQ56 Notebook PC and HP G56 Notebook - Page 108
13 bezel illustrated 20 spare part number 20, 61 boot options 81 boot order 81 100 Index button sound 81 buttons power 7 TouchPad 5 C Cable Kit contents 24 spare part number 24 cables, service considerations 30 camera module removal 62 spare part number 62 camera, product description 2 caps lock - Compaq Presario CQ56-100 | Compaq Presario CQ56 Notebook PC and HP G56 Notebook - Page 109
description 2 removal 37 spare part numbers 18, 23, 37 specifications 84 hard drive bay, identifying 13 hard drive cover illustrated 22 8 Windows logo 8 L language support 81 latch, battery release 13 lights caps lock 6 drive 10 optical drive 9 power 6, 9 TouchPad 5 webcam 11 wireless 6 M Main menu - Compaq Presario CQ56-100 | Compaq Presario CQ56 Notebook PC and HP G56 Notebook - Page 110
assembly removal 52 spare part number 18, 52 speakers, identifying 7 specifications computer 82 display 83 DVD±RW SuperMulti Double- Layer Drive with V vents, identifying 10, 13 VGA port 10 Virtualization Technology 81 W webcam module, spare part number 21 Windows 7 operating system DVD 89 Windows
-
 1
1 -
 2
2 -
 3
3 -
 4
4 -
 5
5 -
 6
6 -
 7
7 -
8
-
9
-
10
-
11
-
12
-
13
-
14
-
15
-
16
-
17
-
18
-
19
-
20
-
21
-
22
-
23
-
24
-
25
-
26
-
27
-
28
-
29
-
30
-
31
-
32
-
33
-
34
-
35
-
36
-
37
-
38
-
39
-
40
-
41
-
42
-
43
-
44
-
45
-
46
-
47
-
48
-
49
-
50
-
51
-
52
-
53
-
54
-
55
-
56
-
57
-
58
-
59
-
60
-
61
-
62
-
63
-
64
-
65
-
66
-
67
-
68
-
69
-
70
-
71
-
72
-
73
-
74
-
75
-
76
-
77
-
78
-
79
-
80
-
81
-
82
-
83
-
84
-
85
-
86
-
87
-
88
-
89
-
90
-
91
-
92
-
93
-
94
-
95
-
96
-
97
-
98
-
99
-
100
-
101
-
102
-
103
-
104
-
105
-
106
-
107
-
108
-
109
-
110
 |
 |

Compaq Presario CQ56 Notebook
PC and HP G56 Notebook PC
Maintenance and Service Guide
SUMMARY
This guide is a troubleshooting reference used for maintaining and servicing the computer. It provides
comprehensive information on identifying computer features, components, and spare parts;
troubleshooting computer problems; and performing computer disassembly procedures.