Compaq dc7800 vPro Setup and Configuration for the dc7800p Business PC with In
Compaq dc7800 - Convertible Minitower PC Manual
 |
View all Compaq dc7800 manuals
Add to My Manuals
Save this manual to your list of manuals |
Compaq dc7800 manual content summary:
- Compaq dc7800 | vPro Setup and Configuration for the dc7800p Business PC with In - Page 1
Setup and Configuration for the dc7800p Business PC with Intel vPro Processor Technology Introduction 3 AMT Setup and Configuration 4 AMT System Phases 4 SMB Mode - AMT Setup and Configuration with MEBx 4 SMB Mode - AMT Setup and Configuration Steps 6 Intel AMT WebGUI 13 Connecting with the - Compaq dc7800 | vPro Setup and Configuration for the dc7800p Business PC with In - Page 2
with HP Compaq dc7700p Business PCs. • AMT 2.2 - Will be available as a Web download in the Fall of 2007 with HP Compaq dc7700p Business PCs. • AMT 3.0 - Introduced with the Intel Q35 Express chipset and will be shipped with HP Compaq d7800p systems. AMT 3.0 is an important update that provides - Compaq dc7800 | vPro Setup and Configuration for the dc7800p Business PC with In - Page 3
AMT is enabled, it can be discovered by management software over a network. AMT Configuration sets up all other AMT options not covered in AMT Setup, such as enabling the system for Serial TLS). SMB mode AMT set up and configuration is a manual process done through the Intel ME BIOS Extension (MEBx). - Compaq dc7800 | vPro Setup and Configuration for the dc7800p Business PC with In - Page 4
sure HP Compaq dc7800c PCs have a BIOS revision of at least version 1.04 and a ME firmware of at least 3.0.1.1104 and a MEBx of at least version 3.0.2.0004. Shipping HP Compaq dc7700p Business PCs with AMT 2.0 or 2.1 can be upgraded to AMT 2.2 through a BIOS upgrade available using Web download. 4 - Compaq dc7800 | vPro Setup and Configuration for the dc7800p Business PC with In - Page 5
to take advantage of AMT 2.2 features, make sure HP Compaq dc7700p Business PCs have a BIOS revision of at least version 3.03, an ME firmware of at least version 2.2.1.1034, and a MEBx of at least version 2.1.4.000. Updating an HP Compaq dc7700p system from AMT 2.0 or 2.1 to AMT 2.2 by flashing the - Compaq dc7800 | vPro Setup and Configuration for the dc7800p Business PC with In - Page 6
window displays indicating that the system resets after configuration. 5. Select Y. ME platform configuration allows IT personnel to configure ME features such as AMT/ASF selection, power options, firmware update not generate any traffic. If there is a problem that affects the ME, it can be removed - Compaq dc7800 | vPro Setup and Configuration for the dc7800p Business PC with In - Page 7
Control. a. Select Manageability Feature Selection. Default Setting = Intel AMT, Recommended Setting = Intel AMT This option sets the platform management mode: None, Intel AMT, or ASF. By default, HP Compaq dc7800p Business PCs are set to Intel AMT, and ASF is an available option. Note that setting - Compaq dc7800 | vPro Setup and Configuration for the dc7800p Business PC with In - Page 8
in Host Sleep States, and then select Desktop:ON in S0, S3, ME WoL in S3, S4-5, OFF After Power Loss. Default Setting = Desktop: ON in S0, Recommended Setting = Desktop: ON is S0, S3, ME WoL in S3, S4-5, OFF After Power Loss This option sets the ME power policy when the system is in a sleep - Compaq dc7800 | vPro Setup and Configuration for the dc7800p Business PC with In - Page 9
, S3, S4, and S5. ME will not automatically initialize after recovering from a G3 power loss. ME is ON only when the system is in S0. It will be asleep in and reboot. After the ME Configuration is complete, you can configure the AMT on the next boot. 11. Press Ctrl-P during POST to enter MEBx Setup - Compaq dc7800 | vPro Setup and Configuration for the dc7800p Business PC with In - Page 10
Interface, and then select N. Default Setting = Network Interface Enabled, Recommended Setting = Network Interface Enabled If the network is disabled, then all remote AMT capabilities are disabled and TCP/IP settings are not necessary. This option is a toggle, and the next time you access it you are - Compaq dc7800 | vPro Setup and Configuration for the dc7800p Business PC with In - Page 11
1.0 Mode, and then select N. Default Setting = Intel AMT 3.0 Mode, Recommended Setting = Intel AMT 3.0 Mode This option is a toggle, and the next time you access it you are prompted with the opposite setting. b. Change to Small Business, and the select Y. Default Setting = Enterprise, Recommended - Compaq dc7800 | vPro Setup and Configuration for the dc7800p Business PC with In - Page 12
option enables/disables the ability to remotely update the ME firmware. 21. Skip Set PRTC. Default go to sleep when not being used in a nonactive system. HP recommends a setting of 1, which allows the ME to go to used as a test to determine if AMT Setup and Configuration was performed properly on - Compaq dc7800 | vPro Setup and Configuration for the dc7800p Business PC with In - Page 13
and passwords • Updating ME firmware WebGUI support is enabled by default for SMB Setup and Configured systems. WebGUI support for Enterprise Setup and Configured systems is determined by the Setup and Configuration Server. Connecting with the Intel AMT WebGUI - SMB Example 1. Power on an AMT system - Compaq dc7800 | vPro Setup and Configuration for the dc7800p Business PC with In - Page 14
4. Type the user name and password. The default username is admin and the password is what you set during AMT Setup in the MEBx. Figure 6 Intel AMT WebGUI Screen 5. Review system information and/or make any necessary changes. NOTE: You can change the MEBx password for the remote system in the WebGUI - Compaq dc7800 | vPro Setup and Configuration for the dc7800p Business PC with In - Page 15
AMT client system and the SCS must share a set of Provisioning ID (PID) and Provisioning Passphrase (PPS). This pair forms between an AMT client system and an SCS: 1. The AMT system sends original PSK is deleted from the AMT client system, and a new PSK all communication between the AMT client and the - Compaq dc7800 | vPro Setup and Configuration for the dc7800p Business PC with In - Page 16
5. In Intel ME State Control, select Enabled. 6. In Intel ME Firmware Local Update Qualifier, select Always Open. 7. Select Intel ME Features Control. a. Select Check Manageability Features. b. Select Intel AMT. 8. Select Intel ME Power Control. a. Select ME ON in Host Sleep States. b. Select Option - Compaq dc7800 | vPro Setup and Configuration for the dc7800p Business PC with In - Page 17
Configuration screen includes numerous options, which are available by scrolling down the menu. Figure 7 Intel AMT Configuration Screen Figure 8 Intel AMT Configuration Screen Continued 13. Select Host Name, and then type a host name Default Setting = HPSystem, Recommended Setting = User Dependent - Compaq dc7800 | vPro Setup and Configuration for the dc7800p Business PC with In - Page 18
, DHCP is enabled. 15. Select Provision Model. a. Change to Intel AMT 1.0 Mode, and then select N. Default Setting = Intel AMT 3.0 Mode, Recommended Setting = Intel AMT 3.0 Mode b. Change to Small Business, and then select N. Default Setting = Enterprise, Recommended Setting = Enterprise c. Select - Compaq dc7800 | vPro Setup and Configuration for the dc7800p Business PC with In - Page 19
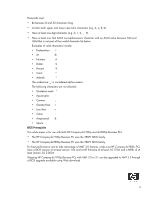
TLS Provisioning Mode • DNS • Host Initiated • Hash Data • Hash Algorithm • Serial Number • ISDefault Bit • Time Validity Pass • FQDN • Provisioning IP • ii. Enter Port. Default Setting = 0, Recommended Setting = 9971 This option is used in Enterprise mode when an Intel AMT Setup and Configuration - Compaq dc7800 | vPro Setup and Configuration for the dc7800p Business PC with In - Page 20
be generated by an SCS. The Admin Password, PID, and PPS can be pre-populated by HP during manufacturing. Go to the OEM TLS-PSK section for details. ii. Skip Delete PID = User Dependent This option enables or disables VLAN support. If VLAN is enabled, then the VLAN tag must be provided (1-4094). 20 - Compaq dc7800 | vPro Setup and Configuration for the dc7800p Business PC with In - Page 21
message window indicates MEBx remote access. c. Select Serial Over LAN, and then select the ability to remotely update the ME firmware. 21. Skip Set when not being used in a nonactive system. HP recommends a setting of 1 which allows the ME power. The system is now in In-Setup Mode and is ready for - Compaq dc7800 | vPro Setup and Configuration for the dc7800p Business PC with In - Page 22
's IP address must be manually entered into the AMT system's MEBx. The " Hello" message contains the following information: • PID • UUID (Universally Unique Identifier) • IP address • ROM and firmware AMT system using a TLS Pre-Shared-Key (PSK) cipher suite if TLS is supported. - Compaq dc7800 | vPro Setup and Configuration for the dc7800p Business PC with In - Page 23
manually or be connected to a network where it will connect with an S&CS and begin Enterprise Mode - AMT Configuration. IT TLS-PSK IT TLS-PSK AMT location. In the first stage, customers purchase systems from HP, which will AMT Setup those systems during manufacturing, bringing them to the In - Compaq dc7800 | vPro Setup and Configuration for the dc7800p Business PC with In - Page 24
HP provides a fee-based customized service that will AMT Setup systems in the factory and securely provide pre-shared keys. HP offers a secured service that will eliminate manual AMT on that platform. 6. The system BIOS detects the USB drive key. a. If found, the BIOS looks for a Setup.bin file at - Compaq dc7800 | vPro Setup and Configuration for the dc7800p Business PC with In - Page 25
is available starting with AMT 2.2 for the dc7700p HP Compaq Business PC and with AMT 3.0 for the dc7800p HP Compaq Business PC. It is not available with AMT 2.0 and AMT 2.1 on the dc7700p HP Compaq Business PC. Systems with older AMT revisions must be upgraded to at least AMT 2.2 to take advantage - Compaq dc7800 | vPro Setup and Configuration for the dc7800p Business PC with In - Page 26
the OTP to the AMT system and to the SCS. Consult your ISV management console provider for details on operating system agents for Delayed remote configuration support. Delayed RCFG is available for both AMT 3.0 on the dc7800 HP Compaq Business PC and AMT 2.2 on the dc7700p HP Compaq Business PC. 26 - Compaq dc7800 | vPro Setup and Configuration for the dc7800p Business PC with In - Page 27
-outs in HP Systems The HP Compaq dc7800p Business PCs are AMT 3.0 compliant. They are shipped out of the factory in Bare-Metal mode with the ME set to broadcast Hello messages for 255 hours when the ME is active and the system is connected to a network. The HP Compaq dc7700p Business PCs that are - Compaq dc7800 | vPro Setup and Configuration for the dc7800p Business PC with In - Page 28
4. Select TLS PKI. Figure 11 Intel Remote Configuration Screen 1. Select Remote Configuration Enable/Disable. Default Setting = Enabled, Recommended Setting = Enabled This option enables or disables remote configuration. 2. Skip Manage Certificate Hashes. This option shows the hashes in the system, - Compaq dc7800 | vPro Setup and Configuration for the dc7800p Business PC with In - Page 29
CA Certificates The following list provides supported Certificate Authorities and certificates. Not all certificates are populated in certain 26 1B A0 D7 77 70 02 8F 20 EE E4 • Comodo AAA CA (*not supported on the dc7800) • End Date: 12/31/2028 • SHA1 Fingerprint: D1 EB 23 A4 6D 17 D6 - Compaq dc7800 | vPro Setup and Configuration for the dc7800p Business PC with In - Page 30
does not reset ME Configuration settings or passwords. Partial unprovisioning is available for Enterprise mode provisioned systems. Partial unprovisioning will return all AMT Configuration setting to factory defaults with the exception of the PID, PPS, and PKICH. It does not reset ME Configuration - Compaq dc7800 | vPro Setup and Configuration for the dc7800p Business PC with In - Page 31
Full Return to Factory Defaults All AMT settings can be returned to the factory default by clearing CMOS. This includes resetting the password to the default "admin". However, setting in the ME such as the ME Power Settings will not be reset. Those settings must be manually reset to the default for - Compaq dc7800 | vPro Setup and Configuration for the dc7800p Business PC with In - Page 32
service. Q: Can AMT be set for static address and the OS set for DHCP or vice versa? A: No. Although it can be done, this is not a supported to port 16992. Q: What is the difference between the ME and AMT? A: The ME is the controller that manages AMT along with ASF and QST. Notice that clearing AMT - Compaq dc7800 | vPro Setup and Configuration for the dc7800p Business PC with In - Page 33
is also known as G0. • S3 is the Standby (Microsoft terminology) or Suspend-to-RAM state. The memory subsystem and Vaux power rail remains powered, while the rest of the system, including the processor, is not powered. When the system resumes from S3, the system context remains intact because system - Compaq dc7800 | vPro Setup and Configuration for the dc7800p Business PC with In - Page 34
that allows the ME to go into a low power state when it is not used. There are three services. Nothing herein should be construed as constituting an additional warranty. HP shall not be liable for technical or editorial errors or omissions contained herein. Microsoft, MS-DOS, Windows, and Windows
-
 1
1 -
 2
2 -
 3
3 -
 4
4 -
 5
5 -
 6
6 -
 7
7 -
8
-
9
-
10
-
11
-
12
-
13
-
14
-
15
-
16
-
17
-
18
-
19
-
20
-
21
-
22
-
23
-
24
-
25
-
26
-
27
-
28
-
29
-
30
-
31
-
32
-
33
-
34
 |
 |

1
vPro Setup and Configuration for the dc7800p Business PC
with Intel vPro Processor Technology
Introduction
. . . . . . . . . . . . . . . . . . . . . . . . . . . . . . . . . . . . . . . . . . . . . . . . . . . . . . . . . . . .3
AMT Setup and Configuration
. . . . . . . . . . . . . . . . . . . . . . . . . . . . . . . . . . . . . . . . . . . . . . .4
AMT System Phases . . . . . . . . . . . . . . . . . . . . . . . . . . . . . . . . . . . . . . . . . . . . . . . . . . . .4
SMB Mode - AMT Setup and Configuration with MEBx
. . . . . . . . . . . . . . . . . . . . . . . . . . .4
SMB Mode - AMT Setup and Configuration Steps . . . . . . . . . . . . . . . . . . . . . . . . . . . . . . .6
Intel AMT WebGUI . . . . . . . . . . . . . . . . . . . . . . . . . . . . . . . . . . . . . . . . . . . . . . . . . . . . . .13
Connecting with the Intel AMT WebGUI - SMB Example
. . . . . . . . . . . . . . . . . . . . . . . . .14
Setup and Configuration Server
. . . . . . . . . . . . . . . . . . . . . . . . . . . . . . . . . . . . . . . . . . . . .16
Setup and Configuration Server Availability . . . . . . . . . . . . . . . . . . . . . . . . . . . . . . . . . . . . .16
Enterprise Mode Setup and Configuration
. . . . . . . . . . . . . . . . . . . . . . . . . . . . . . . . . . . . . .17
Enterprise Mode - AMT Setup and Configuration Steps
. . . . . . . . . . . . . . . . . . . . . . . . . .17
Provisioning Methods
. . . . . . . . . . . . . . . . . . . . . . . . . . . . . . . . . . . . . . . . . . . . . . . . . . . .24
Legacy . . . . . . . . . . . . . . . . . . . . . . . . . . . . . . . . . . . . . . . . . . . . . . . . . . . . . . . . . . . .24
IT TLS-PSK . . . . . . . . . . . . . . . . . . . . . . . . . . . . . . . . . . . . . . . . . . . . . . . . . . . . . . . . . .24
OEM TLS-PSK . . . . . . . . . . . . . . . . . . . . . . . . . . . . . . . . . . . . . . . . . . . . . . . . . . . . . . .24
USB Drive Key Set Up and Configuration . . . . . . . . . . . . . . . . . . . . . . . . . . . . . . . . . . . . . . .25
USB Drive Key Requirements . . . . . . . . . . . . . . . . . . . . . . . . . . . . . . . . . . . . . . . . . . . . .26
Remote Configuration
. . . . . . . . . . . . . . . . . . . . . . . . . . . . . . . . . . . . . . . . . . . . . . . . . . . .26
Remote Configuration: Bare-Metal vs. Delayed . . . . . . . . . . . . . . . . . . . . . . . . . . . . . . . .27
Remote Configuration Time-outs in HP Systems
. . . . . . . . . . . . . . . . . . . . . . . . . . . . . . . .28
Remote Configuration Prerequisites
. . . . . . . . . . . . . . . . . . . . . . . . . . . . . . . . . . . . . . . .28
MEBx and Hashes . . . . . . . . . . . . . . . . . . . . . . . . . . . . . . . . . . . . . . . . . . . . . . . . . . . .28
List of Supported CA Certificates . . . . . . . . . . . . . . . . . . . . . . . . . . . . . . . . . . . . . . . . . .30
Return to Default . . . . . . . . . . . . . . . . . . . . . . . . . . . . . . . . . . . . . . . . . . . . . . . . . . . . . . . .31
Full Return to Factory Defaults . . . . . . . . . . . . . . . . . . . . . . . . . . . . . . . . . . . . . . . . . . . . . . .32
Appendix A: Frequently Asked Questions
. . . . . . . . . . . . . . . . . . . . . . . . . . . . . . . . . . . . . .32
Appendix B: Power / Sleep / Global States Explained
. . . . . . . . . . . . . . . . . . . . . . . . . . . . .34
Appendix C: Wake-On-ME Explained . . . . . . . . . . . . . . . . . . . . . . . . . . . . . . . . . . . . . . . . .35