Compaq nc6400 ProtectTools - Page 34
Setup procedures, Enabling the embedded security chip
 |
View all Compaq nc6400 manuals
Add to My Manuals
Save this manual to your list of manuals |
Page 34 highlights
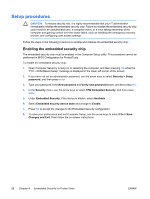
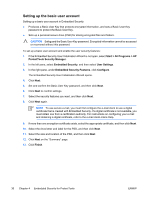
Setup procedures CAUTION To reduce security risk, it is highly recommended that your IT administrator immediately initialize the embedded security chip. Failure to initialize the embedded security chip could result in an unauthorized user, a computer worm, or a virus taking ownership of the computer and gaining control over the owner tasks, such as handling the emergency recovery archive, and configuring user access settings. Follow the steps in the following 2 sections to enable and initialize the embedded security chip. Enabling the embedded security chip The embedded security chip must be enabled in the Computer Setup utility. This procedure cannot be performed in BIOS Configuration for ProtectTools. To enable the embedded security chip: 1. Open Computer Setup by turning on or restarting the computer, and then pressing f10 while the "F10 = ROM Based Setup" message is displayed in the lower-left corner of the screen. 2. If you have not set an administrator password, use the arrow keys to select Security > Setup password, and then press enter. 3. Type your password in the New password and Verify new password boxes, and then press f10. 4. In the Security menu, use the arrow keys to select TPM Embedded Security, and then press enter. 5. Under Embedded Security, if the device is hidden, select Available. 6. Select Embedded security device state and change to Enable. 7. Press f10 to accept the changes to the Embedded Security configuration. 8. To save your preferences and exit Computer Setup, use the arrow keys to select File > Save Changes and Exit. Then follow the on-screen instructions. 28 Chapter 4 Embedded Security for ProtectTools ENWW
-
 1
1 -
2
-
3
-
4
-
5
-
6
-
7
-
8
-
9
-
10
-
11
-
12
-
13
-
14
-
15
-
16
-
17
-
18
-
19
-
20
-
21
-
22
-
23
-
24
-
25
-
26
-
27
-
28
-
 29
29 -
 30
30 -
 31
31 -
 32
32 -
 33
33 -
 34
34 -
 35
35 -
 36
36 -
 37
37 -
 38
38 -
 39
39 -
40
-
41
-
42
-
43
-
44
-
45
-
46
-
47
-
48
-
49
-
50
-
51
-
52
-
53
-
54
-
55
-
56
-
57
-
58
-
59
-
60
-
61
-
62
-
63
-
64
-
65
-
66
-
67
-
68
-
69
-
70
-
71
-
72
-
73
-
74
-
75
-
76
 |
 |