Compaq nx9010 Service Manual
Compaq nx9010 - Notebook PC Manual
 |
View all Compaq nx9010 manuals
Add to My Manuals
Save this manual to your list of manuals |
Compaq nx9010 manual content summary:
- Compaq nx9010 | Service Manual - Page 1
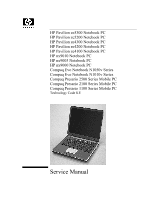
ze4100 Notebook PC HP nx9010 Notebook PC HP nx9005 Notebook PC HP nx9000 Notebook PC Compaq Evo Notebook N1050v Series Compaq Evo Notebook N1010v Series Compaq Presario 2500 Series Mobile PC Compaq Presario 2100 Series Mobile PC Compaq Presario 1100 Series Mobile PC Technology Code KE Service Manual - Compaq nx9010 | Service Manual - Page 2
and is subject to change without notice. The warranties for HP products are set forth in the express limited warranty statements accompanying such products. Nothing herein should be construed as constituting an additional warranty. Service Manual Second Edition April 2003 First Edition January 2003 - Compaq nx9010 | Service Manual - Page 3
Product Information...1-1 Features ...1-48 Operation ...1-54 Specifications ...1-58 Internal Design ...1-64 Removal and Replacement 2-1 Disassembly Flowchart ...2-3 Removing the Battery...2-4 Removing a SDRAM Module...2-5 Removing the Wireless LAN Mini-PCI Card 2-7 Removing the Hard Disk Drive - Compaq nx9010 | Service Manual - Page 4
Figure 2-1. Disassembly Flow ...2-3 Figure 2-2. Removing the Battery ...2-4 Figure 2-3. Removing an SDRAM Module 2-5 Figure 2-4. Removing an SDRAM Module 2-6 Figure 2-5. Removing the Mini-PCI Card 2-7 Figure 2-6. Removing the Mini-PCI Card 2-8 Figure 2-7. Removing the Hard Disk Drive 2-9 Figure - Compaq nx9010 | Service Manual - Page 5
Tables Table 1-1. Notebook Products ...1-1 Table 1-2. Product Comparisons...1-43 Table 1-3. Activating Power Modes 1-54 Table 1-4. Main Status Lights (front of notebook 1-55 Table 1-5. Keyboard Status Lights...1-55 Table 1-6. Fn Hot Keys...1-56 Table 1-7. Specifications...1-58 Table 1-8. - Compaq nx9010 | Service Manual - Page 6
Compaq Evo Notebook 1050v and 1010v Series, and Compaq Presario 2500, 2100, and 1100 Series Mobile PCs. These notebook models use technology code KE. It is for use by authorized service personnel while installing, servicing, and repairing these products. The manual is designed as a self-paced guide - Compaq nx9010 | Service Manual - Page 7
Information The following list of HP and Compaq notebook products is current at the time of publication but is subject to change. Table 1-1. Notebook Products Notebook Product CPU Display Hard Drive Nx9010 Notebook PC DG071A ABG Pentium 4-D 2.66-GHz 15.0-in SXGA+ 40 GB DG071A AB1 Pentium - Compaq nx9010 | Service Manual - Page 8
Notebook Product GB 40 GB 40 GB 40 GB 40 GB CD/DVD Drives Standard SDRAM/ Video Mem Communication combination 512 MB/64 MB iNIC + modem integrated combination 256 MB/64 MB iNIC + modem + diskette integrated Battery Li ion Li ion Li ion Li ion Li ion Li ion Product Information Service Manual - Compaq nx9010 | Service Manual - Page 9
Notebook Product GB 30 GB CD/DVD Drives Standard SDRAM/ Video Mem Communication combination 256 Battery Li ion Li ion Li ion Li ion Li ion Li ion Li ion Li ion Li ion Li ion Li ion Li ion Li ion Li ion Li ion Li ion Li ion Li ion Li ion Li ion Li ion Li ion Li ion Li ion Service Manual Product - Compaq nx9010 | Service Manual - Page 10
Notebook Product GB CD/DVD Drives Standard SDRAM/ Video Mem Communication Battery Li ion Li ion Li ion Li ion Li ion Li ion Li ion Li ion Li ion Li ion Li ion Li ion Li ion Li ion Li ion Li ion Li ion Li ion Li ion Li ion Li ion Li ion Li ion Li ion 1-4 Product Information Service Manual - Compaq nx9010 | Service Manual - Page 11
Notebook Product GB 40 GB CD/DVD Drives Standard SDRAM/ Video Mem Communication DVD + diskette Battery Li ion Li ion Li ion Li ion Li ion Li ion Li ion Li ion Li ion Li ion Li ion Li ion Li ion Li ion Li ion Li ion Li ion Li ion Li ion Li ion Li ion Li ion Li ion Li ion Service Manual Product - Compaq nx9010 | Service Manual - Page 12
Notebook Product GB CD/DVD Drives Standard SDRAM/ Video Mem Communication Battery Li ion Li ion Li ion Li ion Li ion Li ion Li ion Li ion Li ion Li ion Li ion Li ion Li ion Li ion Li ion Li ion Li ion Li ion Li ion Li ion Li ion Li ion Li ion Li ion 1-6 Product Information Service Manual - Compaq nx9010 | Service Manual - Page 13
Notebook Product XGA 30 GB CD/DVD Drives Standard SDRAM/ Video Mem Communication combination 512 MB/64 Battery Li ion Li ion Li ion Li ion Li ion Li ion Li ion Li ion Li ion Li ion Li ion Li ion Li ion Li ion Li ion Li ion Li ion Li ion Li ion Li ion Li ion Li ion Li ion Service Manual Product - Compaq nx9010 | Service Manual - Page 14
Notebook Product CPU Nx9005 Notebook PC DF988A ABA Athlon 1.8-GHz GHz DG194A ACB Athlon 2.0-GHz DG194A AKB Athlon 2.0-GHz Display Hard CD/DVD Drive Drives Standard SDRAM/ Video Mem Communication Battery 15.0-in XGA 30 GB 15.0-in XGA 30 GB 15 Li ion 1-8 Product Information Service Manual - Compaq nx9010 | Service Manual - Page 15
Notebook Product 30 GB 30 GB 30 GB 30 GB CD/DVD Drives Standard SDRAM/ Video Mem Communication combination 256 MB/64 MB iNIC + modem integrated combination 256 MB/64 MB iNIC + modem + diskette integrated Battery Li ion Li ion Li ion Li ion Li ion Li ion Service Manual Product Information 1-9 - Compaq nx9010 | Service Manual - Page 16
Notebook Product GB 20 GB 20 GB 40 GB 40 GB CD/DVD Drives Standard SDRAM/ Video Mem Communication combination 256 MB/64 MB iNIC + modem integrated combination 512 MB/64 MB iNIC + modem + diskette integrated Battery Li ion Li ion Li ion Li ion Li ion Li ion Product Information Service Manual - Compaq nx9010 | Service Manual - Page 17
Notebook Product 20 GB 20 GB 20 GB 20 GB CD/DVD Drives Standard SDRAM/ Video Mem Communication combination 256 MB/64 MB iNIC + modem integrated combination 256 MB/64 MB iNIC + modem + diskette integrated Battery Li ion Li ion Li ion Li ion Li ion Li ion Service Manual Product Information 1-11 - Compaq nx9010 | Service Manual - Page 18
Notebook Product GB 30 GB 40 GB 30 GB 30 GB CD/DVD Drives Standard SDRAM/ Video Mem Communication combination 256 MB/64 MB iNIC + modem + integrated CD-ROM + 256 MB/64 MB iNIC + modem diskette integrated Battery Li ion Li ion Li ion Li ion Li ion Li ion Li Product Information Service Manual - Compaq nx9010 | Service Manual - Page 19
Notebook Product CPU Display Nx9000 Notebook PC DF981A AB1 Pentium 4-M 2.53-GHz 15.0-in UXGA Hard Drive XGA 40 GB CD/DVD Drives Standard SDRAM/ Video Mem Communication combination 1024 MB/ + modem + integrated 802.11b Battery Li ion Li ion Li ion Service Manual Product Information 1-13 - Compaq nx9010 | Service Manual - Page 20
Notebook Product GB 30 GB 30 GB 30 GB 30 GB CD/DVD Drives Standard SDRAM/ Video Mem Communication combination 256 MB/64 MB iNIC + modem + DVD + diskette 256 MB/64 MB iNIC + modem + integrated 802.11b Battery Li ion Li ion Li ion Li ion Li ion Li ion Li ion Product Information Service Manual - Compaq nx9010 | Service Manual - Page 21
Notebook Product 40 GB 40 GB 40 GB 40 GB 40 GB CD/DVD Drives Standard SDRAM/ Video Mem Communication DVD + diskette 256 MB/64 MB iNIC + 11b combination 256 MB/64 MB iNIC + modem + integrated 802.11b Battery Li ion Li ion Li ion Li ion Li ion Li ion Service Manual Product Information 1-15 - Compaq nx9010 | Service Manual - Page 22
Notebook Product GB 40 GB 40 GB 40 GB 40 GB CD/DVD Drives Standard SDRAM/ Video Mem Communication combination 256 MB/64 MB iNIC + modem + 802.11b combination 256 MB/64 MB iNIC + modem + diskette integrated Battery Li ion Li ion Li ion Li ion Li ion Li ion Li Product Information Service Manual - Compaq nx9010 | Service Manual - Page 23
Notebook Product DG876A GHz 14.1-in XGA Hard Drive 30 GB 40 GB 40 GB 20 GB 30 GB 30 GB 30 GB 30 GB CD/DVD Drives Standard SDRAM/ Video Mem Communication DVD + modem diskette integrated Battery Li ion Li ion Li ion Li ion Li ion Li ion Li ion Li ion Service Manual Product Information 1-17 - Compaq nx9010 | Service Manual - Page 24
Notebook Product CPU Pavilion ze5300 Notebook PC DC809A ABA Pentium 4-D 2.4-GHz Display Hard Drive 15.0- Battery Li ion Li ion Li ion Li ion Li ion Li ion Li ion Li ion Li ion Li ion Li ion Li ion Li ion Li ion Li ion Li ion Li ion Li ion Li ion Li ion 1-18 Product Information Service Manual - Compaq nx9010 | Service Manual - Page 25
Notebook Product CPU Pavilion ze5200 Notebook PC DB395A ABA Pentium 4-D 2.0-GHz Display 14.1-in XGA Hard Drive 40 GB CD/DVD Drives Standard SDRAM/ Video Mem Communication combination 512 + + diskette integrated 802.11b Battery Li ion Li ion Li ion Service Manual Product Information 1-19 - Compaq nx9010 | Service Manual - Page 26
Notebook Product CPU Pavilion ze4300 Notebook PC XGA Hard CD/DVD Drive Drives Standard SDRAM/ Video Mem Battery Li ion Li ion Li ion Li ion Li ion Li ion Li ion Li ion Li ion Li ion Li ion Li ion Li ion Li ion Li ion Li ion Li ion Li ion Li ion 1-20 Product Information Service Manual - Compaq nx9010 | Service Manual - Page 27
Notebook Product GB 15.0-in XGA 60 GB CD/DVD Drives Standard SDRAM/ Video Mem Communication combination 256 MB/64 MB iNIC Battery Li ion Li ion Li ion Li ion Li ion Li ion Li ion Li ion Li ion Li ion Li ion Li ion Li ion Li ion Li ion Li ion Li ion Li ion Li ion Li ion Service Manual Product - Compaq nx9010 | Service Manual - Page 28
Notebook Product in XGA 20 GB CD/DVD Drives Standard SDRAM/ Video Mem Communication combination 256 MB/64 Battery Li ion Li ion Li ion Li ion Li ion Li ion Li ion Li ion Li ion Li ion Li ion Li ion Li ion Li ion Li ion Li ion Li ion Li ion Li ion Li ion 1-22 Product Information Service Manual - Compaq nx9010 | Service Manual - Page 29
Notebook Product CPU Pavilion ze4200 Notebook PC 14.1-in XGA Hard CD/DVD Drive Drives Standard SDRAM/ Video Mem Communication 30 Battery Li ion Li ion Li ion Li ion Li ion Li ion Li ion Li ion Li ion Li ion Li ion Li ion Li ion Li ion Li ion Li ion Li ion Li ion Li ion Service Manual Product - Compaq nx9010 | Service Manual - Page 30
Notebook Product in SXGA+ 40 GB CD/DVD Drives Standard SDRAM/ Video Mem Communication DVD + diskette 256 MB Battery Li ion Li ion Li ion Li ion Li ion Li ion Li ion Li ion Li ion Li ion Li ion Li ion Li ion Li ion Li ion Li ion Li ion Li ion Li ion Li ion 1-24 Product Information Service Manual - Compaq nx9010 | Service Manual - Page 31
Notebook Product 15.0-in SXGA+ 60 GB CD/DVD Drives Standard SDRAM/ Video Mem Communication combination 512 MB/64 MB Battery Li ion Li ion Li ion Li ion Li ion Li ion Li ion Li ion Li ion Li ion Li ion Li ion Li ion Li ion Li ion Li ion Li ion Li ion Li ion Li ion Li ion Service Manual Product - Compaq nx9010 | Service Manual - Page 32
Notebook Product CPU Pavilion ze4100 Notebook PC 4-M 2.0-GHz 15.0-in XGA Hard CD/DVD Drive Drives Standard SDRAM/ Video Mem 20 GB 30 GB Battery Li ion Li ion Li ion Li ion Li ion Li ion Li ion Li ion Li ion Li ion Li ion Li ion Li ion Li ion Li ion Li ion 1-26 Product Information Service Manual - Compaq nx9010 | Service Manual - Page 33
Compaq Evo Notebook N1010v Series F5771 J/ABJ Celeron 1.6-GHz 14.1-in XGA F5772 J/ABJ Celeron 1.6-GHz 14.1-in XGA Hard CD/DVD Drive Drives Standard SDRAM/ Video 128 MB/uma 256 MB/uma LAN + modem LAN + modem Battery Li ion Li ion Li ion Li ion Li ion Li Service Manual Product Information 1-27 - Compaq nx9010 | Service Manual - Page 34
Notebook Product CPU Display Compaq Presario 2500 Series Mobile PC DB390A ABA Pentium Battery Li ion Li ion Li ion Li ion Li ion Li ion Li ion Li ion Li ion Li ion Li ion Li ion Li ion Li ion Li ion Li ion Li ion Li ion Li ion Li ion Li ion Li ion Li ion 1-28 Product Information Service Manual - Compaq nx9010 | Service Manual - Page 35
Notebook Product 40 GB CD/DVD Drives Standard SDRAM/ Video Mem Communication combination 256 MB Battery Li ion Li ion Li ion Li ion Li ion Li ion Li ion Li ion Li ion Li ion Li ion Li ion Li ion Li ion Li ion Li ion Li ion Li ion Li ion Li ion Li ion Li ion Li ion Li ion Service Manual Product - Compaq nx9010 | Service Manual - Page 36
Notebook Product GB CD/DVD Drives Standard SDRAM/ Video Mem Communication Battery Li ion Li ion Li ion Li ion Li ion Li ion Li ion Li ion Li ion Li ion Li ion Li ion Li ion Li ion Li ion Li ion Li ion Li ion Li ion Li ion Li ion Li ion Li ion Li ion 1-30 Product Information Service Manual - Compaq nx9010 | Service Manual - Page 37
Notebook Product CPU DG017A ABU Celeron 2.0-GHz Display 14.1-in XGA Hard Drive 20 GB DG017A UUG Battery Li ion Li ion Li ion Li ion Li ion Li ion Li ion Li ion Li ion Li ion Li ion Li ion Li ion Li ion Li ion Li ion Li ion Li ion Li ion Li ion Li ion Li ion Li ion Li ion Service Manual Product - Compaq nx9010 | Service Manual - Page 38
Notebook Product DG097A AB5 CPU Display Pentium 4-D 2.53-GHz 15.0-in XGA Hard Drive GHz 15.0-in SXGA+ 60 GB CD/DVD Drives Standard SDRAM/ Video Mem Communication DVD/RW + 256 MB/64 MB iNIC + modem + integrated 802.11b Battery Li ion Li ion Li ion Li ion Product Information Service Manual - Compaq nx9010 | Service Manual - Page 39
Notebook Product CPU Display Compaq Presario 2100 Series Mobile PC DB381A ABA Athlon 1.53 Battery Li ion Li ion Li ion Li ion Li ion Li ion Li ion Li ion Li ion Li ion Li ion Li ion Li ion Li ion Li ion Li ion Li ion Li ion Li ion Li ion Li ion Li ion Li ion Li ion Li ion Service Manual Product - Compaq nx9010 | Service Manual - Page 40
Notebook Product GB 20 GB 20 GB 20 GB 20 GB CD/DVD Drives Standard SDRAM/ Video Mem Communication combination 256 MB/64 MB iNIC + modem + modem integrated DVD + diskette 256 MB/64 MB iNIC + modem integrated Battery Li ion Li ion Li ion Li ion Li ion Li ion Product Information Service Manual - Compaq nx9010 | Service Manual - Page 41
Notebook Product XGA 40 GB 15.0-in XGA 40 GB CD/DVD Drives Standard SDRAM/ Video Mem Communication DVD + diskette 256 MB/64 MB iNIC integrated combination 512 MB/64 MB iNIC + modem + diskette integrated Battery Li ion Li ion Li ion Li ion Li ion Li ion Service Manual Product Information 1-35 - Compaq nx9010 | Service Manual - Page 42
Notebook Product XGA 20 GB 14.1-in XGA 40 GB CD/DVD Drives Standard SDRAM/ Video Mem Communication combination 256 MB/64 MB iNIC + modem integrated combination 256 MB/64 MB iNIC + modem + diskette integrated Battery Li ion Li ion Li ion Li ion Li ion Li ion Product Information Service Manual - Compaq nx9010 | Service Manual - Page 43
Notebook Product 60 GB Celeron 2.0-GHz 15.0-in XGA 60 GB CD/DVD Drives Standard SDRAM/ Video Mem Communication DVD + diskette 256 MB/64 MB iNIC + MB/64 MB iNIC + modem + + diskette integrated 802.11b Battery Li ion Li ion Li ion Li ion Li ion Li ion Service Manual Product Information 1-37 - Compaq nx9010 | Service Manual - Page 44
Notebook Product in XGA 40 GB 15.0-in SXGA+ 40 GB CD/DVD Drives Standard SDRAM/ Video Mem Communication combination 512 MB/64 MB iNIC + modem + 256 MB/64 MB iNIC + modem + + diskette integrated 802.11b Battery Li ion Li ion Li ion Li ion Li ion Li ion Li Product Information Service Manual - Compaq nx9010 | Service Manual - Page 45
Notebook Product in XGA 30 GB 15.0-in XGA 40 GB CD/DVD Drives Standard SDRAM/ Video Mem Communication combination 256 MB/64 MB iNIC + modem + integrated DVD + diskette 256 MB/64 MB iNIC + modem integrated Battery Li ion Li ion Li ion Li ion Li ion Li ion Service Manual Product Information 1-39 - Compaq nx9010 | Service Manual - Page 46
Notebook Product DG047A in SXGA+ 40 GB 15.0-in SXGA+ 40 GB CD/DVD Drives Standard SDRAM/ Video Mem Communication DVD + diskette 256 MB/64 MB iNIC + combination 512 MB/64 MB iNIC + modem + diskette integrated Battery Li ion Li ion Li ion Li ion Li ion Li Product Information Service Manual - Compaq nx9010 | Service Manual - Page 47
Notebook Product 20 GB CD/DVD Drives Standard SDRAM/ Video Mem Communication combination Battery Li ion Li ion Li ion Li ion Li ion Li ion Li ion Li ion Li ion Li ion Li ion Li ion Li ion Li ion Li ion Li ion Li ion Li ion Li ion Li ion Li ion Li ion Li ion Li ion Li ion Service Manual Product - Compaq nx9010 | Service Manual - Page 48
Notebook Product CPU Display Compaq Presario 1100 Series Mobile PC XGA F5880 H/ABD Celeron 1.8-GHz 14.1-in XGA Hard CD/DVD Drive Drives Standard SDRAM/ Video Mem 20 GB 20 GB 20 GB 30 GB + modem Battery Li ion Li ion Li ion Li ion Li ion Li ion Li ion 1-42 Product Information Service Manual - Compaq nx9010 | Service Manual - Page 49
. Operating System Windows XP Professional or Home preinstalled. Power States On, Standby, Hibernate, Off. *Intel Desktop Pentium 4-D, Intel Mobile Pentium 4-M, and Intel Celeron Mobile processors. All models feature HP TopTools, and are ACPI compliant. Service Manual Product Information 1-43 - Compaq nx9010 | Service Manual - Page 50
memory, 4x AGP graphics capability. Windows XP Professional or Home preinstalled. On, Standby, Hibernate, Off. *Intel Desktop Pentium 4-D, Intel Mobile Pentium 4-M, and Intel Celeron Mobile processors. All models feature HP TopTools, and are ACPI compliant. 1-44 Product Information Service Manual - Compaq nx9010 | Service Manual - Page 51
memory, 4x AGP graphics capability. Windows XP Professional or Home preinstalled. On, Standby, Hibernate, Off. *Intel Desktop Pentium 4-D, Intel Mobile Pentium 4-M, and Intel Celeron Mobile processors. All models feature HP TopTools, and are ACPI compliant. Service Manual Product Information - Compaq nx9010 | Service Manual - Page 52
× 768) active-matrix TFT. Video ATI Mobility Radeon graphics accelerator with 16, 32, or 64 MB UMA graphics memory, 4x AGP graphics capability. Operating System Windows XP Professional or Home preinstalled. Power States On, Standby, Hibernate, Off. Compaq Evo Notebook 1010v Processor* Celeron - Compaq nx9010 | Service Manual - Page 53
. Operating System Windows XP Professional or Home preinstalled. Power States On, Standby, Hibernate, Off. *Intel Desktop Pentium 4-D, Intel Mobile Pentium 4-M, and Intel Celeron Mobile processors. All models feature HP TopTools, and are ACPI compliant. Service Manual Product Information 1-47 - Compaq nx9010 | Service Manual - Page 54
hard disk activity, battery. 7. Microphone option (not available). 8. Infrared port.* 9. Wireless on-off button and indicator light.* 10. Battery. 11. CD-ROM, DVD, or other drive. 12. PS/2 keyboard or PS/2 mouse port (supports Y adapter). *on certain models 1-48 Product Information Service Manual - Compaq nx9010 | Service Manual - Page 55
View HP Pavilion 4300, 4200, and 4100, HP nx9005 and nx9000, and Compaq Presario 2100 13. AC adapter jack. 14. Two universal serial bus (USB) ports. 15. LAN port.* 16. S-video port mute button and audio mute light.* 27. Floppy drive.* *on certain models Service Manual Product Information 1-49 - Compaq nx9010 | Service Manual - Page 56
View HP Pavilion 4300, 4200, and 4100, HP nx9005 and nx9000, and Compaq Presario 2100 28. Hard disk drive. 29. Battery latch. 30. SDRAM door. 31. Reset button. 32. Port replicator connect.* 33. Mini-PCI door (no user parts inside). * on certain models 1-50 Product Information Service Manual - Compaq nx9010 | Service Manual - Page 57
light.* 9. Audio mute button and audio mute light.* 10. Battery. 11. Volume controls.* 12. Audio jacks (left to right): external microphone, audio out (headphones). 13. CD-ROM, DVD, or other drive. 14. Universal serial bus (USB) port. *on certain models Service Manual Product Information 1-51 - Compaq nx9010 | Service Manual - Page 58
Back View HP Pavilion 5300 and 5200, HP nx9010, and Compaq Presario 2500 15 video port.* 22. Kensington lock slot (security connector). 23. Modem port.* 24. IEEE 1394 port.* 25. PCMCIA card and CardBus slot and button. 26. Floppy drive.* *on certain models 1-52 Product Information Service Manual - Compaq nx9010 | Service Manual - Page 59
Figure 1-6. Bottom View HP Pavilion 5300 and 5200, HP nx9010, and Compaq Presario 2500 27. Hard disk drive. 28. Battery latch. 29. Mini-PCI door (no user parts inside). 30. SDRAM door. 31. Port replicator connect.* 32. Reset button. *on certain models Service Manual Product Information 1-53 - Compaq nx9010 | Service Manual - Page 60
XP) -or- click Start > Shut Down > Shut down (Windows 2000) -or- press the power button for 4 seconds (only if the Start menu procedure doesn't work). To turn on: Press the power button to restart, or to resume your session from Standby or Hibernation mode. 1-54 Product Information Service Manual - Compaq nx9010 | Service Manual - Page 61
notebook is in Standby mode. Off: notebook is off or in Hibernation mode. Hard disk drive activity On: notebook is accessing the hard disk drive. Battery status Green: The AC adapter is connected and the battery is active (as marked on an external keyboard). Service Manual Product Information 1-55 - Compaq nx9010 | Service Manual - Page 62
). Enters Hibernation mode. Toggles Scroll Lock on and off. Increases the audio volume and cancels the mute setting. Decreases the audio volume. Audio mute. 1-56 Product Information Service Manual - Compaq nx9010 | Service Manual - Page 63
of the notebook. Figure 1-7. Resetting the Notebook Note To boot from a CD, insert a bootable CD (such as the Recovery CDs) into the CD/DVD drive, then restart. Press Esc when the HP logo appears, then select the CD/DVD drive as the temporary boot device. Service Manual Product Information 1-57 - Compaq nx9010 | Service Manual - Page 64
These are subject to change: for the latest versions, see the HP Notebook Web site (www.hp.com/notebooks). Table 1-7. Specifications Physical Attributes Processor and Bus Architecture Size (14-inch display): 328 processor with 133-MHz processor system bus. 1-58 Product Information Service Manual - Compaq nx9010 | Service Manual - Page 65
and 1.45-V core low-power processor with 133-MHz processor system bus. Compaq Evo Notebook N1010v and Presario 1010: 1.6- or 1.8-GHz Intel Mobile Celeron processor with 256-KB L2 cache and 1.45-V core low-power processor with 133-MHz processor system bus. Service Manual Product Information 1-59 - Compaq nx9010 | Service Manual - Page 66
CD-RW/DVD drive (or higher). At least 128 MB SDRAM preinstalled. HP Pavilion ze5200, ze4200, ze4100, Compaq Evo N1050v, Compaq Presario 2500, and Compaq Presario 2100 Two slots for PC2100 DDR-266 SDRAM modules. Up to 1 GB (1024 MB) SDRAM using 512 MB modules. Compaq Evo N1010v and Presario 1100 Two - Compaq nx9010 | Service Manual - Page 67
support. S-video TV out (certain models). PS/2 keyboard/mouse. 4-Mbps IrDA-compliant infrared port (certain models). IEEE-1394 (certain models). Universal serial bus (USB 1.1), two ports. One or two 16-/32-bit PC LAN: Ambit with Intersil Prism 2.5 chipset. Service Manual Product Information 1-61 - Compaq nx9010 | Service Manual - Page 68
Memory F4694-60901 317434-001 F4695-60901 317435-001 F4696-60901 317436-001 Hard Drives Evo N1050v, and Presario 2100 • • • • • • • • Pavilion ze4200, nx9000, and Presario 2100 • • • • Evo N1010v and Presario 1100 • • Pavilion ze4100 • • • 1-62 Product Information Service Manual - Compaq nx9010 | Service Manual - Page 69
Battery PC hp/Compaq Pavilion ze5200, nx9010, and Presario 2500 • • • Pavilion ze4300, ze4200, nx9005, Evo N1050v, and Presario 2100 • • • Pavilion ze4200, nx9000, and Presario 2100 • • • • • • • Evo N1010v and Presario 1100 • • • • • • Pavilion ze4100 • Service Manual Product - Compaq nx9010 | Service Manual - Page 70
the motherboard. The following figure shows the connections among the notebook's replaceable electronic modules. Table 1-9 on page 1-65 lists the roles that these modules play in the notebook's functional subsystems. Figure 1-8. Replaceable Module Diagram 1-64 Product Information Service Manual - Compaq nx9010 | Service Manual - Page 71
video RAM. Display output, backlight, power converter for backlight. Hard disk controller. Hard disk mechanism. I/O controller, floppy connector. Floppy drive mechanism. Keyboard BIOS , LAN connector. Modem circuitry (certain models), modem connector. Service Manual Product Information 1-65 - Compaq nx9010 | Service Manual - Page 72
full-size screw outlines. You can use these to verify the sizes of screws before you install them. Installing a wrong-size screw can damage the notebook. (The symbol at the left represents an M2.5×4.0 mm T-head screw.) Service Manual Removal and Replacement 2-1 - Compaq nx9010 | Service Manual - Page 73
preferably magnetized. • Small flat-blade screwdriver. • 5 mm nut driver Table 2-3. Recommended Screw Torque Values Screw Thread Size Torque (cm-kgf 3.4 M2.5 (other) 2,5 - 3,0 2.2 - 2.6 M3 2,5 - 3,0 2.2 - 2.6 Standoff, hex 2,5 - 3,0 2.2 - 2.6 2-2 Removal and Replacement Service Manual - Compaq nx9010 | Service Manual - Page 74
Disassembly Flowchart The following diagram shows the general "path" you will use when disassembling the notebook to access any particular component. Figure 2-1. Disassembly Flow Service Manual Removal and Replacement 2-3 - Compaq nx9010 | Service Manual - Page 75
Removing the Battery (User-Replaceable) Required Equipment • None. Removal Procedure • Slide the battery's release latch, then pull the battery out of its compartment. Figure 2-2. Removing the Battery 2-4 Removal and Replacement Service Manual - Compaq nx9010 | Service Manual - Page 76
the SDRAM module pops up). 4. Carefully pull the SDRAM module out of the connector. Figure 2-3. Removing an SDRAM Module HP Pavilion 4300, 4200, and 4100, HP nx9005 and nx9000, Compaq Evo Notebook N1050 and 1010, and Compaq Presario 2100 and 1100 Models Service Manual Removal and Replacement 2-5 - Compaq nx9010 | Service Manual - Page 77
5200, HP nx9010, and Compaq Presario 2500 Models Reassembly Notes • Carefully press the SDRAM module into the connector at an angle of about 30°, until it is fully inserted. Then press down on both sides of the SDRAM module until the latches snap closed. 2-6 Removal and Replacement Service Manual - Compaq nx9010 | Service Manual - Page 78
AC adapter, if present, and then remove the battery. 2. On the bottom of the notebook, loosen the captive screws holding the Mini-PCI Card HP Pavilion 4300, 4200, and 4100, HP nx9005 and nx9000, Compaq Evo Notebook N1050 and 1010, and Compaq Presario 2100 and 1100 Models Service Manual Removal - Compaq nx9010 | Service Manual - Page 79
, HP nx9010, and Compaq Presario 2500 Models Reassembly Notes • Carefully press the mini-PCI card into the connector at an angle of about 30°, until it is fully inserted. Then press down on both sides of the mini-PCI card until the latches snap closed. 2-8 Removal and Replacement Service Manual - Compaq nx9010 | Service Manual - Page 80
remove the battery. 2. On the bottom of the notebook, remove the hard disk drive rubber screw plugs and M2.5×6.0 mm screws. The number of plugs and screws varies by model. 3. Carefully pull the hard disk drive out of the notebook. Figure 2-7. Removing the Hard Disk Drive Service Manual Removal - Compaq nx9010 | Service Manual - Page 81
drives, you can install the factory software on drive C without affecting other drives. Click Advanced and select to restore only the C partition. 7. When prompted to reboot the notebook, press Ctrl+Alt+Del and follow any instructions that appear. 2-10 Removal and Replacement Service Manual - Compaq nx9010 | Service Manual - Page 82
Rubber screw plugs, display (on display bezel) Door, mini-PCI Door, memory Feet, rubber (on bottom of notebook) Rubber cover, docking port (XE4500 only) Cover, modem port Replacement Procedure . To replace, insert the cover into the modem port opening. Service Manual Removal and Replacement 2-11 - Compaq nx9010 | Service Manual - Page 83
if present, and then remove the battery. 2. Remove the two M2.5×4.0 mm hinge cover screws that secure the keyboard cover to the rear of the notebook. 3. Carefully insert a flat-blade hinges. Damaging either antenna PCA can degrade notebook performance. 2-12 Removal and Replacement Service Manual - Compaq nx9010 | Service Manual - Page 84
. This procedure might need to be repeated on the left side of display assembly hinge to completely remove the cover. Figure 2-9. Removing the Keyboard Cover Service Manual Removal and Replacement 2-13 - Compaq nx9010 | Service Manual - Page 85
Note When removing the keyboard cover on HP Pavilion 5300 and 5200, HP nx9010, and Compaq Presario 2500 models, disconnect the speaker cable as indicated in Figure 2-10. Figure 2-10. Disconnecting under the keyboard, and then press the panel into place. 2-14 Removal and Replacement Service Manual - Compaq nx9010 | Service Manual - Page 86
assembly removal procedures apply only to HP Pavilion 4300, 4200, and 4100, HP nx9005 and nx9000, Compaq Evo Notebook N1050 and N1010, and Compaq Presario 2100 Series notebooks. The HP Pavilion 5300 and 5200, HP nx9010, and Compaq Presario 2500 Series notebook speakers are integrated into the top - Compaq nx9010 | Service Manual - Page 87
Equipment • #1 Phillips screwdriver. Removal Procedure 1. Unplug the AC adapter, if present, and remove the battery. 2. Remove the keyboard cover (page 2-12). 3. Remove the four M2.5×4.0 mm screws that secure the , then lower the keyboard into place. 2-16 Removal and Replacement Service Manual - Compaq nx9010 | Service Manual - Page 88
(User-Replaceable) Figure 2-12. Removing the Keyboard Note This section applies only to HP Pavilion 4300, 4200, and 4100, HP nx9005 and nx9000, Compaq Evo Notebook N1050 and N1010, and Compaq Presario 2100 and 1100 models. Service Manual Removal and Replacement 2-17 - Compaq nx9010 | Service Manual - Page 89
Unplug the AC adapter, if present, and then remove the battery. 2. Remove the keyboard cover (page 2-12). 3. Disconnect HP Pavilion 4300, 4200, and 4100, HP nx9005 and nx9000, Compaq Evo Notebook N1050 and 1010, and Compaq Presario 2100 and 1100 Models 2-18 Removal and Replacement Service Manual - Compaq nx9010 | Service Manual - Page 90
the rear right edge of the switchboard PCA to disconnect the PCA from the motherboard. 6. Remove the switchboard PCA. Figure 2-14. Removing the Switchboard PCA HP Pavilion 5300 and 5200, HP nx9010, and Compaq Presario 2500 Models Service Manual Removal and Replacement 2-19 - Compaq nx9010 | Service Manual - Page 91
Removing the CD/DVD Drive (User-Replaceable) Note This section applies only to HP Pavilion 4300, 4200, and 4100, HP nx9005 and nx9000, Compaq Evo Notebook N1050 and N1010, and Compaq Presario 2100 and 1100 models. Required Equipment • #1 Phillips screwdriver. Removal Procedure 1. Unplug the AC - Compaq nx9010 | Service Manual - Page 92
Figure 2-15. Removing the CD/DVD Drive HP Pavilion 4300, 4200, and 4100, HP nx9005 and nx9000, Compaq Evo Notebook N1050 and 1010, and Compaq Presario 2100 and 1100 Models Service Manual Removal and Replacement 2-21 - Compaq nx9010 | Service Manual - Page 93
Place your index finger in the top case opening and push out on the CD/DVD drive to release it from the motherboard. 5. Remove the CD/DVD drive. Figure 2-16. Removing the CD/DVD Drive HP Pavilion 5300 and 5200, HP nx9010, and Compaq Presario 2500 Models 2-22 Removal and Replacement Service Manual - Compaq nx9010 | Service Manual - Page 94
secure the display assembly to the top case. Note that there is a grounding strap at the left hinge. 7. Lift the display assembly off of the notebook. Service Manual Removal and Replacement 2-23 - Compaq nx9010 | Service Manual - Page 95
Figure 2-17. Removing the Display Assembly 2-24 Removal and Replacement Service Manual - Compaq nx9010 | Service Manual - Page 96
in the package's Readme file. 2. Plug in an AC adapter. 3. Insert the Service Utilities floppy disk in the floppy drive. If the unit has no internal floppy drive, connect a USB floppy drive. 4. Turn on the notebook. 5. When you see the HP logo, press ESC to display the boot menu, then boot from the - Compaq nx9010 | Service Manual - Page 97
and 4100, HP nx9005 and nx9000, Compaq Evo Notebook N1050 and N1010, and Compaq Presario 2100 and 1100 models. Required Equipment • #1 Phillips screwdriver. Removal Procedure 1. Unplug the AC adapter, if present, and remove the battery. 2. Remove these additional assemblies: • Hard disk drive (page - Compaq nx9010 | Service Manual - Page 98
Figure 2-18. Removing the Top Case HP Pavilion 4300, 4200, and 4100, HP nx9005 and nx9000, Compaq Evo Notebook N1050 and 1010, and Compaq Presario 2100 and 1100 Models Service Manual Removal and Replacement 2-27 - Compaq nx9010 | Service Manual - Page 99
applies only to HP Pavilion 5300 and 5200, HP nx9010, and Compaq Presario 2500 models. Required Equipment • #1 Phillips screwdriver. Removal Procedure 1. Unplug the AC adapter, if present, and remove the battery. 2. Remove these additional assemblies: • Hard disk drive (page 2-9). • Keyboard cover - Compaq nx9010 | Service Manual - Page 100
. • One M2.5×4.0 mm screw in the battery bay. • Three M2.5×7.0 mm screws on the front edge of the notebook. Caution The 16 screws removed in Step 4 the notebook. Figure 2-19. Removing the Top Case Screws HP Pavilion 5300 and 5200, HP nx9010, and Compaq Presario 2500 Models Service Manual Removal - Compaq nx9010 | Service Manual - Page 101
5. Turn the notebook top side up with the rear panel facing forward. 6. Remove the two M2.5×7.0 mm screws from the rear of the bottom case. Figure 2-20. Removing the Top Case Screws HP Pavilion 5300 and 5200, HP nx9010, and Compaq Presario 2500 Models 2-30 Removal and Replacement Service Manual - Compaq nx9010 | Service Manual - Page 102
7. Position the notebook so the front faces forward. 8. Disconnect the floppy drive flex cable from the low insertion the notebook. 11. Lift the top case off of the notebook. Figure 2-21. Removing the Top Case HP Pavilion 5300 and 5200, HP nx9010, and Compaq Presario 2500 Models Service Manual - Compaq nx9010 | Service Manual - Page 103
and 4100, HP nx9005 and nx9000, Compaq Evo Notebook N1050 and N1010, and Compaq Presario 2100 and 1100 models. Required Equipment • #1 Phillips screwdriver. Removal Procedure 1. Unplug the AC adapter, if present, and remove the battery. 2. Remove these additional assemblies: • Hard disk drive (page - Compaq nx9010 | Service Manual - Page 104
the Floppy Drive HP Pavilion 4300, 4200, and 4100, HP nx9005 and nx9000, Compaq Evo Notebook N1050 and 1010, and Compaq Presario 2100 and 1100 Models Reassembly Notes Caution Do not excessively bend or fold the floppy drive cable. Excessive flexing can damage the floppy drive cable connections - Compaq nx9010 | Service Manual - Page 105
applies only to HP Pavilion 5300 and 5200, HP nx9010, and Compaq Presario 2500 models. Required Equipment • #1 Phillips screwdriver. Removal Procedure 1. Unplug the AC adapter, if present, and remove the battery. 2. Remove these additional assemblies: • Hard disk drive (page 2-9). • Keyboard cover - Compaq nx9010 | Service Manual - Page 106
Figure 2-23. Removing the Floppy Drive HP Pavilion 5300 and 5200, HP nx9010, and Compaq Presario 2500 Models Reassembly Notes Caution Do not excessively bend or fold the floppy drive cable. Excessive flexing can damage the floppy drive cable connections. Service Manual Removal and Replacement 2-35 - Compaq nx9010 | Service Manual - Page 107
) Required Equipment • #1 Phillips screwdriver. Removal Procedure 1. Unplug the AC adapter, if present, and remove the battery. 2. Remove these additional assemblies: • Hard disk drive (page 2-9). • Keyboard cover (page 2-12). • Keyboard (page 2-16). • Switchboard PCA (page 2-18). • Display assembly - Compaq nx9010 | Service Manual - Page 108
I/R PCA. Reassembly Note Figure 2-24. Removing the I/R PCA Caution Use care when handling the I/R PCA cable. Damaging the cable can degrade notebook performance. • Make sure you route the I/R PCA cable between the left screw hole and the bottom case. Service Manual Removal and Replacement 2-37 - Compaq nx9010 | Service Manual - Page 109
PCA removal instructions apply only to HP Pavilion 5300 and 5200, HP nx9010, and Compaq Presario 2500 models. Required Equipment • #1 Phillips screwdriver. Removal Procedure 1. Unplug the AC adapter, if present, and remove the battery. 2. Remove these additional assemblies: • Hard disk drive (page - Compaq nx9010 | Service Manual - Page 110
the audio PCA. Reassembly Note Figure 2-25. Removing the Audio PCA Caution Use care when handling the audio PCA cable. Damaging the cable can degrade notebook performance. • Make sure you route the audio PCA cable into the clip on the bottom case. Service Manual Removal and Replacement 2-39 - Compaq nx9010 | Service Manual - Page 111
and 4100, HP nx9005 and nx9000, Compaq Evo Notebook N1050 and N1010, and Compaq Presario 2100 and 1100 models. Required Equipment • #0 Phillips screwdriver. Removal Procedure 1. Unplug the AC adapter, if present, and remove the battery. 2. Remove these additional assemblies: • Hard disk drive (page - Compaq nx9010 | Service Manual - Page 112
. • Install the heat sink screws in this order: 1. Install all three screws lightly. 2. Fully tighten the screws in the order marked on the heat sink. Service Manual Removal and Replacement 2-41 - Compaq nx9010 | Service Manual - Page 113
applies only to HP Pavilion 5300 and 5200, HP nx9010, and Compaq Presario 2500 models. Required Equipment • #0 Phillips screwdriver. Removal Procedure 1. Unplug the AC adapter, if present, and remove the battery. 2. Remove these additional assemblies: • Hard disk drive (page 2-9). • Keyboard cover - Compaq nx9010 | Service Manual - Page 114
. • Install the heat sink screws in this order: 1. Install all four screws lightly. 2. Fully tighten the screws in the order stamped on the heat sink. Service Manual Removal and Replacement 2-43 - Compaq nx9010 | Service Manual - Page 115
4300, 4200, and 4100, HP nx9005 and nx9000, Compaq Evo Notebook N1050 and N1010, and Compaq Presario 2100 and 1100 models. Removal Procedure 1. Unplug the AC adapter, if present, and remove the battery. 2. Remove these additional assemblies: • Hard disk drive (page 2-9). • Keyboard cover (page - Compaq nx9010 | Service Manual - Page 116
motherboard. Figure 2-28. Removing the CPU Module HP Pavilion 4300, 4200, and 4100, HP nx9005 and nx9000, Compaq Evo Notebook N1050 and 1010, and Compaq Presario 2100 and 1100 Models Reassembly Notes Caution in the reassembly notes on page 2-47. Service Manual Removal and Replacement 2-45 - Compaq nx9010 | Service Manual - Page 117
Note This section applies only to HP Pavilion 5300 and 5200, HP nx9010, and Compaq Presario 2500 models. Removal Procedure 1. Unplug the AC adapter, if present, and remove the battery. 2. Remove these additional assemblies: • Hard disk drive (page 2-9). • Keyboard cover (page 2-12). • Keyboard (page - Compaq nx9010 | Service Manual - Page 118
of its socket on the motherboard. Figure 2-29. Removing the CPU Module HP Pavilion 5300 and 5200, HP nx9010, and Compaq Presario 2500 Models Reassembly Notes Caution Each time you install a new CPU module described in the reassembly notes on page 2-47. Service Manual Removal and Replacement 2-47 - Compaq nx9010 | Service Manual - Page 119
removal instructions apply only to HP Pavilion 5300 and 5200, HP nx9010, and Compaq Presario 2500 models. Required Equipment • Small flat-blade screwdriver. Removal Procedure 1. Unplug the AC adapter, if present, and remove the battery. 2. Remove these additional assemblies: • Hard disk drive (page - Compaq nx9010 | Service Manual - Page 120
installed in the correct locations when reinstalling the hard disk drive guide. 4. Remove the hard disk drive guide. 5. Disconnect the modem cable from the /1394 Connector Module HP Pavilion 5300 and 5200, HP nx9010, and Compaq Presario 2500 Models Service Manual Removal and Replacement 2-49 - Compaq nx9010 | Service Manual - Page 121
Removing the Motherboard (Authorized Service Providers Only) Note This section applies only to HP Pavilion 4300, 4200, and 4100, HP nx9005 and nx9000, Compaq Evo Notebook N1050 and N1010, and Compaq Presario 2100 and 1100 models. Required Equipment • #1 Phillips screwdriver. Removal Procedure Note: - Compaq nx9010 | Service Manual - Page 122
motherboard out of the bottom case. 8. If present, remove the modem port cover. Figure 2-31. Removing the Motherboard HP Pavilion 4300, 4200, and 4100, HP nx9005 and nx9000, Compaq Evo Notebook N1050 and 1010, and Compaq Presario 2100 and 1100 Models Service Manual Removal and Replacement 2-51 - Compaq nx9010 | Service Manual - Page 123
1. Download the notebook service package from the Partnership Web site (see page vii), and create a Service Utilities floppy disk as described in the package's Readme file. 2. Plug in an AC adapter. 3. Insert the Service Utilities floppy disk in the floppy drive. 4. Turn on the notebook. When the HP - Compaq nx9010 | Service Manual - Page 124
mm screw. The remaining three screws are M2.0×4.0 mm screws. Make sure these screws are installed in the correct locations when reinstalling the hard disk drive guide. 6. Remove the hard disk drive guide. Figure 2-32. Removing the Hard Disk Drive Guide Service Manual Removal and Replacement 2-53 - Compaq nx9010 | Service Manual - Page 125
the motherboard and remove the fan. 10. Disconnect the audio board cable from the motherboard. Figure 2-33. Disconnecting the Motherboard Cables 2-54 Removal and Replacement Service Manual - Compaq nx9010 | Service Manual - Page 126
notebook rear panel (two on each side of the parallel and external monitor connectors). 12. Remove the three M2.5×6.0 mm screws that secure the CD/DVD drive rear alignment rail to the bottom case. 13. Remove the CD/DVD drive , remove the modem port cover. Service Manual Removal and Replacement 2-55 - Compaq nx9010 | Service Manual - Page 127
Figure 2-34. Removing the Motherboard 2-56 Removal and Replacement Service Manual - Compaq nx9010 | Service Manual - Page 128
in the package's Readme file. 2. Plug in an AC adapter. 3. Insert the Service Utilities floppy disk in the floppy drive. If the unit has no internal floppy drive, connect a USB floppy drive. 4. Turn on the notebook. 5. When you see the HP logo, press ESC to display the boot menu, then boot from the - Compaq nx9010 | Service Manual - Page 129
update. This restores the old system data on the new motherboard. If you did not store system data, type M for the manual update option. Enter the serial number from the bottom of the notebook-you might have to contact an HP support center to do this. 2-58 Removal and Replacement Service Manual - Compaq nx9010 | Service Manual - Page 130
" on page 2-52. Installing a New Serial Number Label Download the latest version of the serial number label template (Microsoft Word format) from the Partnership Web site (see page vii) under Support/Service in Technical Support Information. The latest version includes fields for warranty period and - Compaq nx9010 | Service Manual - Page 131
below. Caution Handle the connector ends of the antennas carefully. Failure to do so could degrade notebook performance. Handle the antenna routing metal tabs in the bottom case carefully. These tabs can figure below. Figure 2-37. Removing a PCMCIA Door 2-60 Removal and Replacement Service Manual - Compaq nx9010 | Service Manual - Page 132
completes, press the power button to reset the notebook. BIOS updates are available from the HP Business Support Web site (www.hp.com/go/bizsupport). Installation utilities and instructions for creating a BIOS floppy disk are provided with the updates. Service Manual Removal and Replacement 2-61 - Compaq nx9010 | Service Manual - Page 133
have a BIOS floppy disk, download the package from the Partnership Web site (see page vii) under Product Support Information in the Service and Support Library. Follow the instructions for creating the BIOS floppy disk. Caution Make sure to use the correct BIOS floppy disk for the notebook model - Compaq nx9010 | Service Manual - Page 134
below. Component Battery, CMOS Case, bottom Case, top CD/DVD drive CPU module Display assembly Doors, PCMCIA Floppy drive Table 2-5. Removing the CMOS battery, set the correct time and date using the BIOS Setup utility or Date/Time in the Control Panel. See page 2-59. Service Manual Removal and - Compaq nx9010 | Service Manual - Page 135
32). Heat sink (page 2-40). Motherboard (page 2-50). See page 2-15. Additional Steps When replacing the HDD guide, make sure you only replace the two right screws. Do not replace the two left screws. Press the tabs PCMCIA socket from the motherboard. 2-64 Removal and Replacement Service Manual - Compaq nx9010 | Service Manual - Page 136
(page 3-19). ! Sycard PCCtest 450/460 PC card (page 3-25). ! Windows Management Instrumentation (page 3-26). ! BIOS Setup utility (page 3-26). Support by Authorized Service Providers In the U.S., support of notebook computers by Authorized Service Providers (ASPs) is a purchasable option. Standard - Compaq nx9010 | Service Manual - Page 137
abuse. Try to duplicate the customer's problem. Troubleshoot the problem using: - Diagnostic tools. - Troubleshooting suggestions. Verify the repair by testing the functionality of the complete unit. Figure 3-1. Basic Troubleshooting Steps 3-2 Troubleshooting and Diagnostics Service Manual - Compaq nx9010 | Service Manual - Page 138
BIOS Setup utility, and the Sycard PCCtest. Table 3-2 on page 3-5 shows how you can use these tools to isolate the cause of the notebook's problem. ! The troubleshooting suggestions on page 3-6 include general suggestions for repairing notebooks that show specific failure symptoms. Service Manual - Compaq nx9010 | Service Manual - Page 139
an ideal way to find the module responsible for the problem. A failure symptom is rarely caused by more than particular failure. After you replace a module, the notebook will normally be in a confused state and lock up when you troubleshooting. 3-4 Troubleshooting and Diagnostics Service Manual - Compaq nx9010 | Service Manual - Page 140
(if installed) Bootup Tests Describes Processor Tests Describes Memory Tests Tests Describes Fan Tests Batteries Tests (CMOS battery only) Describes Display Tests Describes Hard disk Tests Tests Describes Floppy drive Tests* Tests Describes Keyboard Tests Tests Describes - Compaq nx9010 | Service Manual - Page 141
or floppy drive, replace CPU module, replace motherboard. If OS starts from floppy drive, reload hard drive, replace hard drive. Make sure floppy drive is installed and connected correctly. Make sure CD/DVD is installed and connected correctly. 3-6 Troubleshooting and Diagnostics Service Manual - Compaq nx9010 | Service Manual - Page 142
for corrupt files on hard drive, use Recovery CDs to reinstall factory software onto hard drive, replace hard drive. User must call Technical Support and provide proof of ownership. Password removal is restricted to certain sites. See page 5-1. Service Manual Troubleshooting and Diagnostics 3-7 - Compaq nx9010 | Service Manual - Page 143
. Battery. Battery or contacts. Motherboard. Battery. Battery or contacts. AC adapter. Motherboard. Heat sink. Repair Center: Comments Battery capacity often decreases after a year or more. Check battery and AC adapter. Check heat sink. 3-8 Troubleshooting and Diagnostics Service Manual - Compaq nx9010 | Service Manual - Page 144
Make sure hibernate support is enabled in Power in Control Panel. Also, make sure Hibernate timeouts (Power Schemes tab) for AC and battery power are not set to Never. Repair Center: Comments AC adapter cannot be repaired, and must be replaced. Service Manual Troubleshooting and Diagnostics 3-9 - Compaq nx9010 | Service Manual - Page 145
abuse. Declared to be caused by customer abuse. Declared to be caused by customer abuse. Declared to be caused by customer abuse. If drive case is damaged, drive may not operate properly. Check notebook and drive for evidence of customer abuse. 3-10 Troubleshooting and Diagnostics Service Manual - Compaq nx9010 | Service Manual - Page 146
for other media. Restart notebook. Make sure CD/DVD drive is installed properly. DVD may be double-sided. Movie may be paused. Press Play button. CD/DVD drive. Repair Center: Comments Make sure floppy drive is installed and connected correctly. Service Manual Troubleshooting and Diagnostics 3-11 - Compaq nx9010 | Service Manual - Page 147
. Motherboard. Y-adapter. PS/2 device. Motherboard. Repair Center: Comments HP warranty does not cover expense of correcting this situation. Make sure CD/DVD drive is installed properly. Try reinserting ribbon cable in connector on motherboard. 3-12 Troubleshooting and Diagnostics Service Manual - Compaq nx9010 | Service Manual - Page 148
from \hp\drivers\TouchPad.) Top case. Motherboard. Top case. Motherboard. Top case. Motherboard. Make sure C drive has adequate free space. Delete temporary and unneeded files. Use memory troubleshooter in Windows Help. Not all third-party memory cards have been tested for use with notebook. Use - Compaq nx9010 | Service Manual - Page 149
notebook. Use troubleshooters in Windows Help. Check settings in Control Panel. Check port settings in Device Manager. Test ports with e-Diagtools diagnostics. For USB: contact device vendor and HP Notebook Web site (see page vii) for latest USB drivers Troubleshooting and Diagnostics Service Manual - Compaq nx9010 | Service Manual - Page 150
Motherboard. Infrared is disabled and no drivers installed as shipped. (Drivers are included.) Make sure line between PC cards from notebook (possible IRQ conflict). For fast-IrDA, check for DMA conflict with ECP parallel port. Motherboard. Repair Center: Comments Service Manual Troubleshooting - Compaq nx9010 | Service Manual - Page 151
AC adapter for 24 hours to charge CMOS battery. Always set notebook on a flat surface, so air can flow freely around and underneath it Make sure air vents are not blocked. Games and other programs that drive CPU usage toward 100% can contribute. CMOS battery. Motherboard. Heat sink. Repair Center - Compaq nx9010 | Service Manual - Page 152
supply. Check settings in BIOS Setup. Port replicator. Motherboard. Repair Center: Comments If notebook slows after period of continuous activity, check heat sink-see previous symptom. Port replicator is not repairable, and must be exchanged. Service Manual Troubleshooting and Diagnostics 3-17 - Compaq nx9010 | Service Manual - Page 153
troubleshooting and repairing the notebook: • Notebook e-Diagtools diagnostic program (below). • Power-on self-test (page 3-19). • Sycard PCCtest 450 PC card (page 3-25). • Windows Management Instrumentation (page 3-26). • BIOS the Support Ticket. 3-18 Troubleshooting and Diagnostics Service Manual - Compaq nx9010 | Service Manual - Page 154
tests called POST (Power-On Self-Test). The BIOS will not boot the notebook's operating system if the system memory, CPU, DMA, or interrupt controller fails the POST beep code indicating an error, confirm the problem using other diagnostic tools. Service Manual Troubleshooting and Diagnostics 3-19 - Compaq nx9010 | Service Manual - Page 155
. POST device initialization. Check ROM copyright notice. Initialize I20 support. Check video configuration against CMOS. Initialize PCI bus and devices. Initialize all video adapters in system. QuietBoot start (optional). Shadow video BIOS ROM. 3-20 Troubleshooting and Diagnostics Service Manual - Compaq nx9010 | Service Manual - Page 156
service. Display prompt "Press F2 to enter SETUP". Disable CPU cache. Test RAM between 512 and 640 kB. Test extended memory. Test extended memory number of ATA and SCSI drives. Set time of day. BIOS. Prepare Boot. Initialize SMBIOS. Initialize PnP Option ROMs. Service Manual Troubleshooting and - Compaq nx9010 | Service Manual - Page 157
vectors. Initialize Run Time Clock. Initialize video. Initialize System Management Manager. Output one beep. Clear Huge Segment. Boot to Mini DOS. Boot to Full DOS. Improper video configuration (reprogram EEPROM) or external ROM checksum failure. 3-22 Troubleshooting and Diagnostics Service Manual - Compaq nx9010 | Service Manual - Page 158
and BIOS disabled the cache. May require replacing the motherboard. A disabled cache slows system performance considerably. 02F0: CPU ID: CPU socket number for Multi-Processor error. 02F4: EISA CMOS Not Writeable ServerBIOS2 test error: Cannot write to EISA CMOS. Service Manual Troubleshooting - Compaq nx9010 | Service Manual - Page 159
ROM Drive CD-ROM drive identified. Entering SETUP ... Starting BIOS Setup. Memory Blocks (UMB), indicating released segments of the BIOS that can be reclaimed by a virtual memory manager. Video BIOS shadowed Video BIOS copied to shadow RAM. 3-24 Troubleshooting and Diagnostics Service Manual - Compaq nx9010 | Service Manual - Page 160
. All notebook models (PCI 1520) Table 3-6. Sycard PCCtest Commands Slot Upper Lower PCMCIA PC card (16-bit) test (PC card configuration header) pct450-v-1-b80 pct450-v-0-b80 CardBus (32-bit) test (CardBus configuration header) testcb-v-1-b80 testcb-v-0-b80 Service Manual Troubleshooting and - Compaq nx9010 | Service Manual - Page 161
the BIOS Setup Utility 1. Close all applications, then restart the notebook: click Start > Turn Off Computer > Restart. (If necessary, you can press Ctrl+Alt+Del to restart.) 2. When the HP logo appears, press F2 to enter the BIOS Setup utility. 3-26 Troubleshooting and Diagnostics Service Manual - Compaq nx9010 | Service Manual - Page 162
BIOS Setup. Internal Hard Disk Sets the hard disk drive type and various parameters. Extended Memory Shows the extended memory size. CPU Serial Number Serial Number PC ID Service automatically. Detected automatically. Detected automatically. Service Manual Troubleshooting and Diagnostics 3-27 - Compaq nx9010 | Service Manual - Page 163
Removable Device 3. CD/DVD 4. Built-in LAN Updating the Notebook's BIOS Hewlett-Packard might from time to time provide updates to the notebook's BIOS. Use e-DiagTools for Windows to download and install these BIOS updates as needed (page 2-61). 3-28 Troubleshooting and Diagnostics Service Manual - Compaq nx9010 | Service Manual - Page 164
4 Replaceable Parts This chapter contains an exploded view of the notebook and the following lists of parts: • Notebook replaceable parts (page 4-3). • Accessory replacement parts (page 4-12). • Part number reference (page 4-13). Service Manual Replaceable Parts 4-1 - Compaq nx9010 | Service Manual - Page 165
Figure 4-1. Exploded View HP Pavilion 4300, 4200, and 4100, HP nx9005 and nx9000, and Compaq Presario 2100 4-2 Replaceable Parts Service Manual - Compaq nx9010 | Service Manual - Page 166
Figure 4-2. Exploded View HP Pavilion 5300 and 5200, HP nx9010, and Compaq Presario 2500 Service Manual Replaceable Parts 4-3 - Compaq nx9010 | Service Manual - Page 167
- (Compaq) 2 Display 15.0-inch XGA - (Compaq) 2 Display 14.1-inch XGA - (Compaq) F5771-60903 Evo N1010v and Presario 1100 F5771J • • • • • Pavilion ze4100 F5761H • User Repl No No No No • No • No • No No No No No No No No No No No No No No 4-4 Replaceable Parts Service Manual - Compaq nx9010 | Service Manual - Page 168
• • • • • • • • • • • • • • • • • • • Pavilion ze4200, nx9000, and Presario 2100 • Evo N1010v and Presario 1100 F5771J • • • • Pavilion ze4100 F5761H • User Repl No No No No No No No No • No No No No No No No No No No No No No No No Service Manual Replaceable Parts 4-5 - Compaq nx9010 | Service Manual - Page 169
2100 • • • • Pavilion ze4200, nx9000, and Presario 2100 • • • • Evo N1010v and Presario 1100 F5771J • • • Pavilion ze4100 F5761H User Repl No No • No No No No No No • No • No • No No No No No No No No No No • No No No • No 4-6 Replaceable Parts Service Manual - Compaq nx9010 | Service Manual - Page 170
, nx9000, and Presario 2100 • • • • • • • • • • • Evo N1010v and Presario 1100 F5771J • • • • • Pavilion ze4100 F5761H • User Repl No No • No • No No No No No No No • No • No • No No • No No No • No • No • No • No No No No Service Manual Replaceable Parts 4-7 - Compaq nx9010 | Service Manual - Page 171
and Presario 2100 • • • • Pavilion ze4200, nx9000, and Presario 2100 • • Evo N1010v and Presario 1100 F5771J • • • • • Pavilion ze4100 F5761H • • • User Repl No No No • No No No No No No No No No • No • No • No No No • No • No 4-8 Replaceable Parts Service Manual - Compaq nx9010 | Service Manual - Page 172
16 SPS-COVER MEM/MINI PC 3F Part Number F4640-60981 Evo N1050v, and Presario 2100 Pavilion ze4200, nx9000, and Presario 2100 Evo N1010v and Presario 1100 F5771J • • • Pavilion ze4100 F5761H User Repl No No • No No No No No No • Yes • Yes • Yes Yes Service Manual - Compaq nx9010 | Service Manual - Page 173
ze4200, nx9000, and Presario 2100 • • • • • Evo N1010v and Presario 1100 F5771J • • Pavilion ze4100 F5761H • User Repl Yes Yes Yes Yes • Yes • Yes • Yes • Yes • Yes • Yes • Yes • Yes • Yes • Yes • No Yes • Yes • Yes 4-10 Replaceable Parts Service Manual - Compaq nx9010 | Service Manual - Page 174
-TRAY, HDD, 3F 28 Cover, docking port HP/Compaq 29 SPS-BD AUDIO CONTROL 3F Part Number 319502-001 Exchange Part Number Pavilion ze5300, ze5200, nx9010, and Presario 2500 • Pavilion ze4300, ze4200, nx9005, Evo N1050v, and Presario 2100 Pavilion ze4200, nx9000, and Presario 2100 Evo N1010v and - Compaq nx9010 | Service Manual - Page 175
• Evo N1010v and Presario 1100 F5771J • Pavilion ze4100 H5761H • User Repl Yes • • • • Yes • • • Yes • • Yes • • • • • Yes • • • • Yes • • • • • Yes • • Yes • • Yes • • Yes • • • Yes • • Yes • • • • Yes • • Yes 4-12 Replaceable Parts Service - Compaq nx9010 | Service Manual - Page 176
• • • • • • Pavilion ze4200, nx9000 and Presario 2100 • • • Evo N1010v and Presario 1100 F5771J • • • • Pavilion ze4100 H5761H • User Repl Yes • Yes • Yes • Yes • Yes • Yes • Yes • Yes • Yes • Yes No • No • No • No • No Service Manual Replaceable Parts 4-13 - Compaq nx9010 | Service Manual - Page 177
ze4200, nx9005, Evo N1050v, and Presario 2100 • Pavilion ze4200, nx9000 and Presario 2100 • Evo N1010v and Presario No • • • • No • • • No • No • • • • • No • • • • No • • • • No • • • • No • • • • No • • No • • No 4-14 Replaceable Parts Service Manual - Compaq nx9010 | Service Manual - Page 178
• • Pavilion ze4200, nx9000 and Presario 2100 • • • • • • • • • Evo N1010v and Presario 1100 F5771J • • • • Pavilion ze4100 H5761H • • • User Repl No No No No No No No No No No No No No No No No No No No No No Yes Yes Yes Yes Yes Yes Yes Yes Yes Yes Yes Service Manual Replaceable Parts 4-15 - Compaq nx9010 | Service Manual - Page 179
Pavilion ze4200, nx9000 and Presario 2100 • • • • • • Evo N1010v and Presario 1100 F5771J • • • Pavilion ze4100 H5761H • • • • • User Repl No No Yes Yes Yes Yes Yes Yes Yes Yes Yes Yes No No No No No No Yes No No No No No No No Yes Yes Yes 4-16 Replaceable Parts Service Manual - Compaq nx9010 | Service Manual - Page 180
, nx9005, Evo N1050v, and Presario 2100 • Pavilion ze4200, nx9000 and Presario 2100 • Evo N1010v and Presario No • • No • • • No • • • No • • • No • • No • • No • • • • No • • • No • • • • No • • No • • • • No Service Manual Replaceable Parts 4-17 - Compaq nx9010 | Service Manual - Page 181
PANEL 15.0-inch SXGA PRES SPS-COVER MEM/MINI PC 3F SPS-FAN 3F SMALL SPS-HEATSINK 3F W/2 , ze4200, nx9005, Evo N1050v, and Presario 2100 • Pavilion ze4200, nx9000 and Presario 2100 • Evo N1010v and Presario 1100 F5771J • No • No • No • No • No • No 4-18 Replaceable Parts Service Manual - Compaq nx9010 | Service Manual - Page 182
mini-PCI - 1F w/ labels Tray, HDD - 1F Speaker assy - 1F SPS Evo N1050v, and Presario 2100 Pavilion ze4200, nx9000 and Presario 2100 • • • Evo N1010v • No • No • • No • No • • No • • No • • No • • • No • • • No • • • No • • No Service Manual Replaceable Parts 4-19 - Compaq nx9010 | Service Manual - Page 183
gray/silver) F4640-60944 Guide, HDD - 1F F4640-60945 Evo N1050v, and Presario 2100 • • • • • Pavilion ze4200, nx9000 and Presario 2100 • • • • • Evo N1010v Yes • • • • No • • • • • Yes • • • • Yes • No • No • • • • No 4-20 Replaceable Parts Service Manual - Compaq nx9010 | Service Manual - Page 184
ze4200, nx9000 and Presario 2100 • • • • • • • Evo N1010v and Presario 1100 F5771J • • Pavilion ze4100 H5761H • • • • • • • • • • • User Repl No No Yes No Yes Yes Yes Yes Yes Yes No No No No No No No No No No No No No Yes No No No No No Service Manual Replaceable Parts 4-21 - Compaq nx9010 | Service Manual - Page 185
The log and backup are subject to standard record retention process and review. The final issue relating to removal of passwords is that HP cannot provide information to users that would assist them in improperly removing a password and opening a notebook. Service Manual Reference Information 5-1 - Compaq nx9010 | Service Manual - Page 186
. This issue is common across all vendors supplying TFT displays in their products and is not specific to the notebook display. Notebook TFT displays meet or exceed all HP standards for cosmetic quality of TFT displays. HP does not warrant that the displays will be free of cosmetic imperfections - Compaq nx9010 | Service Manual - Page 187
a lighted display and does not change size. (In contrast, a polarizer scratch is a light line that is visible on a darker background and does not change size.) Service Manual Reference Information 5-3 - Compaq nx9010 | Service Manual - Page 188
Service Notes and Obsolete Parts Service notes containing important repair information for these products will be issued as needed. These notes are available online at the Partnership Web site-see page vii. 5-4 Reference Information Service Manual
-
 1
1 -
 2
2 -
 3
3 -
 4
4 -
 5
5 -
 6
6 -
 7
7 -
8
-
9
-
10
-
11
-
12
-
13
-
14
-
15
-
16
-
17
-
18
-
19
-
20
-
21
-
22
-
23
-
24
-
25
-
26
-
27
-
28
-
29
-
30
-
31
-
32
-
33
-
34
-
35
-
36
-
37
-
38
-
39
-
40
-
41
-
42
-
43
-
44
-
45
-
46
-
47
-
48
-
49
-
50
-
51
-
52
-
53
-
54
-
55
-
56
-
57
-
58
-
59
-
60
-
61
-
62
-
63
-
64
-
65
-
66
-
67
-
68
-
69
-
70
-
71
-
72
-
73
-
74
-
75
-
76
-
77
-
78
-
79
-
80
-
81
-
82
-
83
-
84
-
85
-
86
-
87
-
88
-
89
-
90
-
91
-
92
-
93
-
94
-
95
-
96
-
97
-
98
-
99
-
100
-
101
-
102
-
103
-
104
-
105
-
106
-
107
-
108
-
109
-
110
-
111
-
112
-
113
-
114
-
115
-
116
-
117
-
118
-
119
-
120
-
121
-
122
-
123
-
124
-
125
-
126
-
127
-
128
-
129
-
130
-
131
-
132
-
133
-
134
-
135
-
136
-
137
-
138
-
139
-
140
-
141
-
142
-
143
-
144
-
145
-
146
-
147
-
148
-
149
-
150
-
151
-
152
-
153
-
154
-
155
-
156
-
157
-
158
-
159
-
160
-
161
-
162
-
163
-
164
-
165
-
166
-
167
-
168
-
169
-
170
-
171
-
172
-
173
-
174
-
175
-
176
-
177
-
178
-
179
-
180
-
181
-
182
-
183
-
184
-
185
-
186
-
187
-
188
 |
 |

HP Pavilion ze5300 Notebook PC
HP Pavilion ze5200 Notebook PC
HP Pavilion ze4300 Notebook PC
HP Pavilion ze4200 Notebook PC
HP Pavilion ze4100 Notebook PC
HP nx9010 Notebook PC
HP nx9005 Notebook PC
HP nx9000 Notebook PC
Compaq Evo Notebook N1050v Series
Compaq Evo Notebook N1010v Series
Compaq Presario 2500 Series Mobile PC
Compaq Presario 2100 Series Mobile PC
Compaq Presario 1100 Series Mobile PC
Technology Code KE
Service Manual