Craftsman 21805 Operation Manual
Craftsman 21805 - 10 in. Table Saw Manual
 |
View all Craftsman 21805 manuals
Add to My Manuals
Save this manual to your list of manuals |
Craftsman 21805 manual content summary:
- Craftsman 21805 | Operation Manual - Page 1
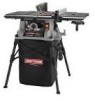
MANUAL 10 in. TABLE SAW Model No. 315.21 8050 _lJ WARNING: To reduce the risk of injury, the user must reed end understand the operator's manual before using this product. Customer Help Line: 1-800-932-3188 Sears, Roebuck and Co., 3333 Beverly Rd., Hoffman Estates, IL 60179 USA Visit the Craftsman - Craftsman 21805 | Operation Manual - Page 2
10-13 • ToolsNeeded ... 13 • Loose Parts ... 14 • "Assembly ...15-19 • Operation 19-32 II Adjustments... 33-35 • Maintenance ... 36 • Troubleshooting...37-38 • Exploded View...39-47 • Parts Ordering/Service ...Back Page ONE YEAR FULL WARRANTY ON CRAFTSMAN TOOL If this Craftsman , Sears, - Craftsman 21805 | Operation Manual - Page 3
personal injury. READ ALL INSTRUCTIONS • KNOW YOUR POWER TOOL Read the operator's manual carefuny. Learn the saw's applications and limitations as instructions for lubricating and changing accessories. • DISCONNECT TOOLS, When not in use, before servicing, or when changing attachments, blades, - Craftsman 21805 | Operation Manual - Page 4
. • WHEN SERVICING use only identical replacement parts. Usa of any other parts may create a hazard or cause product damage. • USE ONLY RECOMMENDED ACCESSORIES listed in this manual or addendums, Use of accessories that are not listed may cause the risk of personal injuw, Instructions for safe use - Craftsman 21805 | Operation Manual - Page 5
"freehand" which means using only your hands to support or guide the workpiece. Always use either the rip fence or miter gauge to position and guide the work. • NEVER stand or have any part of your body in line with the path of the saw blade. • NEVER reach behind, over, or within three inches - Craftsman 21805 | Operation Manual - Page 6
To reduce the risk 'of injury, user must read and understand operator's manual before using this product. Always wear safety goggles or safety glasses with side ira= i i. m=l Failureto keep your hands away from the blade will result in serious personal injury. ® Pinch Warning Hot Surface - Craftsman 21805 | Operation Manual - Page 7
only identical replacement parts. _k WARNING: To avoid serious personal injury, do not attempt to use this product until you read thoroughly and understand completely the operator's manual. Save this operator's manual and review frequently for continuing safe operation and instructing others who - Craftsman 21805 | Operation Manual - Page 8
the motor's horsepower rating. A line intended only for lights cannot properly carry a power tool motor. Wirethat is heavy enough for a short distance will be too light for a greater distance. A linethat can support one power tool may not be able to support two or three tools. GROUNDING INSTRUCTIONS - Craftsman 21805 | Operation Manual - Page 9
without the workplace being guided by a fence, miter gauge, or other aids. Gum A sticky,sap-based residue from wood products. Heel Alignment of the blade to the fence. Kerr The material removed by the blade in a through cut orthe slot produced by the blade in a non-through or part{al cut. Kickback - Craftsman 21805 | Operation Manual - Page 10
10 in. Blade Tilt O° - 45 ° Net Weight Without Leg Stand 43 Ibs. Net Weight Wlth Leg Stand 53 Ibs. Rating 120 V,60 Hz, AC only Input 15 Amperes No Load Speed 5,000/min, Cutting Depth at 0 3 in. Cutting Depth at 45 2-1/2 in. SPREADER OUTFEED SUPPORT SLIDING TABLE EXTENSION MITER GAUGE - Craftsman 21805 | Operation Manual - Page 11
cut, with positive stops at 90 ° and 45 _. MITER GAUGE GROOVBS - The miter gauge rides in the grooves on the saw table. MOTOR - The powerful industion motor, with capacitor start and V-belt drive, is housed in a sturdy steel base. OUTFEED SUPPORT - This table extension at the back of the tool gives - Craftsman 21805 | Operation Manual - Page 12
by an insert called the throat plate. The height of the blade is set with a handwheel on the front of the cabinet. To accommodate wide panels, the saw table has rails on each side. Detailed instructions are provided in the Operation section of this manual for the basic cuts: cross cuts. miter cuts - Craftsman 21805 | Operation Manual - Page 13
For maximum performance, it is recommended that you use the Craftsman 36-tooth, 10 in. carbide ¢ombination blade provided with your saw. Additional blade styles of the same high quality are available for specific operations such as ripping. Your local dealer can provide yeu with complete information - Craftsman 21805 | Operation Manual - Page 14
The following items are included with your table saw: It E M P L Fig. 1 A. Blade Guard with Spreader and Anti-Kickback Pawls 1 B. Miter Gauge 1 C. Rip Fence 1 D. Spider Leg Stand 1 I. Extension Table (left 1 J. Extension Table (right 1 K. Indicator (left 1 L, Indicator (right 1 - Craftsman 21805 | Operation Manual - Page 15
in this manual. • If any pans are damaged or missing, please call 1-800-932-3188 for assistance. _L WARNING" If any parts are the blade. Failure to heed this warning can result in serious personal injury. _k WARNING: To avoid serious personal injury, always make sure the table saw is securely - Craftsman 21805 | Operation Manual - Page 16
table saw base to the leg stand_ • Repeat with the other three locking knobs. SLOT LOCKING KNOB I I TO INSTALL BEVEL HANDLE ASSEMBLY See Figure 10. • Lift the end cap off the bevel handle assembly using a flat blade F_.10 Fig. 9 MOUNTING HOLES The table saw must be mounted to a firm supporting - Craftsman 21805 | Operation Manual - Page 17
the height/bevel adjusting handwheel oIockwise. Proper installation of the blade guard assembly means that the saw blade and spreader are in alignmentALWAYS align the spreader to the saw blade pdor to turning on the table saw. • Lower the blade, • Remove the wing screw and washer from beneath the - Craftsman 21805 | Operation Manual - Page 18
extension rods and must be inserted into the plastic brackets under the saw table first. • Locate the left sliding extension tabl- and slide the extension rode into the plastic brackets under the saw table, • Push the extension table until it rests against the saw table and is completely closed - Craftsman 21805 | Operation Manual - Page 19
The use of attachments or accessories not recommended can resurt in serious personal injury. _1, WARNING; Although many of the illustrations in this manual are shown with the blade guard removed for clarity, do not operate the saw without the blade guard unless specifically instructed to do so. 19 - Craftsman 21805 | Operation Manual - Page 20
listed below: • Straight line cutting operations such as cross cutting, ripping, mitering, beveling, and compound cutting • Dado or molding cuts with optional accessories II Cabinet making and woodworking NOTE=This table saw is designed to cut wood and wood composition products only. BASIC OPERATION - Craftsman 21805 | Operation Manual - Page 21
miter cut. CUTTING TIPS Bade and rabbet cuts are non-through cuts which can be either rip cuts or cross cuts. Carefully read and understand all sections of this operator's manual before attempting any operation. _, WARNING: Do not use blades provide proper support for the wood as it comes out of the - Craftsman 21805 | Operation Manual - Page 22
rip fence, Place the workpiece against the fence and over the saw blade area, Adjust the featherboard to apply resistance to the workpiece just forward of the blade. Attach a C-clamp to secure the featherboard to the edge of the saw table. _k WARNING: DO not locate the featherboard to the rear of - Craftsman 21805 | Operation Manual - Page 23
lock lever to the left. Fig, 23 TO ADJUST THE BEVEL INDICATOR See Figure 24. If the bevel indicator is not at zero when the saw blade is at 90 °, adjust the indicator by loosening the screw and setting it at 0_ on the bevel scale. Retighten the screw. ANGLED - Craftsman 21805 | Operation Manual - Page 24
right or left. • Loosen the lock knob, • With the miter gauge in the miter gauge slot. rotate the gauge until the desired angle is reached on the scale. • Retighten the lock knob. BLADE SCALE INDICATOR 2irl. MARK RIP FENCE SAW TABLE REARLIP MITER_ GAUGE_ 24 RIP SCALE FRONT RAIL LOCKING LEVER - Craftsman 21805 | Operation Manual - Page 25
pushing the lever back towards the saw base. TO USE THE OUTFEED SUPPORT See Figure 29. The outfeed Support slides to give the operator additional support for cutting long workpieces. • With the table saw in the OFF position, stand behind the saw. • Grasp the outfesd support with both hands and pull - Craftsman 21805 | Operation Manual - Page 26
handwheel and under the saw table in the front of the saw. Loosen the screws. • If the back of the blade was too far from the miter gauge groove, place a block of wood on the left side of the blade and push it into the blade until the blade is parallel to the miter gauge groove. Retighten the screws - Craftsman 21805 | Operation Manual - Page 27
, • Set the blade to the correct depth for the workpiecs, • Set the miter gauge to O° and tighten the lock knob. PLACELEFTHANDON WORKPIECEANO MITERGAUGEHERE CROSSCUT SWITCH,KEY ,,_I__ SWITCHIN LOCKEDPOSITION Fig. 34 • Place a support (the same height as saw table) behLnd the saw for the cut - Craftsman 21805 | Operation Manual - Page 28
by lifting the locking handle. • Set the miter gauge to the desired angle and tighten the lock knob. • Place a support (the same height as saw table) behind the saw for the cut work. • Make sure the wood is clear of the blade before turning on the saw. • Let the blade build up to full speed before - Craftsman 21805 | Operation Manual - Page 29
on the miter gauge and feed the workpiece into the blade. • When the cut is made, turn the saw off. Wait for the blade to come to a complete stop before removing the workpiece. MITERGAUGE STRAIGHT BEVELCROSSCUT BLADE ANGLED • Remove the sliding miter table and move the accessory table to the - Craftsman 21805 | Operation Manual - Page 30
flat on the table with the edge flush against the miter gauge. Let the blade build up to full speed before feeding the workplece into the blade. • Advance the workpiece and the miter gauge toward the blade. Keep the werkpiece flush against the miter gauge. Push the miter gauge and workplace toward - Craftsman 21805 | Operation Manual - Page 31
the blade guard assembly is installed and working properly to avoid poseible serious injury, • Place a support the same height as the top of the saw table behind the saw for the cut work. Add supportsto the sides as needed. • Depending on the shape of the panel, use the rip fence or miter gauge. If - Craftsman 21805 | Operation Manual - Page 32
, insert the throat plate, then securely tighten the throat p_atescrew. BLADE GUARD REMOVED NON-THROUGHCUT MAKING A DADO CUT See Figure 43. An optional dadc throat plate (part number 0121010317) is required for this procedure. Do r_otuse blades rated less than the speed of this tool. This saw is - Craftsman 21805 | Operation Manual - Page 33
and made. BLADE ARBORSHAFT BLADE WASHER BLADE NUT Fig. 45 To replace the blade with an accessory blade, follow the instructions provided with the accessory. To install a standard blade: • Place the new blade on the arbor shaft (the teeth must point down toward the front of the saw to work - Craftsman 21805 | Operation Manual - Page 34
47- 48. The angle settings of your saw have been set at the factory and, unless damaged in shipping, should not require setting during assembly. After extensive use, it may need to be checked. • Raise the blade and the blade guard. • If the blade is not perfectly vertical (O_),loosen the adjustment - Craftsman 21805 | Operation Manual - Page 35
the miter gauge base, • If the rod is not square, loosen the knob, adjustthe rod. and tighten the knob. • Adjust the 0 ° stop screw until it rests against the stop pin. • Adjust the plus and minus 45° stop screws using a45 ° triangle and the steps above. TO CHECK THE ALIGNMENT TO THE BLADE See - Craftsman 21805 | Operation Manual - Page 36
A A WARNING: When servicing, use only identical replacement parts. Use of any other parts may create a hazard or of the miter gauge. • Protect the blade by cleaning out saw dust from underneath the table and in the blade teeth. Use a resin solvent on the blade teeth. • Clean plastic parts only with - Craftsman 21805 | Operation Manual - Page 37
PROBLEM inn Excess vibration. Rip fence does not move smoothTy. Rip fence does not lock at rear. ii Cutting binds or burns work, Wood edges away from rip fence when ripping. CAUSE Blade is out of balance. Blade is damaged. Saw is not mounted securely. Work surface is uneven. Blade is warped, Rip - Craftsman 21805 | Operation Manual - Page 38
damaged. Adjust positive stops. Adjust the miter gauge, HHn • n Clean the gears or screw post. • •nn Plug in motor cord or wall cord. Replace circuit fuse. Reset circuit breake[ Have the cord or switch replaced at your Sears Service Center. Blade is dull or dirty. Blade is wrong type for cut being - Craftsman 21805 | Operation Manual - Page 39
CRAFTSMAN 10 in. TABLE SAW - MODEL NUMBER 315.218050 36 45 co I 34 C B D 2O SEE_OTE"A" _IL WARNING: Lmproperelectrical repair of the table saw can resu]t in damage to the drive system possibly causing electrical shock or electrocution, Any repairs requiring disassembly of your tool require - Craftsman 21805 | Operation Manual - Page 40
CRAFTSMAN 10 in. TABLE SAW - MODEL NO. 315.218050 -- = == The model number wirl be found on the data plate attached 1o the cabinet. Arways mention the model ] , number in all correspondence regarding your TABLE SAW or when ordering repair parts. J KEY PART NO. 1 2 3 4 5 6 7 8 9 10 11 12 13 14 - Craftsman 21805 | Operation Manual - Page 41
• CRAFTSMAN 10 in. TABLE SAW - MODEL NO. 315.218050 21 53 56 22 23 24 8 4 2 46" [J 42 43 51 31 36 \ 54 -37 G ,_L WARNING. Improper electrical repair of the table saw can result in damage to the dnve system possibly causing electrical shock or electrocution. Any repairs - Craftsman 21805 | Operation Manual - Page 42
54 55 56 57 CRAFTSMAN 10 in. TABLE SAW - MODEL NO. 315.218050 .... PART NUMBER DESCRIPTION QTY. 0121010919 ...1 Rubber Pad (NRB70 1 " Washer (M26 x 10 x 2T 1 • Screw (M4 x 7 mm 8 Gear Rack ...1 • Screw, Hex Hd. (M5 x 8 ram 2 Front Cabinet Support PEate 1 Cam ...2 " Washer (D4) ...2 * - Craftsman 21805 | Operation Manual - Page 43
CRAFTSMAN 10 in. TABLE SAW - MODEL NO, 315,218050 . FIGURE A: RIP FENCE ASSEMBLY 2 6 17 21 16 KEY PART Head (M5 x 15 ram 2 "Washer (M6.4 x 16 x 1,5 1 2 * Screw, Pan Head (M4 x 10 ram 1 Indicator ...1 Front Block ...1 Rod ...1 Clamping Handle ...1 Axle ...1 Ring Pad ...2 * Screw, Hex Hd, (M5 - Craftsman 21805 | Operation Manual - Page 44
CRAFTSMAN 10 in. TABLE SAW - MODEL NO. 315,218050 '" FIGURE B" MITER GAUGE 1 2 3 12 13 14 KEY NO. 1 2 3 4 G 6 7 8 9 10 11 12 13 14 k, PART NUMBER 0121010222 412012705 412080702 9121015330302 0131010109-126 0101010917 0101010918 0121010803 0131O10329 0121010204 410561004 411012704 410132734 - Craftsman 21805 | Operation Manual - Page 45
CRAFTSMAN 10 IN. TABLE SAW - MODEL NO. 315.218050 __ FIGURE C : RIGHT EXTENSION TABLE ASSEMBLY 1 5 4 3 2 KEY NO. 1 2 3 4 5 PART NUMBER 0121010103-126 410171710 0121010909 0121010910 9131015331302 A121013102 DESCRIPTION QTY. Right Auxiliary Table 1 "Self-Taplng Screw (10-24 x 1 in 4 - Craftsman 21805 | Operation Manual - Page 46
L CRAFTSMAN 10 in. TABLE SAW - MODEL NO. 315.218050 ' FIGURE E: OUTFEED SUPPORT ASSEMBLY 1 2 KEY NO. 1 2 3 4 PART NUMBER 410551701 0121010308-58 0121o10911 0121010217 A121013901 =m 3 4 DESCRIPTION QTY. Screw w/Flat Washer. Pan Hd. (1/4-20 x 1/2 in 2 Outfeed Support ...1 Rod ...2 PLug...2 - Craftsman 21805 | Operation Manual - Page 47
IN.TABLESAW- MODELNO.315,218050 FIGUREG=LEGSTANDASSEMBLY 14 KEY NO. 1 2 3 4 5 6 7 8 9 10 11 12 13 14 15 16 PART ...1 Leg Tube ...3 Nylon Nut (M5) ...20 Leg Adaptor ...4 End Plug ...3 *Screw (M4 x 10) ...1 Ring ...1 Screw ...20 Linkage ...8 "Carriage Bolt (M12 x 75 ram 1 Front Level Adjusting Knob - Craftsman 21805 | Operation Manual - Page 48
replacement parts, accessories and owner's manuals that you need to do-it-yourself. For Sears professional installation service en fran_ais: I"800-LE-FOYER _ (1-800-533-6937) www.sears .ca i:::::_ .... ::_,_" .:_= . ,,, r,_'* i¸ !:!:_ ® Registered Traderr=_ I _ Trademark / == Service
-
 1
1 -
 2
2 -
 3
3 -
 4
4 -
 5
5 -
 6
6 -
 7
7 -
8
-
9
-
10
-
11
-
12
-
13
-
14
-
15
-
16
-
17
-
18
-
19
-
20
-
21
-
22
-
23
-
24
-
25
-
26
-
27
-
28
-
29
-
30
-
31
-
32
-
33
-
34
-
35
-
36
-
37
-
38
-
39
-
40
-
41
-
42
-
43
-
44
-
45
-
46
-
47
-
48
 |
 |

OPERATOR'S
MANUAL
10 in. TABLE
SAW
Model
No.
315.21
8050
_lJ
WARNING:
To
reduce
the risk of injury, the
user
must
reed end understand
the operator's
manual
before
using
this
product.
Customer
Help Line: 1-800-932-3188
Sears,
Roebuck
and
Co.,
3333
Beverly
Rd.,
Hoffman
Estates,
IL 60179
USA
Visit the Craftsman
web
page: www,sears.com/craftsman
983000-695
8-23-05
Save
this
manual
for
future
reference