Craftsman 536.270320 Operation Manual
Craftsman 536.270320 - 13.5 HP 30 in. Deck Manual
 |
View all Craftsman 536.270320 manuals
Add to My Manuals
Save this manual to your list of manuals |
Craftsman 536.270320 manual content summary:
- Craftsman 536.270320 | Operation Manual - Page 1
Operator's Manual I CRRFTSM FIN°I Mid-Engine Rider 13.5 HP. Electric Start 30" Mower / Mulcher Hydrostatic Drive Model536.270320 CAUTION: Before using this product, read this manual and follow all of its Safety Rules and Operating Instructions. . _a,et_ • Operation • Maintenance • Parts Manual del - Craftsman 536.270320 | Operation Manual - Page 2
TABLE OF CONTENTS WARRANTY 2 MAINTENANCE 22 PRODUCT SPECIFICATIONS 3 SERVICE AND ADJUSTMENT 28 SAFETY RULES 4 TROUBLESHOOTING CHART 36 PREPARATION 7 SLOPE GUIDE 39 OPERATION 10 REPAIR PARTS 40 [ This warranty gives you specific legal rights, and you may also have - Craftsman 536.270320 | Operation Manual - Page 3
the"SafetRy ules". Craftsman Mid-Engine Rider Record in the space below the serial number and the date of purchase of this unit. The model number and serial number are found on a decal attached to the unit. Model Number: 536.270320 Serial Number: PRODUCT SPECIFICATIONS Engine 13.5 HP. Bore - Craftsman 536.270320 | Operation Manual - Page 4
bagger or the mower guard in place. 8. Slow down before turning. 9. Never leave a machine unattended with the engine running. Always turn off the blade(s), set the parking brake, stop the engine and remove the key before dismounting. 10. Turn off power to attachment Instruction Book. or wheel Guide - Craftsman 536.270320 | Operation Manual - Page 5
. b. Do not crank engine with spark plug removed. c. If fuel spills, wait until it evaporates before starting engine. d. Do not start if there is LP or natural gas leakage in the area. 3. Keep all nuts and bolts, especially the blade attachment nuts tight. Frequently check the blade(s) for wear or - Craftsman 536.270320 | Operation Manual - Page 6
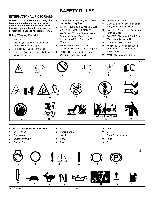
's Manual fore Blade, 13 DANGER: Disconnect Spark Plug Wire Before Servicing Unit. 14 WARNING: Hot Surface, 15 WARNING: Use Caution When Connecting Or Disconnecting Accessories, 16 WARNING: Crushed Fingers. 2 3 II.". Ab o 7 8 6 10 11 12 13 14 Control And Operating 1 Engine Start 2 Engine - Craftsman 536.270320 | Operation Manual - Page 7
. for your mower. All any parts or material NOTE: In this instruction book, left and right describe the loca- tion of a part from the viewpoint of someone sitting in the operator's seat. _b WnaAnRceNINtoGt:heBemfoorweerd, orienmg oavney thperepwairreatiforonm otrhemasipnaterk- plug. HOW TO - Craftsman 536.270320 | Operation Manual - Page 8
secure in the UP position with the seat support rod. 2. Check the top and the side of the battery for the location of the battery date (Figure 1). 3. If the battery is put into service before the battery date, the battery cables can be attached without charging the battery. See "How To Install The - Craftsman 536.270320 | Operation Manual - Page 9
of this instruction book. IMPORTANT! BEFORE YOU START MOWING Check the engine oil, Fill the fuel tank with gasoline, Check the air pressure of the tires. Check the level of the mower housing, Make sure the battery cables are attached. Make sure the wire is attached to the spark plug, MS-3620MA - Craftsman 536.270320 | Operation Manual - Page 10
your lawn mower and while mowing. We recom- mend standard safety glasses or a wide vision safety mask worn over the spectacles or standard safety glasses, available at Sears Stores. LOCATION OF CONTROLS ATTACHMENT CLUTCH: Use the attachment clutch to start and stop the rotation of the blade(s) and - Craftsman 536.270320 | Operation Manual - Page 11
pull-behind attachment or trailer. We have included a slope guide in this engine should not start, if the engine starts, the switch is defective and must be replaced. 2. Check the clutch/brake switch. Sit in the seat. Move the attachment position will allow the mower blade(s) to continue to rotate - Craftsman 536.270320 | Operation Manual - Page 12
normal operation and when using a grass bagger, move the throttle control to the FAST position. For maximum charging of the battery and for a cooler running engine, operate the engine in the FAST position. 3. For transport and to tow pull behind attachments, control the ground speed with the speed - Craftsman 536.270320 | Operation Manual - Page 13
OPERATION HOW TO USE THE ATTACHMENT CLUTCH Use the attachment clutch to engage the blade (Figure 7). 1. Before you start the engine, make sure the attachment clutch is in the DISENGAGE position. 2. To rotate the blade, move the attachment clutch forward to lock the blade in the ENGAGE position. Note - Craftsman 536.270320 | Operation Manual - Page 14
the unit, use the automatic drive disconnect to release the transmission. (Figure 9) 1. The engine must be off. 2. The automatic drive disconnect is located under the left side of the seat deck next to the hydrostatic transaxle. 3. To release the transmission and push the unit, pull and twist the - Craftsman 536.270320 | Operation Manual - Page 15
easy to operate. The drive system has a a clutch/brake pedal on the left side (see Figure 10) and a speed control lever on the right side ( the desired speed. HOW TO CHANGE DIRECTIONS / DRIVE IN REVERSE 1. Always disengage blades and look down and behind before and while backing up. 2. Move the - Craftsman 536.270320 | Operation Manual - Page 16
positions of the speed control lever. Always operate the engine with the throttle control in the FAST position. FUNCTION TRANSPORT THE UNIT To transport the unit, follow the steps below. 1. Move the attachment clutch to the DISENGAGE position. 2. Raise the lift lever to the highest position. - Craftsman 536.270320 | Operation Manual - Page 17
the mulcher cover. 3. Secure the side discharge attachment with the fasteners. 4. To mulch, remove the side discharge attachment and mount the mulcher cover to the mower housing with the fasteners. Mulcher Cover Wingnut Washer Side Discharge Attachment MS-3620MA 17 Washer Wingnut Figure 15 - Craftsman 536.270320 | Operation Manual - Page 18
problems with system before storage of 30 days 1. Drain the fuel tank. the fuel system, empty or longer as follows. the fue! 2. Start the engine. Let the engine run until the fuel lines and the carburetor are empty. 3. After storage, make sure you use fresh fue!. See the storage instructions - Craftsman 536.270320 | Operation Manual - Page 19
position. 1. Make sure the spark plug wire is connected to the spark plug. 2. Move the speed contro! lever to the neutral (N) position (see Figure 16). 3. Make sure the attachment clutch is in the DISENGAGE tion. If the blade rotation control is not in the DISENGAGE tion, the engine wi!! not start - Craftsman 536.270320 | Operation Manual - Page 20
dmisacthearriagle taotwtaacrhdmetnhte in the down position. If the side discharge attachment is damaged, replace the with an original equipment part from a Sears Service Center. IMPORTANT: When you operate with the mower housing, always operate with the throttle control in the FAST - Craftsman 536.270320 | Operation Manual - Page 21
and add oil if necessary. 3. If the engine will not start, first make sure the wire is attached to the spark plug. 4. Make sure all the belts are inside all the belt guides. See the instructions on how to remove and install the motion drive and mower drive belts. 5. Before you make an inspection - Craftsman 536.270320 | Operation Manual - Page 22
Muffler, Check I N E Air Cleaner Cartridge Filter, Service MAINTENANCE TABLE EACH USE FIRST 2 HOURS EVERY 8 HOURS EVERY 25 HOURS EVERY 50 HOURS EVERY 100 BEFORE HOURS STORAGE I , I _ I , , I _ I I I I I I I _/* Spark Plug, Replace Change oil every 25 hours when operating - Craftsman 536.270320 | Operation Manual - Page 23
nut tight. If the blade hits an object, stop the engine. Disconnect the wire to the spark plug. See if the blade is bent or damaged. Check the blade adapter for damage. Before you operate the unit, replace damaged parts with original equipment parts. See a Sears Service Center in your area. Every - Craftsman 536.270320 | Operation Manual - Page 24
BATTERY To charge or clean the battery, remove the battery from the unit as follows. WARNING: To prevent sparks, disconnect the black battery the battery acid can cause an explosion. 1. Before you charge the battery, remove the battery. 2. To charge the battery, use a 12 volt battery charger. - Craftsman 536.270320 | Operation Manual - Page 25
WHERE TO LUBRICATE MAINTENANCE _,,%_ Apply grease with a brush to the areas shown. Lubricate the areas shown with engine oi!. NOTE: Apply grease to the steering gear assembly, CAUTION: If the unit is operated in dry areas that have sand, use a dry graphite spray - Craftsman 536.270320 | Operation Manual - Page 26
replace with a new muffler. A worn muffler is a fire hazard and can damage the engine. If you mount a spark arrester to the muffler, also check the spark arrester when you check the muffler. If the spark arrester is worn or damaged, replace it with a new spark arrester purchased from a Sears Service - Craftsman 536.270320 | Operation Manual - Page 27
MAINTENANCE HOW TO SERVICE THE AIR FILTER NOTE: Never run the engine with the air filters (air cleaner cartridge, pre-cleaner) removed. The air filters will help protect the engine against wear. For the correct replacement filter, see the parts list for the engine. CAUTION: Do not use pressurized - Craftsman 536.270320 | Operation Manual - Page 28
. Attach the spark plug wire to the spark plug. 12. Mow for a short distance. If the height of cut is not level, repeat the above steps. CAUTION: Do not operate with the mower housing in the LEVEL ADJUSTMENT position. If you operate in the LEVEL ADJUSTMENT position, the mower housing and blades can - Craftsman 536.270320 | Operation Manual - Page 29
To Replace The Mower Drive Belt". If replacing the belt does not correct the problem, take the unit to a Sears or other qualified service center. Move the attachment clutch to the DISENGAGE position, Stop the engine. Disconnect the wire from the spark plug. 7. Check the operation of the blade brake - Craftsman 536.270320 | Operation Manual - Page 30
the extension spring to the blade control rod. See illustration "E". 8. Move the attachment clutch to the ENGAGE position. Make sure the mower drive belt is inside all the belt guides and is also below the spacer tube. 9. Make sure the mower housing is level. See the instructions on "How To Level - Craftsman 536.270320 | Operation Manual - Page 31
SERVICE AND ADJUSTMENT HOW TO REPLACE THE MOTION DRIVE BELTS ENGINE DRIVE BELT REMOVAL 1. Remove the mower housing. See the instructions on "How To Remove The Mower Housing". 2. Set the rear hitch on a 10 to 12 inch block. The block must be high enough to raise the rear whee! of off the - Craftsman 536.270320 | Operation Manual - Page 32
SERVICE AND ADJUSTMENT HOW TO REPLACE THE MOWER DRIVE BELT 1. Remove the mower housing. See the instructions on "How To Remove The Mower Housing". 2. Pull the belt retainer away from the idler pulley and remove the mower drive belt (Figure 39). 3. Pull the brake pad away from the jackshaft pulley - Craftsman 536.270320 | Operation Manual - Page 33
the spark plug. Start the engine and test drive the unit. Make sure that the clutch does not slip or that the belt does not slip. 5. If the belt still slips after the clutch has been adjusted, then the motion drive belt is worn or damaged and must be replaced. See "How To Replace The - Craftsman 536.270320 | Operation Manual - Page 34
keep the front wheel on the spindle. 3. If your model has hub caps, install the hub cape. Make sure the washers hold the hub caps in place. Valve Stem Spindle Front Wheel Figure 42 Rear Wheel 1. Install the washers Figure 43. and spacer onto the axle as shown in Rear Wheel >f'_'_ Square Key - Craftsman 536.270320 | Operation Manual - Page 35
fuse and replace with a 15 amp. 15 amp THE ENGINE 1. Clean the dirt and grass from the engine. 2. Change the oil. See the instructions, "How To Change The Oil". 3. Check the air screen. See the instructions, "How To Clean The Cooling System". 4. Check the spark plug. See the instructions, "How To - Craftsman 536.270320 | Operation Manual - Page 36
the spark plug. 6. Adjust the carburetor. PROBLEM: The engine will not turn over. 5. Check for a damaged belt or damaged pulley. Replace the damaged parts. PROBLEM: The grass does not discharge 1. Stop the engine. Clean the mower housing. 2. Raise the height of cut. 3. Replace or sharpen the blade - Craftsman 536.270320 | Operation Manual - Page 37
Carburetor and internal parts the diagnostic work is performed at an Authorized Sears Service Dealer. For emissions warranty service contact your nearest Authorized Sears Service Dealer as listed in the "Yellow Pages" under "Engines, Gasoline," "Gasoline Engines," "Lawn Mowers," or similar category - Craftsman 536.270320 | Operation Manual - Page 38
for 125 hours of actual Intermediate: Engine is certified to be emission engine running time. compliant for 250 hours of actual Extended: Engine is certified to be emission compliant for 500 hours of actual engine running time. For example, a typical walk-behind lawn mower is used 20 to 25 hours - Craftsman 536.270320 | Operation Manual - Page 39
GUID I'_ D_,-,-- Fold this page along dotted line indicated below. Hold page before you so that its left edge DEGREES Operate a riding mower up or down slopes, never across the face of slopes. On a riding mower to determine if a slope is safe to mow: (1) disengage the blade(s), (2) put the - Craftsman 536.270320 | Operation Manual - Page 40
MODEL 536.270320 45 48 1 REPAIR PARTS CHASSIS & HOOD 49 / / / 10 11 J 12 19 11 \ 16 16 24 \ J 15 47 50 ,/ 26 25 / 20 51 8 22 52 30 52 34 31 32 33 \ 13 44 j13 36 / 37 39 MS-3620MA 40 - Craftsman 536.270320 | Operation Manual - Page 41
MODEL 536.270320 Key No. Part Battery Nut, Flange Plate, Rear Screw Plate, Hitch Cover Screw Tray, Battery Nut, Flange Washer Pin, Hair Cap, Fuel Tank Tank, Fuel Screw Screw Screw Rod, Hood Prop MS-3620MA REPAIR PARTS CHASSIS & HOOD Key No. Part 45 1401073 Trim, Left 46 1401072 Trim, - Craftsman 536.270320 | Operation Manual - Page 42
MODEL 536.270320 43 1 \ REPAIR PARTS STEERING 38 \ \ \ 32 o C..P / 35 23 9 34 / // / / /" / 30 / /\ 12 13 // 14 15 17 \ \ \ \ \ \ 29 39 "_ MS-3620MA 42 14 \ 21 - Craftsman 536.270320 | Operation Manual - Page 43
Key No. Part No. 22 011x23 Description E-Ring, Retainer 23 030x35 Pin, Cotter 24 094131 Retainer, Spring 25 1401046E701 Rack, Steering 26 17x201 Washer 27 1401376E701 Bracket, Axle Front 28 17x157 Washer 29 1401250E701 Axle & Spindle Assembly 30 1401059E701 Bracket, Support 31 - Craftsman 536.270320 | Operation Manual - Page 44
MODEL 536.270320 / 1 42 48 \ REPAIR PARTS MOTION DRIVE 6 2 2 76 25 24 95 28 19 16 11 / 58 26 33 31 13 96 96 X 42 36 93 / 51 \ 14 _ 71 \ 25 89 \ - Craftsman 536.270320 | Operation Manual - Page 45
MODEL 536.270320 Key No. Part No. Description 1 1401380 2 091309 3 1401358 4 092378 5 01x134 6 1401375 9 1401357 Engine Engine 64 1401301 E701 Bracket, Left Rear Hanger 65 1401302E701 094618 93 17xl 74 Transaxle Key, Square Spacer, Rear Wheel Washer Wheel & Tire Assembly Tire - Craftsman 536.270320 | Operation Manual - Page 46
MODEL 536.270320 REPAIR PARTS MOWER HOUSING SUSPENSION 1 13 14 8 7 10 9 11 31 / 26 \ 27 MS-3620MA 19 20 46 17 30 - Craftsman 536.270320 | Operation Manual - Page 47
MODEL 536.270320 REPAIR PARTS MOWER HOUSING SUSPENSION Key No. Part No. 1 094497 Description Grip, Lift Lever 2 1401117 Lever, Lift 11 1401030E701 Bracket, Front Hanger Pivot 12 1401118 Pin, Front Hanger 13 26x249 Screw 14 1401129E701 Arm Assembly, Lifter Key No. Part No. 15 17x206 - Craftsman 536.270320 | Operation Manual - Page 48
MODEL 536.270320 REPAIR PARTS MOWER HOUSING 30 \ 31 7 /J 9 15 10 50 32 29 34 45 13 _ 49 3 4 © 5 7 8 9 / 63 12 24 I 6_._. I 26 27 28 29 9/ !/ 13 9 14 /16 9 6 \ 19 18 \\ 21 16 43 20 8 22 / 55 MS-3620MA 45 52 54 51 65-- / 58 59 60 -- 61 6 /56 48 47 45 62 - Craftsman 536.270320 | Operation Manual - Page 49
MODEL 536.270320 REPAIR PARTS MOWER HOUSING Key No. Part No. Description 1 37x111 Belt, Blade Left Torsion 21 166x42 Spring, Right Torsion 22 1401095 Tube, Spacer 23 1401037E701 Bracket, Deck 24 1401040E701 Hanger, Front Housing, Blade 48 1401106E701 Hinge, Mulching Cover 49 - Craftsman 536.270320 | Operation Manual - Page 50
MODEL 536.270320 30NVEIO 8 MO7"I3A Q3EI ::IONV_IO REPAIR PARTS ELECTRICAL SYSTEM 0 UJ _m MS-3620MA / Q3EI 50 - Craftsman 536.270320 | Operation Manual - Page 51
MODEL 536.270320 REPAIR PARTS ELECTRICAL SYSTEM Key No. Pa_ No. 250x146 Description Harness, Chassis Wire 1001995 Mounting Locknut 24x37 26x229 Cable, Battery Ground Screw, Ground Cable 021075 690604 002x82 014x79 024273 26x270 Battery Cover, Battery Terminal Bolt, Carriage Wingnut Switch, - Craftsman 536.270320 | Operation Manual - Page 52
Seat Deck -Left Side) 1 Warning Load Limit (Rear) 1 Auto Disconnect 1 Craftsman Logo (Seat Deck Front) 2 Parking Brake Symbol (Console) 1 Throttle Control (Console) 1 Blade Engage / Disengage (Seat Deck -Right Side) 1 Steering Wheel 1 Starting Instructions 1 13.5 HP I/C B&S (Engine - Craftsman 536.270320 | Operation Manual - Page 53
MS-3620MA 53 - Craftsman 536.270320 | Operation Manual - Page 54
BRIGGS & STRATTON ENGINE MODEL 21B807-0326-E1 lO_ 584 1264 1263 11 306 307 718 d::p 847 I n 52,3_1 842/(]_ 552_ 691 524 O 15_ 20O 22_ REPAIR PARTS MS-3620MA 54 - Craftsman 536.270320 | Operation Manual - Page 55
Side) Seal-Oil (Magneto Side) Sump-Engine Gasket-Breather Screw (Breather Assembly) Tube-Breather Gasket-Crankcase Plug-Oil Drain Crankshaft Seal-Oil (PTO Side) Screw (Crankcase Cover/ Sump) Key-Flywheel REE NO. PART NO. DESCRIPTION RER NO. PART NO. DESCRIPTION 25 792305 Piston Assembly - Craftsman 536.270320 | Operation Manual - Page 56
BRIGGS & STRATTON ENGINE MODEL 21B807-0326-E1 13J 635 383 1022 1034 238 ® 35 617 O REPAIR PARTS Y1026 f 45_ 36+ 1022 102[ 654 _) 53S¢_ 51t_ 54_ 1095 VALVE GASKET SET 1022 868_ 51 MS-3620MA 3_ 358 ENGINE GASKET SET 20 O 51 _ _J 524 O 6170 691 @ 842 O 868 _) 883 1022_ 1266_ 1266A O 56 - Craftsman 536.270320 | Operation Manual - Page 57
ENGINE MODEL 21B807-0326-E1 REPAIR PARTS REF. NO. PART Plug-Spark Gasket Set-Engine Wrench-Spark Plug Seal-Dipstick Tube SeaI-O Ring (Intake Manifold) Boot-Spark Nut Plug (Carburetor) Seal-Governor Stud-Rocker Shaft Arm RER NO. PART Intake) Arm-Rocker Guide-Push Rod Gasket Set-Valve SeaI - Craftsman 536.270320 | Operation Manual - Page 58
BRIGGS & STRATTON ENGINE MODEL 21B807-0326-E1 13o©_ 634 95e 987 [ 98[ 1091 51 106 ) _ 276@ 104 q:_ 127 _ 947 137J_ o REPAIR PARTS 616_ 404 # 614 I_ 121 CARBURETOR OVERHAUL KIT lO5 51% 95 104 g 276@ 1270 6170 634 977 CARBURETOR GASKET SET 987(_ 1266_ 1266A0 222 _ 21_2o9 _ # - Craftsman 536.270320 | Operation Manual - Page 59
BRIGGS & STRATTON ENGINE MODEL 21B807-0326-E1 REPAIR PARTS RER NO. PART NO. DESCRIPTION 51Oe_*692137 94 695425 Carburetor Plug-Welch Valve-Throttle Kit-Throttle Shaft Float-Carburetor Tube-Fuel Transfer Gasket-Float Bowl Kit-Choke Shaft RER NO. PART NO. DESCRIPTION REF. NO. PART NO. - Craftsman 536.270320 | Operation Manual - Page 60
BRIGGS & STRATTON ENGINE MODEL 21B807-0326-E1 1040 643 967 445 1267_ 968 zO 66_ REPAIR PARTS { 1036 EMISSION LABEL { 74 37 1044 _ 1070 1005 _ G 783 O 729_ 697 801 1061;644_ 803_ 310 1 311 579 _ 797_ 802 MS-3620MA 334 60 47Z__j 877 1119 - Craftsman 536.270320 | Operation Manual - Page 61
BRIGGS & STRATTON ENGINE MODEL 21B807-0326-E1 REPAIR PARTS REF. NO. PART NO. DESCRIPTION 23 37 73 74 78 Nut (Brush Retainer) Cap-Drive Cap-End Housing-Starter Terminal-Spark Plug Wire/Connector-Alterna- tor REF. NO. PART NO. DESCRIPTION 878 967 968 1005 1036 1040 1044 691237 697292 - Craftsman 536.270320 | Operation Manual - Page 62
PEERLESS HYDRO MODEL 2000-2000-022 REPAIR PARTS 209A / 103' / I / 110 108 MS-3620MA 22 62 -200A - Craftsman 536.270320 | Operation Manual - Page 63
MODEL 2000-2000-022 Key No. 1A 3A 5 6 9 13 14 15 17 22 23 25 26 28 29 31 36 37 38 41 42 42A 44A 44B 45 47 48 49 56 65 67 70 79 Part Axle 17,219" Axle 12.062" Spur Gear 10T (steel) Spur Gear 34T (steel) Wash er. 7501D ,56W Brake Shaft Spacer .625 Spring REPAIR PARTS Oil Fill Plug Oil Seal - Craftsman 536.270320 | Operation Manual - Page 64
Battery Charge, 24 Clean, 24 Belt Motion Drive, 31 Mower Drive, 32 Blade, 23 Clutch, 33 Filter, Air, 27 Fuse, 35 Install, Wheels, 34 Lubrication, 25 Mower Housing Clean, 35 Install, 30 Level, 28 Remove, 30 Muffler, 26 Spark Plug, 27 Maintenance Chart, 22 Motion Drive Belt Adjust, 33 Replace - Craftsman 536.270320 | Operation Manual - Page 65
detras del asiento Modelo 536.270320 PRECAUCION: Antes de usar este producto, lea este manual y siga todas las reglas DE LOCALIZACION DE AVERiAS ........ 101 72 GUiA DE INCLINACION 106 de servicios autorizado de Craftsman. Para saber cu&l le queda m&s cerca, Ilame al 1-800-4-MY-HOME_.L - Craftsman 536.270320 | Operation Manual - Page 66
del asiento de Craftsman. Su unidad ha leer y guardar este manual. Las instrucciones le permitiran la etiqueta fijada a la unidad. Nt_mero de modelo: 536,270320 Admision Escape 0,003-0,005 pulg. (0,08-0,13 mm potencia nominal cuando sea usado en una parte del equipo acoplado (potencia real "en - Craftsman 536.270320 | Operation Manual - Page 67
este motor. Este motor esta garanti- Searsparaobteneurnparachisppaasraeltubodeescape. zado Onicamente de acuerdo alas garantias del producto y de Enalgunolsugaresla, sleyeslocalersequiereenlusodeuna emisiones indicadas en otras secciones de este manual. MS-3620MA 67 - Craftsman 536.270320 | Operation Manual - Page 68
No gire el volante bruscamente. ceder. Tenga cuidado al retro- d. Utilice contrapesos o pesos en las ruedas cuando esto sea recomendado en el Manual de Instrucciones. 7. Est6 atento a la direcci6n de descarga de la hierba cortada. No dirija la descarga hacia personas o hacia lugares donde pudiera - Craftsman 536.270320 | Operation Manual - Page 69
REGLAS DE SEGURIDAD RECOMENDACIONES IV. REMOLQUES 1. En las cuestas, corte el c6sped verticalmente (hacia arriba y hacia abajo), y no en linea perpendicular (de lado a lade). 2. Quite todo obstAculo tal como piedras, ramas, etc. 3. Tenga cuidado con los hoyos, baches o resaltos. El terreno - Craftsman 536.270320 | Operation Manual - Page 70
estAn sujetos a desgaste, da_o y deterioro, factores que pueden exponer las partes m6viles o permitir que objetos sean lanzados por la maquina. AI guardar la segOn sea necesario. 11. Antes de comenzar a revisar cualquier parte de la unidad, espere a que todo movimiento se detenga. RESPONSABILIDAD - Craftsman 536.270320 | Operation Manual - Page 71
del Usuario antes de operar esta m&quina. 7 ADVERTENCIA: Objetos pueden set lanzados de la m&quina. Opere a una distancia segura de otras personas. Lea el Manual del Usuario antes de operar esta m&quina. 8 ADVERTENCIA: No use esta m&quina en cuestas de m_.s de 15 grades. 9 PELIGRO: Mantenga a otras - Craftsman 536.270320 | Operation Manual - Page 72
hasta que haya acabado de montar la unidad. NOTA. En este manual de instrucciones, el lado derecho o izquierdo describe la ubicacion de una las dos lengOetas de separaci6n superior de la caja de cart6n. ubicadas en la parte 2. Jale la cinta de separaci6n per mas de doce pulgadas a la vez. - Craftsman 536.270320 | Operation Manual - Page 73
le indicara si necesita cambiar la bateria. 1. Levante el soporte del asiento y fije!o en la posici6n LEVANTADA con la vari!la del soporte. 2. Revise la parte superior y los lados de la bateria (1) para la ubicaci6n de la fecha de la bateria. (Figura 45). 3. Si la bateria va a entrar en servicio - Craftsman 536.270320 | Operation Manual - Page 74
. Si el carter no esta cortando de forma pareja, lea las instrucciones en "C6mo nivelar el carter" en la secci6n de Servicio y Ajuste de este manual de instrucciones. ilMPORTANTE! ANTES DE EMPEZAR A CORTAR EL ClaSPED Revise el aceite del motor, Llene el tanque de gasolina, Revise la presion de aire - Craftsman 536.270320 | Operation Manual - Page 75
OPERAClON Pedal de embrague y freno Palanca de freno de estacionamiento Palanca de elevaci6n Interruptor con Ilave de encendido Embrague de aditamento Palanca de control de velocidad Palanca de control de aceleraci6n Figura 47 La operacion de cualquier cortadora de cesped puede causar el - Craftsman 536.270320 | Operation Manual - Page 76
Ileve. No operar la unidad en cuestas con una inclinaci6n mayor que 10 grados cuando este utilizando un aditamento o remolque de arrastre. En este manual hemos incluido una guia de cuestas para ayudarle a determinar la inclinaci6n de la cuesta en la que estarA operando su unidad. Nunca permita que - Craftsman 536.270320 | Operation Manual - Page 77
OPERAClON COMO DETENER LA UNIDAD 1, Pise a fondo el pedal de embrague y freno para detener la unidad. Mantenga su pie en el pedal. 2. Mueva el control de rotaci6n de la cuchi!la a la posici6n DESEMBRAGUE. 3. Mueva la palanca de control de velocidad a la posici6n NEUTRO. 4. Enganche el freno de - Craftsman 536.270320 | Operation Manual - Page 78
OPERAClON COMO USAR EL EMBRAGUE DE ADITAMENTO El embrague de aditamento8 se usa para enganchar la cuchi!la (Figura 51 ). _b 1. Antes de arrancar el motor, aseg0rese de que el embrague de aditamentos est6 en la posici6n DESEMBRAGUE 2. Para que la cuchilla empiece a girar, mueva el embrague de - Craftsman 536.270320 | Operation Manual - Page 79
OPERAClON COMO DESCONECTAR LA TRANSMISION Para empujar la unidad, use la desconexi6n automatica para desactivar la transmisi6n. (Figura 53) 1. El motor debe estar apagado. 2. La deecenexi6n automatica de la transmiei6n est,_ ubicada debajo del lado izquierdo de la plataforma del asiento, junto al - Craftsman 536.270320 | Operation Manual - Page 80
OPERACION COMO USAR LA PALANCA DE CONTROL DE VELOCIDADES La transmisi6n hidrostatica es muy facil de operar. El sistema de transmisi6n tiene un pedal de embrague / freno en el lade izquierdo (Figura 54) y una palanca de control de velocidades y direcci6n en e! lado derecho (Figura 55). Pedal de - Craftsman 536.270320 | Operation Manual - Page 81
OPERAClON POSICIONES DE LA PALANCA DE CONTROL DE VELOCIDADES La velocidad de avance se controla por la posici6n de la palanca de control de velocidade8. El cuadro siguiente incluye las funciones junto con las posiciones correspondientes de la palanca de control de velocidade8. Siem,pre opere el - Craftsman 536.270320 | Operation Manual - Page 82
OPERAClON COMO DE INSTALAR EL ADITAMENTO PARA DESCARGA LATERAL _b AdeDeVcEoRnTecEtNeCIAel. cabPlaeradeevlaitabrujqiau. eEel lemmbortaogruearrdaenlquade,i- tamento tiene que eetar en la poeicion de DESEM- BRAGUE. La cubierta para trituradora le permite triturar la hierba para obtener un corte - Craftsman 536.270320 | Operation Manual - Page 83
sea necesario. 1. Aseg6rese de que la unidad est_ nivelada. NOTA: No revise el nivel del aceite cuando el motor este en marcha. 2. Limpie las partes alrededor de la varilla indicadora del nivel de aceite. Retire la varilla indicadora. Limpie el aceite de la varilla. 3. Inserte la varilla indicadora - Craftsman 536.270320 | Operation Manual - Page 84
OPERAClON CARBURADOR Los ajustes de fAbrica para el carburador son para la mayoria de las condiciones. Si e! motor funciona bajo las condiciones siguientes, es posible que e! carburador requiera un ajuste. Para servicio consulte a un agente autorizado de Sears. 1. El motor lJene una p6rdida de - Craftsman 536.270320 | Operation Manual - Page 85
ni baje cuestas que son demasiado empinadas para poder retroceder en una li- ncueaestrae.ctCa.onsNuulntecalam"Ganueiaje plaarauncuideasdtasa" traalvfeinsalddeeuensate manual para obtener informaci6n sobre c6mo evaluar las cuestas. 1, Antes de manejar cuesta arriba o cuesta abajo, mueva la palanca de - Craftsman 536.270320 | Operation Manual - Page 86
. El c6sped mojado es muy dificil de cortar. Ponga la altura del carter de la cortadora de c6sped para que se corte solamente la tercera parte superior del c6sped. Si el cesped es demasiado alto, ponga la altura del carter a la altura maxima. Entonces, baje el carter para un segundo corte - Craftsman 536.270320 | Operation Manual - Page 87
, ddeeelacobnuejicatepareal prevenir que el motor ee encienda por accidente. Maintenance, replacement, or repair of the emission control devices and systems may be performed by any Sears or other qualified service dealer. El mantenimiento regular mejorara el rendimiento y extenderA la vida - Craftsman 536.270320 | Operation Manual - Page 88
la bujia. Revise la cuchi!la por si estuviera doblada o da_ada. Revise el adaptador de la cuchilla por si estuviera dar_ado. Reemplace cualquier parte dar_ada con repuestos originales, antes de operar la unidad. Si necesita asistencia t&cnica, vaya a un Centro de Servicio Sears cercano a usted. Cada - Craftsman 536.270320 | Operation Manual - Page 89
MANTENIMIENTO BATERiA LIBRE DE MANTENIMIENTO COMO DESMONTAR LA BATERiA Si necesita cambiar o limpiar la bateria, desm6ntela de la siguiente manera. ADVERTENCIA. Para evitar que ee produzcan chiepae, deeconecte el cable negro de la bateria del borne _1= nAeDgVaEtiRvToEN(-C) IAan. - Craftsman 536.270320 | Operation Manual - Page 90
DONDE LUBRICAR MANTENIMIENTO _,.%_ Lubrique con aceite de motor las &reas mostra- _ dAdaapssl.i.que grasa con un cepillo alas Areas mostra- NOTA: Aplique grasa al ensamblado del mecanismo de direccion. PRECAUCION: Si la unidad se opera en areas aridas donde hay arena, utilice polvo de grafito - Craftsman 536.270320 | Operation Manual - Page 91
MANTENIMIENTO MOTOR COMO REVISAR EL ACEITE NOTA: No revise el nivel del aceite mientras que el motor este en marcha. 1. Aseg_rese de que la unidad este nivelada. 2. Limpie e! Area alrededor de la varilla indicadora de nivel de aceite (Figura 68). Retire la varilla indicadora. Limpie el aceite de la - Craftsman 536.270320 | Operation Manual - Page 92
Para el tamar_o de un filtro de repuesto, consulte la lista de partes para el motor. PRECAUCION: No use aire presurizado ni solventes para limpie la base del filtro de aire. 5. Instale un filtro de aire, si es parte del equipo, y un portafiltro nuevos firmemente en la base para el filtro de aire. - Craftsman 536.270320 | Operation Manual - Page 93
SERVICIO Y AJUSTE COMO NIVELAR EL CARTER Para que la cuchilla corte con facilidad y el c_sped tenga mejor aspecto es necesario que el carter de! cortac6sped est6 nivelado. ADVERTENCIA. Antes de inspeccionar, ajustar o re- _hlL psearahraclea upnairdaade,vidtaerscqouneecetle meoltocar - Craftsman 536.270320 | Operation Manual - Page 94
SERVICIO Y AJUSTE COMO AJUSTAR EL EMBRAGUEDE ADITAMENTO _ quDeVEfuRnTcEioNnCaIrA:corErel cetammberangteue padrea aedviittaamr elenstoionetise.ne En condiciones normales de use, no necesitara ajustar el embrague de aditamento. Sin embargo, si el cortacesped empieza a funcionar mal y la calidad - Craftsman 536.270320 | Operation Manual - Page 95
SERVICIO Y AJUSTE COMO DESMONTAR EL CARTER 1. Mueva el embrague de aditamento a la posici6n de DESEMBRAGUE. 2, Coloque la palanca de elevaci6n en la posici6n de ajuste de nive! (Figura 76). NOTA: La palanca de elevacion tiene que estar bloqueada en la posici6n de AJUSTE DE NIVEL. 3, Quite - Craftsman 536.270320 | Operation Manual - Page 96
las tuercae de cada lado de la transmision (Figura 81). No saque las tuercae. Afl6jelas hasta que las tuercae queden en la parte de arriba de los pernoe. 7. Deslice la parte posterior de la correa de propulsion por encima de la polea motriz y que salga pot delante de la transmisi6n. Luego, jale - Craftsman 536.270320 | Operation Manual - Page 97
SERVICIO Y AJUSTE COMO CAMBIAR LA CORREA DE TRANSMISION DEL CORTACESPED 1. Desmonte el carter del cortacesped. Consulte "C6mo desmontar el carter". 2. Separe el retenedor de la correa de la polea tensora y saque la correa de transmisi6n (Figura 83). 3. Separe la zapata del freno de la polea del eje - Craftsman 536.270320 | Operation Manual - Page 98
SERVICIO Y AJUSTE COMO AJUSTAR LA PALANCA DE CONTROL DE VELOCIDADES ADVERTENCIA: Antes de inspeccionar, ajustar o re- _b psearahraclea upnairdaade,vidtaerscqouneecetlemeoltocrabalreradnequlae bupjoiat . aEcsctio- dente. 5. Si la unidad se movia lentamente hacia atras cuando la palan- ca de - Craftsman 536.270320 | Operation Manual - Page 99
Rueda delantera 1. El vastago de valvula tiene que quedar hacia la parte exterior del tractor. Deslice la rueda delantera en la mangiJeta. (Figura la Ilave (Figura 87). 3, El vaetago de valvula tiene que quedar en la parte exterior del tractor. Alinee la ranura de la rueda traeera con la Ilave cua- - Craftsman 536.270320 | Operation Manual - Page 100
correas en la secci6n de Servicio y Ajuste. 2. AsegLirese que todas las tuercas, los pernos, y los tornillos esten bien apretados. Inspeccione las partes m6viles para ver si estan da_adas, si tienen grietas, o si estan gastadas. Reemplacelas segOn sea necesario. CARTER DEL CORTACESPED 1. Limpie el - Craftsman 536.270320 | Operation Manual - Page 101
TABLA DE LOCALIZACION DE AVERIAS PROBLEMA: El motor no se enciende. 1. Siga los pasos de "C6mo encender el motor" en este manual. 2. Electric-Start Models: Limpie los bornes de la baterfa. Apriete los ca- bles. 3. Drene el tanque de combustible. Limpie la linea de combustible. Reemplace el filtro - Craftsman 536.270320 | Operation Manual - Page 102
piezas de repuesto y la mano de obra. Los motores pequeflos para todo terreno estAn cubier[os per la garantia respecto a los defectos de las partes del sistema de control de emisiones durante un periodo de dos afios, seg_n las provisiones establecidas abajo. Si alguna de las pares bajo cobertura de - Craftsman 536.270320 | Operation Manual - Page 103
Bus clue el PerJodo de Durabilidad de Emisiones y la Informacion del Indice de Aire Pertinentes en su Etiqueta de Emisiones del Motor Los motores que son certificados porque cumplen con las Normas de Emisiones Etapa 2 de la Junta de Recursos Ambientales de California (CARB) deben mostrar la - Craftsman 536.270320 | Operation Manual - Page 104
MS-3620MA 104 - Craftsman 536.270320 | Operation Manual - Page 105
MS-3620MA 105 - Craftsman 536.270320 | Operation Manual - Page 106
del doblez con la inclinacion de la cuesta. °lloo i..... ..... I _--_ "z I _" O"B_'E""L"O-_.0..RE,, . _;. :.._ ...._...Lj_._pu . eeeoe Opere una cortadora de cesped manual en sentido diagonal a traves de las cuestas, o nunca cuesta arriba o cuesta abajo. o3 10 GRADOS 15 Manejela - Craftsman 536.270320 | Operation Manual - Page 107
A Aceite Cambiar, 91 Revisar, 83, 91 Tipo, 83 Aditamento para descarga lateral, Instalar, 82 Aditamentos, 76 Ajustes CArter, Nivelar, 93 Embrague, 98 Alineaci6n de ruedas, 100 AItura de corte Ajustar, 93 Cambiar, 78 B Bateria Almacenamiento, 100 Cargar, 89 Desmontar, 89 Instalar, 73 Limpiar, - Craftsman 536.270320 | Operation Manual - Page 108
Your Home For repair-in your home-of all major brand appliances, lawn and garden equipment, or heating and cooling systems, no maker who made it, no matter who sold it! For the replacement pa_s, accessories and owner's manuals that you need to do-ibyourself. For Sears professional installation of
-
 1
1 -
 2
2 -
 3
3 -
 4
4 -
 5
5 -
 6
6 -
 7
7 -
8
-
9
-
10
-
11
-
12
-
13
-
14
-
15
-
16
-
17
-
18
-
19
-
20
-
21
-
22
-
23
-
24
-
25
-
26
-
27
-
28
-
29
-
30
-
31
-
32
-
33
-
34
-
35
-
36
-
37
-
38
-
39
-
40
-
41
-
42
-
43
-
44
-
45
-
46
-
47
-
48
-
49
-
50
-
51
-
52
-
53
-
54
-
55
-
56
-
57
-
58
-
59
-
60
-
61
-
62
-
63
-
64
-
65
-
66
-
67
-
68
-
69
-
70
-
71
-
72
-
73
-
74
-
75
-
76
-
77
-
78
-
79
-
80
-
81
-
82
-
83
-
84
-
85
-
86
-
87
-
88
-
89
-
90
-
91
-
92
-
93
-
94
-
95
-
96
-
97
-
98
-
99
-
100
-
101
-
102
-
103
-
104
-
105
-
106
-
107
-
108
 |
 |

Operator's
Manual
I
CRRFTSMFIN°I
.
_a,et_
•
Operation
Mid-Engine
Rider
•
Maintenance
•
Parts
13.5 HP. Electric
Start
30" Mower
/
Mulcher
Hydrostatic
Drive
Model536.270320
CAUTION:
Before using this
product,
read this manual
and follow
all of its Safety
Rules and Operating
Instructions.
Manual del usario
(pagina
65)
Tractor cortacesped
con motor
situado
detras del asiento
Arranque
electrico
de
13,5
caballos
Cortacesped
/
trituradora
de 76 cm.
Transmision
hidrostatica
Modelo 536.270320
PRECAUCION:
Antes
de usar este
producto,
lea este manual
y siga
todas
las reglas
de seguridad
e
instrucciones
de operaci6n.
•
Seguridad
•
Operacion
•
Mantenimiento
•
Piezas
Sears,
Roebuck
and Co., Hoffman
Estates,
IL. 60179
U.S.A.
MS-3620MA
03/06
www.sears.com/craftsman