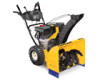
Cub Cadet 526 SWE 524 WE Operator's Manual
Cub Cadet 526 SWE Manual
 |
View all Cub Cadet 526 SWE manuals
Add to My Manuals
Save this manual to your list of manuals |
Cub Cadet 526 SWE manual content summary:
- Cub Cadet 526 SWE | 524 WE Operator's Manual - Page 1
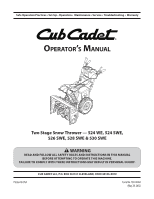
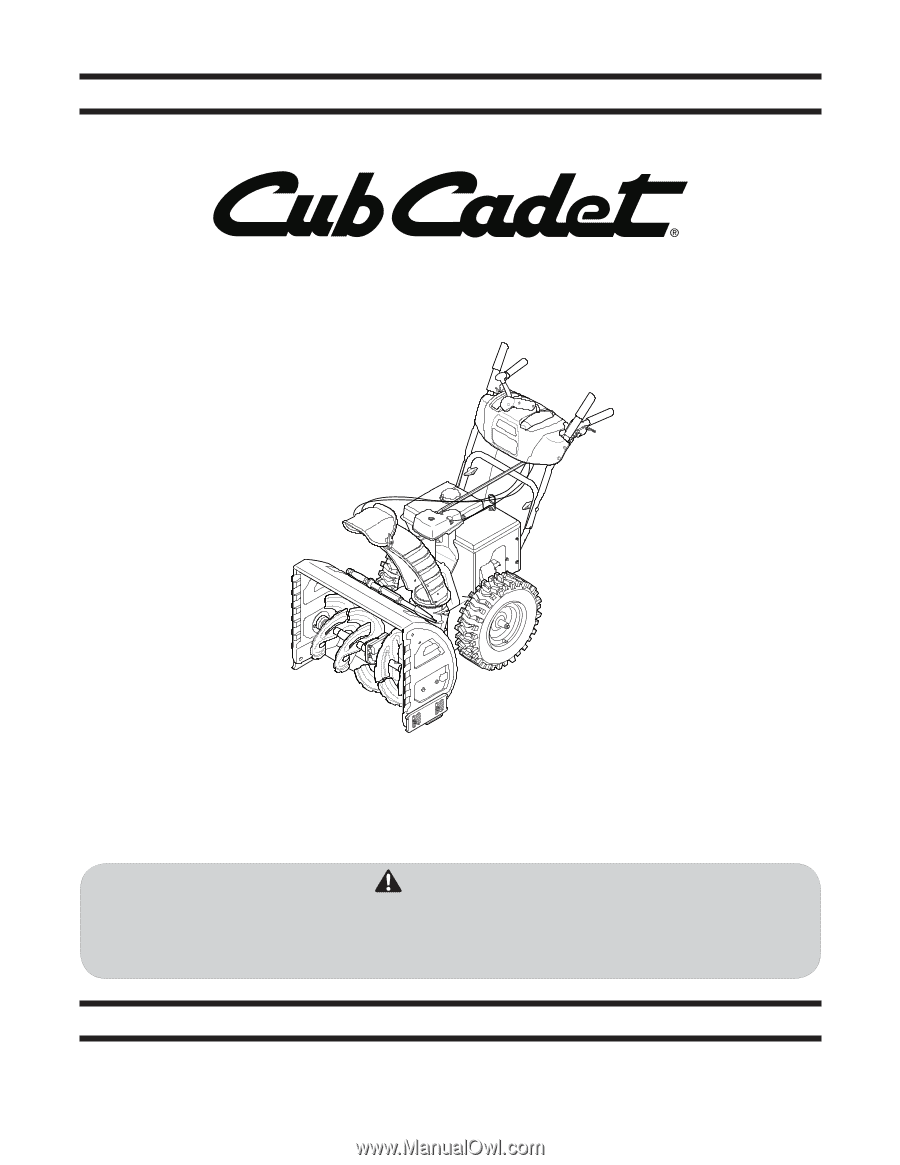
Operation Practices • Set-Up • Operation • Maintenance • Service • Troubleshooting • Warranty Operator's Manual Two Stage Snow Thrower - 524 WE, 524 SWE, 526 SWE, 528 SWE & 530 SWE WARNING READ AND FOLLOW ALL SAFETY RULES AND INSTRUCTIONS IN THIS MANUAL BEFORE ATTEMPTING TO OPERATE THIS MACHINE - Cub Cadet 526 SWE | 524 WE Operator's Manual - Page 2
To The Owner 1 Thank You Thank you for purchasing a Cub Cadet Snow Thrower. It was carefully engineered to provide excellent performance when properly operated and maintained. Please read this entire manual prior to operating the equipment. It instructs you how to safely and easily set up, operate - Cub Cadet 526 SWE | 524 WE Operator's Manual - Page 3
or death. Training 1. Read, understand, and follow all instructions on the machine and in the manual(s) before attempting to assemble and operate. Keep this manual in a safe place for future and regular reference and for ordering replacement parts. 2. Be familiar with all controls and their proper - Cub Cadet 526 SWE | 524 WE Operator's Manual - Page 4
neck to provide space for fuel expansion. 12. Do not overload machine capacity by attempting to clear g. Replace gasoline cap and tighten securely. snow at too fast of a rate. h. If gasoline is spilled, wipe it off the engine and equipment. Move machine to another area. Wait 5 minutes before - Cub Cadet 526 SWE | 524 WE Operator's Manual - Page 5
Do not change the engine governor setting or over-speed the engine. The governor controls the maximum safe operating speed of the engine. 5. Snow thrower shave plates and skid shoes are subject to wear and damage. For your safety protection, frequently check all components and replace with original - Cub Cadet 526 SWE | 524 WE Operator's Manual - Page 6
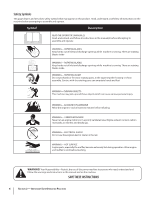
HOT SURFACE Engine parts, especially the muffler, become extremely hot during operation. Allow engine and muffler to cool before touching. WARNING! Your Responsibility-Restrict the use of this power machine to persons who read, understand and follow the warnings and instructions in this manual and - Cub Cadet 526 SWE | 524 WE Operator's Manual - Page 7
3 Contents of Carton • One Snow Thrower • One Chute Control Rod • One Snow Thrower Operator's Manual • Two Replacement Auger Shear Pins • One Chute Assembly • One Product Registration Card • One Engine Operator's Manual Assembly Remove all loose parts before assembling. Handle Assembly 1. Place - Cub Cadet 526 SWE | 524 WE Operator's Manual - Page 8
2. Insert chute control rod into chute control head. Push rod as far into chute control head as possible, keeping the holes in the rod pointing upward. See Figure 3-4. 4. Squeeze the trigger on the joystick and rotate the chute by hand to face forward. The holes in the chute control input will be - Cub Cadet 526 SWE | 524 WE Operator's Manual - Page 9
guide on top of the engine. See Figure 3-10. NOTE: For smoothest operation, the cables should all be to the left of the hex rod. NOTE: Models Set-Up Shear Pins A pair of replacement auger shear pins and bow tie cotter pins are included with your snow thrower. Store them in your snow thrower's dash - Cub Cadet 526 SWE | 524 WE Operator's Manual - Page 10
skid shoes higher on the auger housing. • Use a middle or lower position when the area to be cleared is uneven, such as a gravel driveway NOTE: If you choose to operate the snow thrower on a gravel surface, keep the skid shoes in position for maximum clearance between the ground and the shave plate - Cub Cadet 526 SWE | 524 WE Operator's Manual - Page 11
the auger cable bracket. See Figure 3-14. Chute Assembly NOTE: Upper chutes on models with 4-Way Chute Control are also controlled by the Chute Directional Control. See Figure 4-1. The distance snow is thrown can be adjusted by changing the angle of the chute assembly. To do so: 1. Stop the engine - Cub Cadet 526 SWE | 524 WE Operator's Manual - Page 12
Control Auger Control Heated Grips † Steering Trigger Control † Augers Skid Shoe † If Equipped Figure 4-1 Snow thrower controls the faster. When engaged, the augers rotate and draw snow into the auger housing. Chute Assembly Snow drawn into the auger housing is discharged out the chute - Cub Cadet 526 SWE | 524 WE Operator's Manual - Page 13
with the drive control, the operator can release the auger control (on the left handle) and the augers will remain engaged. Release both controls to stop the augers and wheel drive. Note: Always release the drive control before changing speeds. Failure to do so will result in increased - Cub Cadet 526 SWE | 524 WE Operator's Manual - Page 14
start the snow thrower's engine. While standing in the operator's position (behind the snow thrower), engage the auger control for a few seconds to clear any remaining snow and ice from the chute assembly. The chute directional control is located on the left side of the dash panel. • To change the - Cub Cadet 526 SWE | 524 WE Operator's Manual - Page 15
: NEVER replace the auger shear pins with anything other than OEM Part No.738-04124A replacement shear pins. Any damage to the auger gearbox or other components as a result of failing to do so will NOT be covered by your snow thrower's warranty. WARNING! Always turn off the snow thrower's engine and - Cub Cadet 526 SWE | 524 WE Operator's Manual - Page 16
Engine Refer to the Engine Operator's Manual. Tire Pressure Refer to Assembly and Set-up section for information regarding tire pressure. Shave Plate and Skid Shoes The shave plate and skid shoes on the bottom of the snow thrower are subject to wear. They should be checked periodically and replaced - Cub Cadet 526 SWE | 524 WE Operator's Manual - Page 17
the hex shaft, be careful not to get any oil on the aluminum drive plate or the rubber friction wheel. Doing so will hinder the snow thrower's drive Auger Control Refer to the Assembly and Set-up section for instructions on adjusting the auger control cable. system. Wipe off any excess or spilled - Cub Cadet 526 SWE | 524 WE Operator's Manual - Page 18
the snow thrower forward. The wheels should instructed earlier in this section. 2. Store in a clean, dry area. 3. If storing the snow thrower in an unventilated area, rustproof the machine using a light oil or silicone to coat the snow thrower. 4. Clean the exterior of the engine and the snow thrower - Cub Cadet 526 SWE | 524 WE Operator's Manual - Page 19
Service 7 Belt Replacement Auger Belt To remove and replace your snow thrower's auger belt, proceed as follows: 4. Carefully pivot the snow thrower up and forward so that it rests on the auger housing. 5. Remove the frame cover from the underside of the snow thrower by removing the self-tapping - Cub Cadet 526 SWE | 524 WE Operator's Manual - Page 20
7. Remove the belt from around the auger pulley, and slip the Drive Belt belt between the support bracket and the auger pulley. See Figure 7-5. To remove and replace your snow thrower's drive belt, proceed as follows: 1. To prevent spillage, remove all fuel from tank by running engine until it - Cub Cadet 526 SWE | 524 WE Operator's Manual - Page 21
to replace the snow thrower's friction wheel rubber. See your authorized service dealer to have the friction wheel rubber replaced or phone Customer Support as instructed on page 2 for information on ordering a Service Manual. To inspect the friction wheel, proceed as follows: 1. Allow the engine to - Cub Cadet 526 SWE | 524 WE Operator's Manual - Page 22
snow thrower replacing the friction wheel, perform the Drive Control test on page 18 in the Maintenance and Adjustments section. Figure 7-10 NOTE: If you're replacing the friction wheel assembly as a whole, discard the worn part and slide the new part onto the hex shaft. 22 Section 7 - Service - Cub Cadet 526 SWE | 524 WE Operator's Manual - Page 23
to Service section 3. Replace friction wheel. Refer to Service section. 1. Chute assembly clogged. 2. Foreign object lodged in auger. 3. Auger control cable in need of adjustment. 4. Auger belt loose or damaged. 5. Shear pin(s) sheared. 1. Stop engine immediately and disconnect spark plug wire - Cub Cadet 526 SWE | 524 WE Operator's Manual - Page 24
Drive Belt (526 SWE, 528 SWE & 530 SWE) 684-04159 684-04153 935-04054 925-1629 Friction Wheel Assembly (524 SWE, 526 SWE, 528 SWE, 530 SWE) Friction Wheel Assembly (524 WE) Friction Wheel Rubber (all models) Lamp, 12V 738-04124A 714-04040 Shear Pin, 1.50 Bow-tie Cotter Pin 731-06931 Skid Shoe - Cub Cadet 526 SWE | 524 WE Operator's Manual - Page 25
10 The following attachments and accessories are available for your Cub Cadet snow thrower. See your Cub Cadet dealer or the retailer from which you purchased your snow thrower for information regarding price and availability. Model Number Description 929-0071A Extension Cord, 110V 753 - Cub Cadet 526 SWE | 524 WE Operator's Manual - Page 26
Notes 11 26 - Cub Cadet 526 SWE | 524 WE Operator's Manual - Page 27
Section 11 - Notes 27 - Cub Cadet 526 SWE | 524 WE Operator's Manual - Page 28
) days from the date of purchase. Normal wear parts include, but are not limited to items such as: belts, skid shoes, shave plates and tires. HOW TO OBTAIN SERVICE: Warranty service is available, WITH PROOF OF PURCHASE, through your local authorized service dealer. To locate the dealer in your area
-
 1
1 -
 2
2 -
 3
3 -
 4
4 -
 5
5 -
 6
6 -
 7
7 -
8
-
9
-
10
-
11
-
12
-
13
-
14
-
15
-
16
-
17
-
18
-
19
-
20
-
21
-
22
-
23
-
24
-
25
-
26
-
27
-
28
 |
 |
CUB CADET LLC, P.O. BOX 361131 CLEVELAND, OHIO 44136-0019
Printed In USA
O
PERATOR
’
S
M
ANUAL
Safe Operation Practices • Set-Up • Operation •
Maintenance • Service • Troubleshooting •
Warranty
WARNING
READ AND FOLLOW ALL SAFETY RULES AND INSTRUCTIONS IN THIS MANUAL
BEFORE ATTEMPTING TO OPERATE THIS MACHINE.
FAILURE TO COMPLY WITH THESE INSTRUCTIONS MAY RESULT IN PERSONAL INJURY.
Form No. 769-08161
(May 29, 2012)
Two Stage Snow Thrower — 524 WE, 524 SWE,
526 SWE, 528 SWE & 530 SWE