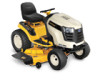
Cub Cadet GTX 1054 GTX 1054 Operator's Manual
Cub Cadet GTX 1054 Manual
 |
View all Cub Cadet GTX 1054 manuals
Add to My Manuals
Save this manual to your list of manuals |
Cub Cadet GTX 1054 manual content summary:
- Cub Cadet GTX 1054 | GTX 1054 Operator's Manual - Page 1
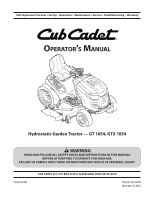
Safe Operation Practices • Set-Up • Operation • Maintenance • Service • Troubleshooting • Warranty Operator's Manual Hydrostatic Garden Tractor - GT 1054, GTX 1054 WARNING READ AND FOLLOW ALL SAFETY RULES AND INSTRUCTIONS IN THIS MANUAL BEFORE ATTEMPTING TO OPERATE THIS MACHINE. FAILURE TO COMPLY - Cub Cadet GTX 1054 | GTX 1054 Operator's Manual - Page 2
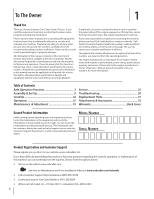
To The Owner 1 Thank You Thank you for purchasing a Cub Cadet Garden Tractor. It was carefully engineered to provide excellent performance when properly operated and maintained. Please read this entire manual prior to operating the equipment. It instructs you how to safely and easily set up, - Cub Cadet GTX 1054 | GTX 1054 Operator's Manual - Page 3
and jewelry can be instruction. caught in movable parts. Never operate this machine in 5. To help avoid blade contact or a thrown object injury, bare feet or sandals. keep bystanders, helpers, children and pets at least 75 feet 10. Be aware of the mower and attachment discharge direction from - Cub Cadet GTX 1054 | GTX 1054 Operator's Manual - Page 4
up on the mower deck presenting a potential fire 3. Do not try to stabilize the machine by putting your foot on hazard. the ground. 27. Use only accessories and attachments approved for this 4. machine by the machine manufacturer. Read, understand 5. and follow all instructions provided with - Cub Cadet GTX 1054 | GTX 1054 Operator's Manual - Page 5
instructions and safe operation practices in this manual and on the machine and should be trained and supervised by an adult. Towing 1. Tow only with a machine that has a hitch designed for towing. Do not attach debris build-up. Clean up oil or fuel spillage and remove any fuel soaked debris. l. - Cub Cadet GTX 1054 | GTX 1054 Operator's Manual - Page 6
to complete stop within approximately (5) five seconds after operating the blade disengagement control. If the blades do not stop within the this time frame, your machine should be serviced professionally by an authorized Cub Cadet Service Dealer. Do not modify engine To avoid serious injury or - Cub Cadet GTX 1054 | GTX 1054 Operator's Manual - Page 7
MANUAL(S) Read, understand, and follow all instructions in the manual(s) before attempting to assemble and operate DANGER- ROTATING BLADES over accident. WARNING- ROTATING BLADES Do not put hands or feet near rotating parts or under the cutting deck. Contact with the blade(s) can amputate hands and - Cub Cadet GTX 1054 | GTX 1054 Operator's Manual - Page 8
15° dashed line USE THIS SLOPE GAUGE TO DETERMINE IF A SLOPE IS TOO STEEP FOR SAFE OPERATION! To check the slope, proceed as follows: 1. Remove this page and fold along the dashed line. 2. Locate a vertical object on or behind the slope (e.g. a pole, building, fence, tree, etc.) 3. Align either side - Cub Cadet GTX 1054 | GTX 1054 Operator's Manual - Page 9
3 Contents of Crate • One Garden Tractor • One Garden Tractor Operator's Manual • One Oil Drain Tube • One Engine Operator's Manual • One Deck Wash Hose Coupler • One Product Registration Card Tractor Set-Up Moving The Tractor Manually Your tractor's transmission is equipped with a hydrostatic - Cub Cadet GTX 1054 | GTX 1054 Operator's Manual - Page 10
to help protect it from corrosion. NOTE: If the battery is put into service after the date shown on top/side of battery, charge the battery as instructed in the Maintenance section your Operator's Manual prior to operating the tractor. Checking Tire Pressure WARNING! Never exceed the maximum - Cub Cadet GTX 1054 | GTX 1054 Operator's Manual - Page 11
top off the tank. See Figure 3-6. NOTE: Your tractor is shipped with oil in the engine. However, you MUST check the oil level before operating. CAUTION: Always check the engine oil level before each use as instructed in the Engine Owner's Manual. Add oil as necessary. Failure to do so may result in - Cub Cadet GTX 1054 | GTX 1054 Operator's Manual - Page 12
Lever Electric PTO Knob Drive Pedal Reverse Pedal Deck Lift Lever Storage Bin Cup Holder Figure 4-1 Garden Tractor controls and features are illustrated in Figure 4-1 and described on the following pages. WARNING! Read and follow all safety rules and instructions in this manual, including the - Cub Cadet GTX 1054 | GTX 1054 Operator's Manual - Page 13
the engine is running, the battery is in need of a charge or the engine's charging system is not generating sufficient amperage. Charge the battery as instructed in the Service section of this manual or have the charging system checked by your Cub Cadet dealer. Section 4 - Controls and Features - Cub Cadet GTX 1054 | GTX 1054 Operator's Manual - Page 14
to the cutting deck or other (separately available) attachments. NOTE: The PTO/Blade Engage knob must be in the disengaged (OFF) position when starting the engine. Parking Brake/Cruise Control Lever Fuel Level Indicator The Fuel Level Indicator is located on the left side of the tractor's dash and - Cub Cadet GTX 1054 | GTX 1054 Operator's Manual - Page 15
BLADE(S), ENGAGE PARKING BRAKE, SHUT OFF AND REMOVE KEY. READ OPERATOR'S MANUAL Safety Interlock Switches This tractor is equipped with a safety interlock system for the protection of the operator. If the interlock system should ever malfunction, do not operate the tractor. Contact your Cub Cadet - Cub Cadet GTX 1054 | GTX 1054 Operator's Manual - Page 16
leave the seat of the tractor without first placing the PTO/Blade Engage knob in the disengaged (OFF) position and engaging the parking brake. If leaving the tractor unattended, also turn the engine off and remove the ignition key. Steering the Tractor On tractors equipped with power steering, when - Cub Cadet GTX 1054 | GTX 1054 Operator's Manual - Page 17
control lever downward and hold it in that position. 3. Remove your foot from the drive pedal. 4. Release pressure from the parking brake/cruise control lever After completing step 3, the drive pedal should remain in the down position and the tractor will maintain the same forward speed. If it doesn - Cub Cadet GTX 1054 | GTX 1054 Operator's Manual - Page 18
power to the cutting deck or other (separately available) attachments. To engage the PTO: 1. Move the throttle control lever to the FAST (rabbit) position. 2. Pull the PTO/Blade Engage knob outward into the engaged (ON) position. See Figure 5-3. NOTE: Always operate the tractor with the throttle - Cub Cadet GTX 1054 | GTX 1054 Operator's Manual - Page 19
and instructions. NOTE: Maintenance, repair, or replacement of the emission control devices and systems which are being done at owner's expense may be performed by any engine repair establishment or individual. Warranty repairs must be performed by a Cub Cadet Dealer. Changing the Engine Oil - Cub Cadet GTX 1054 | GTX 1054 Operator's Manual - Page 20
Cleaner Service the pre-cleaner and cartridge/air cleaner element as instructed in the Engine Owner's Manual. 1. Disengage the PTO (Blade Engage), set the parking brake and stop the engine. 2. Thread the hose coupler (packaged with your tractor's Operator's Manual) onto the end of your garden hose - Cub Cadet GTX 1054 | GTX 1054 Operator's Manual - Page 21
operation. Figure 6-3 Pivot Points & Linkage Lubricate all the pivot points on the drive system, parking brake and lift linkage at least once a season with light oil. Deck Wheels Each of the tractor deck's front gauge wheels is equipped with a grease fitting. Lubricate with a No. 2 multi-purpose - Cub Cadet GTX 1054 | GTX 1054 Operator's Manual - Page 22
heavy gloves when handling the blades. NOTE: Check the tractor's tire pressure before performing any deck leveling adjustments. Refer to Tires on page 28 for information regarding tire pressure. Leveling the Deck (Front To Rear) The front of the cutting deck is supported by a stabilizer bar that can - Cub Cadet GTX 1054 | GTX 1054 Operator's Manual - Page 23
open), the brake is in need of adjustment. See your Cub Cadet dealer to have the brake properly adjusted. Adjusting the Seat Refer to the Assembly & Set-Up section of this manual for seat adjustment instructions. WARNING! Before operating the tractor, make sure the seat is engaged in the seat-stop - Cub Cadet GTX 1054 | GTX 1054 Operator's Manual - Page 24
. If contacting the ground, or above 1⁄2" from the ground, adjust the rear rollers as follows: The deck roller assembly index bracket has five adjustment positions holes. 1. While supporting the roller assembly, remove click pin and withdraw the clevis pin from both the left and right roller index - Cub Cadet GTX 1054 | GTX 1054 Operator's Manual - Page 25
keeper rod to the right and down to remove. c. Remove the deck belt from around the tractor's electric PTO clutch. NOTE: If there is too much tension on the belt for it to be easily removed from the electric PTO clutch, carefully insert a 3⁄8" drive ratchet wrench (set to loosen) into the square - Cub Cadet GTX 1054 | GTX 1054 Operator's Manual - Page 26
loosened earlier. CAUTION: Failure to reinstall the belt keeper rod may result in serious damage to your tractor's PTO system. CAUTION: If the cutting edge of the blade has previously been sharpened, or if any metal separation is present, replace the blades with new ones. WARNING! A poorly balanced - Cub Cadet GTX 1054 | GTX 1054 Operator's Manual - Page 27
tire pressure could cause the cutting deck to mow unevenly. 5. Start the tractor (as instructed in the Operation section of this manual). 6. Set the tractor's parking brake before removing the jumper cables, in reverse order of connection. Charging WARNING! Batteries give off an explosive gas while - Cub Cadet GTX 1054 | GTX 1054 Operator's Manual - Page 28
the belt keeper rod may result in serious damage to your tractor's PTO system. Remount the belt guards removed earlier. Reinstall the deck making sure the belt remains routed around the pulleys as instructed. Idler Pulley Belt Cover Hex Washer Screw Figure 7-7 28 Section 7- Service Belt Keeper - Cub Cadet GTX 1054 | GTX 1054 Operator's Manual - Page 29
and belt until the belt is fully rolled into the PTO pulley. Changing the Transmission Drive Belt Several components must be removed and special tools used in order to change the tractor's transmission drive belt. See your Cub Cadet dealer to have the transmission drive belt replaced. Deck Idler - Cub Cadet GTX 1054 | GTX 1054 Operator's Manual - Page 30
Troubleshooting 8 Problem Engine fails to start Engine runs erratic Engine overheats Engine hesitates at high RPM Engine Idles rough Excessive vibration Uneven cut Cause 1. PTO/Blade Engage knob engaged. 2. Parking brake not engaged. 3. Spark plug wire(s) disconnected. 4. Throttle/choke control - Cub Cadet GTX 1054 | GTX 1054 Operator's Manual - Page 31
Kohler Oil Filter KH-25-050-22-S1 Kohler Fuel Filter 954-04083 Drive Belt (Mowing Deck) 942-0677B 2-in-1 Deck Blade 918-04608A Deck Spindle Phone (800) 965-4CUB to order replacement parts or a complete Parts Manual (have your full model number and serial number ready). Parts Manual downloads - Cub Cadet GTX 1054 | GTX 1054 Operator's Manual - Page 32
Deck Wheel 925-1707D Battery 951-12179B Fuel Tank Cap 946-04556 Throttle/Choke Control Cable 925-2054A Ignition Key 631-04070A Discharge Chute Assembly Phone (800) 965-4CUB to order replacement parts or a complete Parts Manual (have your full model number and serial number ready). Parts - Cub Cadet GTX 1054 | GTX 1054 Operator's Manual - Page 33
Attachments & Accessories 10 The following attachments and accessories are compatible for Cub Cadet GT 1054 and GTX 1054. See your Cub Cadet dealer or the retailer from which you purchased your tractor for information regarding price and availability. Model Number Description 190-841-191 - Cub Cadet GTX 1054 | GTX 1054 Operator's Manual - Page 34
equipment engine is defective, the part will be repaired or replaced by MTD CONSUMER GROUP INC. OWNER'S WARRANTY RESPONSIBILITIES: As the outdoor equipment engine owner, you are responsible for performance of the required maintenance listed in your owner's manual. MTD Consumer Group Inc recommends - Cub Cadet GTX 1054 | GTX 1054 Operator's Manual - Page 35
. MTD Consumer Group Inc will not be liable to warrant failures of warranted parts caused by the use of a non-exempted add-on or modified part. WARRANTED PARTS: The repair or replacement of any warranted part otherwise eligible for warranty coverage may be excluded from such warranty coverage if MTD - Cub Cadet GTX 1054 | GTX 1054 Operator's Manual - Page 36
disaster. Damage resulting from the installation or use of any part, accessory or attachment not approved by Cub Cadet for use with the product(s) covered by this manual will void your warranty as to any resulting damage. In addition, Cub Cadet may deny warranty coverage if the hour meter, or any
-
 1
1 -
 2
2 -
 3
3 -
 4
4 -
 5
5 -
 6
6 -
 7
7 -
8
-
9
-
10
-
11
-
12
-
13
-
14
-
15
-
16
-
17
-
18
-
19
-
20
-
21
-
22
-
23
-
24
-
25
-
26
-
27
-
28
-
29
-
30
-
31
-
32
-
33
-
34
-
35
-
36
 |
 |
CUB CADET LLC, P.O. BOX 361131 CLEVELAND, OHIO 44136-0019
Printed In USA
O
PERATOR
’
S
M
ANUAL
Safe Operation Practices • Set-Up • Operation •
Maintenance • Service • Troubleshooting •
Warranty
WARNING
READ AND FOLLOW ALL SAFETY RULES AND INSTRUCTIONS IN THIS MANUAL
BEFORE ATTEMPTING TO OPERATE THIS MACHINE.
FAILURE TO COMPLY WITH THESE INSTRUCTIONS MAY RESULT IN PERSONAL INJURY.
Form No. 769-08379
(December 18, 2012)
Hydrostatic Garden Tractor — GT 1054, GTX 1054