CyberPower CR42U11001 User Manual
CyberPower CR42U11001 Manual
 |
View all CyberPower CR42U11001 manuals
Add to My Manuals
Save this manual to your list of manuals |
CyberPower CR42U11001 manual content summary:
- CyberPower CR42U11001 | User Manual - Page 1
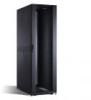
USER'S MANUAL Carbon™ Rack Enclosure CRxU1 Series SAVE THESE INSTRUCTIONS Please read this manual and follow the instructions for installation and use. Copyright © 2017 Cyber Power Systems, Inc. All rights reserved. K01-0000575-02 - CyberPower CR42U11001 | User Manual - Page 2
Table of Contents Safety Instructions 1 Part Identification 2 Enclosure Components 2 Hardware and Accessories 2 Enclosure Installation 3 Caution Labels 3 Move, Unpack and Place the Enclosure 4 Leveling the Enclosure 6 Stabilize the Enclosure 6 Grounding Management 6 - CyberPower CR42U11001 | User Manual - Page 3
Please read these instructions carefully before use. ● The enclosure is a heavy object. Use are only to be used to move the enclosure over short distances. Casters are not to be used to support the total installed weight of the equipment in the rack. Leveling feet should be lowered and secured such - CyberPower CR42U11001 | User Manual - Page 4
Rear Accessory Channels 6. Depth-adjustable Vertical Rack Angles 7. In-Row Rack Connection Brackets 8. Leveling Feet 9. Casters Hardware and Accessories 1 (Model CR42U11001 is shown) Retention Tab* Allen Wrench Key (2) M6 Phillips-Head Screw (50) M6 Cage Nut (50) 2 Cup Washer (50) *Quantity - CyberPower CR42U11001 | User Manual - Page 5
B Equipment Installation Caution C Stabilization HEAVY FIRST: Install heavier equipment at the bottom SECOND: Install equipment from bottom to top See manual for complete C instructions To reduce the risk of injury, install the stabilization brackets prior to final equipment installation. 3 - CyberPower CR42U11001 | User Manual - Page 6
to the final place of installation. Minimize the distance the enclosure will be manually moved. NOTE: Alternate method to move the enclosure is to use 4x M8 to the roof corners of the enclosure. Eye bolts should be rated to support at least 1000 lbs (450kg). 2. After moving the unit to the desired - CyberPower CR42U11001 | User Manual - Page 7
4. Make sure the leveling feet have been raised. If not, turn the leveling feet counterclockwise to raise them. Do not use the included casters to move the enclosure over long distances. CAUTION Always raise the leveling feet when using the casters to move the enclosure. If the leveling feet were - CyberPower CR42U11001 | User Manual - Page 8
This enclosure comes with 4 leveling feet installed. Turn the leveling feet clockwise to lower them to the floor. Ensure the leveling feet firmly support the enclosure while keeping it balanced and level. NOTE: Always lower the leveling feet on the enclosure after positioning it in it's final - CyberPower CR42U11001 | User Manual - Page 9
Enclosure Setup CAUTION Setup the following configuration options shown in this section before mounting equipment into the enclosure. Door and Side Panel Locks The front door, rear door and side panel locks are keyed-alike. Use the included keys to operate the locks. Remove Front and Rear Doors - CyberPower CR42U11001 | User Manual - Page 10
2. Disconnect the grounding wire connected the door and the frame. 3. Pull the door up to remove it from the door hinge. 8 - CyberPower CR42U11001 | User Manual - Page 11
Reverse Front Door CAUTION It is recommended to have two or more people assist in this operation. 1. Remove the front door by following the steps described in the Remove Front and Rear Doors section. After it has been removed, rotate it 180 degrees. 2. Remove the door lock and handle as shown below - CyberPower CR42U11001 | User Manual - Page 12
3. Unscrew the two hinges and reinstall them on the opposite side of the enclosure. 4. Remove the two door latches from the inside of the door. Reinstall them to the corresponding locations as shown below. 10 - CyberPower CR42U11001 | User Manual - Page 13
from the door and enclosure frame. Reinstall them on the opposite side of door and frame, and reconnect them as shown below. 7. To relocate the CyberPower badge*, pull the two parts apart as shown below. To re-install the badge measure the vertical and horizontal distance from the edge of the - CyberPower CR42U11001 | User Manual - Page 14
Open and Remove Side Panels Unlock the side panel and press the retention tab down to release the side panel. Open and Remove Roof Panel The roof panel is removable. From inside the enclosure, locate the two security pins and pull them to release the roof panel. Push the panel upwards to remove it. - CyberPower CR42U11001 | User Manual - Page 15
channels are required to be installed perpendicular to the horizontal rails. Position index numbers are printed on the horizontal rails to guide proper installation. Make sure that the top and bottom positions match to ensure that they are vertically straight. 3 8 9876543210 8 109876543210 - CyberPower CR42U11001 | User Manual - Page 16
. 1. Align the enclosures that will be connected together. 2. Remove the enclosure doors. NOTE: See the Remove Front and Rear Doors section for instructions. 3. Remove a connecting bracket, shown below. Align the connecting bracket between the enclosures such that each end can screw into the other - CyberPower CR42U11001 | User Manual - Page 17
of the roof. Cable openings covered by a metal plate can be removed by unscrewing them from the roof panel. Removable Plastic Cover Accessory Channels CyberPower's rack enclosures come with two accessory channels which have toolless mounting slots for optional vertical cable managers or/and PDUs. 15 - CyberPower CR42U11001 | User Manual - Page 18
or failing. If multiple pieces of equipment use sliding rails only slide one piece of equipment out at once. NOTE: Please review your equipment instructions carefully before installing in the enclosure. 1. Install the included black M6 cage nuts from the back of the rack angles as shown below, and - CyberPower CR42U11001 | User Manual - Page 19
2. Install the equipment by screwing the included black M6 screws and cup washers into the cage nuts as shown below. 6 5 4 For warranty and additional information, please visit: www.cyberpower.com. 17 - CyberPower CR42U11001 | User Manual - Page 20
Cyber Power Systems, Inc. www.cyberpower.com For USA and Canada: 4241 12th Ave East, Suite 400 Shakopee, MN 55379 Toll-free: (877) 297-6937 For all other regions: Please visit our website for local contact information. Copyright © 2017 Cyber Power Systems, Inc. All rights reserved. K01-0000575-02
-
 1
1 -
 2
2 -
 3
3 -
 4
4 -
 5
5 -
 6
6 -
 7
7 -
8
-
9
-
10
-
11
-
12
-
13
-
14
-
15
-
16
-
17
-
18
-
19
-
20
 |
 |

Copyright © 2017 Cyber Power Systems, Inc. All rights reserved.
USER’S MANUAL
Carbon™ Rack Enclosure
CRxU1 Series
Carbon™ Rack Enclosure
CRxU1 Series
SAVE THESE INSTRUCTIONS
Please read this manual and follow the instructions for installation and use.
K01-0000575-02