D-Link DAP-1525 Product Manual
D-Link DAP-1525 Manual
 |
View all D-Link DAP-1525 manuals
Add to My Manuals
Save this manual to your list of manuals |
D-Link DAP-1525 manual content summary:
- D-Link DAP-1525 | Product Manual - Page 1
- D-Link DAP-1525 | Product Manual - Page 2
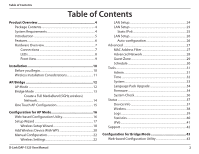
29 Schedule 30 Tools 31 Admin 31 Time 32 System 33 Language Pack Upgrade 34 Firmware 34 System Check 36 Status 37 Device Info 37 Wireless 38 Logs 39 Statistics 40 IPV6 41 Support 42 Configuration for Bridge Mode 43 Web-based Configuration Utility 43 D-Link DAP-1525 User Manual 2 - D-Link DAP-1525 | Product Manual - Page 3
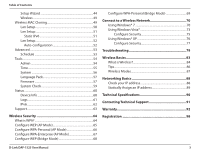
77 Troubleshooting 79 Wireless Basics 83 What is Wireless 84 Tips 86 Wireless Modes 87 Networking Basics 88 Check your IP address 88 Statically Assign an IP address 89 Technical Specifications 90 Contacting Technical Support 91 Warranty 92 Registration 98 D-Link DAP-1525 User Manual 3 - D-Link DAP-1525 | Product Manual - Page 4
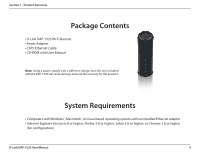
Section 1 - Product Overview Product Overview Package Contents • D-Link DAP-1525 Wi-Fi Booster • Power Adapter • CAT5 Ethernet Cable • CD-ROM with User Manual Note: Using a power supply with a different voltage than the one included with the DAP-1525 will cause damage and void the warranty for - D-Link DAP-1525 | Product Manual - Page 5
Wi-Fi Booster to router and share your high-speed Internet access with everyone on the network. In addition, this Wireless Bridge includes a Quality of Service (QoS) engine that keeps digital phone calls (VoIP) and online gaming smooth and responsive, providing a better Internet experience. EXTENDED - D-Link DAP-1525 | Product Manual - Page 6
its easy-to-use Web-based user interface, the DAP-1525 lets you control what information is accessible to those on the wireless network, whether from the Internet or from your company's server. Configure your access point to your specific settings within minutes. D-Link DAP-1525 User Manual 6 - D-Link DAP-1525 | Product Manual - Page 7
a USB 2.0 printer or a Storage Device 2 Mode Switch Three-way switch used to select Bridge, AP 2.4GHz or AP 5GHz 3 LAN Ports (1-4) Connect 10/100/1000 Ethernet devices such as computers, switches, and hubs 4 Power Receptor Receptor for the supplied power adapter D-Link DAP-1525 User Manual 7 - D-Link DAP-1525 | Product Manual - Page 8
Wireless LED (AP Mode) A solid green light will indicate that AP Mode is ON. 2 Wireless LED (Bridge A solid green light indicates a link has been established. A blinking green indicates the device Mode) solid light indicates a proper connection to the power supply. D-Link DAP-1525 User Manual 8 - D-Link DAP-1525 | Product Manual - Page 9
Section 1 - Product Overview Front View 1 1 Reset Button Press the button to restore the device to its original factory default settings. D-Link DAP-1525 User Manual 9 - D-Link DAP-1525 | Product Manual - Page 10
installation process. Placement of the DAP-1525 is very important. Do not place the DAP-1525 in an enclosed area such as a closet, cabinet, or in the attic or garage. Before you Begin Please configure the Wireless Bridge will not be able to connect to the Internet. D-Link DAP-1525 User Manual 10 - D-Link DAP-1525 | Product Manual - Page 11
Section 2 - Installation Wireless Installation Considerations The D-Link wireless access point lets you access your network using a wireless connection from virtually anywhere within the operating range of your wireless network. Keep in mind, however, that the number, thickness and location of walls - D-Link DAP-1525 | Product Manual - Page 12
4. Connect the cable or modem with the broadband Access Point. 5. Connect the DAP-1525's Ethernet port to your LAN. 6. Move the switch to wireless 2.4GHz AP, or 5GHz AP Mode. 7. Connect your PC or notebook to the DAP-1525 using the PC or notebook's wireless adapter. D-Link DAP-1525 User Manual 12 - D-Link DAP-1525 | Product Manual - Page 13
to your home or office. 2. Connect the cable properly or install the modem. 3. Connect the cable or modem with the broadband Access Point. 4. Move the switch to Bridge Mode. 5. Connect your PC or notebook to the DAP-1525 using the PC or notebook's wireless adapter. D-Link DAP-1525 User Manual 13 - D-Link DAP-1525 | Product Manual - Page 14
you will need to connect one Wireless Bridge to your router and move the switch on the back panel to "AP". The second Wireless Bridge will need to be placed next to your Ethernet-enabled devices and you will need to move the switch on the back panel to "Bridge". D-Link DAP-1525 User Manual 14 - D-Link DAP-1525 | Product Manual - Page 15
the WPS button on your Router or Access Point. WPS LED will flash on and off. 2. Press WPS Push Button on the DAP-1525 and hold it for 5 seconds. 3. When One click AP setup is complete, your DAP-1525 will have the same Wireless settings as your existing Router or AP. D-Link DAP-1525 User Manual 15 - D-Link DAP-1525 | Product Manual - Page 16
or 192.168.0.50 in the address field. Select Admin from the drop-down menu and then enter your password. Leave the password blank by default. If you get a Page Cannot be Displayed error, please refer to the Troubleshooting section for assistance. D-Link DAP-1525 User Manual 16 - D-Link DAP-1525 | Product Manual - Page 17
Section 3 - Configuration Setup Wizard Click Launch Wireless Setup Wizard to quickly configure your access point. A welcome window appears. Click the Next button to continue. D-Link DAP-1525 User Manual 17 - D-Link DAP-1525 | Product Manual - Page 18
Configuration Wireless Setup Wizard This Wizard is designed to assist you in connecting your wireless device to your access point. It will guide you through stepby-step instructions on how to get your wireless device connected. Youmayselecteither WPSorManualfor theconfiguration method. Select Manual - D-Link DAP-1525 | Product Manual - Page 19
Section 3 - Configuration This window displays the settings. Click Save to save your network settings. The following screen opens to indicate that you have successfully saved your new settings. D-Link DAP-1525 User Manual 19 - D-Link DAP-1525 | Product Manual - Page 20
-step instructions on how to set up your wireless network and how to make it secure. Select WPS and click Next. Select PIN to use your PIN number from your wireless device to connect to your network. For PBC configuration, skip to page 18. Click Connect to continue. D-Link DAP-1525 User Manual 20 - D-Link DAP-1525 | Product Manual - Page 21
your wireless network to complete the setup. Select PBC to use the Push Button Configuration in order to connect to your network. Click Connect to continue. Press down the Push Button on the wireless device that you are adding to your network to complete the setup. D-Link DAP-1525 User Manual 21 - D-Link DAP-1525 | Product Manual - Page 22
mode is set to Access Point, it will create a wireless infrastructure network. Band Width: Select the Band Width: Auto 20/40 - Select if you are using both 802.11n and non-802.11n wireless devices. 20MHz - Select if you are not using any 802.11n wireless clients. D-Link DAP-1525 User Manual - D-Link DAP-1525 | Product Manual - Page 23
value of the access point's PIN. Generate New Create a random number that is a valid PIN. This becomes the access point's PIN. You can then copy this PIN to the user interface PIN: of the user. Reset PIN to Default: Restore the default PIN of the access point. D-Link DAP-1525 User Manual 23 - D-Link DAP-1525 | Product Manual - Page 24
: Enter the default gateway IP address. Primary DNS Server: Enter the primary DNS server IP address. Secondary DNS Enter the secondary DNS server IP address. Server: My IPv6 Use the drop-down menu to select the IPv6 mode Connection is: connected to the IPv6 Internet. D-Link DAP-1525 User Manual 24 - D-Link DAP-1525 | Product Manual - Page 25
Subnet Prefix Internet Service Provider. Length: Enter the IPv6 subnet prefix length. Default Gateway: Enter the default gateway IP address. Primary DNS Enter the primary DNS server IP address. Server: Secondary Enter the secondary DNS server IP address. DNS Server: D-Link DAP-1525 User Manual 25 - D-Link DAP-1525 | Product Manual - Page 26
by your DNS Servers Internet Service Provider. automatically: Use the following Enter the IPv6 subnet prefix length. IPv6 DNS Servers: Primary DNS Enter the primary DNS server IP address. Server: Secondary DNS Enter the secondary DNS server IP address. Server: D-Link DAP-1525 User Manual 26 - D-Link DAP-1525 | Product Manual - Page 27
computer with a MAC address listed in the MAC Address List is refused access to the network. Rules: Enter a description of the filtering rule in the Description field and enter the MAC address to add the rule. Click the corresponding clear button to delete the rule. D-Link DAP-1525 User Manual 27 - D-Link DAP-1525 | Product Manual - Page 28
- Configuration Advanced Network This window is used to change the advanced LAN settings. IGMP Snooping: This enables IGMP snooping for the wireless connection. We recommend enabling this if you often use multicast services such as video conferencing and streaming audio/video. D-Link DAP-1525 User - D-Link DAP-1525 | Product Manual - Page 29
regarding wireless security. Enable Guest Tick the check box to prevent the guest clients Zones Clients from accessing other guests in the guest zone. Isolation: Enable Routing Check to allow network connectivity between Between Zones: the different zones created. D-Link DAP-1525 User Manual 29 - D-Link DAP-1525 | Product Manual - Page 30
Section 3 - Configuration Schedule This section allows you to manage schedule rules for Wireless Settings and Guest Zone. Name: Enter a name for your new schedule. Days: Select a day, a range of days, or All Week to or click the Delete icon to remove the schedule. D-Link DAP-1525 User Manual 30 - D-Link DAP-1525 | Product Manual - Page 31
Section 3 - Configuration Tools Admin The "admin" account has the read and write access right. You can also enable Remote Management. Password: Enter a new password for to confirm its accuracy. Enable Graphical Check to enable graphical authentication. Authentication: D-Link DAP-1525 User Manual 31 - D-Link DAP-1525 | Product Manual - Page 32
D-Link Internet time server immediately. Set the Time To manually input the time, use the drop-down menus to enter the values in these fields for the Year, Month, Day, Hour, and Date Minute, and Second. Manually: Click the Save Settings button to save any changes made. D-Link DAP-1525 User Manual - D-Link DAP-1525 | Product Manual - Page 33
above. Note: Restoring the factory default settings will not reset the Wi-Fi Protected Status to Not Configured. Reboot the Click to reboot the access point. Device: Clear Click to clear the language pack. This will put the web Language UI back to English. Pack: D-Link DAP-1525 User Manual 33 - D-Link DAP-1525 | Product Manual - Page 34
the firmware of the access point here. Make sure the firmware you want to use is on the local hard drive of the computer. Click on Browse to locate the firmware file to be used for the update. Please check the D-Link support website for firmware updates at http://support.dlink.com. You can download - D-Link DAP-1525 | Product Manual - Page 35
Section 3 - Configuration If you load a language pack and would like to go back to English, click Maintenance > System and click on Clear next to Clear Language Pack. D-Link DAP-1525 User Manual 35 - D-Link DAP-1525 | Product Manual - Page 36
Section 3 - Configuration System Check This sections Ping Tests by sending ping packets computer is on the Internet. Enter the host name or IP/IPv6 address that you wish to Ping, and click Ping. Ping Result: The results of your ping attempts will be displayed here. D-Link DAP-1525 User Manual 36 - D-Link DAP-1525 | Product Manual - Page 37
information. General: Displays the access point's time and firmware version. LAN: Displays the MAC address and the private (local) IP settings for the access point. Wireless LAN: Displays the wireless MAC address and your wireless settings such as SSID and Channel. D-Link DAP-1525 User Manual 37 - D-Link DAP-1525 | Product Manual - Page 38
MAC address) of the wireless client. UpTime: Displays the amount of time the wireless client has been connected to the access point. Mode: The transmission standard or neighboring wireless networks), and by obstacles between the access point and the wireless device. D-Link DAP-1525 User Manual 38 - D-Link DAP-1525 | Product Manual - Page 39
can be viewed: Level: System Activity, Wireless Activity, and Notice. Click the corresponding check box for the type(s) that you want displayed in the log. Log Type & Use the radio buttons to select Log type and Level: level. Clear: Clear all of the log contents. D-Link DAP-1525 User Manual 39 - D-Link DAP-1525 | Product Manual - Page 40
that were dropped Dropped: while receiving, due to errors, collisions, or access point resource limitations. TX Bytes: Displays the number of bytes that were sent from the access point. RX Bytes: Displays the number of bytes that were received by the access point. D-Link DAP-1525 User Manual 40 - D-Link DAP-1525 | Product Manual - Page 41
IPv6 address of the default Gateway: gateway. LAN IPv6 Link- Displays the LAN IPv6 link-local address. Local Address: Primary DNS Displays the IPv6 address of the primary DNS Server: server. Secondary DNS Displays the IPv6 address of the secondary Server: DNS server. D-Link DAP-1525 User Manual 41 - D-Link DAP-1525 | Product Manual - Page 42
Section 3 - Configuration Support D-Link DAP-1525 User Manual 42 - D-Link DAP-1525 | Product Manual - Page 43
enter 192.168.0.50 in the address field. Select Admin from the drop-down menu and then enter your password. Leave the password blank by default. If you get a Page Cannot be Displayed error, please refer to the Troubleshooting section for assistance. D-Link DAP-1525 User Manual 43 - D-Link DAP-1525 | Product Manual - Page 44
3 - Configuration Setup Wizard This wizard is designed to assist you in configuring the wireless settings for your bridge. It will guide you through step-bystep instructions on how to setup your wireless network. Click Launch Wireless Setup Wizard Click Next to continue. D-Link DAP-1525 User Manual - D-Link DAP-1525 | Product Manual - Page 45
Section 3 - Configuration Please press down on the WPS Button within 111 seconds. The following screen opens to indicate that you have successfully saved your new settings. D-Link DAP-1525 User Manual 45 - D-Link DAP-1525 | Product Manual - Page 46
Select Manual as the configuration method to set up your network manually. Click Next to continue. Choose Manually assign a network key to create your own key. Click Next to continue. Select the wireless security mode you wold like to use. Select Auto and click Next. D-Link DAP-1525 User Manual 46 - D-Link DAP-1525 | Product Manual - Page 47
Section 3 - Configuration Enter the WP2-Auto personal passphrase to establish wireless connection. Click Next to finish the Setup Wizard. The wireless setup wizard is now completed click Finish. D-Link DAP-1525 User Manual 47 - D-Link DAP-1525 | Product Manual - Page 48
security password and click Next to complete the Setup Wizard. If you choose Auto (WPA or WPA2), enter the WPA2Auto Personal Passphrase and click Next to complete the Setup Wizard. This screen will appear once the wireless setup wizard is complete. Click Finish. D-Link DAP-1525 User Manual 48 - D-Link DAP-1525 | Product Manual - Page 49
Enable: Enable the Wi-Fi Protected Setup feature. Security Refer to page 64 for more information regarding wireless security. Mode: Wireless MAC Cloning Enabling this option allows the user to manually assign the source MAC address to packets forwarded by the DAP-1525. If not manually assigned, the - D-Link DAP-1525 | Product Manual - Page 50
ISP. Gateway: Primary DNS Enter the primary DNS server IP address. Server: Secondary DNS Enter the secondary DNS server IP address. Server: My IPv6 Select the mode you would like the router to use to Connection: connect to the IPv6 Internet from the drop-down menu. D-Link DAP-1525 User Manual 50 - D-Link DAP-1525 | Product Manual - Page 51
Internet Service Provider. Subnet Prefix Enter the IPv6 subnet prefix length. Length: Default Enter the default gateway IP address. Gateway: Primary DNS Enter the primary DNS server IP address. Server: Secondary DNS Enter the secondary DNS server IP address. Server: D-Link DAP-1525 User Manual 51 - D-Link DAP-1525 | Product Manual - Page 52
by your DNS Servers Internet Service Provider. automatically: Use the Enter the IPv6 subnet prefix length. following IPv6 DNS Servers: Primary DNS Enter the primary DNS server IP address. Server: Secondary DNS Enter the secondary DNS server IP address. Server: D-Link DAP-1525 User Manual 52 - D-Link DAP-1525 | Product Manual - Page 53
Section 3 - Configuration Advanced Schedule This section allows you to manage schedule rules for Wireless Settings and Guest Zone. Name: Enter a name for your new schedule. Days: Select a day, a range of days, or All Week click the Delete icon to remove the schedule. D-Link DAP-1525 User Manual 53 - D-Link DAP-1525 | Product Manual - Page 54
Section 3 - Configuration Tools Admin This page will allow you to change the Administrator password. Admin has read/write access. Password: Enter a new password for the Administrator Login the check box to enable Graphical Graphical Authentication. Authentication: D-Link DAP-1525 User Manual 54 - D-Link DAP-1525 | Product Manual - Page 55
be configured to Manual: To manually input the time, enter the values in these fields for the Year, Month, Day, Hour, Minute, and Second and then click Save Settings. You can also click the Copy Your Computer's Time Settings button at the bottom of the screen. D-Link DAP-1525 User Manual - D-Link DAP-1525 | Product Manual - Page 56
that you have created. If you want to save the current access point configuration settings, use the Save button above. Reboot The Device: Click to reboot the bridge. Clear Language Pack: Click to clear the language pack. This will put the web UI back to English. D-Link DAP-1525 User Manual 56 - D-Link DAP-1525 | Product Manual - Page 57
the access point here. Make sure the firmware you want to use is on the local hard drive of the computer. Click on Browse to locate the firmware file to be used for the update. Please check the D-Link support site for firmware updates at http://support.dlink.com. You can download firmware upgrades - D-Link DAP-1525 | Product Manual - Page 58
Section 3 - Configuration If you load a language pack and would like to go back to English, click Maintenance > System and click on Clear next to Clear Language Pack. D-Link DAP-1525 User Manual 58 - D-Link DAP-1525 | Product Manual - Page 59
Section 3 - Configuration System Check This sections Ping Tests by sending ping packets computer is on the Internet. Enter the host name or IP/IPv6 address that you wish to Ping, and click Ping. Ping Result: The results of your ping attempts will be displayed here. D-Link DAP-1525 User Manual 59 - D-Link DAP-1525 | Product Manual - Page 60
information. General: Displays the access point's time and firmware version. LAN: Displays the MAC address and the private (local) IP settings for the access point. Wireless LAN: Displays the wireless MAC address and your wireless settings such as SSID and Channel. D-Link DAP-1525 User Manual 60 - D-Link DAP-1525 | Product Manual - Page 61
results so that only the selected options appear in the Log Details section of this screen. Clear: This option clears all of the log contents. D-Link DAP-1525 User Manual 61 - D-Link DAP-1525 | Product Manual - Page 62
the IPv6 gateway. address of the default LAN IPv6 Link- Displays the LAN IPv6 link-local address. Local Address: Primary DNS Displays the IPv6 address of the primary DNS Server: server. Secondary DNS Displays the IPv6 address of the secondary Server: DNS server. D-Link DAP-1525 User Manual 62 - D-Link DAP-1525 | Product Manual - Page 63
Section 3 - Configuration Support D-Link DAP-1525 User Manual 63 - D-Link DAP-1525 | Product Manual - Page 64
on your wireless bridge or access point. WPA/WPA2 incorporates user authentication through the Extensible Authentication Protocol (EAP). EAP is built on a more secure public key encryption system to ensure that only authorized network users can access the network. D-Link DAP-1525 User Manual 64 - D-Link DAP-1525 | Product Manual - Page 65
the Authentication dropdown menu. 6. Click Save Settings to save your settings. If you are configuring the access point with a wireless adapter, you will lose connectivity until you enable WEP on your adapter and enter the same WEP key as you did on the access point. D-Link DAP-1525 User Manual 65 - D-Link DAP-1525 | Product Manual - Page 66
HEX format the pass-phrase must be 64 characters. The ASCII or HEX pass-phrase must be the same at both ends of the wireless connection. 7. Click on Enable to enable the Wi-Fi Protected Setup. 8. Click Save Settings at the top of the window to save your settings. D-Link DAP-1525 User Manual 66 - D-Link DAP-1525 | Product Manual - Page 67
. 8. Click Save Settings at the top of the window to save your settings. If you are configuring the access point with a wireless adapter, you will lose connectivity until you enable WPA on your adapter and enter the same passphrase as you did on the access point. D-Link DAP-1525 User Manual 67 - D-Link DAP-1525 | Product Manual - Page 68
Authentication drop-down menu. 6. Click Save Settings to save your settings. If you are configuring the access point with a wireless adapter, you will lose connectivity until you enable WEP on your adapter and enter the same WEP key as you did on the access point. D-Link DAP-1525 User Manual 68 - D-Link DAP-1525 | Product Manual - Page 69
the wireless connection. 6. Click Save Settings to save your settings. If you are configuring the Access Point with a wireless adapter, you will lose connectivity until you enable WPA-PSK on your adapter and enter the same passphrase as you did on the Access Point. D-Link DAP-1525 User Manual 69 - D-Link DAP-1525 | Product Manual - Page 70
If you are joining an existing network, you will need to know the security key or passphrase being used. 1. Click on the wireless icon in your system tray (lower-right corner). 2. The utility will display any available wireless networks in your area. Wireless Icon D-Link DAP-1525 User Manual 70 - D-Link DAP-1525 | Product Manual - Page 71
get a good signal but cannot access the Internet, check your TCP/IP settings for your wireless adapter. Refer to the Networking Basics section in this manual for more information. 4. The following window appears while your computer tries to connect to the router. D-Link DAP-1525 User Manual 71 - D-Link DAP-1525 | Product Manual - Page 72
connect by pushing the WPS button on the router. It may take 20-30 seconds to connect to the wireless network. If the connection fails, please verify that the security settings are correct. The key or passphrase must be exactly the same as on the wireless router. D-Link DAP-1525 User Manual 72 - D-Link DAP-1525 | Product Manual - Page 73
menu, go to Control Panel, and then click on Network and Sharing Center. The utility will display any available wireless networks in your area. Click on a network (displayed using the SSID) under Select a network to connect to and then click the Connect button. D-Link DAP-1525 User Manual 73 - D-Link DAP-1525 | Product Manual - Page 74
Section 5 - Connecting to a Wireless Network Click Connect Anyway to continue. The utility will display the following window to indicate a connection connection. The next two pages display the windows used to connect to either a WEP or a WPA-PSK wireless network. D-Link DAP-1525 User Manual 74 - D-Link DAP-1525 | Product Manual - Page 75
Section 5 - Connecting to a Wireless Network Configure Security It is recommended to enable wireless encryption on your wireless bridge or access point before configuring your wireless adapter. If you are joining the field provided and then click the Connect button. D-Link DAP-1525 User Manual 75 - D-Link DAP-1525 | Product Manual - Page 76
. Click on a network (displayed using the SSID) and click the Connect button. If you get a good signal, but cannot access the Internet, check you TCP/IP settings for your wireless adapter. Refer to the Networking Basics section in this manual for more information. D-Link DAP-1525 User Manual 76 - D-Link DAP-1525 | Product Manual - Page 77
Open the Windows® XP Wireless Utility by right-clicking on the wireless computer icon in your system tray (lower-right corner of screen). Select View Available Wireless Networks. 2. Highlight the wireless network (SSID) you would like to connect to and click Connect. D-Link DAP-1525 User Manual 77 - D-Link DAP-1525 | Product Manual - Page 78
the security passphrase and click Connect. It may take 20-30 seconds to connect to the wireless network. If the connection fails, please verify that the security settings are correct. The WPA-PSK passphrase must be exactly the same as on the wireless access point. D-Link DAP-1525 User Manual 78 - D-Link DAP-1525 | Product Manual - Page 79
. Software firewalls such as Zone Alarm, Black Ice, Sygate, Norton Personal Firewall, and Windows® XP firewall may block access to the configuration pages. Check the help files included with your firewall software for more information on disabling or configuring it. D-Link DAP-1525 User Manual 79 - D-Link DAP-1525 | Product Manual - Page 80
button down for 10 seconds. Release the button and the access point will go through its reboot process. Wait about 30 seconds to access the access point. The default IP address is 192.168.0.50. When logging in, the username is admin and leave the password box empty. D-Link DAP-1525 User Manual 80 - D-Link DAP-1525 | Product Manual - Page 81
XP users type in cmd) and click Enter (or click OK). • Once the window opens, you'll need to do a special ping. Use the following syntax: ping [url] [-f ] [-l] [MTU value] Example: ping yahoo.com -f -l 1472 You should start at 1472 and work your way down by 10 each time. D-Link DAP-1525 User Manual - D-Link DAP-1525 | Product Manual - Page 82
• Click on Setup and then click Manual Configure. • To change the MTU enter the number in the MTU field and click Save Settings to save your settings. • Test your email. If changing the MTU does not resolve the problem, continue changing the MTU in increments of ten. D-Link DAP-1525 User Manual 82 - D-Link DAP-1525 | Product Manual - Page 83
Under many circumstances, it may be desirable for mobile network devices to link to a conventional Ethernet LAN in order to use servers, printers or an Internet connection supplied through the wired LAN. A Wireless Access point is a device used to provide this link. D-Link DAP-1525 User Manual 83 - D-Link DAP-1525 | Product Manual - Page 84
, the signal can travel up to 300 feet. With an outdoor access point the signal can reach out up to 30 miles to serve places like manufacturing plants, industrial locations, college and high school campuses, airports, golf courses, and many other outdoor venues. D-Link DAP-1525 User Manual 84 - D-Link DAP-1525 | Product Manual - Page 85
house • Simple and easy to use Small Office and Home Office • Stay on top of everything at home as you would at office • Remotely access your office network from home • Share Internet connection and printer with multiple computers • No need to dedicate office space D-Link DAP-1525 User Manual 85 - D-Link DAP-1525 | Product Manual - Page 86
home appliances such as cordless telephones, microwaves, wireless speakers, and televisions as far away as possible from the bridge/access point. This would significantly reduce any interference that the appliances might cause since they operate on same frequency. D-Link DAP-1525 User Manual 86 - D-Link DAP-1525 | Product Manual - Page 87
an Access Point or wireless bridge. All the wireless devices, or clients, will connect to the wireless bridge or access point. An Ad-Hoc network contains only clients, such as laptops with wireless cardbus adapters. All the adapters must be in Ad-Hoc mode to communicate. D-Link DAP-1525 User Manual - D-Link DAP-1525 | Product Manual - Page 88
. Some firewall software programs may block a DHCP request on newly installed adapters. If you are connecting to a wireless network at a hotspot (e.g. hotel, coffee shop, airport), please contact an employee or administrator to verify their wireless network settings. D-Link DAP-1525 User Manual 88 - D-Link DAP-1525 | Product Manual - Page 89
Default Gateway the same as the LAN IP address of your router (192.168.0.1). Set Primary DNS the same as the LAN IP address of your router (192.168.0.1). The Secondary DNS is not needed or you may enter a DNS server from your ISP. Step 5 Click OK twice to save your settings. D-Link DAP-1525 User - D-Link DAP-1525 | Product Manual - Page 90
materials and construction, and network overhead, lower actual data throughput rate. Environmental conditions will adversely affect wireless signal range. 2Range varies depending on country's regulation. 3The DAP-1525 doesn't include 5.25-5.35GHz & 5.47~5.725GHz. D-Link DAP-1525 User Manual 90 - D-Link DAP-1525 | Product Manual - Page 91
number of the product (e.g. DAP-1525) • Hardware Revision (located on the label on the bottom of the access point (e.g. rev A1)) • Serial Number (s/n number located on the label on the bottom of the access point). You can find software updates and user documentation on the D-Link website as well as - D-Link DAP-1525 | Product Manual - Page 92
the defective Hardware will be refunded by D-Link upon return to D-Link of the defective Hardware. All Hardware or part thereof that is replaced by D-Link, or for which the purchase price is refunded, shall become the property of D-Link upon replacement or refund. D-Link DAP-1525 User Manual 92 - D-Link DAP-1525 | Product Manual - Page 93
the Software is properly installed on approved hardware and operated as contemplated in its documentation. D-Link further warrants that, : The customer shall return the product to the original purchase point based on its return policy. In case the return policy com/. D-Link DAP-1525 User Manual 93 - D-Link DAP-1525 | Product Manual - Page 94
, firmware or other products or services provided by anyone other than D-Link; and Products that have been purchased from inventory clearance or liquidation sales or other sales in which D-Link, PERFORMANCE OF THE PRODUCT IS WITH THE PURCHASER OF THE PRODUCT. D-Link DAP-1525 User Manual 94 - D-Link DAP-1525 | Product Manual - Page 95
. Copyright ©2009-2010 by D-Link Corporation/D-Link Systems, Inc. All rights reserved. CE Mark Warning: This is a Class B product. In a domestic environment, this product may cause radio interference, in which case the user may be required to take adequate measures. D-Link DAP-1525 User Manual 95 - D-Link DAP-1525 | Product Manual - Page 96
limits set forth for an uncontrolled environment. This equipment should be installed and operated with minimum distance 20cm between the radiator & your body. This transmitter must not be co-located or operating in conjunction with any other antenna or transmitter. D-Link DAP-1525 User Manual 96 - D-Link DAP-1525 | Product Manual - Page 97
. This equipment should be installed and operated with minimum distance firmware setting is not accessible by the end user. For detailed warranty information applicable to products purchased outside the United States, please contact the corresponding local D-Link office. D-Link DAP-1525 User Manual - D-Link DAP-1525 | Product Manual - Page 98
Appendix F - Registration Registration Product registration is entirely voluntary and failure to complete or return this form will not diminish your warranty rights. Version 1.0 February 18, 2010 D-Link DAP-1525 User Manual 98
-
 1
1 -
 2
2 -
 3
3 -
 4
4 -
 5
5 -
 6
6 -
 7
7 -
8
-
9
-
10
-
11
-
12
-
13
-
14
-
15
-
16
-
17
-
18
-
19
-
20
-
21
-
22
-
23
-
24
-
25
-
26
-
27
-
28
-
29
-
30
-
31
-
32
-
33
-
34
-
35
-
36
-
37
-
38
-
39
-
40
-
41
-
42
-
43
-
44
-
45
-
46
-
47
-
48
-
49
-
50
-
51
-
52
-
53
-
54
-
55
-
56
-
57
-
58
-
59
-
60
-
61
-
62
-
63
-
64
-
65
-
66
-
67
-
68
-
69
-
70
-
71
-
72
-
73
-
74
-
75
-
76
-
77
-
78
-
79
-
80
-
81
-
82
-
83
-
84
-
85
-
86
-
87
-
88
-
89
-
90
-
91
-
92
-
93
-
94
-
95
-
96
-
97
-
98
 |
 |