D-Link DAP-1650 User Manual
D-Link DAP-1650 Manual
 |
View all D-Link DAP-1650 manuals
Add to My Manuals
Save this manual to your list of manuals |
D-Link DAP-1650 manual content summary:
- D-Link DAP-1650 | User Manual - Page 1
Version 1.01 | 12/09/2013 User Manual DAP-1650 Wireless AC1200 Dual-band Gigabit Range Extender DAP-1650 - D-Link DAP-1650 | User Manual - Page 2
Utility 17 Wireless Setup Wizard 18 Access Point Mode 19 Repeater Mode 22 Media Bridge Mode 24 Manual Configuration 26 Wireless Settings 26 Access Point Mode 27 Repeater Mode 31 D-Link DAP-1650 User Manual Media Bridge Mode 35 Configuring Wireless Security 36 Network Settings 39 - D-Link DAP-1650 | User Manual - Page 3
Windows® 7 80 Windows Vista 83 WPA/WPA2 84 WPS/WCN 2.0 86 Using Windows® XP 87 Configure WPA-PSK 88 Troubleshooting 90 Networking Basics 94 Check your IP address 94 Statically Assign an IP address 95 Technical Specifications 96 Compliance Statements 98 D-Link DAP-1650 User Manual iii - D-Link DAP-1650 | User Manual - Page 4
- Product Overview Product Overview Package Contents DAP-1650 Wireless AC1200 Dual Band Gigabit Cloud Router Ethernet Cable Power Adapter Wi different voltage rating than the one included with the DAP-1650 will cause damage and void the warranty for this product. D-Link DAP-1650 User Manual 4 - D-Link DAP-1650 | User Manual - Page 5
Requirements: • Internet Explorer® 7.0 or higher • Mozilla Firefox 12.0 or higher • Google™ Chrome 20.0 or higher • Apple Safari 4.0 or higher Windows® Users: Make sure you have the latest version of Java installed. Visit www.java.com to download the latest version. D-Link DAP-1650 User Manual 5 - D-Link DAP-1650 | User Manual - Page 6
in networking, introduces the new D-Link DAP-1650Wireless AC1200 Dual-band Gigabit Range Extender. With the ability to transfer files with a maximum combined wireless signal rate of up to 1200 Mbps1, the DAP-1650 gives you high-speed wireless network access for your home or office. The DAP-1650 is - D-Link DAP-1650 | User Manual - Page 7
's security. • User-friendly Setup Wizard - Through its easy-to-use web-based user interface, the DAP-1650 lets you control what information is accessible to those on the wireless network, whether from the Internet or from your company's server. Configure your access point to your specific settings - D-Link DAP-1650 | User Manual - Page 8
Port Connect a USB storage device to enable network wide access. 2 WPS Button Use WPS (Wi-Fi Protected Setup) to easily create a secure connection to power adapter. 6 Reset Button (base) Press the reset button to return the device back to it's factory conditions. D-Link DAP-1650 User Manual 8 - D-Link DAP-1650 | User Manual - Page 9
The light will blink green during the WPS process. The light will blink orange during boot up. 2 Internet LED A solid light indicates connection on the Internet port. If the LED is orange, the connection is good but the access point cannot connect to the Internet. D-Link DAP-1650 User Manual 9 - D-Link DAP-1650 | User Manual - Page 10
operation modes, enabling you to customize it to your networking requirements. Please refer to the following sections to determine which mode is most suitable for your network. • Access Point mode - page 11 • Repeater mode - page 12 • Media Bridge mode - page 13 D-Link DAP-1650 User Manual 10 - D-Link DAP-1650 | User Manual - Page 11
the network. If wireless security is enabled on the access point, the client will need to enter a password to connect. In Access Point mode, multiple clients can connect wirelessly to the network at the same time. AP Mode Internet Router DAP-1650 Wireless Devices D-Link DAP-1650 User Manual 11 - D-Link DAP-1650 | User Manual - Page 12
Installation Repeater Mode In Repeater mode, the DAP-1650 extends the range of your existing wireless network by repeating the wireless signal of another access point or wireless router. The DAP-1650 and wireless router (if used) must be within range of each other. The extended wireless network can - D-Link DAP-1650 | User Manual - Page 13
wireless link between two existing networks, and enables you to attach a wired device to a wireless network.The two networks must be within wireless reach of one another in order for bridge mode to be effective. Media Bridge Mode Internet Router/ Switch DAP-1650 Gaming console D-Link DAP-1650 - D-Link DAP-1650 | User Manual - Page 14
Section 2 - Installation Wireless Installation Considerations The DAP-1650 wireless access point lets you access your network using a wireless connection from virtually anywhere within the operating range of the device. Keep in mind, however, that the number, thickness and location of walls, - D-Link DAP-1650 | User Manual - Page 15
will allow you to access files from a USB storage drive that is plugged into your router. You must enable file sharing from the Setup > Storage page (refer to page 22) for this app to work properly. 1. Plug your USB storage drive into the USB port. Note: The DAP-1650 supports hard drives with up - D-Link DAP-1650 | User Manual - Page 16
2 - Installation QRS Mobile App Setup The DAP-1650 can be network that is displayed on the Wi-Fi Configuration Card included in your package (ex: dlink-a8fa). Then, enter the Wi-Fi password also printed on the Wi-Fi Configuration Card (akbdj1936). For iOS For Android D-Link DAP-1650 User Manual - D-Link DAP-1650 | User Manual - Page 17
as Internet Explorer and enter http://dlinkap.local in the address field. Select Admin from the drop-down menu and then enter your password. Leave the password blank by default. If you get a Page Cannot be Displayed error, please refer to "Troubleshooting" on page xc for assistance. D-Link DAP-1650 - D-Link DAP-1650 | User Manual - Page 18
Section 3 - Configuration Wireless Setup Wizard Click Launch Wireless Setup Wizard to configure your access point. If you want to configure the access point manually without running the wizard, skip to "Manual Configuration" on page 26. Click Next to continue. D-Link DAP-1650 User Manual 18 - D-Link DAP-1650 | User Manual - Page 19
Access Point Mode This wizard is designed to assist you in configuring your DAP-1650 as an access point. Select Access Point from the drop-down menu. Then, click Next to continue. This screen will help you to set a network name (SSID) and security password for your wireless network. Specify - D-Link DAP-1650 | User Manual - Page 20
username and cannot be changed, and by default, the password is blank. Check the Enable Graphical Authentication box to enable CAPTCHA authentication for added security. Click Next to continue. Select your time zone from the drop-down menu and click Next to continue. D-Link DAP-1650 User Manual 20 - D-Link DAP-1650 | User Manual - Page 21
taken to your browser's bookmark settings to save the address. Click Cancel to continue without saving a bookmark. In order for your network settings to take effect the AP will reboot automatically. When the device has finished rebooting the main screen will display. D-Link DAP-1650 User Manual 21 - D-Link DAP-1650 | User Manual - Page 22
Repeater Mode This wizard is designed to assist you in configuring your DAP-1650 as a repeater to extend the range of your existing wireless network. Select Repeater from the drop-down menu. This screen will help you to set a network name (SSID) and security password for your wireless network - D-Link DAP-1650 | User Manual - Page 23
Configuration The wizard will scan for available wireless networks. Select the network you wish to extend and click Next. Enter your password for that wireless network and click Next. A summary page will be displayed, showing the current settings for your 2.4 GHz and 5 GHz wireless networks. It is - D-Link DAP-1650 | User Manual - Page 24
the range of your existing wireless network. This mode is particularly useful for attaching a wired device to a wireless network. Select Media Bridge from the drop-down menu. The wizard will scan for available wireless networks. Select the network you wish to extend and click Next. D-Link DAP-1650 - D-Link DAP-1650 | User Manual - Page 25
that you make a note of this information for future reference. Click Finish to save your network settings. In order for your network settings to take effect the AP will reboot automatically. When the device has finished rebooting the main screen will display. D-Link DAP-1650 User Manual 25 - D-Link DAP-1650 | User Manual - Page 26
your DAP-1650 instead of running the setup wizard. Please refer to the following pages for detailed instructions on how to manually configure the DAP-1650 for your desired operation mode. Access Point mode - page 27 Repeater mode - page 31 Media Bridge mode - page 35 D-Link DAP-1650 User Manual - D-Link DAP-1650 | User Manual - Page 27
Point Mode 2.4 GHz Band Wireless Mode: Select Access Point from the drop-down menu. Enable Wireless: Check the box to enable the wireless function for the 2.4 GHz band. If you do not want to use wireless, uncheck the box to disable all wireless functions. You may also set up a specific time range - D-Link DAP-1650 | User Manual - Page 28
seen by site survey utilities, so wireless clients will have to manually enter the SSID of your wireless network in order to connect to it. Security For information on how to set up wireless security, please refer Mode: to "Configuring Wireless Security" on page 36. D-Link DAP-1650 User Manual 28 - D-Link DAP-1650 | User Manual - Page 29
. Wireless Indicates the channel setting for the DAP-1650. The channel Channel: can be changed to fit the channel setting for an existing wireless network or to reduce interference in congested areas. If you enable Auto Channel Scan, this option will not be available. D-Link DAP-1650 User Manual - D-Link DAP-1650 | User Manual - Page 30
default setting wireless network in order to connect to it. Security Mode: For information on how to set up wireless security, please refer to "Configuring Wireless Security" on page 36. Click Save Settings at the bottom of the page to save the current configuration. D-Link DAP-1650 User Manual - D-Link DAP-1650 | User Manual - Page 31
Repeater Mode Repeater mode re-broadcasts the wireless signal of an existing network to increase coverage. The existing wireless signal can be repeated by the DAP-1650 using both the 2.4 GHz and 5 GHz bands. 2.4 GHz Band Wireless Mode: Select Repeater from the drop-down menu. Enable Wireless: Check - D-Link DAP-1650 | User Manual - Page 32
. You may select the wireless access point to connect to. Security For information on how to set up wireless security, please refer Mode: to "Configuring Wireless Security" on page 36. Click Save Settings at the bottom of the page to save the current configuration. D-Link DAP-1650 User Manual 32 - D-Link DAP-1650 | User Manual - Page 33
. Wireless Indicates the channel setting for the DAP-1650. The channel Channel: can be changed to fit the channel setting for an existing wireless network or to reduce interference in congested areas. If you enable Auto Channel Scan, this option will not be available. D-Link DAP-1650 User Manual - D-Link DAP-1650 | User Manual - Page 34
the default setting, wireless network in order to connect to it. Security For information on how to set up wireless security, please refer Mode: to "Configuring Wireless Security" on page 36. Click Save Settings at the bottom of the page to save the current configuration. D-Link DAP-1650 User Manual - D-Link DAP-1650 | User Manual - Page 35
at the bottom of the page to save the current configuration. Note: The Bridge mode is not completely specified in the Wi-Fi or IEEE standards. This mode will work with other DAP-1650 units. Communication with other APs (even other D-Link APs) is not guaranteed. D-Link DAP-1650 User Manual 35 - D-Link DAP-1650 | User Manual - Page 36
key (password) for your wireless network. The key should adhere to the requirements of WEP encryption method specified above. Authentication: Select an authentication method from the drop-down menu Click Save Settings at the bottom of the page to save the current configuration. D-Link DAP-1650 User - D-Link DAP-1650 | User Manual - Page 37
centralized authentication for wireless access. If you are missing any of the information required for this setup, please contact your network administrator. Security Mode: Select WPA-Enterprise from the drop-down menu. WPA Mode: There are two versions of WPA supported by the DAP-1650; WPA and WPA2 - D-Link DAP-1650 | User Manual - Page 38
to display the setup options for an optional backup RADIUS server configuration. Second RADIUS Enter the IP address for your network's backup RADIUS Server IP authentication server. Address: Second Pre- at the bottom of the page to save the current configuration. D-Link DAP-1650 User Manual 38 - D-Link DAP-1650 | User Manual - Page 39
DNS server address to be used by the access Server: point (Static IP only). Secondary DNS Enter the secondary DNS server address to be used by the access Server: point (Static IP only). Click Save Settings at the bottom of the page to save the current configuration. D-Link DAP-1650 User Manual 39 - D-Link DAP-1650 | User Manual - Page 40
address to the access point. LAN IPv6 The router's local IPv6 address will be displayed here. This Address: address should be used to access the web-based configuration utility through the IPv6 protocol. Subnet Prefix Enter the prefix length for IPv6 IP addresses on your network. Length: Default - D-Link DAP-1650 | User Manual - Page 41
further configuration is required. Primary DNS Enter the primary IPv6 DNS server address to be used. Server: Secondary DNS Enter the secondary IPv6 DNS server address to be used. Server: Click Save Settings at the bottom of the page to save the current configuration. D-Link DAP-1650 User Manual 41 - D-Link DAP-1650 | User Manual - Page 42
password that will be associated with the user account. Verify Password: In the Verify Password field, the user can re-enter the password that will be associated with the user account. Click the Add/Edit button the add a new user account or modify an existing account. D-Link DAP-1650 User Manual - D-Link DAP-1650 | User Manual - Page 43
the constrains of the access path specified. Click the Append button to add a blank account with the access path and permission specified. Click the OK button to accept the changes made for the existing account. Click the Cancel button to discard the changes made. D-Link DAP-1650 User Manual 43 - D-Link DAP-1650 | User Manual - Page 44
on the Dynamic DNS page, the WAN IP address will be used. If, however, a DDNS account is specified, then the domain name will be used. Click on the Save Settings button to accept the changes made. Click on the Don't Save Settings button to discard the changes made. D-Link DAP-1650 User Manual 44 - D-Link DAP-1650 | User Manual - Page 45
Note: The shared media may not be secure. Allowing any devices to stream is recommended only on secure networks. DLNA Server: Select whether to enable or disable the DLNA Media Server functions. DLNA Server Choose a located on the root folder of the connected drive. D-Link DAP-1650 User Manual 45 - D-Link DAP-1650 | User Manual - Page 46
DAP-1650. There will be different advanced features available for configuration based on the mode in which your device is operating. The instructions below are listed according to operation mode. Access Point Mode Access Control MAC filtering allows you to control wireless access to your network - D-Link DAP-1650 | User Manual - Page 47
Snooping: Enabling this option allows the access point to listen for internet group management protocol (IGMP) traffic, which can help to detect clients which require multicast streams. Click Save Settings at the bottom of the page to save the current configuration. D-Link DAP-1650 User Manual 47 - D-Link DAP-1650 | User Manual - Page 48
different from your Name: main wireless network. Security Mode: Refer to "Wireless Security" on page lxxvi for more information regarding wireless security. WLAN Partition: Tick the check box to prevent the guest clients from accessing other guests in the guest zone. D-Link DAP-1650 User Manual 48 - D-Link DAP-1650 | User Manual - Page 49
network gaming performance by prioritizing applications. By default the QoS engine settings are disabled and application priority is not classified automatically. Enable QoS This option is disabled by default fine-tune your network traffic prioritzation by protocol. D-Link DAP-1650 User Manual 49 - D-Link DAP-1650 | User Manual - Page 50
Setup: option is selected, wireless clients will only be able to use the WPS-PBC (push-button connection) method. Current PIN: Displays the current PIN which can be used by wireless clients to connect to the access point. Click Reset PIN to Default to return the PIN to its factory default. Click - D-Link DAP-1650 | User Manual - Page 51
to the access point at any one time for each wireless band. Enable User Check the box to enable the user limit function. Limit: User Limit: Enter a number of users (between 1-32). Click Save Settings at the bottom of the page to save the current configuration. D-Link DAP-1650 User Manual 51 - D-Link DAP-1650 | User Manual - Page 52
Settings at the bottom of the page to save the current configuration. 5 GHz Band Transmit Power: Select the desired transmission power of the wireless radio from the drop-down menu. Click Save Settings at the bottom of the page to save the current configuration. D-Link DAP-1650 User Manual 52 - D-Link DAP-1650 | User Manual - Page 53
Setup: option is selected, wireless clients will only be able to use the WPS-PBC (push-button connection) method. Current PIN: Displays the current PIN which can be used by wireless clients to connect to the access point. Click Reset PIN to Default to return the PIN to its factory default. Click - D-Link DAP-1650 | User Manual - Page 54
Settings at the bottom of the page to save the current configuration. 5 GHz Band Transmit Power: Select the desired transmission power of the wireless radio from the drop-down menu. Click Save Settings at the bottom of the page to save the current configuration. D-Link DAP-1650 User Manual 54 - D-Link DAP-1650 | User Manual - Page 55
Setup: option is selected, wireless clients will only be able to use the WPS-PBC (push-button connection) method. Current PIN: Displays the current PIN which can be used by wireless clients to connect to the access point. Click Reset PIN to Default to return the PIN to its factory default. Click - D-Link DAP-1650 | User Manual - Page 56
settings of the router such as time and date, administrator password, and update the device's firmware. . Access Point Mode Admin New Password: To change the password for the web-based configuration utility's admin account, enter a new password in the field provided. Confirm Re-enter the new - D-Link DAP-1650 | User Manual - Page 57
file to the access point. Note: This will overwrite any current configuration. Restore to Click Restore Device to reset the DAP-1650's settings to the Factory Default factory defaults. Settings: Warning Click to remove a language pack from the device. Language Pack: D-Link DAP-1650 User Manual 57 - D-Link DAP-1650 | User Manual - Page 58
a firmware upgrade. Warning: You must use a wired connection to the access point to update the firmware. Language Pack Click Browse to locate a language pack file on your computer. Upgrade: Once located, click Upload to commence the language pack upgrade process. D-Link DAP-1650 User Manual 58 - D-Link DAP-1650 | User Manual - Page 59
End dates for Dates: daylight saving time. Enable NTP Check the box to have the access point automatically Server: synchronize its clock and calendar with D-Link's Internet time server. NTP Server Used: Type the address of the NTP server you would like to use in the field provided, or choose a pre - D-Link DAP-1650 | User Manual - Page 60
Check Host Name or IP Enter the host name or IP address for which you wish to conduct Address: a ping test. Host Name Enter the host name or IPv6 address for which you wish to or IPv6 conduct a ping test. Address: Ping Displays results of the ping test above. Result: D-Link DAP-1650 User Manual 60 - D-Link DAP-1650 | User Manual - Page 61
3 - Configuration Schedules Use the schedules page to create new schedule rules for various access point functions. Schedules created here will be available for selection from schedule selection drop-down or click on the Delete icon to delete the rule from the list. D-Link DAP-1650 User Manual 61 - D-Link DAP-1650 | User Manual - Page 62
the field provided. Confirm Re-enter the new password in this field. Password: Gateway Name: This allows you create a user friendly name for your device. Enable Click Save Settings at the bottom of the page to save the Graphical current configuration. Authentication: D-Link DAP-1650 User Manual 62 - D-Link DAP-1650 | User Manual - Page 63
file to the access point. Note: This will overwrite any current configuration. Restore to Click Restore Device to reset the DAP-1650's settings to the Factory Default factory defaults. Settings: Warning: Click to remove a language pack from the device. Language Pack: D-Link DAP-1650 User Manual 63 - D-Link DAP-1650 | User Manual - Page 64
a firmware upgrade. Warning: You must use a wired connection to the access point to update the firmware. Language Pack Click Browse to locate a language pack file on your computer. Upgrade: Once located, click Upload to commence the language pack upgrade process. D-Link DAP-1650 User Manual 64 - D-Link DAP-1650 | User Manual - Page 65
End dates for Dates: daylight saving time. Enable NTP Check the box to have the access point automatically Server: synchronize its clock and calendar with D-Link's Internet time server. NTP Server Used: Type the address of the NTP server you would like to use in the field provided, or choose a pre - D-Link DAP-1650 | User Manual - Page 66
the field provided. Confirm Re-enter the new password in this field. Password: Gateway Name: This allows you create a user friendly name for your device. Enable Click Save Settings at the bottom of the page to save the Graphical current configuration. Authentication: D-Link DAP-1650 User Manual 66 - D-Link DAP-1650 | User Manual - Page 67
to the access point. Note: This will overwrite any current configuration. Restore to Click Restore Device to reset the DAP-1650's settings to the Factory Default factory defaults. Settings: Warning Click to remove a language pack from the device. Language Pack: D-Link DAP-1650 User Manual lxvii - D-Link DAP-1650 | User Manual - Page 68
a firmware upgrade. Warning: You must use a wired connection to the access point to update the firmware. Language Pack Click Browse to locate a language pack file on your computer. Upgrade: Once located, click Upload to commence the language pack upgrade process. D-Link DAP-1650 User Manual lxviii - D-Link DAP-1650 | User Manual - Page 69
End dates for Dates: daylight saving time. Enable NTP Check the box to have the access point automatically Server: synchronize its clock and calendar with D-Link's Internet time server. NTP Server Used: Type the address of the NTP server you would like to use in the field provided, or choose a pre - D-Link DAP-1650 | User Manual - Page 70
the access point. Wireless LAN: Displays the wireless MAC address and wireless settings such as SSID and channel for the 2.4 GHz wireless band. Wireless LAN 2: Displays the wireless MAC address and wireless settings such as SSID and channel for the 5 GHz wireless band. D-Link DAP-1650 User Manual - D-Link DAP-1650 | User Manual - Page 71
Configuration Logs The DAP-1650 keeps a running log of events and activities occurring on the access point. If the to display log items of each type. Click Apply Log Settings Now to update the log options. First Page: This button directs you to the first page . D-Link DAP-1650 User Manual lxxi - D-Link DAP-1650 | User Manual - Page 72
that passes through it. You can view the amount of packets that pass through the LAN and wireless portions of the network. The traffic counter will reset if the access point is rebooted. Use the buttons at the top of the page to Refresh or Clear the statistics. D-Link DAP-1650 User Manual lxxii - D-Link DAP-1650 | User Manual - Page 73
allows you to view the wireless clients that are connected to your wireless access point. Connected Time: Displays the amount of time the wireless client has been connected to the access point. MAC Address: The Ethernet ID (MAC address) of the wireless client. D-Link DAP-1650 User Manual lxxiii - D-Link DAP-1650 | User Manual - Page 74
the IPv6 protocol. Primary DNS If configured this field will display the details of the primary IPv6 DNS server address to be used. Server: Secondary DNS If configured this field will display the details of the secondary IPv6 DNS server address to be used. Server: D-Link DAP-1650 User Manual lxxiv - D-Link DAP-1650 | User Manual - Page 75
Section 3 - Configuration Help D-Link DAP-1650 User Manual lxxv - D-Link DAP-1650 | User Manual - Page 76
can use to protect your wireless network from intruders. Please note that some security methods may not be available for all operation modes. The DAP-1650 offers the following types of security: • Wired Equivalent Privacy (WEP) • Wi-Fi Protected Setup (WPS) • Wi-Fi Protected Access (WPA/WPA2) --WPA - D-Link DAP-1650 | User Manual - Page 77
and encrypt data. • WPA/WPA2 - Enterprise is designed for medium-to-large scale networking environments and uses a centralized RADIUS server for authentication. Users must be registered and authorized by the RADIUS server in order to access the wireless network. D-Link DAP-1650 User Manual lxxvii - D-Link DAP-1650 | User Manual - Page 78
the wireless network icon in the taskbar, next to the time display. Clicking on this icon will display a list of wireless networks which are within connecting proximity of your computer. Select the desired network by clicking on the network name. Wireless Icon D-Link DAP-1650 User Manual lxxviii - D-Link DAP-1650 | User Manual - Page 79
router, you can also press the WPS button on your router at this point to enable the WPS function. When you have established a successful connection to a wireless network, the word Connected will appear next to the name of the network to which you are connected. D-Link DAP-1650 User Manual lxxix - D-Link DAP-1650 | User Manual - Page 80
you are joining an existing network, you will need to know the security key or passphrase being used. 1. Click on the wireless icon in your system tray (lower-right corner). 2. The utility will display any available wireless networks in your area. Wireless Icon D-Link DAP-1650 User Manual lxxx - D-Link DAP-1650 | User Manual - Page 81
get a good signal but cannot access the Internet, check your TCP/IP settings for your wireless adapter. Refer to the Networking Basics section in this manual for more information. 4. The following window appears while your computer tries to connect to the router. D-Link DAP-1650 User Manual lxxxi - D-Link DAP-1650 | User Manual - Page 82
connect by pushing the WPS button on the router. It may take 20-30 seconds to connect to the wireless network. If the connection fails, please verify that the security settings are correct. The key or passphrase must be exactly the same as on the wireless router. D-Link DAP-1650 User Manual lxxxii - D-Link DAP-1650 | User Manual - Page 83
Click on a network (displayed using the SSID) and click the Connect button. If you get a good signal but cannot access the Internet, check your TCP/ IP settings of your wireless adapter. Refer to the Networking Basics section in this manual for more information. D-Link DAP-1650 User Manual lxxxiii - D-Link DAP-1650 | User Manual - Page 84
used. 1. Open the Windows Vista Wireless Utility by right-clicking on the wireless computer icon in your system tray (lower right corner of screen). Select Connect to a network. 2. Highlight the Wi-Fi name (SSID) you would like to connect to and click Connect. D-Link DAP-1650 User Manual lxxxiv - D-Link DAP-1650 | User Manual - Page 85
-Fi password) that is on your router and click Connect. It may take 20-30 seconds to connect to the wireless network. If the connection fails, please verify that the security settings are correct. The key or passphrase must be exactly the same as on the wireless router. D-Link DAP-1650 User Manual - D-Link DAP-1650 | User Manual - Page 86
to click the Generate New PIN button or Reset PIN to Default button. If you are using third party software to set up Wi-Fi Protection, carefully follow the directions. When you are finished, proceed to the next section to set up the newly-configured router. D-Link DAP-1650 User Manual lxxxvi - D-Link DAP-1650 | User Manual - Page 87
Click on a network (displayed using the SSID) and click the Connect button. If you get a good signal but cannot access the Internet, check the TCP/ IP settings of your wireless adapter. Refer to the Networking Basics section in this manual for more information. D-Link DAP-1650 User Manual lxxxvii - D-Link DAP-1650 | User Manual - Page 88
Windows® XP Wireless Utility by right-clicking on the wireless computer icon in your system tray (lower-right corner of screen). Select View Available Wireless Networks. 2. Highlight the wireless network (SSID) you would like to connect to and click Connect. D-Link DAP-1650 User Manual lxxxviii - D-Link DAP-1650 | User Manual - Page 89
. Enter the WPAPSK passphrase and click Connect. It may take 20-30 seconds to connect to the wireless network. If the connection fails, please verify that the WPA-PSK settings are correct. The WPA-PSK passphrase must be exactly the same as on the wireless router. D-Link DAP-1650 User Manual lxxxix - D-Link DAP-1650 | User Manual - Page 90
Troubleshooting This chapter provides solutions to problems that can occur during the installation and operation of the DAP-1650. Read the following descriptions if you are having problems. 1. Why can't I access the web-based configuration utility? When entering the name or IP address of the D-Link - D-Link DAP-1650 | User Manual - Page 91
down for 10 seconds. Release the button and the access point will go through its reboot process. Wait about 30 seconds to access the access point. The default address is http://dlinkap.local. When logging in, the username is Admin and leave the password box empty. D-Link DAP-1650 User Manual xci - D-Link DAP-1650 | User Manual - Page 92
Section 6 - Troubleshooting 3. Why can't I connect to certain sites or send and receive emails when connecting through my access point? If you are having a problem sending or receiving email, or : ping [url] [-f ] [-l] [MTU value] Example: ping yahoo.com -f -l 1472 D-Link DAP-1650 User Manual xcii - D-Link DAP-1650 | User Manual - Page 93
below: • Open your browser, enter the IP address of your access point (192.168.0.50) and click OK. • Enter your username (Admin) and password (blank by default). Click OK to enter the web configuration page for the device. • Click on Setup and then click Manual Configure. • To change the MTU enter - D-Link DAP-1650 | User Manual - Page 94
the IP address, subnet mask, and the default gateway of your adapter. If the address is 0.0.0.0, check your adapter installation, security settings, and the settings on your router. Some firewall software programs may block a DHCP request on newly installed adapters. D-Link DAP-1650 User Manual - D-Link DAP-1650 | User Manual - Page 95
Default Gateway the same as the LAN IP address of your router (192.168.0.1). Set Primary DNS the same as the LAN IP address of your router (192.168.0.1). The Secondary DNS is not needed or you may enter a DNS server from your ISP. Step 5 Click OK twice to save your settings. D-Link DAP-1650 User - D-Link DAP-1650 | User Manual - Page 96
network interface • Guest zone • Web file access • Multi-language web setup wizard • Green Ethernet • SharePort Mobile • WPA & WPA2 (Wi-Fi Protected Access) • DLNA media server support • QoS • MAC address filter • QRS Mobile • Wi-Fi Protected Setup (WPS) PIN/PBC D-Link DAP-1650 User Manual - D-Link DAP-1650 | User Manual - Page 97
will adversely affect wireless signal range. 2All Maximum transmission power values expressed are for dual-chain mode. Maximum transmission power and included antennas may vary depending on regional regulations. 3 Range may vary depending on regional regulations. D-Link DAP-1650 User Manual xcvii - D-Link DAP-1650 | User Manual - Page 98
in a residential installation. This equipment generates, uses and can radiate radio frequency energy and, if not installed and used in accordance with the instructions, may cause is connected. - Consult the dealer or an experienced radio/TV technician for help. D-Link DAP-1650 User Manual xcviii - D-Link DAP-1650 | User Manual - Page 99
This equipment should be installed and operated with minimum US model. Per FCC regulation, all WiFi product marketed in US must fixed to bandes 5 250-5 350 MHz et 5 650-5 850 MHz et que ces radars pourraient causer du brouillage et/ou des dommages aux dispositifs LAN-EL. D-Link DAP-1650 User Manual - D-Link DAP-1650 | User Manual - Page 100
d'exposition aux rayonnements IC établies pour un environnement non contrôlé. Cet équipement doit être installé et utilisé avec un minimum de 20 cm de distance entre la source de rayonnement pour l'exploitation de l'émetteur. TELEC Statement: 5GHz 在5.25-5.35 D-Link DAP-1650 User Manual c
-
 1
1 -
 2
2 -
 3
3 -
 4
4 -
 5
5 -
 6
6 -
 7
7 -
8
-
9
-
10
-
11
-
12
-
13
-
14
-
15
-
16
-
17
-
18
-
19
-
20
-
21
-
22
-
23
-
24
-
25
-
26
-
27
-
28
-
29
-
30
-
31
-
32
-
33
-
34
-
35
-
36
-
37
-
38
-
39
-
40
-
41
-
42
-
43
-
44
-
45
-
46
-
47
-
48
-
49
-
50
-
51
-
52
-
53
-
54
-
55
-
56
-
57
-
58
-
59
-
60
-
61
-
62
-
63
-
64
-
65
-
66
-
67
-
68
-
69
-
70
-
71
-
72
-
73
-
74
-
75
-
76
-
77
-
78
-
79
-
80
-
81
-
82
-
83
-
84
-
85
-
86
-
87
-
88
-
89
-
90
-
91
-
92
-
93
-
94
-
95
-
96
-
97
-
98
-
99
-
100
 |
 |

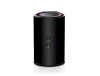
DAP-1650 Wireless AC1200 Dual-band Gigabit Range Extender
DAP-1650
User Manual
Version 1.01 | 12/09/2013