D-Link DCS-1110 Product Manual
D-Link DCS-1110 - Network Camera Manual
 |
UPC - 790069292750
View all D-Link DCS-1110 manuals
Add to My Manuals
Save this manual to your list of manuals |
D-Link DCS-1110 manual content summary:
- D-Link DCS-1110 | Product Manual - Page 1
- D-Link DCS-1110 | Product Manual - Page 2
27 DDNS 28 URL JPG 29 Tools 30 Admin 30 System 31 Default 32 Firmware 33 Recording 34 Trigger 35 Motion Detection 36 Port 37 Status 38 Device Info 38 Help 39 Installing the DCS-1110 Behind a Router 40 1. Identify the Camera's IP Address 40 2. Identify the HTTP and AV Ports for the - D-Link DCS-1110 | Product Manual - Page 3
Frequently Asked Questions 67 Internet Camera Features 67 Internet Camera Installation 69 How to Ping Your IP Address 72 Time Zone Table 74 Adjusting the Camera Focus 76 Technical Specifications 77 Contacting Technical Support 79 Warranty 80 Registration 85 D-Link DCS-1110 User Manual 3 - D-Link DCS-1110 | Product Manual - Page 4
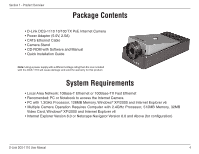
• D-Link DCS-1110 10/100 TX PoE Internet Camera • Power Adapter (5.0V, 2.5A) • CAT5 Ethernet Cable • Camera Stand • CD-ROM with Software and Manual • Quick Installation Guide Note: Using a power supply with a different voltage rating than the one included with the DCS-1110 will cause - D-Link DCS-1110 | Product Manual - Page 5
or Internet via a web browser. The simple installation procedure and intuitive web-based interface offer easy integration with your Ethernet or Fast Ethernet network. The DCS-1110 also comes with remote monitoring capability for a complete and cost-effective solution. D-Link DCS-1110 User Manual 5 - D-Link DCS-1110 | Product Manual - Page 6
support for 802.3af Power over Ethernet (PoE), the DCS-1110 works with a compatible PoE power injector or PoE switch. This eliminates the need for mounting the camera near a power supply. • Web Configuration - Using a standard Web browser, Administrators can configure and manage the Internet Camera - D-Link DCS-1110 | Product Manual - Page 7
viewing and allows the administrator to manage and control the Internet Camera at anytime, from anywhere in the world. Many applications exist, including industrial and public monitoring of homes, offices, banks, hospitals, child-care centers, and amusement parks. D-Link DCS-1110 User Manual 7 - D-Link DCS-1110 | Product Manual - Page 8
settings. The IP address will also return to the default settings with DHCP selected. Ethernet Cable Connector The DCS-1110 features an RJ-45 connector for connections to 10Base-T Ethernet cabling or 100Base-TX Fast Ethernet cabling. The port supports 802.3af Power over Ethernet (PoE) and the - D-Link DCS-1110 | Product Manual - Page 9
LED. Steady orange confirms a good connection to the LAN. Depending on the data traffic, the LED will begin to flash to indicate that the DCS-1110 is receiving/transceiving from/to the LAN network. D-Link DCS-1110 User Manual Power LED The Power LED is positioned on the right side of the - D-Link DCS-1110 | Product Manual - Page 10
Connect the included Ethernet cable to the network cable connector located on the back panel of the DCS-1110 and attach it to the network. Network Connectivity is confirmed when the orange LED Indicator on the DCS-1110 located left of the Power LED is illuminated. D-Link DCS-1110 User Manual 10 - D-Link DCS-1110 | Product Manual - Page 11
user access to the DCS-1110 since the Default settings for the Admin ID and Admin Password are both "admin." Once the ID and Password are defined, only the Administrator has access to the management of the DCS-1110. This procedure should be done as soon as possible. D-Link DCS-1110 User Manual 11 - D-Link DCS-1110 | Product Manual - Page 12
Section 2 - Installation Using the Setup Wizard Follow the simple steps below to run the Setup Wizard to guide you quickly through the installation process. Insert the D-Link DCS-1110 CD into your CD-ROM drive. Click on Installation Wizard D-Link DCS-1110 User Manual 12 - D-Link DCS-1110 | Product Manual - Page 13
Section 2 - Installation Click Next Click Yes D-Link DCS-1110 User Manual 13 - D-Link DCS-1110 | Product Manual - Page 14
Section 2 - Installation Click Next Click Finish D-Link DCS-1110 User Manual 14 - D-Link DCS-1110 | Product Manual - Page 15
Section 2 - Installation Now you should install ffdshow, this will install the proper codec that will allow you to playback recorded video taken by the DCS-1110. Select a language. Click OK Click Next D-Link DCS-1110 User Manual 15 - D-Link DCS-1110 | Product Manual - Page 16
Section 2 - Installation Click I Agree Click Next D-Link DCS-1110 User Manual 16 - D-Link DCS-1110 | Product Manual - Page 17
Section 2 - Installation Click Install Click Next D-Link DCS-1110 User Manual 17 - D-Link DCS-1110 | Product Manual - Page 18
Section 2 - Installation Click Finish To run the Setup Wizard, click on Start->Programs->D-Link Setup Wizard. Select the camera you want to setup and click Wizard. Click Wizard D-Link DCS-1110 User Manual 18 - D-Link DCS-1110 | Product Manual - Page 19
Section 2 - Installation Click Next This page shows the current network settings of the camera. Click Next to continue. Click Next D-Link DCS-1110 User Manual 19 - D-Link DCS-1110 | Product Manual - Page 20
Section 2 - Installation Click Restart Click Link to open a web-browser and access the configuration utility. (see page 21) Click Link D-Link DCS-1110 User Manual 20 - D-Link DCS-1110 | Product Manual - Page 21
a web-browser such as Internet Explorer and enter the IP address that you assigned to the DCS-1110. Click Go. In this example, the IP address is 192.168.0.100. Enter the user name and password.The factory default username and password are both admin. Click Apply D-Link DCS-1110 User Manual 21 - D-Link DCS-1110 | Product Manual - Page 22
camera for your network. Setup: This will allow you to change the configuration settings of the DCS-1110. Audio On: This will turn on the built-in microphone on the DCS-1110. By default the audio is turned off. Upside Down: This will flip be saved to a local hard drive. D-Link DCS-1110 User Manual 22 - D-Link DCS-1110 | Product Manual - Page 23
: Select this if the camera is operating under low light conditions. In this setting, the DCS-1110 will be able to view dcs1110\myrecording). Start Video Clicking this button will start recording video and audio immediately to the file path specified above. Recording: D-Link DCS-1110 User Manual - D-Link DCS-1110 | Product Manual - Page 24
of the video display. By Resolution: default the capture resolution is set to VGA (640x480). Frame Rate: This is the refresh frame rate. By default the frame rate is set to 15 bit rate than 352k is advised. Camera This name will appear on the log-in screen. Name: D-Link DCS-1110 User Manual 24 - D-Link DCS-1110 | Product Manual - Page 25
's password you want to assign to the specific Username. The maximum password length is 16 characters (Printable ASCII). User List: The User List displays all the user names that have access to the DCS-1110. To delete a user, click on the corresponding trash can icon. D-Link DCS-1110 User Manual - D-Link DCS-1110 | Product Manual - Page 26
are manually assigning a Static IP, enter your IP Address, IP Subnet Mask, Gateway IP Address, and DNS into the fields provided. If you are using a DHCP network, you may choose DHCP client and the IP address, IP subnet mask, Gateway and DNS fields will be filled in automatically. D-Link DCS-1110 User - D-Link DCS-1110 | Product Manual - Page 27
Section 3 - Configuration PPPoE PPPoE: If you are using a PPPoE connection, click the Yes button and enter the User Name and Password for your PPPoE account. D-Link DCS-1110 User Manual 27 - D-Link DCS-1110 | Product Manual - Page 28
DCS-1110 will automatically update your DDNS server every time it receives a different IP address. Depending on the service, this update may take a few hours. If you are using a DDNS connection, click the Yes button and enter in your User Name, Password, and Domain Name. D-Link DCS-1110 User Manual - D-Link DCS-1110 | Product Manual - Page 29
Section 3 - Configuration iMode: Adjust the resolution for the picture. URL JPG iMode Page Specify the file name for the URL. The Name: default setting is "iMode".The URL will be: http://IP_Address_of_camera/iMode. asp D-Link DCS-1110 User Manual 29 - D-Link DCS-1110 | Product Manual - Page 30
User Name: Enter the administrator user name (admin). Password: Enter the current password. New Password: Enter the new administrator password with a maximum length of 16 (printable ASCII) characters. Confirm Confirm the new password by entering Password: it again. D-Link DCS-1110 User Manual 30 - D-Link DCS-1110 | Product Manual - Page 31
. Set the Time: Manually set the time by selecting the Year, Month, Day, Hour, Minute, and Second. Time Zone: Used to adjust the hour of time servers for local settings. Daylight Saving Used to adjust for Daylight Saving Time Time: if applicable in your region. D-Link DCS-1110 User Manual 31 - D-Link DCS-1110 | Product Manual - Page 32
Default Restart: Click the Restart button to restart the camera system. Default: Click the Restore button to restore factory default settings. This means that any changes made will be lost and the system will be reset to the initial status when shipped from the factory. D-Link DCS-1110 User Manual - D-Link DCS-1110 | Product Manual - Page 33
the D-Link Website to be used for the update. Upgrading the firmware will not change any of your system settings. Browse: After you have downloaded the new firmware, click Browse to locate the firmware update on your hard drive. Click Apply to complete the firmware upgrade. D-Link DCS-1110 User Manual - D-Link DCS-1110 | Product Manual - Page 34
Network Share images to your network storage device. Folder: Login Method: Select either Anonymous or Account. By selecting Anonymous, no user name or password is required. If you select Account from the drop down the single frame files when no motion is detected. D-Link DCS-1110 User Manual 34 - D-Link DCS-1110 | Product Manual - Page 35
default is 25. If you use a port other than 25 you can change it here. Motion Detection Increasing the time set here will avoid false alarms. This option allows you to set the amount of time between Skip Time: motion detection events before the next recording will start. D-Link DCS-1110 User Manual - D-Link DCS-1110 | Product Manual - Page 36
window being monitored that is required to initiate a motion detected alert. If this is set to 100%, motion is detected within the whole window to trigger a snapshot. Note: Setting a higher sensitivity the monitoring level and a motion detected alert is triggered. D-Link DCS-1110 User Manual 36 - D-Link DCS-1110 | Product Manual - Page 37
the audio and video. By default the port is set to 5000. You may change the port number if using multiple cameras. AV Streaming This is the port used to stream video. By default the port is set to 5001. You may change the port number Port: if using multiple cameras. D-Link DCS-1110 User Manual 37 - D-Link DCS-1110 | Product Manual - Page 38
Section 3 - Configuration IP View Port: This is the port used to stream the video from IPView program. It can be set to a port other than the default TCP port 5100. Status Device Info The Device Info screen lists the settings that are currently set for the DCS-1110 D-Link DCS-1110 User Manual 38 - D-Link DCS-1110 | Product Manual - Page 39
Section 3 - Configuration Help Click on the Help tab to access descriptions of the particular function you need help with. The help screen is organized in the order of the tabs and then each menu item under that tab. D-Link DCS-1110 User Manual 39 - D-Link DCS-1110 | Product Manual - Page 40
to your network settings. The Default Gateway will be the IP Address of your router's Local IP Address. (i.e. 192.168.0.1 if you are using a D-Link router) In this example, the camera's IP Address is 192.168.0.100. Please refer to the screenshot to the right. D-Link DCS-1110 User Manual 40 - D-Link DCS-1110 | Product Manual - Page 41
camera uses from 80 to something else, like 83. If you are behind a residential gateway, you will need to open a corresponding port on your gateway as well. Not all gateways are the same, please refer to your gateway's user's manual for specific instructions on how to forward ports. D-Link DCS-1110 - D-Link DCS-1110 | Product Manual - Page 42
ONE Web port per additional camera installed: port 81, 82, etc. for Web server. The AV Control Port and AV Streaming Port also need to be open. These ports are 5000 and 5001. Each camera will also require different control and streaming ports (5002, 5003,...etc). D-Link DCS-1110 User Manual 42 - D-Link DCS-1110 | Product Manual - Page 43
from your ISP. A static IP address is a fixed IP address that will not change over time and will be more convenient for you to use to access your camera from a remote location.You can use DDNS to obtain an IP address, please refer to page 28 for more information. D-Link DCS-1110 User Manual 43 - D-Link DCS-1110 | Product Manual - Page 44
the Internet (WAN) IP Address of the router, followed by the HTTP port number. (Example: http://24.163.122.90:83) To access from a computer on your local (home) network, simply enter the local IP Address of your camera with the HTTP port. (e.x. http://192.168.0.100:83) D-Link DCS-1110 User Manual - D-Link DCS-1110 | Product Manual - Page 45
the DCS-1110. IPView SE is a complete software management tool for the DCS-1110 and includes all configurable settings available in the web configuration utility. Insert the CD-ROM into the CD-ROM drive. A menu screen will appear as shown below. Click Install IPView SE D-Link DCS-1110 User Manual 45 - D-Link DCS-1110 | Product Manual - Page 46
Section 3 - Configuration Click Next Click Yes D-Link DCS-1110 User Manual 46 - D-Link DCS-1110 | Product Manual - Page 47
Section 3 - Configuration Click Next Click Finish D-Link DCS-1110 User Manual 47 - D-Link DCS-1110 | Product Manual - Page 48
application program for the DCS-1110 is automatically installed to \Programs\IPView SE Directory. To start running the IPView SE click on Start > Programs > IPView SE > IPView SE. Once the IPView SE application control panel is executed, the interface will appear. D-Link DCS-1110 User Manual 48 - D-Link DCS-1110 | Product Manual - Page 49
with detailed procedures for using the application. IPView SE allows you to manage your cameras by enabling you to search, configure, and preview all the DCS-1110s from one location. It is designed with a user-friendly interface for ease of control and navigation. D-Link DCS-1110 User Manual 49 - D-Link DCS-1110 | Product Manual - Page 50
Camera's Extra Information Configure Camera from Web Motion Setting Manual Recording Schedule Recording Motion Recording Scan Combine Play Help/About Minimize Close Rotate Snapshot View/List Zoom Maximize Color Setting Always on Top Wake Up Control Panel Upgrade Firmware D-Link DCS-1110 User Manual - D-Link DCS-1110 | Product Manual - Page 51
your camera is behind a router, you will need to enter your router's WAN IP followed by a colon, then the port number that is assigned to your camera. As in example 10.10.10.80:800, where 10.10.10.80 is your router's WAN IP and :800 is the port that your camera is using. D-Link DCS-1110 User Manual - D-Link DCS-1110 | Product Manual - Page 52
camera will be added into IPView SE. If the User Name and Password are entered incorrectly, the camera will not be added into IPView SE. The Login Camera dialog box will appear only if your have already set the Username and Password during the Web Configuration setting. D-Link DCS-1110 User Manual - D-Link DCS-1110 | Product Manual - Page 53
button. The green light from under the camera button will become grey. Before the camera is liberated you will be given the choice to confirm your request to remove the camera. A grey light under the camera button means that this channel is available to add a camera. D-Link DCS-1110 User Manual 53 - D-Link DCS-1110 | Product Manual - Page 54
button and the Change IP Address dialog box will appear. Select Manually Assign IP if you want to connect manually to the camera by providing the IP Address, Subnet Mask, and Default Gateway. Select DHCP if you would like to connect to only cameras on your network. D-Link DCS-1110 User Manual 54 - D-Link DCS-1110 | Product Manual - Page 55
four cameras combined (see image A maximum of 4 cameras can be viewed simultaneously with IPView SE. Select any of the four cameras for the View Mode format. If there is a green light next to the camera button that means that the IPView SE has a camera connected. D-Link DCS-1110 User Manual 55 - D-Link DCS-1110 | Product Manual - Page 56
button and the image should rotate 90o to the left (see image below). View/List Click the View/List button . All the cameras and their properties, such as the camera name, IP Address, user name, and functional information, will be displayed in the View/List screen D-Link DCS-1110 User Manual 56 - D-Link DCS-1110 | Product Manual - Page 57
Configuration Zoom Click the Zoom button x2.5, x3, x3.5, and x4. to zoom in on the camera image. The options under zoom are Fit Window x1, x1.5, x2, Color Setting Click the Color Setting top. Close Click the Close button to close the display screen of the camera. D-Link DCS-1110 User Manual 57 - D-Link DCS-1110 | Product Manual - Page 58
with a camera, click the Manual Recording button . An AVI file will appear in your IPView SE folder. Note: You must stop recording before changing any camera settings. How to Stop Recording To stop recording with a camera, click the Manual Recording button again. D-Link DCS-1110 User Manual 58 - D-Link DCS-1110 | Product Manual - Page 59
DCS-1110 using the Web-based interface, you can review or change your configuration using either the Web-based configuration utility or the Settings in the DCS-1110 IPView SE. Configure Camera from Web Click the Configure Camera between Low and High for motion recording. D-Link DCS-1110 User Manual 59 - D-Link DCS-1110 | Product Manual - Page 60
3 - Configuration Manual Recording Click the Manual Recording button , to begin recording images from your camera. Schedule Recording Click the Schedule Recording button and date for recording. to record based on a specific time and date. Click Add to set the time D-Link DCS-1110 User Manual 60 - D-Link DCS-1110 | Product Manual - Page 61
. Click on the Motion Setting button to set the sensitivity levels for motion recording (see page 59). Scan Click the Scan button to display each camera one by one. When this option is selected the camera(s) will briefly display their images in the View Mode format. D-Link DCS-1110 User Manual 61 - D-Link DCS-1110 | Product Manual - Page 62
Section 3 - Configuration Camera's Extra Information Click the Camera's Extra Information button to view information about your camera. Play Click the Play button to playback video recorded from your camera. D-Link DCS-1110 User Manual 62 - D-Link DCS-1110 | Product Manual - Page 63
your cameras and then click the Save or Save As buttons to save your profile. Up to four cameras can be saved per configuration, there are no limits as to how many configurations can be saved. Click the Load button to load any of your configurations. D-Link DCS-1110 User Manual 63 - D-Link DCS-1110 | Product Manual - Page 64
used to adjust the file size for recording the video images (the default setting is 10MB). If the recorded video files reach the file size file automatically. By File Size - permits recording by file size from 10 MB to 50 MB. Storage List: To add another storage, simply click Link DCS-1110 User Manual 64 - D-Link DCS-1110 | Product Manual - Page 65
free system default or support. Camera scan It allows you to display for each camera one by one. The time interval for each camera can be from 1 Sec. to 20 Sec. interval: About Click the Help/About icon, and then select About for camera details such as software version. D-Link DCS-1110 User Manual - D-Link DCS-1110 | Product Manual - Page 66
the Confirm Uninstall dialog box, click OK to continue the process. The InstallShield Wizard prompt will appear. Click Finish to complete the uninstallation procedure. D-Link DCS-1110 User Manual 66 - D-Link DCS-1110 | Product Manual - Page 67
the IPView Lite application supplied with the Internet Camera CD-ROM.You may also record snapshots using the snapshot feature on the Home page. When viewing this page, press the "snapshot" button on your Web browser to capture the image and save to your hard drive. D-Link DCS-1110 User Manual 67 - D-Link DCS-1110 | Product Manual - Page 68
Camera? The Internet Camera uses Category 5 UTP Twisted-pair cable allowing 10 Base-T and 100 Base-T networking. Can the Internet Camera be setup as a PC-cam on the computer? No, the Internet Camera is used only on Ethernet and Fast Ethernet network or supported by wireless transmission. The D-Link - D-Link DCS-1110 | Product Manual - Page 69
to the following (...bytes = 32 time = 2 ms). Another possible problem may be that the network device utilized by the Internet Camera is not functioning properly, such as hubs or switches. Confirm the power for the devices are well connected and functioning properly. D-Link DCS-1110 User Manual 69 - D-Link DCS-1110 | Product Manual - Page 70
the Camera Focus" on page 76. Noisy images occur. How can I solve the problem? The video images might be noisy if the Internet Camera is used in a very low light environment. To solve this issue you need more lighting, or click on the Nighshot button on the Home page. D-Link DCS-1110 User Manual - D-Link DCS-1110 | Product Manual - Page 71
on your browser to allow the ActiveX plug-in to be installed. If you are using Internet Explorer with a version number of lower than 5, then you will need to upgrade your Web browser software in order to view the streaming video transmitted by the Internet Camera. D-Link DCS-1110 User Manual 71 - D-Link DCS-1110 | Product Manual - Page 72
procedure below to utilize the PING command. Start a DOS window Start>Program>Accessories>Command Prompt Type ping x.x.x.x, where x.x.x.x is the IP Address of the Internet Camera. A successful connection to the camera will be indicated by 4 reply statements (below). D-Link DCS-1110 User Manual 72 - D-Link DCS-1110 | Product Manual - Page 73
Section 3 - Configuration If you fail to connect to your camera you will see the following: Check to see if you have entered your camera's IP Address correctly or reassign your camera's IP Address. D-Link DCS-1110 User Manual 73 - D-Link DCS-1110 | Product Manual - Page 74
Appendix C - Technical Specifications Time Zone Table GMT stands for Greenwich Mean Time, which is the global time that all time zones are measured from. D-Link DCS-1110 User Manual 74 - D-Link DCS-1110 | Product Manual - Page 75
Appendix C - Technical Specifications D-Link DCS-1110 User Manual 75 - D-Link DCS-1110 | Product Manual - Page 76
to the CMOS sensor. Therefore do not expose the Internet Camera's lens directly to sunlight. The Internet Camera is designed for indoor usage and if your application requires prolonged exposure to sunlight, a sun visor is recommended to protect the Internet Camera. D-Link DCS-1110 User Manual 76 - D-Link DCS-1110 | Product Manual - Page 77
to 4 DCS-1110 Internet Cameras • View Up to 4 Cameras on One Screen • Supports all Management Functions Provided in Web Interface • Record Video to Hard Drive or NAS in AVI Format • Scheduled, Motion Triggered, or Manual Recording Options Connectivity • 10/100Mbps Fast Ethernet • Auto Negotiation - D-Link DCS-1110 | Product Manual - Page 78
Appendix C - Technical Specifications Operating Environment • Operating Temperature • Storage temperature • Humidity Warranty 1-Year 41°F ~ 104°F -13°F ~ 50°F 5% ~ 95% D-Link DCS-1110 User Manual 78 - D-Link DCS-1110 | Product Manual - Page 79
453-5465 24 hours a day, seven days a week. Internet Support: http://support.dlink.com [email protected] For customers within Canada: Phone Support: (800) 361-5265 Monday to Friday 7:30am to 9:00pm EST Internet Support: http://support.dlink.ca email:[email protected] D-Link DCS-1110 User Manual 79 - D-Link DCS-1110 | Product Manual - Page 80
the defective Hardware will be refunded by D-Link upon return to D-Link of the defective Hardware. All Hardware or part thereof that is replaced by D-Link, or for which the purchase price is refunded, shall become the property of D-Link upon replacement or refund. D-Link DCS-1110 User Manual 80 - D-Link DCS-1110 | Product Manual - Page 81
in its documentation. D-Link further warrants that, during the Software Warranty Period, the magnetic media on which D-Link delivers the Software will be free of physical defects. The RMA form and entering the assigned Case ID Number at https://rma.dlink.com/. D-Link DCS-1110 User Manual 81 - D-Link DCS-1110 | Product Manual - Page 82
any manuals or accessories in the shipping package. DLink will only software, firmware or other products or services provided by anyone other than D-Link; and Products that have been purchased from inventory clearance or liquidation sales or other sales in which D-Link Link DCS-1110 User Manual 82 - D-Link DCS-1110 | Product Manual - Page 83
from D-Link Corporation/D-Link Systems, Inc., as stipulated by the United States Copyright Act of 1976 and any amendments thereto. Contents are subject to change without prior notice. Copyright 2005 by D-Link Corporation/D-Link Systems, Inc. All rights reserved. D-Link DCS-1110 User Manual 83 - D-Link DCS-1110 | Product Manual - Page 84
radiate radio frequency energy and, if not installed and used in accordance with the instructions, may cause harmful interference to radio communication. However, there is no guarantee outside the United States, please contact the corresponding local D-Link office. D-Link DCS-1110 User Manual 84 - D-Link DCS-1110 | Product Manual - Page 85
Appendix F - Registration Registration Product registration is entirely voluntary and failure to complete or return this form will not diminish your warranty rights. Version 1.00 April 11, 2006 D-Link DCS-1110 User Manual 85
-
 1
1 -
 2
2 -
 3
3 -
 4
4 -
 5
5 -
 6
6 -
 7
7 -
8
-
9
-
10
-
11
-
12
-
13
-
14
-
15
-
16
-
17
-
18
-
19
-
20
-
21
-
22
-
23
-
24
-
25
-
26
-
27
-
28
-
29
-
30
-
31
-
32
-
33
-
34
-
35
-
36
-
37
-
38
-
39
-
40
-
41
-
42
-
43
-
44
-
45
-
46
-
47
-
48
-
49
-
50
-
51
-
52
-
53
-
54
-
55
-
56
-
57
-
58
-
59
-
60
-
61
-
62
-
63
-
64
-
65
-
66
-
67
-
68
-
69
-
70
-
71
-
72
-
73
-
74
-
75
-
76
-
77
-
78
-
79
-
80
-
81
-
82
-
83
-
84
-
85
 |
 |
