D-Link DCS-2102 User Manual - Page 35
SETUP > Recording
 |
View all D-Link DCS-2102 manuals
Add to My Manuals
Save this manual to your list of manuals |
Page 35 highlights
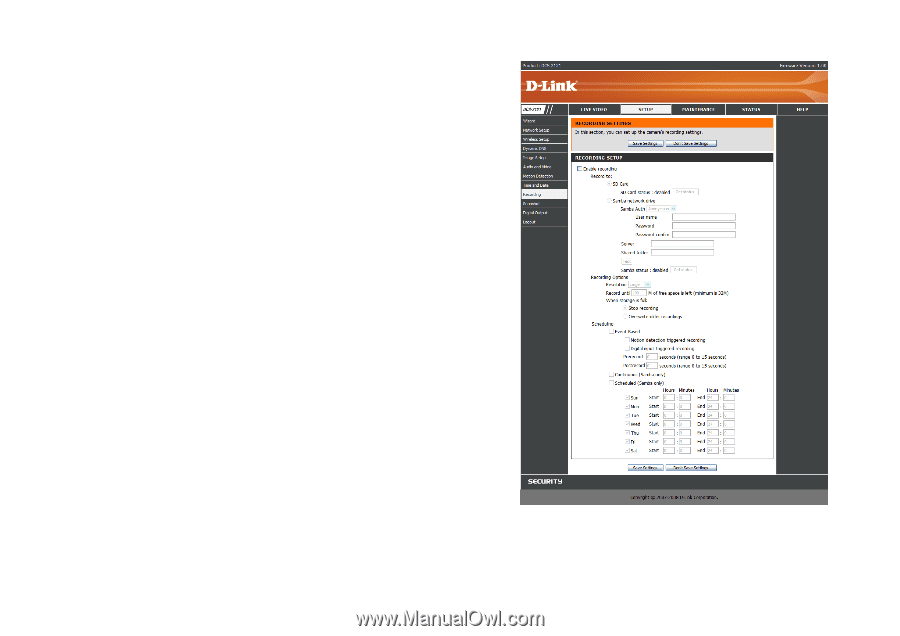
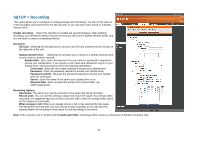
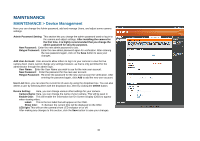
SETUP > Recording This option allows you to configure recording settings and scheduling. You can record video to a Secure Digital card inserted into the SD card slot, or you can have video saved to a Samba network drive. Enable recording: Check this checkbox to enable the recording feature. After enabling recording, you will need to select a location to record to (SD Card or Samba network drive), and you will need to select a scheduling method. Record to: SD Card: Selecting this will allow you to record to an SD Card inserted into the SD slot on the right side of the unit. Samba network drive: Selecting this will allow you to record to a Samba network drive on your wired or wireless network. Samba Auth: Here, select Anonymous if no user name or password is required to access your Samba drive. If you require a user name and password to log in to your Samba drive, select Account and fill in the following information: User name: Enter the user name required to access your Samba drive. Password: Enter the password required to access your Samba drive. Password confirm: Re-enter the password required to access your Samba drive for verification. Server: Enter the name of the server your Samba drive is on. Shared Folder: Enter the path that points to the shared folder e.g. \\DNS-G121\share. Recording Options Resolution: This will let you set the resolution of the video that will be recorded. Record until: You can use this setting to adjust how much free space must remain when recording. It is suggested that you set this to at least 32M to allow for enough buffer space for the camera to record with. When storage is full: When your storage device is full or has reached the free space limit specified in Record until, you can choose to stop recording, or you can have the camera delete old recordings to free space for new recordings to be saved. Note: If the camera is set to SXGA mode in Audio and Video, recordings will be made at a maximum of Medium resolution only. 32
-
 1
1 -
2
-
3
-
4
-
5
-
6
-
7
-
8
-
9
-
10
-
11
-
12
-
13
-
14
-
15
-
16
-
17
-
18
-
19
-
20
-
21
-
22
-
23
-
24
-
25
-
26
-
27
-
28
-
29
-
 30
30 -
 31
31 -
 32
32 -
 33
33 -
 34
34 -
 35
35 -
 36
36 -
 37
37 -
 38
38 -
 39
39 -
 40
40 -
41
-
42
-
43
-
44
-
45
-
46
-
47
-
48
-
49
-
50
-
51
-
52
-
53
-
54
-
55
-
56
-
57
-
58
-
59
-
60
-
61
 |
 |