D-Link DCS-3220 Product Manual
D-Link DCS-3220 - SECURICAM Network Camera Manual
 |
UPC - 790069269516
View all D-Link DCS-3220 manuals
Add to My Manuals
Save this manual to your list of manuals |
D-Link DCS-3220 manual content summary:
- D-Link DCS-3220 | Product Manual - Page 1
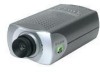
DCS-3220 2-Way Audio Internet Camera with Digital Zoom Manual Version 1.10 Building Networks for People (10/04/04) - D-Link DCS-3220 | Product Manual - Page 2
Wizard 9 Installation Wizard Screen 14 Enabling UPnP for Windows XP/Me 17 Installing IP surveillance Software 21 Testing the DCS-3220 25 Security ...26 Using and Configuring the DCS-3220 with a NAT Router 27 Using the DCS-3220 with an Internet Browser 33 Record Snapshots to your FTP - D-Link DCS-3220 | Product Manual - Page 3
Package Contents D-Link DCS-3220 Internet Camera Power Adapter Installation software and manual on CD Quick Installation Guide Camera Stand Category 5 Ethernet Cable If any of the above items are missing, please contact your reseller. Note: Using a power supply with a different voltage than the - D-Link DCS-3220 | Product Manual - Page 4
no special hardware or software such as PC frame grabber cards. All that is required is a computer with Internet Explorer Web browser (version 5.x or above). Just plug in the camera and view the picture from your Internet Camera with a valid IP Address. CCD Sensor The DCS-3220 comes standard with - D-Link DCS-3220 | Product Manual - Page 5
Variety of Protocols Supporting TCP/IP networking, SMTP e-mail, HTTP and other Internet related protocols, the DCS-3220 can be integrated easily into other Internet/Intranet applications because of its standards-based features. The camera also supports UPnP TM and DDNS. DDNS allows the camera to use - D-Link DCS-3220 | Product Manual - Page 6
Connector Reset Button I/O Connector Ethernet Cable Connector Ethernet Cable Connector The DCS-3220 back panel features an RJ-45 connector for connections to 10Base-T Ethernet cabling or 100Base-TX Fast Ethernet cabling. This network port supports the NWay protocol, allowing the Internet Camera - D-Link DCS-3220 | Product Manual - Page 7
Panel Socket for stand Attachment socket for the Camera Stand Located on the bottom panel of the DCS-3220, the socket is used to connect the camera stand to the Internet Camera by attaching the screw head on the camera stand to the Internet Camera. Power LED LED stands for Light-Emitting Diode - D-Link DCS-3220 | Product Manual - Page 8
cable Connect an Ethernet cable to the network cable connector located on the DCS-3220's back panel and attach it to the network. Attach the external power supply Attach the external power supply to the DC power input connector located on the DCS-3220's back panel labeled 12VDC and connect the - D-Link DCS-3220 | Product Manual - Page 9
Installation Wizard and the IP surveillance software. Installing the Installation Wizard program Insert the CD that is included with the DCS-3220 Internet Camera. The DCS-3220 installation menu will start up automatically from the CD. If the CD does not start up automatically (the Windows operating - D-Link DCS-3220 | Product Manual - Page 10
Installation Wizard (continued) Click Installation Wizard. Please wait while the InstallShield Wizard prepares to install. Click Next. 10 - D-Link DCS-3220 | Product Manual - Page 11
Installation Wizard (continued) The InstallShield will install in the following folder. To install into a different folder, click Browse and select another type a new folder name, or select one from the existing folders list. Click Next. Please wait while the Installation Wizard is installed. 11 - D-Link DCS-3220 | Product Manual - Page 12
column. *A DHCP server is a device that supplies IP Addresses to its clients that are on the same network. IMPORTANT: A hardware reset of the Internet Camera may be required if the Installation Wizard cannot find the camera. To accomplish this reset, lightly insert a paper clip (or a similar sized - D-Link DCS-3220 | Product Manual - Page 13
Internet browser to the IP Address of the DCS3220, in this example it is: http://192.168.0.12. Your DCS-3220 may have a different IP Address. You have now completed the Setup Wizard and are ready to use your camera! You can also continue to the section titled "Installing IP surveillance Software - D-Link DCS-3220 | Product Manual - Page 14
Installation Wizard screen by clicking on the corresponding tab: Search Click to search for any available cameras to connect to the network. Add Click to manually add a camera to the network. A window will appear, prompting you to enter the camera's IP address or domain name. A second window will - D-Link DCS-3220 | Product Manual - Page 15
Wizard Screen (continued) Network Settings Here users can configure the Network Settings for the camera. Enter the IP address, Subnet mask, Default router IP, Primary DNS, and Secondary DNS. Automatically, the option to reset IP address at boot is selected. If you would like to save your IP address - D-Link DCS-3220 | Product Manual - Page 16
Installation Wizard Screen (continued) Locate the Firmware to Upgrade Indicate the location of the firmware to be uploaded to the camera. Selected Package This displays the file name of the firmware selected for upload. Reset to Default - Click the Reset to Default tab to reset the camera's settings - D-Link DCS-3220 | Product Manual - Page 17
Enabling UPnP for Windows XP/Me UPnP is short for Universal Plug and Play, which is a networking architecture that provides compatibility among networking equipment, software, and peripherals. The DCS-3220 is a UPnP enabled Internet camera. If your operating system is UPnP enabled, the device will - D-Link DCS-3220 | Product Manual - Page 18
Enabling UPnP for Windows XP/Me (continued) Click Add/Remove Windows Components. The following screen will appear: Select Networking Services (Communications in Windows Me). Click Details. Select Universal Plug and Play. Click Ok. 18 - D-Link DCS-3220 | Product Manual - Page 19
Enabling UPnP for Windows XP/Me (continued) Click Next. Please wait while Setup configures the components. Click Finish. 19 - D-Link DCS-3220 | Product Manual - Page 20
Enabling UPnP for Windows XP/Me (continued) To view your DCS-3220 Internet Camera in an Internet browser, go to your Desktop and click My Network Places. Click My Network Places. Click DCS-3220-100. The last three digits (100), represent the fourth octet of your Internet Camera's IP address (in this - D-Link DCS-3220 | Product Manual - Page 21
automated alarms Account password protection Scheduled recording for each camera Email / FTP snapshot AVI file export Motion detection for each camera To install the IP surveillance software, click on Install IP surveillance Software on the CD included with the Internet Camera. The Welcome screen - D-Link DCS-3220 | Product Manual - Page 22
Installing IP surveillance Software (continued) Click Yes. Please read the Software Licensing Agreement and click yes if you wish to accept the agreement. Click "No" to exit the installation. Click Next. Enter your name and company information and click "Next." 22 - D-Link DCS-3220 | Product Manual - Page 23
Installing IP surveillance Software (continued) Select the destination directory. Click Next. Select the program folder the software will be installed into. Click Next. 23 - D-Link DCS-3220 | Product Manual - Page 24
Installing IP surveillance Software (continued) Click Next. Click Finish. The installation is complete. 24 - D-Link DCS-3220 | Product Manual - Page 25
Testing the DCS-3220 Internet Camera Open your Internet browser and type in the IP address of the DCS-3220. In this example the address is: http://192.168.0.12 (your DCS-3220 may have a different IP address based on what you used in the Installation Wizard program). The window in the center of your - D-Link DCS-3220 | Product Manual - Page 26
privileges for all users. The Internet Camera supports multi-level password protection/access to the Internet Camera that can be restricted to Administrator's Password to constrain user access to the Internet Camera since the Default settings are Null String (no password). Once the Password is - D-Link DCS-3220 | Product Manual - Page 27
Local Area Network (LAN) until the router is configured to allow remote viewing of the camera over the Internet. Assign a Local IP Address for Your Camera Run the Installation Wizard program from the CD included with the DCS-3220. Follow the steps in the Quick Installation Guide to configure the DCS - D-Link DCS-3220 | Product Manual - Page 28
a Local IP Address View the Internet Camera using your Internet Explorer Web browser Run your Internet Explorer Web browser. In the address bar, type in the IP Address that was assigned to the Internet Camera by the Installation Wizard program. The DCS-3220 Home Page appears with a window displaying - D-Link DCS-3220 | Product Manual - Page 29
they are already in use by other devices (e.g. in a multiple camera environment). Ports that are used by the DCS-3220 Router Set-Up and Installation The following steps generally apply to any router that you have on your network. The D-Link DI-624 is used as an example to clarify the configuration - D-Link DCS-3220 | Product Manual - Page 30
Static IP Address will also allow you to access your camera attached to your router over the Internet Open Virtual Server Ports to Enable Remote Image Viewing The firewall security features built into the DI-624 router prevent users from accessing the video from the DCS-3220 over the Internet. The - D-Link DCS-3220 | Product Manual - Page 31
the DCS-3220 with a NAT Router (continued) Follow these steps to configure your router's Virtual Server settings: • Click Enabled. • Enter a different name for each entry. • Enter your camera's local IP Address (e.g., 192.168.0.146 in the example in step on page 28) in the Private IP field - D-Link DCS-3220 | Product Manual - Page 32
colon and port number if you are using the default Web server port 80. To access from a computer on your local (home) network, simply enter the local IP Address of the Camera followed by a colon and the port number (e.g., 205.163.122.96:83). http://205.163.122.96:83 Viewing the DCS-3220 Remotely 32 - D-Link DCS-3220 | Product Manual - Page 33
to control and monitor the camera. Using the IP surveillance software with the DCS-3220. Open your Internet Explorer Web browser and enter the IP address for your Internet Camera. In the example, this address is 192.168.0.146. Your address may differ. If a window appears asking to install a Verisign - D-Link DCS-3220 | Product Manual - Page 34
Using the DCS-3220 with an Internet browser (continued) Home Page Screen The image from the DCS-3220 should be visible or decrease microphone volume. Mute Microphone - Click to mute the camera's microphone. + - Opens digital zoom window. Click the Zoom button below the image to display the digital - D-Link DCS-3220 | Product Manual - Page 35
Using the DCS-3220 with an Internet browser (continued) Home Page Screen The image from the DCS-3220 should be visible from the Home page on your computer monitor. There are two buttons on the left side of the Home page: Connection Type - D-Link DCS-3220 | Product Manual - Page 36
Using the DCS-3220 with an Internet browser (continued) Home > Connections Screen The following the DCS-3220 successfully, the working protocol will be displayed in "Protocol Option." The chosen protocol will be recorded in the user's PC and used for the next connection. If the network environment - D-Link DCS-3220 | Product Manual - Page 37
tabs across the top of the Configuration screen. From each tab, different elements of the DCS-3220 can be configured. The Advanced tab is the default screen in Configuration and Network is the default screen under Advanced. Any changes made to these settings will require the system to restart. Make - D-Link DCS-3220 | Product Manual - Page 38
Advanced > Network Reset IP Address at next boot Once the DCS-3220 is configured, this box should be unchecked at all times. If the box has been checked and the connection is lost, run the Installation Wizard to find the camera's IP address. General IP address Subnet mask Default router - Primary - D-Link DCS-3220 | Product Manual - Page 39
system log e-mail fails to send. (This address should be within the SMTP server's domain for authentication purposes.) Local FTP server port - 1st FTP server 1st FTP server port 1st FTP user name 1st FTP password 1st FTP remote folder - Can be other than default port 21. If you find that you want - D-Link DCS-3220 | Product Manual - Page 40
passive Mode - Passive mode setting for the backup FTP server. HTTP Settings HTTP Port- Streaming UDP Audio port - Can be set to other than the default port 80. When the administrator changes the HTTP port of the DCS-3220 (which has an IP Address of 192.168.0.100) from 80 to 8080, users must type - D-Link DCS-3220 | Product Manual - Page 41
a domain name linked to a changing (dynamic) IP address. With most Cable and DSL connections, you are assigned a dynamic IP address and that address is used only for the duration of that specific connection. With the DCS-3220, you can set up your DDNS service and the DCS-3220 will automatically - D-Link DCS-3220 | Product Manual - Page 42
server. Enter your password or key used to connect to the DDNS server. UPnP is short for Universal Plug and Play, which is a networking architecture that provides compatibility among networking equipment, software, and peripherals. The DCS-3220 is a UPnP enabled internet camera. If your operating - D-Link DCS-3220 | Product Manual - Page 43
may cause the DCS-3220 to not respond. Change the configurations only if necessary. Consult with your network administrator or your Internet Service Provider (ISP) if you do not have the necessary information. If you cannot connect to the camera, refer to page 126 for camera reset and restore - D-Link DCS-3220 | Product Manual - Page 44
Using the DCS-3220 with an Internet browser (continued) Configuration decrease bandwidth utilization. If you have a bad network connection, use a lower interval to minimize the the DCS-3220 is to be installed upside down. Improve efficiency in the multi-user environment - If the camera works in - D-Link DCS-3220 | Product Manual - Page 45
Using the DCS-3220 with an Internet browser (continued) Configuration > Advanced > Video Settings (continued) Click Apply 25 or 30 frames per second, the slower frame rate will not be noticed. If your network bandwidth is below 384 Kbps, you should adjust the bit rate according to your bandwidth and - D-Link DCS-3220 | Product Manual - Page 46
Using the DCS-3220 with an Internet browser (continued) Recommendations for setting video for the best performance. Recording settings to compromise between real-time and clear images If you have a broadband network, set Fix quality to Good, or better, rather than setting the Bit rate. Otherwise - D-Link DCS-3220 | Product Manual - Page 47
the DCS-3220 with an Internet browser (continued) Configuration > Advanced > Audio (continued) Transmission Mode - Select the transmission mode that the camera camera will detect and adjust the frame rate according to the user's network throughput. If the camera works in a versatile or low network - D-Link DCS-3220 | Product Manual - Page 48
the original settings. Configuration > Advanced > Motion Detection Click the Motion Detection button from the Configuration screen to access settings that effect how the DCS-3220 Internet Camera can serve as a security device by recording only when motion is detected. Click Motion Detection. 48 - D-Link DCS-3220 | Product Manual - Page 49
Using the DCS-3220 with an Internet browser (continued) Configuration > Advanced >Motion Detection (continued) Enable motion detection - Check this option to turn on the motion detection. Window Name Sensitivity - The text entered here will show at the top of the motion window. Sets the - D-Link DCS-3220 | Product Manual - Page 50
. The DCS-3220 is manufactured without any passwords by default. This allows the ability to access the DCS-3220 (including the Configuration) by anyone as long as the IP address is known. It is recommended that you enter a password to restrict others from accessing your camera. Type a password in - D-Link DCS-3220 | Product Manual - Page 51
Using the DCS-3220 with an Internet browser (continued) Configuration > Tools > Admin (continued) Guest account: This option allows a user to connect to a camera with view -only privileges. User name is "demo." No password is required. This is useful for demonstrations and keeps guests separate - D-Link DCS-3220 | Product Manual - Page 52
with the NTP server over the Internet whenever the DCS-3220 starts up. It will fail if the assigned time server cannot be reached. NTP server - Assign the IP address or domain name of the timeserver. Leaving the text box blank will let DCS-3220 connect to default time servers. Time zone - Used - D-Link DCS-3220 | Product Manual - Page 53
Using the DCS-3220 with an Internet browser (continued) Configuration > Tools > Applications Click on the Applications button to access the Applications settings from the Tools menu. 53 - D-Link DCS-3220 | Product Manual - Page 54
Using the DCS-3220 with an Internet browser (continued) Configuration > Tools > Applications (Continued) Weekly schedule: Sunday triggered. There are 4 conditions related to the digital input and three windows for motion detection. There can be multiple selections. Select the appropriate digital - D-Link DCS-3220 | Product Manual - Page 55
Using the DCS-3220 with an Internet browser (continued) Configuration > Tools > Applications (Continued) Trigger the option. Confirm the external mail or FTP server settings in network configuration. Reset output - Check and save this option to reset the external device at the digital output - D-Link DCS-3220 | Product Manual - Page 56
will restart and require the Installation Wizard software program to locate the IP address of the DCS3220. Configuration > Status > Device Info Click on the Status tab to access Device Info and a Log of DCS-3220 system activity. The Device Info is the default screen when you click on the Status - D-Link DCS-3220 | Product Manual - Page 57
Using the DCS-3220 with an Internet browser (continued) Click Device Info. The Device Info screen lists the following important settings that are currently set for the DCS-3220. • Firmware Version number • Mac Address • IP Address • Subnet Mask • Default router address • Primary DNS - D-Link DCS-3220 | Product Manual - Page 58
Using the DCS-3220 with an Internet browser (continued) Configuration > Help Click on the Help tab to access descriptions of the particular function you need help with. The help screen is organized in the order of the tabs and then each menu item under that tab. 58 - D-Link DCS-3220 | Product Manual - Page 59
an FTP or SMTP server. Click the Motion Detection button under the Advanced tab from the Configuration screen to access settings that affect how the DCS-3220 Internet Camera can serve as a security device by recording only when motion is detected. X Back Door Click Motion Detection. In this window - D-Link DCS-3220 | Product Manual - Page 60
server settings for the DCS-3220. Click Network 1 2 123.123.123.1 3 John Smith 4 5 Snapshot 6 7 In this window, enter the settings for the FTP server you wish to record to. Optionally, you can enter settings for a secondary backup FTP server. 1 Local FTP server port- The Default port is 21 - D-Link DCS-3220 | Product Manual - Page 61
will allow access to a second external FTP server if your camera is behind a router protected by a firewall. For detailed information about each setting, please refer to Configuration > Advanced > Network in the section titled "Using the DCS-3220 With an Internet Browser" (page 37). Click the apply - D-Link DCS-3220 | Product Manual - Page 62
button under the Tools tab to set the application settings for the DCS-3220. Click Applications. XXX X X Back Door X In this window, follow the steps below to set the application settings for snapshots to be recorded to an FTP site: Select the weekdays you would like to record and enter the - D-Link DCS-3220 | Product Manual - Page 63
a 32MB video card is required for multiple camera viewing and recording in IP Surveillance) SDRAM: 128 MB SDRAM Hard Disk: 40GB Video Card: nVidia, TNT, TNT2, GeForce series with 32MB video memory / ATI Radeon series with 32 MB video memory Software Installation Put the installation disk into your - D-Link DCS-3220 | Product Manual - Page 64
Using IP surveillance Software (continued) Installing the IP surveillance software (continued) Click Next The "License Agreement" window below will appear. Please read the following license agreement carefully. Click "Yes" to accept this agreement and proceed with the installation. Click Yes 64 - D-Link DCS-3220 | Product Manual - Page 65
the IP surveillance software (continued) Next, the "User information" window below will appear. This window will prompt you to enter the user name and company name. Enter your user name and company name and then click "Next" to continue. Click Next. You must setup the administrator's password in - D-Link DCS-3220 | Product Manual - Page 66
Using IP surveillance Software (continued) Installing the IP surveillance software (continued) Select the installation directory for this application software and click "Next", which is shown in the figure below. You can change the installation directory by clicking "Browse..." Click Next. Select a - D-Link DCS-3220 | Product Manual - Page 67
Using IP surveillance Software (continued) Installing the IP surveillance software (continued) After checking all the setup information in the window shown below, click "Next" to start the installation of the application software. Click Next. Click "Finish", in the window shown below, to finish - D-Link DCS-3220 | Product Manual - Page 68
in the system tray signifies that the IP surveillance Software is currently active on the system. Security for Launcher When Launcher starts, there is no need to undergo a username/password check. But when users want to pass authentication again to see the popup menu. Below is the login window: 68 - D-Link DCS-3220 | Product Manual - Page 69
Using IP surveillance Software (continued) Launcher (continued) When Launcher is locked, the unlock window will appear, prompting for the user password in order to unlock. The input area of the dialog will be grayed (disabled) for 60 seconds after 3 consecutive failures. User Interface Below is the - D-Link DCS-3220 | Product Manual - Page 70
Using IP surveillance Software (continued) Launcher (continued) Tools Contains many utilities. Currently only change password is implemented. The change password dialog looks like this: Autorun at Startup Users can select whether or not to autorun Launcher when Window boots up. Monitor Starts up the - D-Link DCS-3220 | Product Manual - Page 71
High compression ratio Maximum of 16 cameras with different monitor layouts Auto alarm in multiple modes Account-password protection Multiple recording modes: Event-driven, Scheduled, and manual recording for each camera. Just-in-time snapshot Motion detection with 3 alert windows for each camera 71 - D-Link DCS-3220 | Product Manual - Page 72
Using IP surveillance Software (continued) Monitor Program (continued) Application Layout and Functionalities stop alert, and configuration menu for camera configurations, global settings, scheduler settings and the user information of this application software. Tips for these operations are - D-Link DCS-3220 | Product Manual - Page 73
This area includes volume control, manual recording, video printing, snapshot, and trash can to remove video from display windows. DI/DO control This tool receives the digital input signal and sends digital output signal to the remote Video Server/ Network Camera series product associated with the - D-Link DCS-3220 | Product Manual - Page 74
monitor program, the admin has the right to access the DCS-3220 Network Camera through this application software and change the local settings as well. But the admin password for the software is not the same as the admin password for the Internet camera. You can change the settings of each selected - D-Link DCS-3220 | Product Manual - Page 75
interested in the remote settings for each camera, you can refer to "Using the DCS-3220 with an Internet Browser," which starts on page 33. Remote Camera Webpage Settings Local Settings Setup Page Camera Selections The Layout of the Configuration In the local settings, shown below, three main - D-Link DCS-3220 | Product Manual - Page 76
Using IP surveillance Software (continued) Monitor Program (continued) Insert - To insert a remote network camera to the camera list. Click the "Insert" button, an "Insert New Channel" dialog will popup, as shown below. Specify the IP address, port, and admin password of the network camera, click - D-Link DCS-3220 | Product Manual - Page 77
Using IP surveillance Software (continued) Monitor Program (continued) Delete - The deletion of a device is a much easier operation than "insertion". It removes the selected network camera from the camera list. Highlight the camera that you want to delete from the list and click on the "Delete" - D-Link DCS-3220 | Product Manual - Page 78
window. Enable motion detect This will trigger an alert sound that has been specified in the section titled "Global Settings \ Alert Sound." Check this option to enable audio alert for the camera software provides options for you to define the triggering criteria for the digital input of the DCS-3220 - D-Link DCS-3220 | Product Manual - Page 79
Using IP surveillance Software (continued) Monitor Program (continued) Changing the Camera Order in the List You can "drag and drop" in the grid area of the camera list to change the sequence of the connected Network Cameras, which is shown below. This will allow you to rearrange the cameras in an - D-Link DCS-3220 | Product Manual - Page 80
Using IP surveillance Software (continued) Monitor Program (continued) Global Settings After completing the connection to each remote Network Camera, we need to configure some global settings for all the cameras. These include the video database directory, the usage of the Hard disk, and options for - D-Link DCS-3220 | Product Manual - Page 81
IP surveillance Software The directory for storing the default and user-customized schedules for the hard disk that will be reserved for other Windows applications (at least 15%). The remainder of the camera(s) to record to. As you move the bar to the right, more space will be available for your camera - D-Link DCS-3220 | Product Manual - Page 82
Using IP surveillance Software (continued) Monitor Program (continued) Modulation Mode You must select the input signal format (NTSC or PAL) for displaying the original resolution of video stream from DCS-3220. NOTE: You need to select the input signal format according to the camera type or CCD - D-Link DCS-3220 | Product Manual - Page 83
Using IP surveillance Software (continued) Monitor Program (continued) Backup Settings: Using Backup Settings in the global settings window, you can backup recorded data from selected cameras to a specified location. Directory This is the directory where backup data will be saved. You can select the - D-Link DCS-3220 | Product Manual - Page 84
Using IP surveillance Software (continued) Monitor Program (continued) Using the Monitor Program This section depicts, in detail, how to manipulate the monitor tool. Connection of the DCS-3220 Channel: Once you have the privilege to connect to the DCS-3220, the cameras will automatically appear in - D-Link DCS-3220 | Product Manual - Page 85
Using IP surveillance Software (continued) Monitor Program (continued) Selected Channel Recording 5 Connected and monitoring show the video of a specific channel in the a display window Step 1: Move the mouse cursor to the display window shown below. Mouse cursor Location hint Video 1 Display - D-Link DCS-3220 | Product Manual - Page 86
window, it can be dragged and dropped to other windows. If you drag one camera's video to a window that already has its own camera's video, the two cameras will trade display windows. Dragging and Dropping is a very convenient way to manipulate the video channels in the IP surveillance Software - D-Link DCS-3220 | Product Manual - Page 87
Using IP surveillance Software (continued) Monitor Program (continued) Video shown Empty video box Removing video from a display window Step 1: Move the mouse cursor to the display window that contains the video channel you wish to remove. Step 2: Note that the cursor will change to the hand-shape - D-Link DCS-3220 | Product Manual - Page 88
Using IP surveillance Software (continued) Monitor Program (continued) Press and hold the left mouse button here. Move the mouse cursor here, and then release the left mouse button. The Layout There are six different layouts available, as shown below, for the display windows in the monitor program. - D-Link DCS-3220 | Product Manual - Page 89
Using IP surveillance Software (continued) Monitor Program (continued) Double click on a display window to switch to a single channel layout. When you choose the one-channel layout or four-channel layout, buttons to switch the pages, as shown in the figure below. PT Use to switch between cameras. 89 - D-Link DCS-3220 | Product Manual - Page 90
Using IP surveillance Software (continued) Monitor Program (continued) To view an individual camera from the multi-camera layout, double-click on the desired display window. You will see that the size of the display window is the same as the one-channel layout. Clicking the "Back" button in the - D-Link DCS-3220 | Product Manual - Page 91
Using IP surveillance Software (continued) Monitor Program (continued) IP surveillance includes DI/DO (Digital Input / With these features, you can monitor the remote sensor input from DI and also trigger the camera by DO switch. PT Set digital output to LOW Set digital output to HIGH No connection - D-Link DCS-3220 | Product Manual - Page 92
Using IP surveillance Software (continued) Monitor Program (continued) Alert Message If you have checked the box for "Enable Motion Detect" or "Enable Digital Input" on "Camera Configurations > Alert Settings" screen, the alert message will show in the window shown above. Once the alert, caused by - D-Link DCS-3220 | Product Manual - Page 93
configuration menu shown below, a dialog box will appear and display the information about the installed version of IP surveillance. The information includes the software name, version, user name, and company. Miscellaneous Functions Full Screen Quit Minimize Stop Alert Sound Configuration Menu - D-Link DCS-3220 | Product Manual - Page 94
Using IP surveillance Software (continued) Monitor Program (continued) Full Screen With this function, you Alert Message receiver, so that the alert messages can be reviewed. Configuration Menu The menu includes Camera Configuration, Global Settings, Scheduler, and About options. Common Control - D-Link DCS-3220 | Product Manual - Page 95
Settings" for more details. Printer Click on the printer icon to print the current image to your default printer. Trashcan You can drag and drop the video channel to the Trashcan to close the video connection with the DCS-3220. Status Bar Local time Software name Current login user Login time - D-Link DCS-3220 | Product Manual - Page 96
Using IP surveillance Software (continued) Scheduling The scheduler allows the user to schedule recordings from the selected video channel of the DCS-3220. Through both suitable for all applications Individual schedule for each video channel Supports up to 9 preset schedule schemes for each video - D-Link DCS-3220 | Product Manual - Page 97
Using IP surveillance Software (continued) Scheduling (continued) The scheduler will not be accessible until at least one camera has been added to the camera list. Go to the configuration menu and click on "Scheduler" to launch the scheduler. The Layout and Functionalities Introduction The layout of - D-Link DCS-3220 | Product Manual - Page 98
Using IP surveillance Software (continued) Scheduling (continued) The layout of the scheduler tool is roughly divided into 4 parts. Part 1 The first part of the scheduler is the video channel selection area. It provides the IP addresses and location information of the connected video channels for - D-Link DCS-3220 | Product Manual - Page 99
Using IP surveillance Software (continued) Scheduling (continued) In this area you will select the video channel that you want to set a schedule for. Each video channel will display a name, IP address, and location. Please note that when you switch between video channels in this area, the changes in - D-Link DCS-3220 | Product Manual - Page 100
Using IP surveillance Software (continued) Scheduling (continued) Hour Time-Line In the figure below, the Hour time-line is displayed. Marking/Unmarking the Recording Time on the Hour Time- - D-Link DCS-3220 | Product Manual - Page 101
Using IP surveillance Software (continued) Scheduling (continued) Apply and Erase Buttons After you have selected the time period with sections for more information. Motion Detection As shown above, you can check the windows that you would like to record while the motion detection is triggered. 101 - D-Link DCS-3220 | Product Manual - Page 102
Using IP surveillance Software (continued) Scheduling (continued) Digital Input In the figure above, there are four conditions for the digital input. Check the condition that you would like to - D-Link DCS-3220 | Product Manual - Page 103
Using IP surveillance Software (continued) Scheduling (continued) There are three modes in the secondary As... This button is used to save the current schedule as another file name instead of the default name. Undo Click on this button to undo all changes for the current schedule since the last - D-Link DCS-3220 | Product Manual - Page 104
Using IP surveillance Software (continued) Playback Program The playback program is a very powerful, convenient, and easy way to browse the recorded video. It second) Zoom in (from full range to 10 seconds) Zoom out (up to full range) Full range System control tool: Window locker System settings 104 - D-Link DCS-3220 | Product Manual - Page 105
playback program, it is necessary for you to log in to the application software. The figure below shows the login dialog. For security concerns, only the admin account can log in to this program. To change the password of the admin account, please refer to the section titled "Logging In." Layout - D-Link DCS-3220 | Product Manual - Page 106
Using IP surveillance Software (continued) Playback Program (continued) When you successfully log in to the playback system, the main window will be shown video in the IP surveillance database. Main Areas Display Area The display area is able to show the surveillance database of each camera by time. - D-Link DCS-3220 | Product Manual - Page 107
Using IP surveillance Software (continued) Playback Program (continued) Histogram Area The histogram is an system control tool. Status Area The status area is located at the bottom of the main window. It tells you the program status information including display mode, display size, display speed, - D-Link DCS-3220 | Product Manual - Page 108
Using IP surveillance Software (continued) Playback Program (continued) Pull Bar The pull bar is a playing. Note that the pull bar will only function under the normal display mode. Settings After the main window is shown on the screen, you must modify the settings to make it to work properly. Click - D-Link DCS-3220 | Product Manual - Page 109
Using IP surveillance Software (continued) Playback Program (continued) The items in the settings windows are: Database location files will be stored. Exported AVI files will be stored in the sub-directory (camera name) under the directory you set here. Snapshot location This sets the directory - D-Link DCS-3220 | Product Manual - Page 110
Using IP surveillance Software (continued) Playback Program (continued) Normal (Single Frame) Mode While in the normal (single frame) display mode, you can change the video currently displayed by: (1) Changing - D-Link DCS-3220 | Product Manual - Page 111
Using IP surveillance Software (continued) Playback Program (continued) Histogram Area Inverted region the method of how to use the tools in the control panel (shown in the main playback window) will be discussed. Selector Tools The figure below shows the selector tools. They are location selector, - D-Link DCS-3220 | Product Manual - Page 112
Using IP surveillance Software (continued) Playback Program (continued) Location selector Period selector Playback method selector Alert area selector Location Selector The location selector is a control that lets you select the camera you want to see (refer to the figure above). The location name - D-Link DCS-3220 | Product Manual - Page 113
Using IP surveillance Software (continued) Playback Program (continued) Playback Method Selector Full you checked that window in the settings dialog. The alert area selector will be changed to alert window 0 by default settings when you change the location selector to another window. Play Control For - D-Link DCS-3220 | Product Manual - Page 114
IP surveillance Software (continued) Playback Program (continued) Speed Indicator Pause Play Forward Stop Play The supported "Stop" button, the start point will be reset to the start of the present period. Pause/ . Fast Play and Slow Play The camera supports a maximum of x16 fast forward play - D-Link DCS-3220 | Product Manual - Page 115
Using IP surveillance Software (continued) Playback Program (continued) Display Adjustment Tool When you to the original size. Due to the limitation of the display area size, the maximum zoom in ratio supported is only 2.25:1 for NTSC modulation mode and 1.875:1 for PAL modulation mode. If you want - D-Link DCS-3220 | Product Manual - Page 116
Using IP surveillance Software (continued) Playback Program (continued) Full Screen When you click on the " . You can see the new interval in more details. The scale of pull bar and alert histogram window change. The period start and end time change as well. The period selector will show the new - D-Link DCS-3220 | Product Manual - Page 117
IP surveillance Software scale of the pull bar and alert histogram window change. The period start and end time change , i.e. "Lock Window", "Settings", "Minimize", and "Exit." Lock Window If you are the "Lock Window" button to lock the main window. Once you click this button, the main window will be - D-Link DCS-3220 | Product Manual - Page 118
Software (continued) Playback Program (continued) Settings The settings dialog will pop up when you click the "Settings" button. For more information about setting this program, please refer to the section titled "Settings." Minimize Click this button in order to minimize the playback program window - D-Link DCS-3220 | Product Manual - Page 119
settings that affect how the DCS-3220 Internet Camera can serve as a security device by recording only when motion is detected. Note: These settings can be configured in your Web browser and while logged into the IP surveillance Program. Click Motion Detection In this window, follow the steps below - D-Link DCS-3220 | Product Manual - Page 120
Schedule Video Recording with Motion Detection (continued) Click Scheduler In the Primary Schedule you can choose either Once (for one time recording) or Every Day (for scheduled recording). For example, if you would like to record events every day during a certain time frame, click on the beginning - D-Link DCS-3220 | Product Manual - Page 121
detection. Note: You must first create motion detection windows in the Web configuration page of the camera. Remember the names of the windows and the order in which you created them, as can be used on another system running IP surveillance or can be used as a backup if you need to re-install the - D-Link DCS-3220 | Product Manual - Page 122
the software application CD supplied with the Internet Camera. Internet Camera Installation Q: Can the Internet Camera be used outdoors? A: The Internet Camera is not weatherproof. It needs to be equipped with a weatherproof case to be used outdoors and it is not recommended. Q: What network cabling - D-Link DCS-3220 | Product Manual - Page 123
. To correct the possible problem, you need to first disconnect the Internet Camera from the network. Then run the PING utility (follow the instructions in the Appendix - How to Ping Your IP Address.) In Windows 95/98/2000, check that the IP Address of the Internet Camera is within the same subnet - D-Link DCS-3220 | Product Manual - Page 124
the Network Settings in Windows and configure the computer with a valid IP address or connect the camera to a router with DHCP enabled. A2:This error can also occur if the Installation Wizard icon is clicked on more than once from the setup wizard. Q: Why does the Internet Camera work locally but - D-Link DCS-3220 | Product Manual - Page 125
How can I solve the problem? A1: The video images might be noisy if the DCS-3220 is used in a Internet Camera from the network. Start a DOS window. Type ping x.x.x.x, where x.x.x.x is the IP address of the Internet Camera. The replies, as illustrated below, will provide an explanation to the problem - D-Link DCS-3220 | Product Manual - Page 126
reset the system or restore the factory default settings. Sometimes resetting the DCS-3220 will return the system back to a normal state. If the system still has problems after reset, restore the factory settings and install again: RESET reset hole. 2. Wait for the LED on the front of the camera - D-Link DCS-3220 | Product Manual - Page 127
I/O Connector I/O Connector Definition for the Internet Camera The DCS-3220 provides a general I/O terminal block with one DI) that is used for connecting a diversity of external alarm devices to the Internet Camera such as IR-Sensors and alarm relays. The digital input is used for connecting - D-Link DCS-3220 | Product Manual - Page 128
negative from the PIR is connected to the D+ of the camera I/O port. Configuring Your Camera for External Trigger Based Recording To configure your camera to record when triggered by an external device, you must first set your SMTP or FTP settings in order to send snapshots to your email account or - D-Link DCS-3220 | Product Manual - Page 129
I/O Connector (continued) Configuring Your Camera for External Trigger Based Recording (continued) Click the Network button under the Advanced tab to set the SMTP or FTP server settings for the DCS-3220. Click Network In this window, enter the settings for the SMTP or FTP server to which recorded - D-Link DCS-3220 | Product Manual - Page 130
button under the Tools tab to set the application settings for the DCS-3220. Click Applications In this window, follow the steps below to set the application settings for snapshots to be sent to your email account or FTP server when triggered by a motion sensor or other external device: Select the - D-Link DCS-3220 | Product Manual - Page 131
The DCS-3220 Internet Camera features an interchangeable C/CS-type lens that can be used for different applications as necessary. It supports rotational focus control so the lens can be adjusted to focus under normal and stable conditions to maximize the image quality of the Internet Camera. Fixed - D-Link DCS-3220 | Product Manual - Page 132
Replacing the Lens Since the DCS-3220 is designed with a CS- mount, the lens equipped with the Internet Camera can be replaced with any standard C or CS lens commonly used within the surveillance industry. Follow the instructions below to replace the supplied lens with any C or CS type lens. 1. - D-Link DCS-3220 | Product Manual - Page 133
Internet Explorer 6.X and above Networking Protocol TCP/IP, HTTP, SMTP, FTP, Telnet, NTP, DNS, DHCP, DDNS, and UPnP Ethernet 10BaseT or 100BaseT Fast Ethernet Video Algorithm supported output (max. 24VDC 1A, 125VAC 0.5A) Security Administrator and user group protected Password authentication 133 - D-Link DCS-3220 | Product Manual - Page 134
(continued) LED indicator Bi-color status indicator Camera specification 1/4 inch color CCD sensor 1.0Lux in.) Viewing system requirement Protocol Standard Internet TCP/IP suite Operating system MicrosoftR Windows XP, 2000, Me or 98SE Browser Internet Explorer 6.x or above Environmental Operating - D-Link DCS-3220 | Product Manual - Page 135
over the Telephone: (877) 453-5465 24 hours a day, seven days a week. D-Link Technical Support over the Internet: http://support.dlink.com email:[email protected] Tech Support for customers within Canada: D-Link Technical Support over the Telephone: (800) 361-5265 Monday to Friday 7:30am to 12:00am - D-Link DCS-3220 | Product Manual - Page 136
Time Zone Table GMT stands for Greenwich Mean Time, which is the global time that all time zones are measured from. 136 - D-Link DCS-3220 | Product Manual - Page 137
Time Zone Table (continued) 137 - D-Link DCS-3220 | Product Manual - Page 138
be to replace the non-conforming Software (or defective media) with software that substantially conforms to DLink's functional specifications for the Software or to refund at D-Link's sole discretion. Except as otherwise agreed by D-Link in writing, the replacement Software is provided only to the - D-Link DCS-3220 | Product Manual - Page 139
covered in the operating manual for the product, and normal maintenance; Damage that occurs in shipment, due to act of God, failures due to power surge, and cosmetic damage; Any hardware, software, firmware or other products or services provided by anyone other than D-Link; Products that have been - D-Link DCS-3220 | Product Manual - Page 140
radiate radio frequency energy and, if not installed and used in accordance with the instructions, may cause harmful interference to radio communication. However, there is no guarantee that help. For detailed warranty outside the United States, please contact corresponding local D-Link office. 140 - D-Link DCS-3220 | Product Manual - Page 141
Registration Register online your D-Link product at http://support.dlink.com/register/ 10/04/04 141
-
 1
1 -
 2
2 -
 3
3 -
 4
4 -
 5
5 -
 6
6 -
 7
7 -
8
-
9
-
10
-
11
-
12
-
13
-
14
-
15
-
16
-
17
-
18
-
19
-
20
-
21
-
22
-
23
-
24
-
25
-
26
-
27
-
28
-
29
-
30
-
31
-
32
-
33
-
34
-
35
-
36
-
37
-
38
-
39
-
40
-
41
-
42
-
43
-
44
-
45
-
46
-
47
-
48
-
49
-
50
-
51
-
52
-
53
-
54
-
55
-
56
-
57
-
58
-
59
-
60
-
61
-
62
-
63
-
64
-
65
-
66
-
67
-
68
-
69
-
70
-
71
-
72
-
73
-
74
-
75
-
76
-
77
-
78
-
79
-
80
-
81
-
82
-
83
-
84
-
85
-
86
-
87
-
88
-
89
-
90
-
91
-
92
-
93
-
94
-
95
-
96
-
97
-
98
-
99
-
100
-
101
-
102
-
103
-
104
-
105
-
106
-
107
-
108
-
109
-
110
-
111
-
112
-
113
-
114
-
115
-
116
-
117
-
118
-
119
-
120
-
121
-
122
-
123
-
124
-
125
-
126
-
127
-
128
-
129
-
130
-
131
-
132
-
133
-
134
-
135
-
136
-
137
-
138
-
139
-
140
-
141
 |
 |

2-Way Audio Internet Camera
with Digital Zoom
Manual
Building Networks for People
Version 1.10
DCS-3220
(10/04/04)