D-Link DCS-5029L Quick Install Guide
D-Link DCS-5029L Manual
 |
View all D-Link DCS-5029L manuals
Add to My Manuals
Save this manual to your list of manuals |
D-Link DCS-5029L manual content summary:
- D-Link DCS-5029L | Quick Install Guide - Page 1
ENGLISH DCS-5029L HD Pan & Tilt Day/Night Network Camera Cloud Camera Quick Install Guide 1 - D-Link DCS-5029L | Quick Install Guide - Page 2
Contents DCS-5029L HD Pan & Tilt Day/Night Network Camera Ethernet Cable Audio In/Out Cable Power Adapter Mounting Kit Quick Install Guide If • Installed and enabled Java and ActiveX® controls Network Device and Service • A router (D-Link Cloud Router is recommended) • An Internet connection • An e- - D-Link DCS-5029L | Quick Install Guide - Page 3
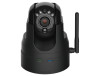
PIR Sensor IR LEDs* Microphone Antenna Speaker microSD Card Slot Power LED WPS Status LED *Note: If you see a white haze when viewing in night vision mode, the IR lights on the camera may be reflecting off a nearby surface. Try repositioning the camera in order to avoid glare from the IR LEDs - D-Link DCS-5029L | Quick Install Guide - Page 4
settings (both wired and wireless) to your camera, and add it to your mydlink account. If you do not have a D-Link Cloud Router, skip to the Easy Setup section on the next page. 1 Attach the power supply to the power receptor located on the back of the DCS-5029L and connect it to a wall outlet - D-Link DCS-5029L | Quick Install Guide - Page 5
have a D-Link Cloud Router, you can use any Windows or Mac computer to go through the Setup Wizard, which will guide you through the installation process, from connecting your hardware to configuring your camera. Download the Setup Wizard from http://www.mydlink.com/support. Windows Users - Extract - D-Link DCS-5029L | Quick Install Guide - Page 6
3 Sign in with your mydlink account registered in the Setup Wizard. • Windows does not have Java installed by default. Download it from http://www.java.com. • In Mac OS X 10.7.x, Java applets are disabled by default. Click the Finder > Applications > Utilities > Java Preferences and check - D-Link DCS-5029L | Quick Install Guide - Page 7
behind the mounting bracket. When you run the cables through the channel, secure them with the built-in guides. Leave enough cable length protruding from the top to connect the cables to the camera. 4. Fasten the arm mount to the wall using the screws provided. Lightly pull on the arm mount to - D-Link DCS-5029L | Quick Install Guide - Page 8
Technical Support This guide is only for the first time configuration. Please refer to the user manual to learn more or visit http://www.mydlink.com for more information. Also feel free to contact us. U.S. customers can contact D-Link Technical Support through our website. USA http://support.dlink.
-
 1
1 -
 2
2 -
 3
3 -
 4
4 -
 5
5 -
 6
6 -
 7
7 -
8
 |
 |

DCS-5029L
Quick Install Guide
HD Pan & Tilt Day/Night Network Camera
Cloud Camera
1
ENGLISH
ENGLISH