D-Link DCS-5029L User Manual
D-Link DCS-5029L Manual
 |
View all D-Link DCS-5029L manuals
Add to My Manuals
Save this manual to your list of manuals |
D-Link DCS-5029L manual content summary:
- D-Link DCS-5029L | User Manual - Page 1
Version 1.1 | October 6, 2014 User Manual HD Pan & Tilt Day/Night Network Camera Cloud Camera DCS-5029L - D-Link DCS-5029L | User Manual - Page 2
Manual Overview D-Link reserves the right to revise this publication and to make changes in the content hereof without obligation to notify any person or organization of such revisions or changes. Information in this document may become obsolete as our services and websites develop and change. - D-Link DCS-5029L | User Manual - Page 3
instructions. Follow the safety guidelines below: • Do not spill food or liquids on product, and never operate the product in a wet environment. If the product gets wet, see the appropriate section in your troubleshooting guide , or uninterruptible power supply (UPS). D-Link DCS-5029L User Manual 3 - D-Link DCS-5029L | User Manual - Page 4
MANAGEMENT SOFTWARE, AND; A NETWORK CONNECTION. D-LINK HAS NO CONTROL OVER SUCH SERVICES AND PRODUCTS AND EXPRESSLY DISCLAIMS ANY AND ALL LIABILITY FOR THE FAILURE OF THE DEVICE OR ANY FEATURE THEREOF RESULTING FROM THE FAILURE OF ANY THIRD-PARTY SERVICE OR PRODUCT. D-Link DCS-5029L User Manual 4 - D-Link DCS-5029L | User Manual - Page 5
Wireless Setup 39 Dynamic DNS (DDNS 40 Image Setup 41 Audio and Video 43 PTZ Setup 44 Motion Detection 46 Sound Detection 47 Time and Date 48 Event Setup 49 Add Server 51 Add Media 52 Add Event 54 Add Recording 56 SD Card 58 Advanced 59 DI and DO 59 D-Link DCS-5029L User Manual 5 - D-Link DCS-5029L | User Manual - Page 6
Info 66 Log 67 Help 68 Configuring the DCS-5029L without mydlink 69 Troubleshooting 75 Technical Specifications 78 Contacting Technical Support 80 Networking Basics 81 Check Your IP Address 81 Statically Assign an IP Address 82 Warranty 84 Registration 91 D-Link DCS-5029L User Manual 6 - D-Link DCS-5029L | User Manual - Page 7
Power Adapter Mounting Kit Quick Install Guide If any of the above items are missing, please contact your reseller. Note: Using a power supply with a different voltage than the one included with your product will cause damage and void the warranty for this product. D-Link DCS-5029L User Manual 7 - D-Link DCS-5029L | User Manual - Page 8
Network Device and Service Windows® Users: Make sure Link Cloud Router is recommended) • An Internet connection • An e-mail account (required to create a mydlink™ account) mydlink Requirements • For mydlink and mydlink app requirements refer to: http://www.mydlink.com D-Link DCS-5029L User Manual - D-Link DCS-5029L | User Manual - Page 9
your camera from anywhere over the Internet through the mydlink website, or through the mydlink mobile app for iOS and Android. You can view your camera's live video, take snapshots, and manage the camera's configuration, all from anywhere you have Internet access. D-Link DCS-5029L User Manual 9 - D-Link DCS-5029L | User Manual - Page 10
. Motion Triggered Notifications and Recordings The DCS-5029L can send e-mail notifications with DCS-5029L can also upload images to an FTP server whenever motion in these areas is detected. 802.11g/n Wireless or Ethernet/Fast Ethernet Support The DCS-5029L camera. D-Link DCS-5029L User Manual 10 - D-Link DCS-5029L | User Manual - Page 11
WPS (Wi-Fi Protected Setup) connection status of the camera. *Note: If you see a white haze when viewing in night vision mode, the IR lights on the camera may be reflecting off a nearby surface. Try repositioning the camera in order to avoid glare from the IR LEDs. D-Link DCS-5029L User Manual 11 - D-Link DCS-5029L | User Manual - Page 12
back to its factory default settings. 3 Ethernet Port Connect 10/100 Ethernet devices such as computers, switches, and routers. 4 DI/DO Port Attach digital I/O devices such as alarms or motion sensors. 5 Power Receptor Connect to the supplied power adapter. D-Link DCS-5029L User Manual 12 - D-Link DCS-5029L | User Manual - Page 13
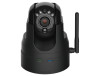
intercom. 2 Antenna The external antenna increases the device's range of connectivity. 3 WPS Button Use WPS (Wi-Fi Protected Setup) to easily create a secure connection to your network. 4 microSD Slot Insert a microSD card to store recorded images and video. D-Link DCS-5029L User Manual 13 - D-Link DCS-5029L | User Manual - Page 14
Minimize the number of walls and ceilings between your adapter and other network devices (such as your network camera) - each wall or ceiling can reduce your adapter's range by 3-98 feet (1-30 meters). 2. Be base transmits a signal even if the phone is not in use. D-Link DCS-5029L User Manual 14 - D-Link DCS-5029L | User Manual - Page 15
Camera Setup Wizard to guide you through installation and initial configuration of your camera. Refer to "Camera Setup Wizard" on page 20. Manual Hardware Installation: This section shows you how to manually set up your camera clear the device of any personal data. D-Link DCS-5029L User Manual 15 - D-Link DCS-5029L | User Manual - Page 16
the cable after the Zero Configuration Setup is complete and place the camera within your wireless network. If you prefer to initiate a wireless connection with your router, you can use WPS (Wi-Fi Protected Setup). Refer to "WPS - Push Button Setup" on page 19. D-Link DCS-5029L User Manual 16 - D-Link DCS-5029L | User Manual - Page 17
, or Safari) and log in to your mydlink account. Step 4 The mydlink page will automatically check for new devices. Once mydlink detects your camera, a notice will appear that says, Zero Configuration (at the bottom of the screen). Click the notification to continue. D-Link DCS-5029L User Manual 17 - D-Link DCS-5029L | User Manual - Page 18
the camera to your account. Your setup is manual focus adjustment ring that surrounds the camera lens. If you notice a white haze when viewing in night vision mode, the night vision light on the camera may be reflecting off a nearby surface. Try repositioning the camera. D-Link DCS-5029L User Manual - D-Link DCS-5029L | User Manual - Page 19
interface and click on an on-screen button to activate the WPS feature. Step 3 Allow up to one minute to configure. The DCS-5029L will automatically create a secure wireless connection to your router. The blue LED will flash and your camera will reboot. WPS Button D-Link DCS-5029L User Manual 19 - D-Link DCS-5029L | User Manual - Page 20
and holding the reset button on the device for 10 seconds while the device is powered on. Note: At the end of the Setup Wizard, you can click Go To Camera if you wish to access the Configuration Utility. Refer to "Using the Web Configuration Utility" on page 28. D-Link DCS-5029L User Manual 20 - D-Link DCS-5029L | User Manual - Page 21
does not support WPS, you will still be able to set up your camera's wireless settings using the camera's Web interface. Refer to "Wireless Setup" on page 39. Configure Your Camera Refer to "Configuration" on page 28 for information on how to configure your camera. D-Link DCS-5029L User Manual 21 - D-Link DCS-5029L | User Manual - Page 22
arm mount to make sure it is fastened securely. Do not overtighten the screws as this may crack the mounting bracket. 5. Align the camera base mounting guides with the camera shoe and thumbscrew on the arm mount. Tighten the thumbscrew to lock the camera in place. D-Link DCS-5029L User Manual 22 - D-Link DCS-5029L | User Manual - Page 23
services Laptop mydlink provides users with a quick and easy way to view and to manage multiple cameras over the Internet. With a DCS-5029L mydlink-enabled camera QR code scan app. D-Link DCS-5029L User Manual mydlink Requirements: for mydlink and mydlink app requirements refer to: www.mydlink.com - D-Link DCS-5029L | User Manual - Page 24
mydlink Cloud Services, which include free access to the mydlink portal website. After you register your DCS-5029L, you will be able to remotely access your camera from the the focus by rotating the manual focus adjustment ring that surrounds the camera lens. D-Link DCS-5029L User Manual 24 - D-Link DCS-5029L | User Manual - Page 25
to "Zero Configuration Setup" on page 16 or "Manual Hardware Installation" on page 21. • For a wired connection, make sure the Ethernet connection between your camera and router is secure. • If the Power LED is off, check the power source. D-Link DCS-5029L User Manual LEDs Color Status Description - D-Link DCS-5029L | User Manual - Page 26
back recorded videos, log in to your mydlink account, access your camera, and click on the SD Card tab to locate videos for viewing. Recording Date: Select the recording date and time from the drop-down menu. Click GO to view recorded video from your microSD card. D-Link DCS-5029L User Manual 26 - D-Link DCS-5029L | User Manual - Page 27
Click to configure advanced features for your camera. The Settings: Username will be admin by default. Enter your Password for the camera (not your mydlink password). Remove Device: Click if you want to remove and un-register the camera from your mydlink account. D-Link DCS-5029L User Manual 27 - D-Link DCS-5029L | User Manual - Page 28
OK. Note: If you are directly connecting your camera to your PC, or if you are using the camera on a closed network, the default IP address is 192.168.0.20. If the camera is connected to a router or network, a different IP address may have been assigned. DCS-5029L D-Link DCS-5029L User Manual 28 - D-Link DCS-5029L | User Manual - Page 29
camera to that position. (Instructions for presets are provided under "PTZ Setup" on page 44.) Pan Step: Select a number that controls how much the camera should move up or down each time the user the manual focus adjustment ring that surrounds the camera lens. D-Link DCS-5029L User Manual 29 - D-Link DCS-5029L | User Manual - Page 30
color when a motion trigger event occurs if the motion detection feature is enabled. When a recording is in progress, this indicator will change color. Zoom In/Zoom Out Auto Pan Stop automatic panning function. Starts the camera's motion along the predefined path. D-Link DCS-5029L User Manual 30 - D-Link DCS-5029L | User Manual - Page 31
from the camera's microphone to the PC's speakers. Click again to stop audio in. Click to end audio from a microphone connected to your PC to the speakers connected to the camera. Click again to stop audio out. Press this button to start and stop digital output. D-Link DCS-5029L User Manual 31 - D-Link DCS-5029L | User Manual - Page 32
Motion settings. Refer to "Motion Detection" on page 46. Detection Setup: *Note: To register your camera with mydlink and enable its mydlink-related features, you should use the Camera Setup Wizard for installation. Please refer to "Camera Setup Wizard" on page 20. D-Link DCS-5029L User Manual 32 - D-Link DCS-5029L | User Manual - Page 33
settings to enter, check with your ISP or network administrator. Enable PPPoE: If your camera is directly connected to the Internet through a DSL modem, you may select this option. Enter the User Name and Password provided to you by your ISP. Click Next to continue. D-Link DCS-5029L User Manual 33 - D-Link DCS-5029L | User Manual - Page 34
. Click Next to continue. Enter a name for your camera. Click Next to continue. Select the Time Zone that corresponds to your camera's location to ensure that all events are triggered, captured, your settings. (Click Back if you need to change your settings.) D-Link DCS-5029L User Manual 34 - D-Link DCS-5029L | User Manual - Page 35
Section 4 - Configuration Motion Detection Setup Wizard This wizard will guide you through a step-by-step process to configure your camera's motion detection functions. Click Next to continue. Step a customized schedule, click From and specify the day(s) and hours. D-Link DCS-5029L User Manual 35 - D-Link DCS-5029L | User Manual - Page 36
3 This step allows you to specify how you will receive event notifications from your camera. You may choose not to receive notifications, or to receive notifications via e-mail Apply to save them. Wait a few moments while the camera saves your settings and restarts. D-Link DCS-5029L User Manual 36 - D-Link DCS-5029L | User Manual - Page 37
assigned to your camera automatically. Static IP Client: Select this connection type if your Internet Service Provider (ISP) User Name and Password provided to you by your ISP or network administrator. PPPoE Status: Displays the PPPoE status as either active or inactive. D-Link DCS-5029L User Manual - D-Link DCS-5029L | User Manual - Page 38
The DCS-5029L allows you to multicast each of the available streams for stream: using a group address. You can specify the TTL value for each stream. Enter the port and TTL settings you wish to use if you do not want to use the default settings. Click Save Settings. D-Link DCS-5029L User Manual - D-Link DCS-5029L | User Manual - Page 39
- Configuration Wireless Setup This section allows you to set up and configure the wireless settings on your camera. Enable Check the box to allow your camera to connect to your , enter the Key (also known as password) for your wireless network. Click Save Settings. D-Link DCS-5029L User Manual 39 - D-Link DCS-5029L | User Manual - Page 40
Enter your Password used to connect to the DDNS server. Timeout: This allows you to specify the periodic update time for notifying the DDNS server of the camera's current IP address. Status: Displays the connection status as Active or Inactive. Click Save Settings. D-Link DCS-5029L User Manual 40 - D-Link DCS-5029L | User Manual - Page 41
Setup This section allows you to configure the image settings for your camera. Enable Privacy Check the box to enable the privacy mask function. This allows you to specify Mask Setting: rectangular areas on the screen that should be blocked from recording and taking snapshots with your DCS-5029L - D-Link DCS-5029L | User Manual - Page 42
camera image. Saturation: Adjust the color saturation level. Sharpness: Select a number from 0 to 8 to specify how much sharpening to apply to the image. Mount Type: Select the mount type , either Ceiling or Desktop, to ensure the PTZ controls respond accurately. D-Link DCS-5029L User Manual 42 - D-Link DCS-5029L | User Manual - Page 43
menu to select the desired fixed bandwidth. Fixed quality: Select the image quality level for the camera to try to maintain. High quality levels, like excellent, will result in increased bit rates. Audio audio. A higher number increases volume. Click Save Settings. D-Link DCS-5029L User Manual 43 - D-Link DCS-5029L | User Manual - Page 44
the speed Speed: at which the camera will pan. You can choose a value between 0 and 10, with 0 being the slowest. Click the Test button to view the camera movement at the selected pan speed. Proceed to the next page for instructions for creating a preset sequence. D-Link DCS-5029L User Manual 44 - D-Link DCS-5029L | User Manual - Page 45
Section 4 - Configuration Preset Sequence: Create a preset sequence, which will automatically move the camera's view from one preset point to another. To add a preset to the sequence, the preferred order, you can click the Test button to view the preset sequence. D-Link DCS-5029L User Manual 45 - D-Link DCS-5029L | User Manual - Page 46
window will trigger an alert. Drawing Mode: To define the part of the picture that you want the camera to monitor for movement, first click and drag your mouse over the image area to bring up the screen will continue blinking orange as long as motion is detected. D-Link DCS-5029L User Manual 46 - D-Link DCS-5029L | User Manual - Page 47
camera. Detection Level: Specifies the measurable detection level. When the sound level exceeds the detection level, the camera will trigger an event. Enter a value between 50 and 90. The higher the number, the less sensitive the camera will be. Click Save Settings. D-Link DCS-5029L User Manual - D-Link DCS-5029L | User Manual - Page 48
this option will allow the camera to update its system clock Manually: time of the internal system clock manually. Or you can click on Copy Your Computer's Time Settings to automatically set the date and time based on your computer's settings. Click Save Settings. D-Link DCS-5029L User Manual - D-Link DCS-5029L | User Manual - Page 49
the camera to send snapshots or videos to your e-mail address or to an FTP server. To start plotting an event, we suggest that you configure Server and Media columns first so that the network camera will know what action will be performed when a trigger is activated. D-Link DCS-5029L User Manual - D-Link DCS-5029L | User Manual - Page 50
4 - Configuration The Event Setup page includes these four sections: • Server • Media • Event • Recording 1. To add a new Media, Event, or Recording and click Delete. 3. To edit an item, click on the item name and a window will open for modifying the selected item. D-Link DCS-5029L User Manual 50 - D-Link DCS-5029L | User Manual - Page 51
e-mail server account. FTP: Enter the configuration for the target FTP server account. Network Storage: Specify a network storage device. Only one network storage device is supported. SD Card: Use the camera's onboard SD card storage. Click Save Settings. D-Link DCS-5029L User Manual 51 - D-Link DCS-5029L | User Manual - Page 52
profiles. Send pre-event Set the number of pre-event images for the camera image(s) [0~3]: to take. Pre-event images are images taken before the main to record before the main recording: event video clip starts. You can record up to three seconds of pre-event video. D-Link DCS-5029L User Manual 52 - D-Link DCS-5029L | User Manual - Page 53
Configuration Maximum Set the maximum length (in seconds) of video to record duration: for your video clips. Maximum file Set the maximum file logs. This will save the event to the camera system log, but will not record any snapshots or video. Click Save Settings. D-Link DCS-5029L User Manual 53 - D-Link DCS-5029L | User Manual - Page 54
event when the PIR sensor is activated by Sensor: moving infrared objects, even in a dark environment. Sound Detection: Triggers an event when sound is detected. D-Link DCS-5029L User Manual 54 - D-Link DCS-5029L | User Manual - Page 55
the drop-down menu. Trigger D/O: Check the box to trigger the digital output for a specific number of seconds when an event occurs. Click Save Settings. D-Link DCS-5029L User Manual 55 - D-Link DCS-5029L | User Manual - Page 56
(folder) and then will delete the oldest file and create a new file for cyclical recording. Note: When you specify the total cycling recording size, make sure that you leave enough HDD space for the size that is specified. Otherwise, the recording will stop. D-Link DCS-5029L User Manual 56 - D-Link DCS-5029L | User Manual - Page 57
on the file size you specify. Time of each file If you select this option, files will be separated based for recording: on the maximum length you specify. File Name Prefix: The prefix name will be added on the file name of the recording file(s). Click Save Settings. D-Link DCS-5029L User Manual 57 - D-Link DCS-5029L | User Manual - Page 58
play back. Picture: If picture files are stored on the microSD card, click on the link and locate the file you would like to view. Format SD Card: Click this button and the system will automatically format the microSD card and create folders for pictures and video. D-Link DCS-5029L User Manual 58 - D-Link DCS-5029L | User Manual - Page 59
is triggered, video will be recorded or snapshots will be taken and alerts will be e-mailed as specified. (Refer to "Event Setup" on page 49.) D/I and D/O: The camera sends a signal whenever an event when the device status changes to "Closed." Click Save Settings. D-Link DCS-5029L User Manual 59 - D-Link DCS-5029L | User Manual - Page 60
it is inserted.) Automatic: Click Automatic, and the Day/Night mode is set automatically. Generally, the camera uses Day mode and switches to Night mode when needed. Day Mode: Day mode enables the IR Cut ending time (To) from the drop-down menu. Click Save Settings. D-Link DCS-5029L User Manual 60 - D-Link DCS-5029L | User Manual - Page 61
certificate for secure access to your camera. Enable HTTPS Check the box to enable the HTTPS (Hypertext Transfer Protocol Secure) Secure Connection: service. Create Certificate Choose the way the HTTPS secure connection and then click Remove. Click Save Settings. D-Link DCS-5029L User Manual 61 - D-Link DCS-5029L | User Manual - Page 62
devices (such as a computer) that have permission to access the video from the camera. Click Add to save the specified IP address. Delete allow list: Click to 255, only users with IP addresses located between 171.0.0.0 and 192.255.255.255 can access your DCS-5029L. D-Link DCS-5029L User Manual 62 - D-Link DCS-5029L | User Manual - Page 63
the LED function may be useful if you want to make the camera less obvious. Privacy Control: Check the box to enable privacy control. Click Privacy On to put the camera in Privacy Mode, and click Save. (When privacy mode is turned on, the camera lens is hidden.) D-Link DCS-5029L User Manual 63 - D-Link DCS-5029L | User Manual - Page 64
to enable a scheduled reboot, meaning the camera Reboot: will reboot on a specific day or days, at a specific time. Then select a schedule by checking the boxes by the days of the week and selecting a time from the drop-down menu. Click Save to save your schedule. D-Link DCS-5029L User Manual 64 - D-Link DCS-5029L | User Manual - Page 65
or the camera may be damaged. When upgrading firmware, do not unplug the camera or your PC, or close your Web browser until the process is complete. It is also highly recommended that you use a wired connection for your camera and PC when upgrading firmware. D-Link DCS-5029L User Manual 65 - D-Link DCS-5029L | User Manual - Page 66
Section 4 - Configuration Status Device Info This section displays important information about your camera and network settings, including the MAC Address and Firmware Version. D-Link DCS-5029L User Manual 66 - D-Link DCS-5029L | User Manual - Page 67
Section 4 - Configuration Log This section displays log information for your camera, which is the list of events that occurred most recently. You can download the log by clicking the Download button, or clear the log by clicking the Clear button. D-Link DCS-5029L User Manual 67 - D-Link DCS-5029L | User Manual - Page 68
Section 4 - Configuration Click on the link to the help topic for more information. Help D-Link DCS-5029L User Manual 68 - D-Link DCS-5029L | User Manual - Page 69
are the steps for manual installation. However, if you decide to use the Setup Wizard, it will perform all steps automatically. This section is designed to walk you through the setup process for installing your camera behind a router and enable remote video viewing. D-Link DCS-5029L User Manual 69 - D-Link DCS-5029L | User Manual - Page 70
live video from the camera. You are able to view this screen from any PC running Internet Explorer on your LAN. Click on Setup at the top of the Live Video screen. Click on Network Setup so you can learn about port settings. (Instructions on the next page.) D-Link DCS-5029L User Manual 70 - D-Link DCS-5029L | User Manual - Page 71
Network page displays the port settings for your camera. If necessary, these ports can be changed if they are already in use by other devices (e.g. in a multiple camera environment). Note: Both the HTTP port and RTSP port are required to be opened for the DCS-5029L. D-Link DCS-5029L User Manual 71 - D-Link DCS-5029L | User Manual - Page 72
Static IP address is a fixed IP address that will not change over time and will be more convenient for you to use to access your camera from a remote location. The Static IP address will also allow you to access your camera attached to your router over the Internet. D-Link DCS-5029L User Manual 72 - D-Link DCS-5029L | User Manual - Page 73
are using the default camera port settings, enter 80 into the Public and Private Port section, click Apply. 6. Scheduling should be set to Always so that the camera images can be accessed at any time. Note: Instructions for Virtual Server continue on the next page. D-Link DCS-5029L User Manual 73 - D-Link DCS-5029L | User Manual - Page 74
are the same, so refer to your user manual for specific instructions on how to open ports. Enter valid ports in the Virtual Server section of your router. Please make sure to check the box next to the camera name on the Virtual Server List to enable your settings. D-Link DCS-5029L User Manual 74 - D-Link DCS-5029L | User Manual - Page 75
Unfortunately, this will change all your settings back to the factory default settings. To reset your camera, use an unfolded paper clip to press and hold the RESET button on the back of your camera for about 10 seconds while your camera is plugged in. D-Link DCS-5029L User Manual Reset Button 75 - D-Link DCS-5029L | User Manual - Page 76
will damage the sensor. 7. The camera is producing noisy images. How can I solve the problem? The video images might be noisy if the camera is used in a very low-light environment. Try switching to night mode if you are consistently monitoring a low light area. D-Link DCS-5029L User Manual 76 - D-Link DCS-5029L | User Manual - Page 77
Troubleshooting set properly. For more, refer to "Image Setup" on page 41. 9. Why are no images camera should only be installed indoors. Do not install this camera where IR interference can be a problem, like pointing through a glass door or window. Placing the camera Link DCS-5029L User Manual 77 - D-Link DCS-5029L | User Manual - Page 78
Overlays • Configurable Motion Detection • Flip and Mirror • Pre-event Snapshot • Pre-event Recording 16:9 RESOLUTION • 1280 x 720 at up to 30 fps • 800 x 448 at up to 30 fps • 640 x 360 at up to 30 fps • 480 x 272 at up to 30 fps • 320 x 176 at up to 30 fps D-Link DCS-5029L User Manual 78 - D-Link DCS-5029L | User Manual - Page 79
: 115° PAN/TILT RANGE • Pan Range: +170° to -170° (total 340°) • Tilt Range: +95° to -10° (total 105°) DIGITAL ZOOM • Up to 10x D-Link DCS-5029L User Manual POWER • Input: 100-240 VAC, 50/60Hz • Output: 5VDC, 2.5 A DIMENSIONS (W X D X H) • 4.72 x 4.06 x 5.11 in (119.89 x 103.12 x 129.79 mm) WEIGHT - D-Link DCS-5029L | User Manual - Page 80
asked questions and answers to technical issues. For customers within the United States: Phone Support: (877) 453-5465 Internet Support: http://support.dlink.com For customers within Canada: Phone Support: (866) 354-6599 Internet Support: http://support.dlink.ca D-Link DCS-5029L User Manual 80 - D-Link DCS-5029L | User Manual - Page 81
the IP address, subnet mask, and default gateway of your adapter. If the address is 0.0.0.0, check your adapter installation, security settings, and the settings on your router. Some firewall software programs may block a DHCP request on newly installed adapters. D-Link DCS-5029L User Manual 81 - D-Link DCS-5029L | User Manual - Page 82
• Set Default Gateway the same as the LAN IP address of your router or gateway. • Set Primary DNS the same as the LAN IP address of your router or gateway. • The Secondary DNS is optional (you may enter a DNS server from your ISP). • Click OK to save your settings. D-Link DCS-5029L User Manual 82 - D-Link DCS-5029L | User Manual - Page 83
• Set Default Gateway the same as the LAN IP address of your router or gateway. • Set Primary DNS the same as the LAN IP address of your router or gateway. • The Secondary DNS is optional (you may enter a DNS server from your ISP). • Click OK to save your settings. D-Link DCS-5029L User Manual 83 - D-Link DCS-5029L | User Manual - Page 84
the defective Hardware will be refunded by D-Link upon return to D-Link of the defective Hardware. All Hardware or part thereof that is replaced by D-Link, or for which the purchase price is refunded, shall become the property of D-Link upon replacement or refund. D-Link DCS-5029L User Manual 84 - D-Link DCS-5029L | User Manual - Page 85
the actual purchase price paid that is attributable to the Software. Except as otherwise agreed by D-Link in writing, customer must obtain a Case ID Number from D-Link Technical Support at https://support.dlink.com, who will attempt to assist the customer dlink.com/. D-Link DCS-5029L User Manual 85 - D-Link DCS-5029L | User Manual - Page 86
damaged in transit, and the RMA number must be prominently marked on the outside of the package. Do not include any manuals or accessories in the shipping package. D-Link will only replace the defective portion of the product and will not ship back any accessories. D-Link DCS-5029L User Manual 86 - D-Link DCS-5029L | User Manual - Page 87
firmware or other products or services provided by anyone other than D-Link; and Products that have been purchased from inventory clearance or liquidation sales or other sales in which D-Link OF MERCHANTABILITY, FITNESS FOR A PARTICULAR PURPOSE AND NON-INFRINGEMENT. D-Link DCS-5029L User Manual 87 - D-Link DCS-5029L | User Manual - Page 88
adaptation without permission from D-Link Corporation/D-Link Systems, Inc., as stipulated by the United States Copyright Act of 1976 and any amendments thereto. Contents are subject to change without prior notice. ©2014 by D-Link Systems, Inc. All rights reserved. D-Link DCS-5029L User Manual 88 - D-Link DCS-5029L | User Manual - Page 89
energy and, if not installed and used in accordance with the instructions, may cause harmful interference to radio communication. However, there firmware programmed at the factory to match the intended destination. The firmware setting is not accessible by the end user. D-Link DCS-5029L User Manual - D-Link DCS-5029L | User Manual - Page 90
device has been designed to operate with an antenna having a maximum gain of 2 dB. Antenna having a higher gain is strictly prohibited per regulations of Industry Canada. The required antenna impedance is 50 ohms. D-Link DCS-5029L User Manual 90 - D-Link DCS-5029L | User Manual - Page 91
Appendix E - Registration Registration Product registration is entirely voluntary and failure to complete or return this form will not diminish your warranty rights. Version 1.1 October 6, 2014 D-Link DCS-5029L User Manual 91
-
 1
1 -
 2
2 -
 3
3 -
 4
4 -
 5
5 -
 6
6 -
 7
7 -
8
-
9
-
10
-
11
-
12
-
13
-
14
-
15
-
16
-
17
-
18
-
19
-
20
-
21
-
22
-
23
-
24
-
25
-
26
-
27
-
28
-
29
-
30
-
31
-
32
-
33
-
34
-
35
-
36
-
37
-
38
-
39
-
40
-
41
-
42
-
43
-
44
-
45
-
46
-
47
-
48
-
49
-
50
-
51
-
52
-
53
-
54
-
55
-
56
-
57
-
58
-
59
-
60
-
61
-
62
-
63
-
64
-
65
-
66
-
67
-
68
-
69
-
70
-
71
-
72
-
73
-
74
-
75
-
76
-
77
-
78
-
79
-
80
-
81
-
82
-
83
-
84
-
85
-
86
-
87
-
88
-
89
-
90
-
91
 |
 |

User Manual
DCS-5029L
Version 1.1 | October 6, 2014
Cloud Camera
HD Pan & Tilt Day/Night Network Camera