D-Link DCS-5222L User Manual - Page 15
WPS - Push Button Setup - manual
 |
View all D-Link DCS-5222L manuals
Add to My Manuals
Save this manual to your list of manuals |
Page 15 highlights
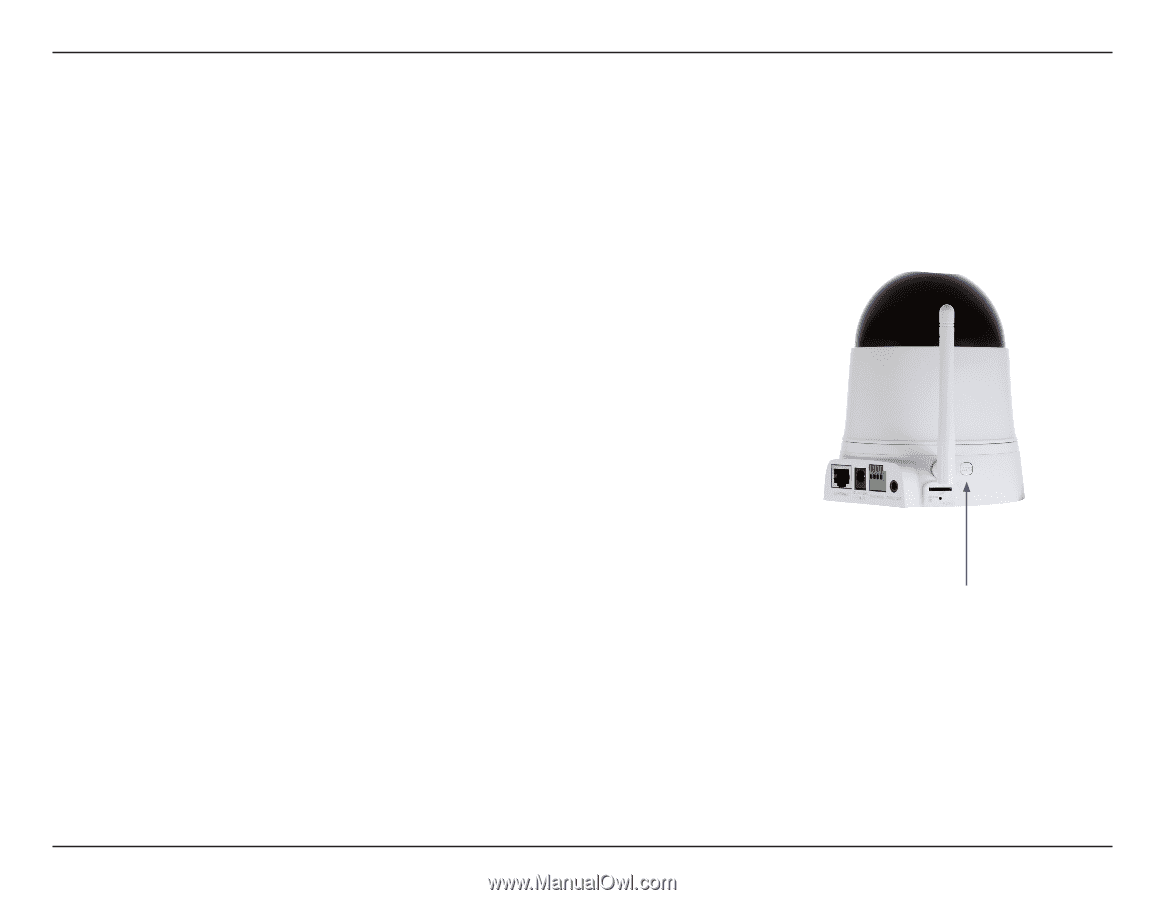
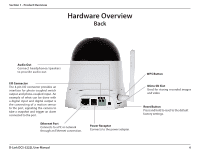
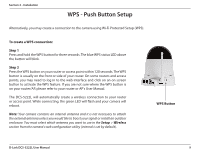
Section 2 - Installation WPS - Push Button Setup Alternatively, you may create a connection to the camera using Wi-Fi Protected Setup (WPS). To create a WPS connection: Step 1 Press and hold the WPS button for three seconds. The blue WPS status LED above the button will blink. Step 2 Press the WPS button on your router or access point within 120 seconds. The WPS button is usually on the front or side of your router. On some routers and access points, you may need to log in to the web interface and click on an on-screen button to activate the WPS feature. If you are not sure where the WPS button is on your router/AP, please refer to your router or AP's User Manual. The DCS-5222L will automatically create a wireless connection to your router or access point. While connecting, the green LED will flash and your camera will reboot. Note: Your camera contains an internal antenna and it is not necessary to attach the external antenna unless you would like to boost your signal or install an outdoor enclosure. You must select which antenna you want to use in the Setup > Wireless section from the camera's web configuration utility (internal is set by default). WPS Button D-Link DCS-5222L User Manual 9
-
 1
1 -
2
-
3
-
4
-
5
-
6
-
7
-
8
-
9
-
 10
10 -
 11
11 -
 12
12 -
 13
13 -
 14
14 -
 15
15 -
 16
16 -
 17
17 -
 18
18 -
 19
19 -
 20
20 -
21
-
22
-
23
-
24
-
25
-
26
-
27
-
28
-
29
-
30
-
31
-
32
-
33
-
34
-
35
-
36
-
37
-
38
-
39
-
40
-
41
-
42
-
43
-
44
-
45
-
46
-
47
-
48
-
49
-
50
-
51
-
52
-
53
-
54
-
55
-
56
-
57
-
58
-
59
-
60
-
61
-
62
-
63
-
64
-
65
-
66
 |
 |