D-Link DFL-2560G Hardware Installation Guide
D-Link DFL-2560G Manual
 |
UPC - 790069335440
View all D-Link DFL-2560G manuals
Add to My Manuals
Save this manual to your list of manuals |
D-Link DFL-2560G manual content summary:
- D-Link DFL-2560G | Hardware Installation Guide - Page 1
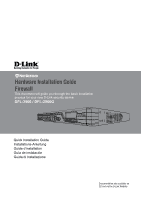
Building Networks for People Hardware Installation Guide Firewall This document will guide you through the basic installation process for your new D-Link security device. DFL-2560 / DFL-2560G Quick Installation Guide Installations-Anleitung Guide d'installation Guía de instalación Guida di - D-Link DFL-2560G | Hardware Installation Guide - Page 2
About This Guide This guide contains step-by-step instructions for setting up the D-Link DFL-2560/DFL-2560G Firewall. Please note that the model you have purchased may appear slightly different from those shown in the illustrations. Unpacking the Product Open the shipping - D-Link DFL-2560G | Hardware Installation Guide - Page 3
it down and powering it back on. When you power on the DFL-2560/2560G, the LCD panel will display following message: "Press keypad to enter setup Orange - System failure or license lockdown. Light Off - No Link. Solid Green - Link present. Blinking Green - Port is sending or receiving data. Light - D-Link DFL-2560G | Hardware Installation Guide - Page 4
2560/DFL-2560G device into a standard 19-inch equipment rack. To install an DFL-2560/DFL-2560G device into a rack: 1. Attach the mounting brackets to each side of the chassis as shown in figure 6 and secure them with the provided screws. 4 D-Link NetDefend Firewall Figure 6. Attaching Rack Mount - D-Link DFL-2560G | Hardware Installation Guide - Page 5
of the device. WAN1 Plug the other end into an AC power source. DMZ LAN1 Console Note: D-Link recommends the use of a surge protector with your power connection. To power on the DFL-2560/2560G device, press the AC power switch on the rear panel to Server Fram the on position. To power - D-Link DFL-2560G | Hardware Installation Guide - Page 6
DFL-2560/2560G allows either HTTP or a secure HTTPS connections from any management host. However, for security reasons, only a secure HTTPS connection is allowed by default. For more information about configuring connections settings, please refer to the Firewall User Manual D-Link NetDefend supports - D-Link DFL-2560G | Hardware Installation Guide - Page 7
After initial setup, please refer to the companion publications found in PDF format on the accompanying Reference CD for detailed instructions on configuring the DFL-2560/2560G. D-Link NetDefend Firewall Log Reference Guide This document describes all log messages that might be generated by the - D-Link DFL-2560G | Hardware Installation Guide - Page 8
- D-Link DFL-2560G | Hardware Installation Guide - Page 9
Building Networks for People Handbuch zur Hardwareinstallation Firewall Diese Anleitung führt Sie durch den allgemeinen Installationsprozess für Ihr neues D-Link-Sicherheitsgerät. DFL-2560 / DFL-2560G Die Dokumentation ist auch auf CD und über die D-LinkWebsite verfügbar. - D-Link DFL-2560G | Hardware Installation Guide - Page 10
Mbit/s* G Ethernet-Ports mit 10/100/1000 Mbit/s* (DFL-2560) 1000 Mbit/s Den Ports sind die Nummern 1 - 4 zugewiesen (von links nach rechts). SFP-Port* (DFL-2560G) Tabelle 1. Beschreibung der Vorderseite der DFL-2560 / 2560G * Konfigurierbare Gigabit Ethernet-Ports mit Autosensing Duplex und - D-Link DFL-2560G | Hardware Installation Guide - Page 11
Tastenfeld auf der LCD-Anzeige während des Systemstarts Beim Einschalten der 2560/2560G wird auf der LCD-Anzeige die folgende Meldung eingeblendet: „Press RX-Status Grün LINK Speed (Verbin- Grün/ dungsgeschwindigkeit) Orange Verbindung und TX/ RX für SFP-Port (Nur DFL-2560G) Orange Status - D-Link DFL-2560G | Hardware Installation Guide - Page 12
Systemstart der DFL-2560/2560G abgeschlossen ist 2560/DFL-2500G-Gerät in einem Rack: 1. Bringen Sie die Befestigungsklammern an den beiden Seiten des Gehäuses an, wie in Abbildung 6 gezeigt, und fixieren Sie sie mit den mitgelieferten Schrauben. Tabelle 4. Gerätestatus gemäß LCD-Anzeige 12 D-Link - D-Link DFL-2560G | Hardware Installation Guide - Page 13
ßen Sie das andere Ende an eine Wechselstromquelle an. Internet WAN1 DMZ LAN1 Console Hinweis: D-Link empfiehlt die Verwendung eines Überspannungsschutzes für die Stromverbindung. Zum Einschalten des DFL-2560/2560G-Geräts stellen Sie den Netzschalter an der Geräterückseite in die Position EIN - D-Link DFL-2560G | Hardware Installation Guide - Page 14
Firefox 1.0 oder höher Netscape Navigator 8.0 oder höher Hinweis: Die DFL-2560/2560G ermöglicht entweder HTTP- oder sichere HTTPS-Verbindungen von jedem Management-Host. Verwendung der Konsolenport-Verbindung benötigen Sie Folgendes: Abbildung 9. Browser-Adresse 14 D-Link NetDefend Firewall - D-Link DFL-2560G | Hardware Installation Guide - Page 15
ßen Ausführliche Informationen zur Konfiguration der DFL-2560/2560G nach der Ersteinrichtung finden Sie in der Begleitdokumentation im PDF-Format auf der im Lieferumfang enthaltenen ReferenzCD. NetDefendOS-Firmware, dem proprietären Betriebssystem von D-Link, das die NetDefend Firewall steuert. Das - D-Link DFL-2560G | Hardware Installation Guide - Page 16
- D-Link DFL-2560G | Hardware Installation Guide - Page 17
Building Networks for People Guide d'installation du matériel Pare-feu Ce document vous guidera tout au long de la procédure élémentaire d'installation de votre nouvel appareil de sécurité D-Link. DFL-2560 / DFL-2560G Documentation également disponible sur CD et sur le site Web de D-Link. - D-Link DFL-2560G | Hardware Installation Guide - Page 18
À propos de ce guide Ce guide contient des instructions étape par étape pour configurer le pare-feu D-Link DFL-2560/DFL-2560G. Notez que le modèle que vous avez acheté peut légèrement différer de celui illustré sur les figures. Déballage du produit Ouvrez le carton d' - D-Link DFL-2560G | Hardware Installation Guide - Page 19
riphérique Commandes de l'écran LCD durant le démarrage À la mise sous tension du DFL-2560/2560G, l'écran LCD affiche le message suivant : « Appuyez sur une touche pour lancer la Restaurer la configuration », les paramètres enregistrés sont tous effacés définitivement. D-Link NetDefend Firewall 19 - D-Link DFL-2560G | Hardware Installation Guide - Page 20
5. Définition des boutons (après le démarrage) Une fois que le DFL-2560/2560G a terminé son sous-programme de démarrage du système, l'écran LCD matériel Vous pouvez monter le DFL-2560/DFL-2560G dans un bâti standard de 19 pouces. Pour ce faire : 1. Montez les supports de montage de chaque côté du ch - D-Link DFL-2560G | Hardware Installation Guide - Page 21
de l'appareil. Branchez l'autre extrémité à une prise de courant CA. Remarque : D-Link recommande de protéger l'alimentation contre les surtensions à l'aide d'un dispositif approprié. Pour allumer le DFL-2560/2560G, mettez l'interrupteur d'alimentation CA situé à l'arrière de l'appareil en position - D-Link DFL-2560G | Hardware Installation Guide - Page 22
(l'adresse IP par défaut est https://192.168.10.1). Remarque : Le DFL-2560/2560G accepte les connexions HTTP ou HTTPS sécurisées de n'importe quel hôte de de Données). Figure 9. Adresse du navigateur 22 D-Link NetDefend Firewall Pour utiliser une connexion via le port de console, vous devez - D-Link DFL-2560G | Hardware Installation Guide - Page 23
. Interface de ligne de commande du pare-feu NetDefend D-Link Guide de référence Ce document décrit toutes les commandes textuelles PDF sur le CD de référence pour obtenir des instructions détaillées sur la configuration du DFL-2560/2560G. Manuel d'utilisation du pare-feu NetDefend D-Link - D-Link DFL-2560G | Hardware Installation Guide - Page 24
- D-Link DFL-2560G | Hardware Installation Guide - Page 25
Building Networks for People Guía de instalación de hardware Cortafuegos Este documento le guiará a través del proceso de instalación básico de su nuevo dispositivo de seguridad D-Link. DFL-2560 / DFL-2560G La documentación está también disponible en CD y a través del sitio web de D-Link - D-Link DFL-2560G | Hardware Installation Guide - Page 26
D-Link DFL-2560/DFL-2560G. Tenga PDF) -- Dos (2) soportes de montaje en bastidor -- Una (1) suscripción a IPS de 12 meses -- Una (1) suscripción a antivirus de 12 meses Descripción general del producto Panel frontal - DFL-2560 y DFL-2560G CA G F ED B Figura 1. Panel frontal del DFL-2560/2560G - D-Link DFL-2560G | Hardware Installation Guide - Page 27
LED de estado del dispositivo Controles de teclado del LCD durante el arranque Al encender el DFL-2560/2560G, el panel LCD mostrará el mensaje siguiente: "Press keypad to enter setup" ( configuración" y confirma esas opciones, se borrarán todos los ajustes guardados. D-Link NetDefend Firewall 27 - D-Link DFL-2560G | Hardware Installation Guide - Page 28
instalar un dispositivo DFL-2560/ DFL-2560G en un armario bastidor: 1. Acople los soportes de montaje a cada lado del chasis, como se muestra en la figura 6 y fíjelos con los tornillos suministrados. Tabla 4. Estado del dispositivo mostrado en el panel LCD 28 D-Link NetDefend Firewall Figura - D-Link DFL-2560G | Hardware Installation Guide - Page 29
. Enchufe el otro extremo en una toma de alimentación CA. Nota: D-Link recomienda el uso de un protector de sobretensión en la conexión de alimentación utilizada. Para encender o apagar el dispositivo DFL-2560/DFL-2560G, pulse el interruptor de alimentación CA situado en el panel posterior del - D-Link DFL-2560G | Hardware Installation Guide - Page 30
Explorador Microsoft Internet Explorer Versión 6.0 o superior Nota: DFL-2560/2560G permite conexiones HTTP o HTTPS seguras desde cualquier host de equipo siguiente: Figura 9. Dirección del explorador 30 D-Link NetDefend Firewall 1. Un terminal o un ordenador con un puerto serie y capacidad - D-Link DFL-2560G | Hardware Installation Guide - Page 31
ón inicial, consulte la documentación adjunta en formato PDF que encontrará en el CD de referencia incluido, para obtener instrucciones detalladas sobre la configuración del DFL-2560/2560G. Manual del usuario del cortafuegos D-Link NetDefend Este documento describe el funcionamiento y control - D-Link DFL-2560G | Hardware Installation Guide - Page 32
- D-Link DFL-2560G | Hardware Installation Guide - Page 33
Building Networks for People Guida di installazione Firewall In questo documento è descritta la procedura veloce per l'installazione del Firewall D-Link. DFL-2560 / DFL-2560G Documentazione disponibile anche su CD e tramite il sito Web D-Link - D-Link DFL-2560G | Hardware Installation Guide - Page 34
al sevizio antivirus della durata di 12 mesi Panoramica sul prodotto Pannello frontale - DFL-2560 e DFL-2560G CA G F ED B Figura 1. Pannello frontale di DFL-2560/ 2560G 34 D-Link NetDefend Firewall Elemento Funzione A Pannello LCD B Tastierino C LED Descrizione Utilizzato per - D-Link DFL-2560G | Hardware Installation Guide - Page 35
stato del dispositivo Comandi del tastierino LCD durante l'avvio All'accensione di DFL-2560/2560G, il pannello LCD visualizzerà il seguente messaggio: "Premere il tastierino per configurazione", tutte le impostazioni salvate saranno cancellate in modo permanente. D-Link NetDefend Firewall 35 - D-Link DFL-2560G | Hardware Installation Guide - Page 36
installare un dispositivo DFL-2560/DFL-2560G in un rack: 1. Collegare le staffe di montaggio su ciascun lato del telaio, come illustrato nella figura 6 e fissarle utilizzando le viti in dotazione. Tabella 4. Stato del dispositivo visualizzato sul pannello LCD 36 D-Link NetDefend Firewall Figura - D-Link DFL-2560G | Hardware Installation Guide - Page 37
. Collegare l'altra estremità alla sorgente di alimentazione . Nota: D-Link consiglia l'uso di un dispositivo di protezione da sovratensioni sul collegamento all'alimentazione. Per accendere il dispositivo DFL-2560/ DFL-2560G, portare l'interruttore di alimentazione posto sul pannello posteriore in - D-Link DFL-2560G | Hardware Installation Guide - Page 38
successiva Netscape Navigator 8.0 o successiva Nota: il dispositivo DFL-2560/2560G consente di stabilire connessioni HTTP o HTTPS protette da è https://192.168.10.1) Figura 9. Indirizzo del browser 38 D-Link NetDefend Firewall Figura 10. Messaggio di autenticazione Nota: il menu a tendidna - D-Link DFL-2560G | Hardware Installation Guide - Page 39
http://support.dlink.com.tw, da cui è possibile accedere al sito Web D-Link per il proprio paese. Supporto Tecnico http://www.dlink.it/support Supporto PDF disponibili nel CD di riferimento per istruzioni dettagliate sulla configurazione del dispositivo DFL-2560/2560G. Manuale dell'utente di D-Link - D-Link DFL-2560G | Hardware Installation Guide - Page 40
radiate radio frequency energy and, if not installed and used in accordance with the instruction manual, may cause harmful interface to radio communication. Operation of this equipment in a residential may be required to take adequate measures. VCCI WARNING Statement 40 D-Link NetDefend Firewall - D-Link DFL-2560G | Hardware Installation Guide - Page 41
NOTES D-Link NetDefend Firewall 41 - D-Link DFL-2560G | Hardware Installation Guide - Page 42
NOTES 42 D-Link NetDefend Firewall - D-Link DFL-2560G | Hardware Installation Guide - Page 43
NOTES D-Link NetDefend Firewall 43 - D-Link DFL-2560G | Hardware Installation Guide - Page 44
Ver. 1.00(E) 2009/10/07 086W020000067
-
 1
1 -
 2
2 -
 3
3 -
 4
4 -
 5
5 -
 6
6 -
 7
7 -
8
-
9
-
10
-
11
-
12
-
13
-
14
-
15
-
16
-
17
-
18
-
19
-
20
-
21
-
22
-
23
-
24
-
25
-
26
-
27
-
28
-
29
-
30
-
31
-
32
-
33
-
34
-
35
-
36
-
37
-
38
-
39
-
40
-
41
-
42
-
43
-
44
 |
 |

This document will guide you through the basic installation
process for your new D-Link security device.
Building Networks for People
DFL-2560 / DFL-2560G
Documentation also available on
CD and via the D-Link Website
Hardware Installation Guide
Firewall
Quick Installation Guide
Installations-Anleitung
Guide d’installation
Guía de instalación
Guida di Installazione