D-Link DHA-390 Quick Installation Guide
D-Link DHA-390 - Internet Surveillance Camera Starter Manual
 |
UPC - 790069307072
View all D-Link DHA-390 manuals
Add to My Manuals
Save this manual to your list of manuals |
D-Link DHA-390 manual content summary:
- D-Link DHA-390 | Quick Installation Guide - Page 1
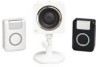
Package Contents DHA-390 Internet Surveillance Camera Starter Kit Quick Install Guide Camera Camera Base Mounting Kit Router Powerline Adapter Camera Powerline Adapter Black Ethernet Cable White Camera Cable Camera Connection Adapter Warranty Card Registration Card (attached to this guide - D-Link DHA-390 | Quick Installation Guide - Page 2
to any place in your house by simply plugging the Camera Powerline Adapter (white) into any power outlet. For more information about the different features of your new product, go to www.d-life.com/download/ to download the User Manual. • On the My Devices screen, click Add Device + 1 Add your
-
 1
1 -
 2
2
 |
 |

2
Assemble the camera base
(A)
Tighten the wheel on the bracket
(B)
Screw the bracket into the base
(C)
Screw the collar onto the base
(D)
Screw the camera onto the base
A
B
C
D
Before you install, please make sure...
... you have a broadband connection, such as ADSL or cable modem service
... you have a router with an available Ethernet port connected to your broadband modem
*1
... you have a PC running Windows
®
2000/XP/Vista
™
32-bit with Internet access and Internet Explorer
®
6.0 or higher with ActiveX
®
support
Package Contents
Mounting Kit
Black Ethernet Cable
Camera Powerline
Adapter
Router Powerline
Adapter
White Camera Cable
DHA-390 Internet Surveillance Camera Starter Kit
Quick Install Guide
Camera
Camera Base
Camera Connection
Adapter
Step 1: Install Camera
3
Connect your camera to the network
(A) Connect the white cable to your camera
(B) Connect the other end of the white cable to the Camera
Powerline Adapter (white)
(C) Plug the Camera Powerline Adapter (white) into a power outlet
Note:
It is recommended that you plug the adapter directly into a wall power
outlet, and not into a power strip.
(D) Check to make sure that both the Network LED and Powerline
LED are lit solid blue.
*3 *4
Troubleshooting
*1 If you do not have a router, you may need to connect using PPPoE or Static IP. Please refer to the
User Manual, which you can download from www.d-life.com/download/
*2 If the Network LED on the Router Powerline Adapter (black) is not lit or flashing, check your
connection between the router and the adapter.
*3 If the Network LED on the Camera Powerline Adapter (white) is off and flickering on occasionally,
check to make sure the white cable is connected securely to both the camera and the Camera
Powerline Adapter (white).
*4 The Powerline adapters use your home’s electrical wiring to network your camera to your router. If
the Powerline LEDs do not light up solid blue, the distance between your power outlets might be too
long or the power outlets may be on different circuits; try plugging the Camera Powerline Adapter
(white) into a power outlet closer to the Router Powerline Adapter (black). If this does not help, you
may need to use the Ethernet Cable Connection Method pictured to the right.
Ethernet Cable Connection Method
1
Connect the black adapter to the network
(A) Connect the black cable to your router
(B) Connect the other end of the black cable to the Router Powerline
Adapter (black)
(C) Plug the Router Powerline Adapter (black) into a power outlet
Note:
It is recommended that you plug the adapter directly into a wall power
outlet, and not into a power strip.
(D) Check to make sure the Network LED is lit solid blue
*2
Warranty Card
Registration Card
(attached to this guide)
Camera installation complete!
Continue to Step 2 on the other side
2
3
1
Your home’s electrical wiring
A
B
Powerline
LED
Network
LED
D
C
If the included black Ethernet cable is not long enough,
any Ethernet cable up to 100m may be used.
A
Network LED
D
B
C
To broadband modem
To PC
For more troubleshooting, visit us on the web at
www.d-life.com/faq/
Example setup: