D-Link DIR-505 Manual
D-Link DIR-505 Manual
 |
View all D-Link DIR-505 manuals
Add to My Manuals
Save this manual to your list of manuals |
D-Link DIR-505 manual content summary:
- D-Link DIR-505 | Manual - Page 1
- D-Link DIR-505 | Manual - Page 2
herein are trademarks or registered trademarks of their respective companies. Copyright © 2012 by D-Link Systems, Inc. All rights reserved. This publication may not be reproduced, in whole or in part, without prior expressed written permission from D-Link Systems, Inc. D-Link DIR-505 User Manual i - D-Link DIR-505 | Manual - Page 3
12 Manual Setup 13 Router/Access Point Mode 13 Repeater Mode 15 Wi-Fi Hot Spot Mode 17 Quick Router Setup for Mobile Device 19 SharePort Mobile App 22 Settings 23 Router Mode 27 Quick Setup Wizard 27 Web-based Configuration Utility 30 Internet Connection Setup 31 Manual Internet Setup - D-Link DIR-505 | Manual - Page 4
91 Firmware 92 Time 93 System Check 94 Schedules 95 Status 96 Device Info 96 Logs 97 Statistics 98 Wireless 99 Help 100 Repeater Mode 101 Quick Setup Wizard 101 Quick Setup Wizard 103 Manual Configuration 105 Wireless Settings 105 Repeater Mode 106 LAN Setup 107 D-Link DIR-505 User - D-Link DIR-505 | Manual - Page 5
Firmware 139 Time 140 Status 141 Device Info 141 Logs 142 Statistics 143 Help 144 Connect a Wireless Client to your Router 145 WPS Button 145 Windows® 7 146 WPA/WPA2 146 WPS 149 Windows Vista 153 WPA/WPA2 154 WPS/WCN 2.0 156 Windows® XP 157 WPA/WPA2 158 D-Link DIR-505 User Manual - D-Link DIR-505 | Manual - Page 6
of Contents Troubleshooting 160 Wireless Basics 164 What is Wireless 165 Tips 167 Networking Basics 168 Statically Assign an IP address 169 Technical Specifications 170 Contacting Technical Support 171 GPL Code Statement 172 Warranty 187 Registration 194 D-Link DIR-505 User Manual v - D-Link DIR-505 | Manual - Page 7
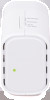
Section 1 - Product Overview PProacdkuacgteOCvoentrevnietsw DIR-505 All-in-One Mobile Companion Ethernet Cable Quick Install Guide If any of the above items are missing, please contact your reseller. D-Link DIR-505 User Manual 1 - D-Link DIR-505 | Manual - Page 8
Browser Requirements: • Internet Explorer 8 or higher • Firefox 8.0 or higher • Safari 4.0 or higher • Google Chrome (16.0.9.12.75) Windows® Users: Make sure you have the latest version of Java installed. Visit www.java.com to download the latest version. D-Link DIR-505 User Manual 2 - D-Link DIR-505 | Manual - Page 9
intruders. TOTAL COVERAGE The DIR-505 delivers powerful 802.11n performance and increases the range of your wireless network by extending the range of your wireless coverage of another AP or wireless router. ULTIMATE PERFORMANCE The D-Link All-in-One Mobile Companion (DIR-505) is a 802.11n compliant - D-Link DIR-505 | Manual - Page 10
access corporate networks. • User-friendly Setup Wizard - Through its easy-to-use Web-based user interface, the DIR-505 lets you control what information is accessible to those on the wireless network, whether from the Internet or from your company's server. Configure your router to your specific - D-Link DIR-505 | Manual - Page 11
a USB or a storage device with your local network. 2 Reset Button Pressing the Reset button restores the router to its original factory default settings. 3 Ethernet Port The auto MDI/MDIX Internet port is the connection for the Ethernet cable to the cable or DSL modem. D-Link DIR-505 User Manual - D-Link DIR-505 | Manual - Page 12
ON and operating properly The device is processing WPS The device is off During Power ON or system is defective The device is powered off D-Link DIR-505 User Manual 6 - D-Link DIR-505 | Manual - Page 13
operational modes you can use. Operation Modes Depending on how you want to use your DIR-505 will determine which mode you use. This section will help you figure out which setting works with your setup. • Router/Access Point mode • Repeater Mode • Wi-Fi Hot Spot mode D-Link DIR-505 User Manual 7 - D-Link DIR-505 | Manual - Page 14
) and channel as the AP in order to connect. If wireless security is enabled on the AP, the client will need to enter a password to connect to the AP. In Router mode, multiple clients can connect to the AP at the same time. Router Repeate DIR-505 DIR USB Flash Drive D-Link DIR-505 User Manual 8 - D-Link DIR-505 | Manual - Page 15
name) and channel as the AP in order to connect. If wireless security is enabled on the AP, the client will need to enter a password to connect to the AP. In Access Point mode, multiple clients can connect to the AP at the same time. Access Point Mode Router DIR-505 D-Link DIR-505 User Manual 9 - D-Link DIR-505 | Manual - Page 16
router (if used) must be within range of each other. Make sure that all clients, APs, and the wireless router all use the same SSID (wireless network name), channel, and security settings. Router Repeater Mode Wi-Fi Hotspo -505 DIR-505 USB Flash Drive US D D-Link DIR-505 User Manual - D-Link DIR-505 | Manual - Page 17
to maintain a public IP address separately from your private IP address. Additionally, it enhances private network security by limiting the access of external computers in the private IP network space. Repeater Mode Wi-Fi Hotspot Mode DIR-505 USB Flash Drive D-Link DIR-505 User Manual 11 - D-Link DIR-505 | Manual - Page 18
on range. Try to position access points, wireless routers, wireless connection may degrade dramatically or drop completely. Make sure your 2.4GHz phone base is as far away from your wireless devices as possible. The base transmits a signal even if the phone in not in use. D-Link DIR-505 User Manual - D-Link DIR-505 | Manual - Page 19
). D-Link DIR-505 User Manual 54mm 90mm D-Link DIR-505 Mobile Companion Wi-Fi Configuration Note Web browser link: Web browser link: http://dlinkrouter or http:// 192.168.0.1 http://dlinkrouter or http:// 192.168.0.1 Default configuration Your configuration Username: "Admin" Password - D-Link DIR-505 | Manual - Page 20
http://dlinkrouter in the address bar. Once the setup is complete then proceed to the next step. 5. From your laptop or mobile device go to your wireless utility to display the available wireless networks and select the network that you created for internet access. D-Link DIR-505 User Manual 14 - D-Link DIR-505 | Manual - Page 21
the on-screen instructions to complete the setup. If this is your second time type http://dlinkrouter in the address bar. Click Launch Wireless Setup Wizard to continue. D-Link DIR-505 User Manual 54mm 90mm D-Link DIR-505 Mobile Companion Wi-Fi Configuration Note Web browser link: Web browser - D-Link DIR-505 | Manual - Page 22
Manual configuration, select the Wi-Fi network you would like the DIR-505 to connect to wirelessly. 5. Enter the Wi-Fi Password and click Next. Once the second screen appears, you have successfully completed the setup. Please click Save and write down the SSID and Password on your companion card - D-Link DIR-505 | Manual - Page 23
the on-screen instructions to complete the setup. If this is your second time type http://dlinkrouter in the address bar. Click Launch Wireless Setup Wizard to continue. D-Link DIR-505 User Manual 54mm 90mm D-Link DIR-505 Mobile Companion Wi-Fi Configuration Note Web browser link: Web browser - D-Link DIR-505 | Manual - Page 24
the setup. Click Save and write down the SSID & password in your companion card for future reference. 6. From your laptop or mobile device go to your wireless utility to display the available wireless networks and select the network that you created in step 5. D-Link DIR-505 User Manual 18 - D-Link DIR-505 | Manual - Page 25
" APP from the app store to your iPhone or iPad. 2. From your mobile device, click Settings. Then, click Wi-Fi. Settings 3. Select the network that is displayed on your companion card (ex: dlinka8f). Then, enter the Wi-Fi password included in your card (ex:akbdj1936). D-Link DIR-505 User Manual - D-Link DIR-505 | Manual - Page 26
Section 2 - Installation 4. Once it connected, click on the QRS Mobile icon. 5. Click Start to continue. 6. Follow the instruction and click Next to continue. D-Link DIR-505 User Manual 20 - D-Link DIR-505 | Manual - Page 27
Section 2 - Installation 7. Once the Setup is complete, the following screen will show up. Then, select your new Wi-FI Name and enter the password you just setup from your laptop or mobile device. D-Link DIR-505 User Manual 21 - D-Link DIR-505 | Manual - Page 28
Router/AP Mode Router/AP Repeater Wi-Fi Hot Spot 2. Insert your USB flash drive to DIR-505 first and then Plug DIR-505 into wall outlet. Note: Please refer to page 56 for Storage setup information before you proceed to the next step below. 3. Scan the bar code to download the SharePort Mobile APP - D-Link DIR-505 | Manual - Page 29
initial setup. Then, enter your Wi-Fi password. 6. Once connected click on the SharePort Mobile icon. 7. Then, the following screen will pop up. D-Link DIR-505 User Manual Settings 54mm 90mm D-Link DIR-505 Mobile Companion Wi-Fi Configuration Note Web browser link: Web browser link: http - D-Link DIR-505 | Manual - Page 30
corner of the screen Then, click Edit to enter your User Name and Password. Once you finish, click Done to continue. By default, user Name is "admin" and password is blank. 9. For the Movie section, click the movie icon to play your movie from your USB flash drive. D-Link DIR-505 User Manual 24 - D-Link DIR-505 | Manual - Page 31
section, click the music icon to play your music from your USB flash drive. 11. For the Photo section, click the Photo icon to open your photo from your USB flash drive. 12. For the Files section, click on the Files icon to open your file from your USB flash drive. D-Link DIR-505 User Manual 25 - D-Link DIR-505 | Manual - Page 32
Section 2 - Installation 14. For the Folder section, click on the folder icon to open a file from your USB flash drive. D-Link DIR-505 User Manual 26 - D-Link DIR-505 | Manual - Page 33
already configured your settings and you would like to access the configuration utility, please refer to page 30. This wizard is designed to guide you through a step-by-step process to configure your new D-Link router and connect to the Internet. Click Next to continue. D-Link DIR-505 User Manual - D-Link DIR-505 | Manual - Page 34
continue. In order to secure your router, please enter a new password. Check the Enable Graphical Authentication box to enable CAPTCHA authentication for added security. Click Next to continue. Select your time zone from the drop-down menu and click Next to continue. D-Link DIR-505 User Manual 28 - D-Link DIR-505 | Manual - Page 35
3 - Configuration The Setup Complete window will display your wireless settings. Click Save to continue. If you want to create a bookmark to the router, click . The router will now reboot. Please allow a minute or two. Click the Continue button once it is active. D-Link DIR-505 User Manual 29 - D-Link DIR-505 | Manual - Page 36
the IP address of the router (http://192.168.0.1). Windows and Mac users may also connect by typing http://dlinkrouter or http://dlinkrouter.local in the address bar. Select Admin from the drop-down menu and then enter your password. Leave the password blank by default. D-Link DIR-505 User Manual - D-Link DIR-505 | Manual - Page 37
Connection Setup to configure your connection manually and continue to the next page. If you want to configure your router to connect to the Internet using the wizard, click Internet Connection Setup Wizard. You will be directed to the Quick Setup Wizard. Please skip to page 23. D-Link DIR-505 User - D-Link DIR-505 | Manual - Page 38
-by-step process to configure your new D-Link router and connect to the Internet. Click Next to continue. In order to secure your router, please enter a new password. Click Next to continue. Select your time zone from the drop-down menu and click Next to continue. D-Link DIR-505 User Manual 32 - D-Link DIR-505 | Manual - Page 39
Router with the PC that was originally connected to your broadband connection, and if you are, then click the Clone MAC button to copy your computer's MAC Address. Click Next to continue. Your setup is complete. Click Connect to save your settings and reboot your router. D-Link DIR-505 User Manual - D-Link DIR-505 | Manual - Page 40
to remove your PPPoE software from your computer. The software is no longer needed and will not work through a router. If the router detected or you selected PPTP, enter your PPTP username, password, and other information supplied by your ISP. Click Next to continue. D-Link DIR-505 User Manual 34 - D-Link DIR-505 | Manual - Page 41
router detected or you selected L2TP, enter your L2TP username, password, and other information supplied by your ISP. Click Next to continue. If the router detected or you selected Static, enter the IP and DNS settings supplied by your ISP. Click Next to continue. D-Link DIR-505 User Manual 35 - D-Link DIR-505 | Manual - Page 42
Configuration Manual Internet Setup Dynamic (Cable) Operation Mode: Select Router or Access point from the drop-down menu. My Internet Select Dynamic IP (DHCP) to obtain IP Address information Connection: automatically from your ISP. Select this option if your ISP does not give you any IP numbers - D-Link DIR-505 | Manual - Page 43
for DSL services. Make sure to remove your PPPoE software from your computer. The software is no longer needed and will not work through a router. My Internet Select PPPoE (Username/Password) from the drop-down menu. Connection: Address Mode: Select Static IP if your ISP assigned you the IP address - D-Link DIR-505 | Manual - Page 44
of the Advanced DNS service or its features. Enable True Check to enable true Gigabit routing. This will increase the Gigabit Routing through-put of the WAN-LAN connectivity of the router. Connectivity: Address Mode: Select Static if your ISP assigned you the IP address, subnet mask, gateway, and - D-Link DIR-505 | Manual - Page 45
MAC address on the Broadband Router. It is not recommended that you change the default MAC address unless required by your ISP. You can use the Clone Your PC's MAC Address button to replace the Internet port's MAC address with the MAC address of your Ethernet card. D-Link DIR-505 User Manual 39 - D-Link DIR-505 | Manual - Page 46
then retype the password in the next box. Reconnect Select either Always-on, On-Demand, or Manual. Mode: Maximum Idle Enter a maximum idle time during which the Internet connection Time: is maintained during inactivity. To disable this feature, enable Auto-reconnect. D-Link DIR-505 User Manual 40 - D-Link DIR-505 | Manual - Page 47
address on the Broadband Router. It is not recommended Address: that you change the default MAC address unless required by your ISP. You can use the Clone Your PC's MAC Address button to replace the Internet port's MAC address with the MAC address of your Ethernet card. D-Link DIR-505 User Manual - D-Link DIR-505 | Manual - Page 48
want to configure the wireless settings on your router using the wizard, click Wireless Security Setup Wizard and refer to the next page. If you want to manually configure the wireless settings on your router click Manual Wireless Network Setup and refer to page 45. D-Link DIR-505 User Manual 42 - D-Link DIR-505 | Manual - Page 49
Next. Manually: Select this option to manually enter your network key and click Next. If you selected Automatically, the summary window will display your settings. Write down the security key and enter this on your wireless clients. Click Save to save your settings. D-Link DIR-505 User Manual 43 - D-Link DIR-505 | Manual - Page 50
Section 4 - Security Select Manually to manually enter your network key and click Next. Enter your Wireless Security Password and click Next to continue. If you selected Manually, the following screen will appear once the setup is complete. D-Link DIR-505 User Manual 44 - D-Link DIR-505 | Manual - Page 51
Section 4 - Security Manual Configuration Wireless Settings Router Mode Enable Wireless: Check the box to enable the wireless function. If you do not want to use wireless, uncheck the box to disable all the wireless functions. You may also set up a specific time range (schedule). Select a schedule - D-Link DIR-505 | Manual - Page 52
the DIR-505. If checked, the SSID of the DIR-505 will not be seen by Site Survey utilities so your wireless clients will have to know the SSID of your DIR-505 in order to connect to it. Security Mode: Refer to page 49 for more information regarding the wireless security. D-Link DIR-505 User Manual - D-Link DIR-505 | Manual - Page 53
: network or to customize the wireless network. If you enable Auto Channel Scan, this option will be grayed out. Enable Auto The Auto Channel Scan setting can be selected to allow the DIR-505 to choose the channel with the least amount of Channel Scan: interference. D-Link DIR-505 User Manual 47 - D-Link DIR-505 | Manual - Page 54
the DIR-505. If checked, the SSID of the DIR-505 will not be seen by Site Survey utilities so your wireless clients will have to know the SSID of your DIR-505 in order to connect to it. Security Mode: Refer to page 49 for more information regarding the wireless security. D-Link DIR-505 User Manual - D-Link DIR-505 | Manual - Page 55
the RC4 encryption algorithm. WEP provides security by encrypting data over your wireless network so that it is protected as it is transmitted from one wireless device to another. To gain access to a WEP network, you must be defined so that you can change keys easily. D-Link DIR-505 User Manual 49 - D-Link DIR-505 | Manual - Page 56
). In ASCII all numbers and letters are valid. 6. Click Save Settings to save your settings. If you are configuring the router with a wireless adapter, you will lose connectivity until you enable WEP on your adapter and enter the same WEP key as you did on the router. D-Link DIR-505 User Manual 50 - D-Link DIR-505 | Manual - Page 57
. 6. Click Save Settings at the top of the window to save your settings. If you are configuring the access point with a wireless adapter, you will lose connectivity until you enable WPA-PSK on your adapter and enter the same passphrase as you did on the access point. D-Link DIR-505 User Manual 51 - D-Link DIR-505 | Manual - Page 58
to RADIUS Server, enter the IP Address of your RADIUS server. 6. Next to RADIUS Server Port, enter the port you are using with your RADIUS server. 1812 is the default port. 7. Next to Shared Secret, enter the security key. 8. Click Save Settings to save your settings. D-Link DIR-505 User Manual 52 - D-Link DIR-505 | Manual - Page 59
of the router and to configure the DHCP settings. Router Settings Router IP Enter the IP address of the router. The default IP address is Address: 192.168.0.1. If you change the IP address, once you click Save Settings, you will need to enter the new IP address in your browser to get back into - D-Link DIR-505 | Manual - Page 60
the host name Reservations List: (name of your computer or device), MAC Address, and IP address. Enable: Check to enable the reservation. Edit: Click the edit icon to make changes to the reservation entry. Delete: Click to remove the reservation from the list. D-Link DIR-505 User Manual 54 - D-Link DIR-505 | Manual - Page 61
Section 3 - Configuration Media Server This feature allows you to share music, pictures and videos with any devices connected to your network. Enable Media Check this box to enable the media server feature. Server: Computer Enter the media server's name. Name: D-Link DIR-505 User Manual 55 - D-Link DIR-505 | Manual - Page 62
Enter a password for this account. Verify Password: Re-enter the password. Click Add/Edit to create the user. User List: Displays the accounts. The Admin and Guest accounts are built-in to the router. Number of Displays the USB device plugged into the router. Devices: D-Link DIR-505 User Manual 56 - D-Link DIR-505 | Manual - Page 63
and public ports are usually the same. The public port is the port seen from the Internet side, and the private port is the port being used by the application on the computer within your local network. Protocol Type: Select TCP, UDP, or Both from the drop-down menu. D-Link DIR-505 User Manual 57 - D-Link DIR-505 | Manual - Page 64
is the port number on the Internet side that will be used to access the application. You may define a single port or a range of ports. You can use a comma to add multiple ports or port ranges. Traffic Type: Select the protocol of the firewall port (TCP, UDP, or Both). D-Link DIR-505 User Manual 58 - D-Link DIR-505 | Manual - Page 65
parameter allows you to manually add a MAC filtering Filtering rule. Click the SAVE button to add the new MAC filtering Rule: rule to the MAC Filtering Rules list at the bottom of this screen. You may select a client MAC address from the dropdown menu and click - D-Link DIR-505 | Manual - Page 66
Section 3 - Configuration Website Filters Website Filters are used to allow you to set up a list of Web sites that can be viewed by multiple users through the network. To use this feature select to Allow or that you want to allow Domain: or block. Click Save Settings. D-Link DIR-505 User Manual 60 - D-Link DIR-505 | Manual - Page 67
Section 3 - Configuration Firewall Settings A firewall protects your network from the outside world. The DIR-505 offers a firewall type functionality. The SPI feature helps prevent cyber attacks. to protect your network from certain Check: kinds of "spoofing" attacks. D-Link DIR-505 User Manual 61 - D-Link DIR-505 | Manual - Page 68
Configuration Advanced Wireless Transmit Set the transmit power of the antennas. Power: WMM Enable: WMM is QoS for your wireless network. This will improve the quality of video and voice applications for your wireless to increase performance in some environments. D-Link DIR-505 User Manual 62 - D-Link DIR-505 | Manual - Page 69
. Current PIN: Shows the current PIN. Reset PIN to Restore the default PIN of the router. Default: Generate New Create a random number that is a valid PIN. This becomes PIN: the router's PIN. You can then copy this PIN to the user interface of the wireless client. D-Link DIR-505 User Manual 63 - D-Link DIR-505 | Manual - Page 70
to start the wizard. Device Wizard: WPS Button You can also simply press the WPS button on the side of the router, and then press the WPS button on your wireless client to automatically connect without logging into the router. Refer to page 106 for more information. D-Link DIR-505 User Manual 64 - D-Link DIR-505 | Manual - Page 71
Section 3 - Configuration UPnP Settings Enable UPnP: To use the Universal Plug and Play (UPnP™) feature click on Enabled. UPnP provides compatibility with networking equipment, software and peripherals. D-Link DIR-505 User Manual 65 - D-Link DIR-505 | Manual - Page 72
is different Network Name: from your main wireless network. Enable Routing Check to allow network connectivity between the Between Zones: different zones created. Security Mode: Select the type of security or encryption you would like to enable for the guest zone. D-Link DIR-505 User Manual 66 - D-Link DIR-505 | Manual - Page 73
Internet access. If you choose to expose a computer, you can enable DMZ. DMZ is short for Demilitarized Zone. This option will expose the chosen computer completely to the outside world. Enable DMZ: Check the box to enable DMZ. DMZ IP Address: Enter the DMZ IP Address. D-Link DIR-505 User Manual - D-Link DIR-505 | Manual - Page 74
DIR-505 to be configured from the Internet by a web browser. A username/password is still required to Management: access the Web Management interface. Remote Admin The port number used to access the DIR-505 is used in the URL. Example: http://x.x.x.x:8080 whereas x.x.x.x is the Internet IP address - D-Link DIR-505 | Manual - Page 75
the time and date with your router. This will only connect to a server on the Internet, not a local server. Check the box to enable this feature. NTP Server Used: Enter the IP address of a NTP server or select one from the drop-down menu. Set the Date and To manually input the time, enter the values - D-Link DIR-505 | Manual - Page 76
configuration settings, use the Save button above. Reboot Device: Click to reboot the router. Clear Language If you previously installed a language pack and want to Pack: revert all the menus on the Router interface back to the default language settings, click the Clear button. D-Link DIR-505 User - D-Link DIR-505 | Manual - Page 77
. Please check the D-Link support site for firmware updates at http://support.dlink.com. You can download firmware upgrades to your hard drive from the D-Link support site. Firmware This section displays information about the firmware Information: that is loaded on the Router. Click the Check Now - D-Link DIR-505 | Manual - Page 78
registered with your DDNS service provider. Username or Enter the Username or key for your DDNS account. Key: Password or Enter the Password or key for your DDNS account. Key: Timeout: Enter a timeout time (in hours). Status: Displays the current connection status. D-Link DIR-505 User Manual 72 - D-Link DIR-505 | Manual - Page 79
Section 3 - Configuration System Check Ping Test: The Ping Test is used to send Ping packets to test if a computer is on the Internet. Enter the IP address that you wish to Ping and click Ping. Ping Results: The results of your ping attempts will be displayed here. D-Link DIR-505 User Manual 73 - D-Link DIR-505 | Manual - Page 80
Section 3 - Configuration Schedules Schedules can be created and End Time of 8pm. Name: Enter a name for your new schedule. Days: Select a day, a range of days, or All Week to include every day. Time format: Check All Day - 24hrs or enter a icon to remove the schedule. D-Link DIR-505 User Manual 74 - D-Link DIR-505 | Manual - Page 81
the router. LAN: Displays the MAC address and the private (local) IP settings for the router. Wireless LAN: Displays the wireless MAC address and your wireless settings such as SSID and Channel. LAN Computer: Displays the LAN client info which connects to the router. D-Link DIR-505 User Manual 75 - D-Link DIR-505 | Manual - Page 82
the Router logs. Last Page: Click this button to view the last page of the Router logs. Previous: Click this button to view the previous page of the Router logs. Next: Click this button to view the next page of the Router logs. Clear: Clears all of the log contents. D-Link DIR-505 User Manual 76 - D-Link DIR-505 | Manual - Page 83
the 802.11n/g (2.4GHz) and 802.11n/a (5GHz) wireless bands. The traffic counter will reset if the device is rebooted. Refresh: Click the Refresh button to refresh the Router's traffic statistics. Reset: Click the Reset button to reset the Router's traffic statistics. D-Link DIR-505 User Manual 77 - D-Link DIR-505 | Manual - Page 84
- Configuration Internet Sessions The Internet Sessions page displays full details of active Internet sessions through your router. An Internet session is a conversation between a program or application on a LAN-side computer and a program or application on a WAN-side computer. D-Link DIR-505 User - D-Link DIR-505 | Manual - Page 85
Section 3 - Configuration Wireless The wireless client table displays a list of current connected wireless clients. This table also displays the connection time and MAC address of the connected wireless clients. D-Link DIR-505 User Manual 79 - D-Link DIR-505 | Manual - Page 86
Section 3 - Configuration Help D-Link DIR-505 User Manual 80 - D-Link DIR-505 | Manual - Page 87
Section 3 - Configuration Access Point Mode Quick Setup Wizard Click Next to begin the Quick Setup Wizard. Select Access Point from the drop-down menu and click Next to continue. D-Link DIR-505 User Manual 81 - D-Link DIR-505 | Manual - Page 88
a name in the box. You may use up to 32 characters. Then enter a Wi-Fi Password and click Next. When this screen appears, the setup is complete. Writ down your Wi-Fi Security Settings information for future reference. Click the Save button to save your settings. D-Link DIR-505 User Manual 82 - D-Link DIR-505 | Manual - Page 89
: Select Invisible if you do not want the SSID of your wireless network to be broadcasted by the DIR-657. If Invisible is selected, the SSID of the DIR-657 will not be seen by Site Survey utilities so your wireless clients will have to know the SSID of your DIR-657 D-Link DIR-505 User Manual 83 - D-Link DIR-505 | Manual - Page 90
3 - Configuration LAN Setup Device Name: Allows you to configure the device more easily when your network is using TCP/IP protocol. Enter a name for your device. My LAN Select from the drop-down menu the Operation Mode you would Connection: like to use. IP Address: Enter the IP address assigned - D-Link DIR-505 | Manual - Page 91
parameter allows you to manually add a MAC filtering Filtering rule. Click the SAVE button to add the new MAC filtering Rule: rule to the MAC Filtering Rules list at the bottom of this screen. You may select a client MAC address from the drop-down menu and click - D-Link DIR-505 | Manual - Page 92
Configuration Advanced Wireless Transmit Set the transmit power of the antennas. Power: WMM Enable: WMM is QoS for your wireless network. This will improve the quality of video and voice applications for your wireless to increase performance in some environments. D-Link DIR-505 User Manual 86 - D-Link DIR-505 | Manual - Page 93
. Current PIN: Shows the current PIN. Reset PIN to Restore the default PIN of the router. Default: Generate New Create a random number that is a valid PIN. This becomes PIN: the router's PIN. You can then copy this PIN to the user interface of the wireless client. D-Link DIR-505 User Manual 87 - D-Link DIR-505 | Manual - Page 94
the wireless network if you have entered the PIN, or pressed a special Wi-Fi Protected Setup button on the device. The router acts as a registrar for the network, although other devices may act as a registrar as well. Add Wireless Click to start the wizard. Device Wizard: D-Link DIR-505 User Manual - D-Link DIR-505 | Manual - Page 95
3 - Configuration User Limit This sections allows you to set a limit on the number of wireless clients to control wireless traffic. Enable User Check the box to enable user limit. Limit: User Limit: Enter a number to regulate the user limit and wireless traffic. D-Link DIR-505 User Manual 89 - D-Link DIR-505 | Manual - Page 96
them). Enable Graphical Enables a challenge-response test to require users to type Authentication: letters or numbers from a distorted image displayed on the screen to prevent online hackers and unauthorized users from gaining access to your router's network settings. D-Link DIR-505 User Manual 90 - D-Link DIR-505 | Manual - Page 97
configuration settings, use the Save button above. Reboot Device: Click to reboot the router. Clear Language If you previously installed a language pack and want to Pack: revert all the menus on the Router interface back to the default language settings, click the Clear button. D-Link DIR-505 User - D-Link DIR-505 | Manual - Page 98
. Please check the D-Link support site for firmware updates at http://support.dlink.com. You can download firmware upgrades to your hard drive from the D-Link support site. Firmware This section displays information about the firmware Information: that is loaded on the Router. Click the Check Now - D-Link DIR-505 | Manual - Page 99
the time and date with your router. This will only connect to a server on the Internet, not a local server. Check the box to enable this feature. NTP Server Enter the IP address of a NTP server or select one from Used: the drop-down menu. Set the Date and To manually input the time, enter the values - D-Link DIR-505 | Manual - Page 100
Section 3 - Configuration System Check Ping Test: The PingTest is used to send Ping packets to test if a computer is on the Internet. Enter the IP address that you wish to Ping and click Ping. Ping Results: The results of your ping attempts will be displayed here. D-Link DIR-505 User Manual 94 - D-Link DIR-505 | Manual - Page 101
Section 3 - Configuration Schedules Schedules can be created and End Time of 8pm. Name: Enter a name for your new schedule. Days: Select a day, a range of days, or All Week to include every day. Time format: Check All Day - 24hrs or enter a icon to remove the schedule. D-Link DIR-505 User Manual 95 - D-Link DIR-505 | Manual - Page 102
the router. LAN: Displays the MAC address and the private (local) IP settings for the router. Wireless LAN: Displays the wireless MAC address and your wireless settings such as SSID and Channel. LAN Computer: Displays the LAN client info which connects to the router. D-Link DIR-505 User Manual 96 - D-Link DIR-505 | Manual - Page 103
the Router logs. Last Page: Click this button to view the last page of the Router logs. Previous: Click this button to view the previous page of the Router logs. Next: Click this button to view the next page of the Router logs. Clear: Clears all of the log contents. D-Link DIR-505 User Manual 97 - D-Link DIR-505 | Manual - Page 104
the 802.11n/g (2.4GHz) and 802.11n/a (5GHz) wireless bands. The traffic counter will reset if the device is rebooted. Refresh: Click the Refresh button to refresh the Router's traffic statistics. Reset: Click the Reset button to reset the Router's traffic statistics. D-Link DIR-505 User Manual 98 - D-Link DIR-505 | Manual - Page 105
Section 3 - Configuration Wireless The wireless client table displays a list of current connected wireless clients. This table also displays the connection time and MAC address of the connected wireless clients. D-Link DIR-505 User Manual 99 - D-Link DIR-505 | Manual - Page 106
Section 3 - Configuration Help Click the desired hyperlink to get more information about how to use the Router. D-Link DIR-505 User Manual 100 - D-Link DIR-505 | Manual - Page 107
3 - Configuration Repeater Mode Quick Setup Wizard This Wizard is designed to assist you in configuring your DIR-505 as an repeater. To start the Setup Wizard click Next. Select WPS as the configuration method only if your wireless device supports Wi-Fi Protected Setup (WPS). For Manual setup, skip - D-Link DIR-505 | Manual - Page 108
- Configuration Select Manual as the configuration method to set up your network manually. Click Next to continue. Please wait while your device scans for available Wi-Fi networks. Select the network you would like your device to connect to and click Connect to continue. D-Link DIR-505 User Manual - D-Link DIR-505 | Manual - Page 109
. To start the Setup Wizard click Next. Select WPS as the configuration method only if your wireless device supports Wi-Fi Protected Setup (WPS). Click Next to continue. Press down the Push Button on the Wireless device you are adding to your wireless network. D-Link DIR-505 User Manual 103 - D-Link DIR-505 | Manual - Page 110
Section 3 - Configuration Select Manual as the configuration method to set up your network manually. Click Next to continue. Select the network you would like your device to connect to and click Connect to continue. D-Link DIR-505 User Manual 104 - D-Link DIR-505 | Manual - Page 111
Section 3 - Configuration Manual Configuration Wireless Settings Use this section to manually configure the wireless settings for your D-Link Repeater. D-Link DIR-505 User Manual 105 - D-Link DIR-505 | Manual - Page 112
the SSID. For security purposes, it is highly recommended to change from the default network name. Channel Width: Select the appropriate channel width between 20MHz or Auto 20/40MHz from the drop-down menu. Security Mode: Select WEP or WPA Personal. Refer to page 88. D-Link DIR-505 User Manual 106 - D-Link DIR-505 | Manual - Page 113
If you change the IP address, once you click Apply, you will need to enter the new IP address in your browser to get back into the configuration utility. Subnet Mask: Enter the Subnet Mask assigned by your ISP. Gateway Enter the Gateway assigned by your ISP. Address: D-Link DIR-505 User Manual 107 - D-Link DIR-505 | Manual - Page 114
Configuration Wireless Security This section will show you the different levels of security you can use to protect your data from intruders. The DIR-505 data over your wireless network so that it is protected as it is transmitted from one wireless device to another. Link DIR-505 User Manual 108 - D-Link DIR-505 | Manual - Page 115
In ASCII all numbers and letters are valid. 6. Click Save Settings to save your settings. If you are configuring the router with a wireless adapter, you will lose connectivity until you enable WEP on your adapter and enter the same WEP key as you did on the router. D-Link DIR-505 User Manual 109 - D-Link DIR-505 | Manual - Page 116
. 6. Click Save Settings at the top of the window to save your settings. If you are configuring the access point with a wireless adapter, you will lose connectivity until you enable WPA-PSK on your adapter and enter the same passphrase as you did on the access point. D-Link DIR-505 User Manual 110 - D-Link DIR-505 | Manual - Page 117
If you change the IP address, once you click Apply, you will need to enter the new IP address in your browser to get back into the configuration utility. Subnet Mask: Enter the Subnet Mask assigned by your ISP. Gateway Enter the Gateway assigned by your ISP. Address: D-Link DIR-505 User Manual 111 - D-Link DIR-505 | Manual - Page 118
If you change the IP address, once you click Apply, you will need to enter the new IP address in your browser to get back into the configuration utility. Subnet Mask: Enter the Subnet Mask assigned by your ISP. Default Gateway: Enter the Gateway assigned by your ISP. D-Link DIR-505 User Manual 112 - D-Link DIR-505 | Manual - Page 119
Section 3 - Configuration Advanced Advanced Wireless Transmit Power: Sets the transmit power of the antennas. HT 20/40 Check to enable or disable this feature. Coexistance: D-Link DIR-505 User Manual 113 - D-Link DIR-505 | Manual - Page 120
access point. Default: Generate New Create a random number that is a valid PIN. This becomes PIN: the router's PIN. You can then copy this PIN to the user interface of the registrar. Add Wireless Press the button to start with the wizard to setup the Station: WPS. D-Link DIR-505 User Manual 114 - D-Link DIR-505 | Manual - Page 121
for the Administrator Login Name. The administrator can make changes to the settings. Confirm Enter the same password that you entered in the Password: previous textbox in order to confirm its accuracy. Enable Check to enable this feature. Graphical Authentication: D-Link DIR-505 User Manual 115 - D-Link DIR-505 | Manual - Page 122
have created. If you want to save the current access point configuration settings, use the Save button above. Note: Restoring the factory default settings will not reset the Wi-Fi Protected Status to Not Configured. Reboot the Click to reboot the repeater. Device: D-Link DIR-505 User Manual 116 - D-Link DIR-505 | Manual - Page 123
the repeater here. Make sure the firmware you want to use is on the local hard drive of the computer. Click on Browse to locate the firmware file to be used for the update. Please check the D-Link support website for firmware updates at http://support.dlink.com. You can download firmware upgrades to - D-Link DIR-505 | Manual - Page 124
of computers. Check this box to use a NTP server. This will only connect to a server on the Internet, not a local server. NTP Server Enter the NTP server or select one from the drop-down Used: menu. Date and Time: To manually input the time, enter the values in these fields for the Year, Month - D-Link DIR-505 | Manual - Page 125
information. General: Displays the access point's time and firmware version. LAN: Displays the MAC address and the private (local) IP settings for the access point. Wireless LAN: Displays the wireless MAC address and your wireless settings such as SSID and Channel. D-Link DIR-505 User Manual 119 - D-Link DIR-505 | Manual - Page 126
Section 3 - Configuration Logs The DIR-505 keeps a running log of events and activities occurring on the Repeater. If the Repeater is rebooted, the logs are opens a new menu where you can configure the log settings. Refresh: This button refreshes the log. D-Link DIR-505 User Manual 120 - D-Link DIR-505 | Manual - Page 127
Section 3 - Configuration Statistics The DIR-505 keeps statistics of the traffic that passes through it. You can view the amount of packets that pass through the LAN and wireless portions of the network. The traffic counter will reset if the access point is rebooted. D-Link DIR-505 User Manual 121 - D-Link DIR-505 | Manual - Page 128
Pre-Setup Wizard. If you have already completed the Pre-Setup Wizard, please continue to page 106. Enter Admin in the User Name field. Leave the password blank by default. Click Next to continue. Please wait while your device scans for an available Wi-Fi Network. D-Link DIR-505 User Manual 122 - D-Link DIR-505 | Manual - Page 129
- Configuration Select the Network you would like your device to connect to and click Connect. Enter the Wi-Fi password and click Next to continue. Select Use the same Wi-Fi Network name for the extended Network and click Next. Your setup is now complete. Click Save to finish. D-Link DIR-505 User - D-Link DIR-505 | Manual - Page 130
Section 3 - Configuration To start the Wizard, click Next to continue. Please wait while your device scans for an available Wi-Fi Network. Select the Network you would like your device to connect to and click Connect. D-Link DIR-505 User Manual 124 - D-Link DIR-505 | Manual - Page 131
Section 3 - Configuration Enter the Wi-Fi password and click Next to continue. Select Use the same Wi-Fi Network name for the extended Network and click Next. Your setup is now complete. Click Save to finish. D-Link DIR-505 User Manual 125 - D-Link DIR-505 | Manual - Page 132
also referred to as the SSID. Channel Width: Select the appropriate channel width between 20MHz or Auto 20/40MHz from the drop-down menu. Security Mode: Select WEP or WPA Personal. D-Link DIR-505 User Manual 126 - D-Link DIR-505 | Manual - Page 133
Section 3 - Configuration Please Select the Wi-Fi Hotspot you would like to connect to with your device. D-Link DIR-505 User Manual 127 - D-Link DIR-505 | Manual - Page 134
. 7. Click Save Settings at the top of the window to save your settings. If you are configuring the access point with a wireless adapter, you will lose connectivity until you enable WPA-PSK on your adapter and enter the same passphrase as you did on the access point. D-Link DIR-505 User Manual 128 - D-Link DIR-505 | Manual - Page 135
that you change the default MAC address unless required by your ISP. You can use the Clone Your PC's MAC Address button to replace the Internet port's MAC address with the MAC address of your Ethernet card. Wi-Fi Protected Select to enable this feature. Setup: D-Link DIR-505 User Manual 129 - D-Link DIR-505 | Manual - Page 136
this section to configure the Wireless LAN settings for your D-Link Router. You can create a new Wi-Fi Network Name (SSID) for your local Wi-Fi Network (WLAN) or use the same Wi-Fi Network Names (SSID) as the joined Wi-Fi, HotSpot for your local Wi-Fi Network (WLAN). D-Link DIR-505 User Manual 130 - D-Link DIR-505 | Manual - Page 137
and AES, TKIP, or AES. Pre-Shared Key: Enter a key (passphrase).The key is entered as a passphrase in ASCII format at both ends of the wireless connection. The pass-phrase must be between 8-63 characters. Wi-Fi Protected Select to Enable this feature. Setup: D-Link DIR-505 User Manual 131 - D-Link DIR-505 | Manual - Page 138
to get back into the configuration utility. Subnet Mask: Enter the Subnet Mask assigned by your ISP. Local Domain Enter the local domain Name. Name: DHCP Server Configure the built-in DHCP server to assign IP addresses Settings: to the computer on your network. D-Link DIR-505 User Manual 132 - D-Link DIR-505 | Manual - Page 139
Section 3 - Configuration Media Server This feature allows you to share music, pictures and videos with any devices connected to your network. Enable Media Check this box to enable the media server feature. Server: Computer Enter the media server's name. Name: D-Link DIR-505 User Manual 133 - D-Link DIR-505 | Manual - Page 140
a password for this account. Verify Password: Re-enter the password. Click Add/Edit to create the user. User List: Displays the accounts. The Admin and Guest accounts are built-in to the router. Number of Displays the USB device plugged into the router. Devices: D-Link DIR-505 User Manual 134 - D-Link DIR-505 | Manual - Page 141
select a client currently connected to your access point from the Wireless Client List drop-down menu and then click - D-Link DIR-505 | Manual - Page 142
Section 3 - Configuration Advanced Wireless Transmit Power: Sets the transmit power of the antennas. HT 20/40 You may choose to Enable or Disable allows two "channels" or paths on which data can travel to be combined to increase performance in some environments. D-Link DIR-505 User Manual 136 - D-Link DIR-505 | Manual - Page 143
for the Administrator Login Name. The administrator can make changes to the settings. Confirm Enter the same password that you entered in the Password: previous textbox in order to confirm its accuracy. Enable Check to enable this feature. Graphical Authentication: D-Link DIR-505 User Manual 137 - D-Link DIR-505 | Manual - Page 144
created. If you want to save the current access point configuration settings, use the Save button above. Note: Restoring the factory default settings will not reset the Wi-Fi Protected Status to Not Configured. Reboot the Click to reboot the access point. Device: D-Link DIR-505 User Manual 138 - D-Link DIR-505 | Manual - Page 145
for the update. Please check the D-Link support website for firmware updates at http://support.dlink.com. You can download firmware upgrades to your hard drive from this site. Firmware Click on Check Now to find out if there is an updated Upgrade: firmware; if so, download the new firmware to your - D-Link DIR-505 | Manual - Page 146
of computers. Check this box to use a NTP server. This will only connect to a server on the Internet, not a local server. NTP Server Enter the NTP server or select one from the drop-down Used: menu. Date and Time: To manually input the time, enter the values in these fields for the Year, Month - D-Link DIR-505 | Manual - Page 147
Section 3 - Configuration Status Device Info This page displays the current information for the DIR-505. It will display the LAN, WAN (Internet), and Wireless information. If your Internet connection is set up for a Dynamic IP address then a Release button and a Renew button will be displayed. Use - D-Link DIR-505 | Manual - Page 148
the Router logs. Last Page: Click this button to view the last page of the Router logs. Previous: Click this button to view the previous page of the Router logs. Next: Click this button to view the next page of the Router logs. Clear: Clears all of the log contents. D-Link DIR-505 User Manual 142 - D-Link DIR-505 | Manual - Page 149
Section 3 - Configuration Statistics The DAP-505 keeps statistics of the traffic that passes through it. You can view the amount of packets that pass through the LAN and wireless portions of the network. D-Link DIR-505 User Manual 143 - D-Link DIR-505 | Manual - Page 150
Section 3 - Configuration Help Click the desired hyperlink to get more information about how to use the Router. D-Link DIR-505 User Manual 144 - D-Link DIR-505 | Manual - Page 151
Protected Setup). Most wireless devices such as wireless adapters, media players, Blu-ray DVD players, wireless printers and cameras will have a WPS button (or a software utility with WPS) that you can press to connect to the DIR-505 router. Please refer to your user manual for the wireless device - D-Link DIR-505 | Manual - Page 152
to enable wireless security (WPA/WPA2) on your wireless router or access point before configuring your wireless adapter. If wireless icon in your system tray (lower-right corner). 2. The utility will display any available wireless networks in your area. Wireless Icon D-Link DIR-505 User Manual - D-Link DIR-505 | Manual - Page 153
get a good signal but cannot access the Internet, check your TCP/IP settings for your wireless adapter. Refer to the Networking Basics section in this manual for more information. 4. The following window appears while your computer tries to connect to the router. D-Link DIR-505 User Manual 147 - D-Link DIR-505 | Manual - Page 154
connect by pushing the WPS button on the router. It may take 20-30 seconds to connect to the wireless network. If the connection fails, please verify that the security settings are correct. The key or passphrase must be exactly the same as on the wireless router. D-Link DIR-505 User Manual 148 - D-Link DIR-505 | Manual - Page 155
4 - Security WPS The WPS feature of the DIR-505 can be configured using Windows® 7. Carry out the following steps to use Windows® 7 to configure the WPS feature: 1. Click the Start button and select Computer from the Start menu. 2. Click Network on the left side. D-Link DIR-505 User Manual 149 - D-Link DIR-505 | Manual - Page 156
Section 4 - Security 3. Double-click the DIR-505. 4. Input the WPS PIN number (displayed in the WPS window on the Router's LCD screen or in the Setup > Wireless Setup menu in the Router's Web UI) and click Next. D-Link DIR-505 User Manual 150 - D-Link DIR-505 | Manual - Page 157
Section 4 - Security 5. Type a name to identify the network. 6. To configure advanced settings, click the icon. Click Next to continue. D-Link DIR-505 User Manual 151 - D-Link DIR-505 | Manual - Page 158
8. The following window informs you that WPS on the router has been setup successfully. Make a note of the security key as you may need to provide this security key if adding an older wireless device to the network in the future. 9. Click Close to complete WPS setup. D-Link DIR-505 User Manual 152 - D-Link DIR-505 | Manual - Page 159
. Click on a network (displayed using the SSID) and click the Connect button. If you get a good signal but cannot access the Internet, check you TCP/ IP settings for your wireless adapter. Refer to the Networking Basics section in this manual for more information. D-Link DIR-505 User Manual 153 - D-Link DIR-505 | Manual - Page 160
. 1. Open the Windows Vista® Wireless Utility by right-clicking on the wireless computer icon in your system tray (lower right corner of screen). Select Connect to a network. 2. Highlight the wireless network (SSID) you would like to connect to and click Connect. D-Link DIR-505 User Manual 154 - D-Link DIR-505 | Manual - Page 161
passphrase that is on your router and click Connect. It may take 20-30 seconds to connect to the wireless network. If the connection fails, please verify that the security settings are correct. The key or passphrase must be exactly the same as on the wireless router. D-Link DIR-505 User Manual 155 - D-Link DIR-505 | Manual - Page 162
or choose to click the Generate New PIN button or Reset PIN to Default button. If you are using third party software to set up Wi-Fi Protection, carefully follow the directions. When you are finished, proceed to the next section to set up the newly-configured router. D-Link DIR-505 User Manual 156 - D-Link DIR-505 | Manual - Page 163
. Click on a network (displayed using the SSID) and click the Connect button. If you get a good signal but cannot access the Internet, check you TCP/ IP settings for your wireless adapter. Refer to the Networking Basics section in this manual for more information. D-Link DIR-505 User Manual 157 - D-Link DIR-505 | Manual - Page 164
the Windows® XP Wireless Utility by right-clicking on the wireless computer icon in your system tray (lower-right corner of screen). Select View Available Wireless Networks. 2. Highlight the wireless network (SSID) you would like to connect to and click Connect. D-Link DIR-505 User Manual 158 - D-Link DIR-505 | Manual - Page 165
. Enter the WPA-PSK passphrase and click Connect. It may take 20-30 seconds to connect to the wireless network. If the connection fails, please verify that the WPA-PSK settings are correct. The WPA-PSK passphrase must be exactly the same as on the wireless router. D-Link DIR-505 User Manual 159 - D-Link DIR-505 | Manual - Page 166
to the following examples. 1. Why can't I access the web-based configuration utility? When entering the IP address of the D-Link router (192.168.0.1 for example), you are not connecting to a website nor do you have to be connected to the Internet. The device has the utility built-in to a ROM chip in - D-Link DIR-505 | Manual - Page 167
to hold the button down for 10 seconds. Release the button and the router will go through its reboot process. Wait about 30 seconds to access the router. The default IP address is 192.168.0.1. When logging in, the username is admin and leave the password box empty. D-Link DIR-505 User Manual 161 - D-Link DIR-505 | Manual - Page 168
Section 6 - Troubleshooting 3. Why can't I connect to certain sites or send and receive emails when connecting through my router? If you are having a problem sending or receiving email, or connecting to secure sites such as eBay, banking sites, and Hotmail, we suggest lowering the MTU in increments - D-Link DIR-505 | Manual - Page 169
below: • Open your browser, enter the IP address of your router (192.168.0.1) and click OK. • Enter your username (admin) and password (blank by default). Click OK to enter the web configuration page for the device. • Click on Setup and then click Manual Configure. • To change the MTU enter the - D-Link DIR-505 | Manual - Page 170
cards. Under many circumstances, it may be desirable for mobile network devices to link to a conventional Ethernet LAN in order to use servers, printers or an Internet connection supplied through the wired LAN. A Wireless Router is a device used to provide this link. D-Link DIR-505 User Manual 164 - D-Link DIR-505 | Manual - Page 171
one point A to point B. But wireless technology has restrictions as to how you can access the network. You must be within the wireless network range area to be able to connect your computer. There are two different types of wireless networks Wireless outdoor venues. D-Link DIR-505 User Manual 165 - D-Link DIR-505 | Manual - Page 172
wireless technology used for WPAN. Bluetooth devices in WPAN operate in a range up to 30 feet away. Compared to WLAN the speed and wireless operation range home • Share Internet connection and printer with multiple computers • No need to dedicate office space D-Link DIR-505 User Manual 166 - D-Link DIR-505 | Manual - Page 173
on same frequency. Security Don't let you next-door neighbors or intruders connect to your wireless network. Secure your wireless network by turning on the WPA or WEP security feature on the router. Refer to product manual for detail information on how to set it up. D-Link DIR-505 User Manual 167 - D-Link DIR-505 | Manual - Page 174
the IP address, subnet mask, and the default gateway of your adapter. If the address is 0.0.0.0, check your adapter installation, security settings, and the settings on your router. Some firewall software programs may block a DHCP request on newly installed adapters. D-Link DIR-505 User Manual 168 - D-Link DIR-505 | Manual - Page 175
the same as the LAN IP address of your router (I.E. 192.168.0.1). Set Primary DNS the same as the LAN IP address of your router (192.168.0.1). The Secondary DNS is not needed or you may enter a DNS server from your ISP. Step 5 Click OK twice to save your settings. D-Link DIR-505 User Manual 169 - D-Link DIR-505 | Manual - Page 176
(SPI) • MAC Address Filtering • DMZ Support Wireless Modes • Router/AP Mode • Repeater Mode • Wi-Fi Hot Spot Mode Wireless Frequency Range • 2.4 GHz to 2.4835 GHz Antennas • Internal Antenna Security • Wi-Fi Protected Access (WPA/WPA2) • WPS™ (PBC) Advanced Features • SharePort™ Mobile app for iOS - D-Link DIR-505 | Manual - Page 177
asked questions and answers to technical issues. For customers within the United States: Phone Support: (877) 453-5465 Internet Support: http://support.dlink.com For customers within Canada: Phone Support: (800) 361-5265 Internet Support: http://support.dlink.ca D-Link DIR-505 User Manual 171 - D-Link DIR-505 | Manual - Page 178
used in this product, are available to you at: http://tsd.dlink.com.tw/GPL.asp The GPL code and LGPL code used in this is distributed WITHOUT ANY WARRANTY and is subject to the copyrights of one or more authors. For details, see the GPL code and the LGPL not allowed. D-Link DIR-505 User Manual 172 - D-Link DIR-505 | Manual - Page 179
to freedom, not price. Our General Public Licenses too, receive or can get the source code. And problems arise substantially in other domains, we stand ready to extend this provision to those domains in future versions of the GPL, as needed to protect the freedom of users. D-Link DIR-505 User Manual - D-Link DIR-505 | Manual - Page 180
" refers to any copyrightable work licensed under this License. Each licensee is addressed as "you". "Licensees" and "recipients" may be individuals or organizations. list of user commands or options, such as a menu, a prominent item in the list meets this criterion. D-Link DIR-505 User Manual 174 - D-Link DIR-505 | Manual - Page 181
of interfaces specified for a particular programming language, one that is widely used among developers working in users can regenerate automatically from other parts of the Corresponding Source. The Corresponding Source for a work in source code form is that same work. D-Link DIR-505 User Manual - D-Link DIR-505 | Manual - Page 182
is not allowed; section 10 makes it unnecessary. 3. Protecting Users' Legal Rights From Anti-Circumvention Law. No covered work shall be of enforcing, against the work's users, your or third parties' legal rights to forbid circumvention of technological measures. D-Link DIR-505 User Manual 176 - D-Link DIR-505 | Manual - Page 183
may charge any price or no price for each copy that you convey, and you may offer support or warranty users beyond what the individual works permit. Inclusion of a covered work in an aggregate does not cause this License to apply to the other parts of the aggregate. D-Link DIR-505 User Manual - D-Link DIR-505 | Manual - Page 184
under the terms of this License, in one of these ways: a) Convey the object as long as you offer spare parts or customer support for that product model, to give anyone who customarily used for software interchange, for a price no more than your reasonable cost of Link DIR-505 User Manual 178 - D-Link DIR-505 | Manual - Page 185
only significant mode of use of the product. "Installation Information"for a User Product means support service, warranty, or updates for a work that has been modified or installed by the recipient, or for the User password or key for unpacking, reading or copying. D-Link DIR-505 User Manual 179 - D-Link DIR-505 | Manual - Page 186
supplement the terms of this License by making exceptions from one or more of its conditions. Additional permissions that are under trademark law for use of some trade names, trademarks, or service marks; or f ) Requiring indemnification of licensors and authors of that Link DIR-505 User Manual 180 - D-Link DIR-505 | Manual - Page 187
your receipt of the notice. Termination of your rights under this section does not terminate the licenses of parties who have received copies or rights D-Link DIR-505 User Manual 181 - D-Link DIR-505 | Manual - Page 188
control of an organization, or substantially all assets of one, or subdividing an organization, or merging organizations. If the predecessor in interest, if the predecessor has it or can get it with reasonable efforts. You may not impose any further restrictions it. D-Link DIR-505 User Manual 182 - D-Link DIR-505 | Manual - Page 189
covered work in a country, would infringe one or more identifiable patents in that country that you have reason to believe are valid. If, pursuant to or in connection with a single transaction or arrangement, you recipients of the covered work and works based on it. D-Link DIR-505 User Manual 183 - D-Link DIR-505 | Manual - Page 190
prohibits the exercise of, or is conditioned on the non-exercise of one or more of the rights that are specifically granted under this License. from those copies), or (b) primarily for and in connection with specific products or compilations that contain the covered work Link DIR-505 User Manual 184 - D-Link DIR-505 | Manual - Page 191
to the present version, but may differ in detail to address new problems or concerns. Each version is given a distinguishing version THE PROGRAM PROVE DEFECTIVE, YOU ASSUME THE COST OF ALL NECESSARY SERVICING, REPAIR OR CORRECTION. 16. Limitation of Liability. IN NO Link DIR-505 User Manual 185 - D-Link DIR-505 | Manual - Page 192
to their terms, reviewing courts shall apply local law that most closely approximates an absolute waiver of all civil liability in connection with the Program, unless a warranty or assumption of liability accompanies a copy of the Program in return for a fee. D-Link DIR-505 User Manual 186 - D-Link DIR-505 | Manual - Page 193
): One (1) year • Power supplies and fans: One (1) Link upon return to D-Link of the defective Hardware. All Hardware or part thereof that is replaced by D-Link, or for which the purchase price is refunded, shall become the property of D-Link upon replacement or refund. D-Link DIR-505 User Manual - D-Link DIR-505 | Manual - Page 194
price paid that is attributable to the Software. Except as otherwise agreed by D-Link from D-Link Technical Support at 1-877 dlink.com/. • After an RMA number is issued, the defective product must be packaged securely in the original or other suitable shipping package D-Link DIR-505 User Manual - D-Link DIR-505 | Manual - Page 195
service Link Technical Support dlink Link will only replace the defective portion of the product and will not ship back any accessories. • The customer is responsible for all in-bound shipping charges to D-Link. No Cash on Delivery ("COD") is allowed. Products sent COD will D-Link DIR-505 User Manual - D-Link DIR-505 | Manual - Page 196
Link. Return shipping charges shall be prepaid by D-Link if you use an address firmware or other products or services provided by anyone other than D-Link; and Products that have been purchased from inventory clearance or liquidation sales or other sales in which D-Link Link DIR-505 User Manual 190 - D-Link DIR-505 | Manual - Page 197
may cause radio interference, in which case the user may be required to take adequate measures. FCC Statement: This equipment has been tested and found to comply with the limits for a Class B digital device, pursuant to Part 15 of the FCC Rules. These limits are D-Link DIR-505 User Manual 191 - D-Link DIR-505 | Manual - Page 198
other antenna or transmitter. The availability of some specific channels and/or operational frequency bands are country dependent and are firmware programmed at the factory to match the intended destination. The firmware setting is not accessible by the end user. D-Link DIR-505 User Manual 192 - D-Link DIR-505 | Manual - Page 199
exposure limits set forth for an uncontrolled environment. End users must follow the specific operating instructions for satisfying RF exposure compliance. This equipment should be compris les interférences pouvant perturber le bon fonctionnement de ce périphérique. D-Link DIR-505 User Manual 193 - D-Link DIR-505 | Manual - Page 200
Appendix G - Registration Registration Product registration is entirely voluntary and failure to complete or return this form will not diminish your warranty rights. Version 1.0 March 29, 2012 D-Link DIR-505 User Manual 194
-
 1
1 -
 2
2 -
 3
3 -
 4
4 -
 5
5 -
 6
6 -
 7
7 -
8
-
9
-
10
-
11
-
12
-
13
-
14
-
15
-
16
-
17
-
18
-
19
-
20
-
21
-
22
-
23
-
24
-
25
-
26
-
27
-
28
-
29
-
30
-
31
-
32
-
33
-
34
-
35
-
36
-
37
-
38
-
39
-
40
-
41
-
42
-
43
-
44
-
45
-
46
-
47
-
48
-
49
-
50
-
51
-
52
-
53
-
54
-
55
-
56
-
57
-
58
-
59
-
60
-
61
-
62
-
63
-
64
-
65
-
66
-
67
-
68
-
69
-
70
-
71
-
72
-
73
-
74
-
75
-
76
-
77
-
78
-
79
-
80
-
81
-
82
-
83
-
84
-
85
-
86
-
87
-
88
-
89
-
90
-
91
-
92
-
93
-
94
-
95
-
96
-
97
-
98
-
99
-
100
-
101
-
102
-
103
-
104
-
105
-
106
-
107
-
108
-
109
-
110
-
111
-
112
-
113
-
114
-
115
-
116
-
117
-
118
-
119
-
120
-
121
-
122
-
123
-
124
-
125
-
126
-
127
-
128
-
129
-
130
-
131
-
132
-
133
-
134
-
135
-
136
-
137
-
138
-
139
-
140
-
141
-
142
-
143
-
144
-
145
-
146
-
147
-
148
-
149
-
150
-
151
-
152
-
153
-
154
-
155
-
156
-
157
-
158
-
159
-
160
-
161
-
162
-
163
-
164
-
165
-
166
-
167
-
168
-
169
-
170
-
171
-
172
-
173
-
174
-
175
-
176
-
177
-
178
-
179
-
180
-
181
-
182
-
183
-
184
-
185
-
186
-
187
-
188
-
189
-
190
-
191
-
192
-
193
-
194
-
195
-
196
-
197
-
198
-
199
-
200
 |
 |
