D-Link DNS-320 Product Manual - Page 111
USB Copy Function
 |
UPC - 790069347283
View all D-Link DNS-320 manuals
Add to My Manuals
Save this manual to your list of manuals |
Page 111 highlights
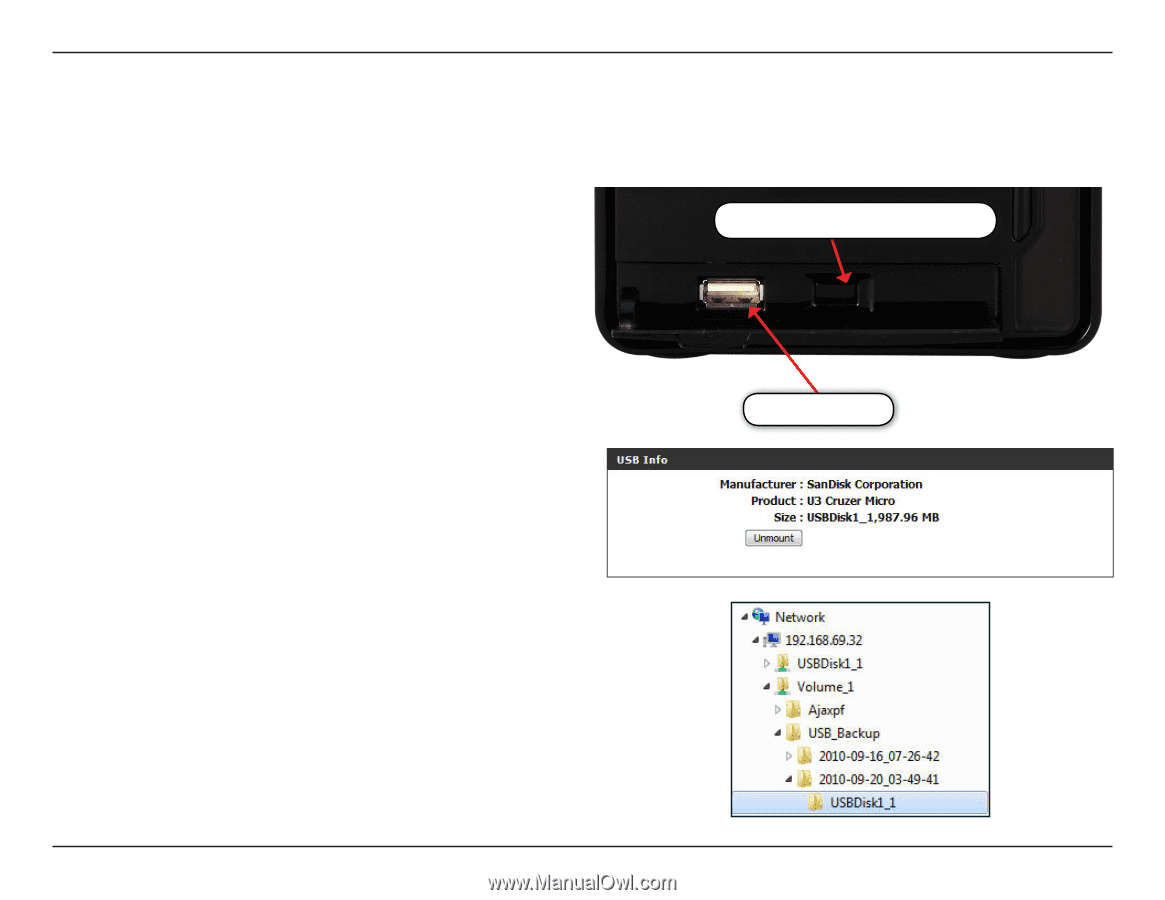
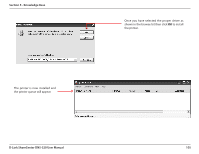
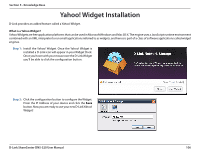
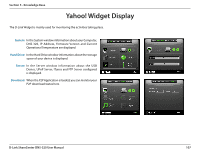
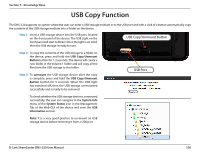
Section 5 - Knowledge Base USB Copy Function The DNS-320 supports on option where the user can enter a USB storage medium in to the USB port and with a click of a button automatically copy the contents of the USB storage medium into a folder on the device Step 1: Insert a USB storage device into the USB port, located on the front panel of the device. The USB Light on the front panel will start to flicker. Once the light is on solid, then the USB storage is ready for use. USB Copy/Unmount Button Step 2: To copy the contents of the USB storage to a folder on the device, press and hold the USB Copy/Unmount Button button for 1-3 seconds. The device will create a new folder in the Volume 1 folder and will copy all the files from the USB storage to this folder. Step 3: To unmount the USB storage device after the copy is complete, press and hold the USB Copy/Unmount Button button for 5 seconds. When the USB light has switched off, then the USB storage un-mounted successfully and is ready to be removed. USB Port To check whether the USB storage device is connected successfully, the user can navigate to the System Info menu of the System Status icon in the Management Tab of the Web GUI of the device and view the USB Information section. Note: It is a very good practice to un-mount an USB storage device before removing it from a USB port. D-Link ShareCenter DNS-320 User Manual 108
-
 1
1 -
2
-
3
-
4
-
5
-
6
-
7
-
8
-
9
-
10
-
11
-
12
-
13
-
14
-
15
-
16
-
17
-
18
-
19
-
20
-
21
-
22
-
23
-
24
-
25
-
26
-
27
-
28
-
29
-
30
-
31
-
32
-
33
-
34
-
35
-
36
-
37
-
38
-
39
-
40
-
41
-
42
-
43
-
44
-
45
-
46
-
47
-
48
-
49
-
50
-
51
-
52
-
53
-
54
-
55
-
56
-
57
-
58
-
59
-
60
-
61
-
62
-
63
-
64
-
65
-
66
-
67
-
68
-
69
-
70
-
71
-
72
-
73
-
74
-
75
-
76
-
77
-
78
-
79
-
80
-
81
-
82
-
83
-
84
-
85
-
86
-
87
-
88
-
89
-
90
-
91
-
92
-
93
-
94
-
95
-
96
-
97
-
98
-
99
-
100
-
101
-
102
-
103
-
104
-
105
-
 106
106 -
 107
107 -
 108
108 -
 109
109 -
 110
110 -
 111
111 -
 112
112 -
 113
113 -
 114
114 -
 115
115 -
 116
116 -
117
-
118
 |
 |