D-Link DNS-320 Product Manual - Page 57
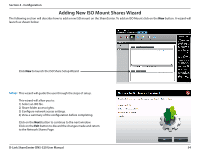
Adding New ISO Mount Shares Wizard
 |
UPC - 790069347283
View all D-Link DNS-320 manuals
Add to My Manuals
Save this manual to your list of manuals |
Page 57 highlights
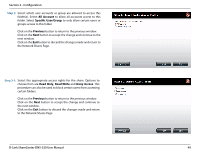
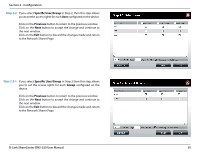
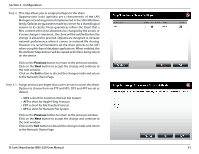
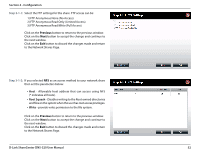
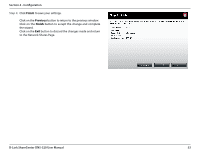
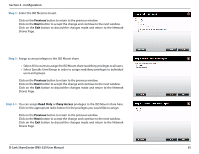
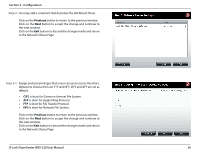
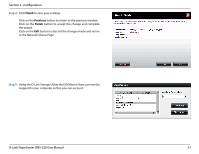
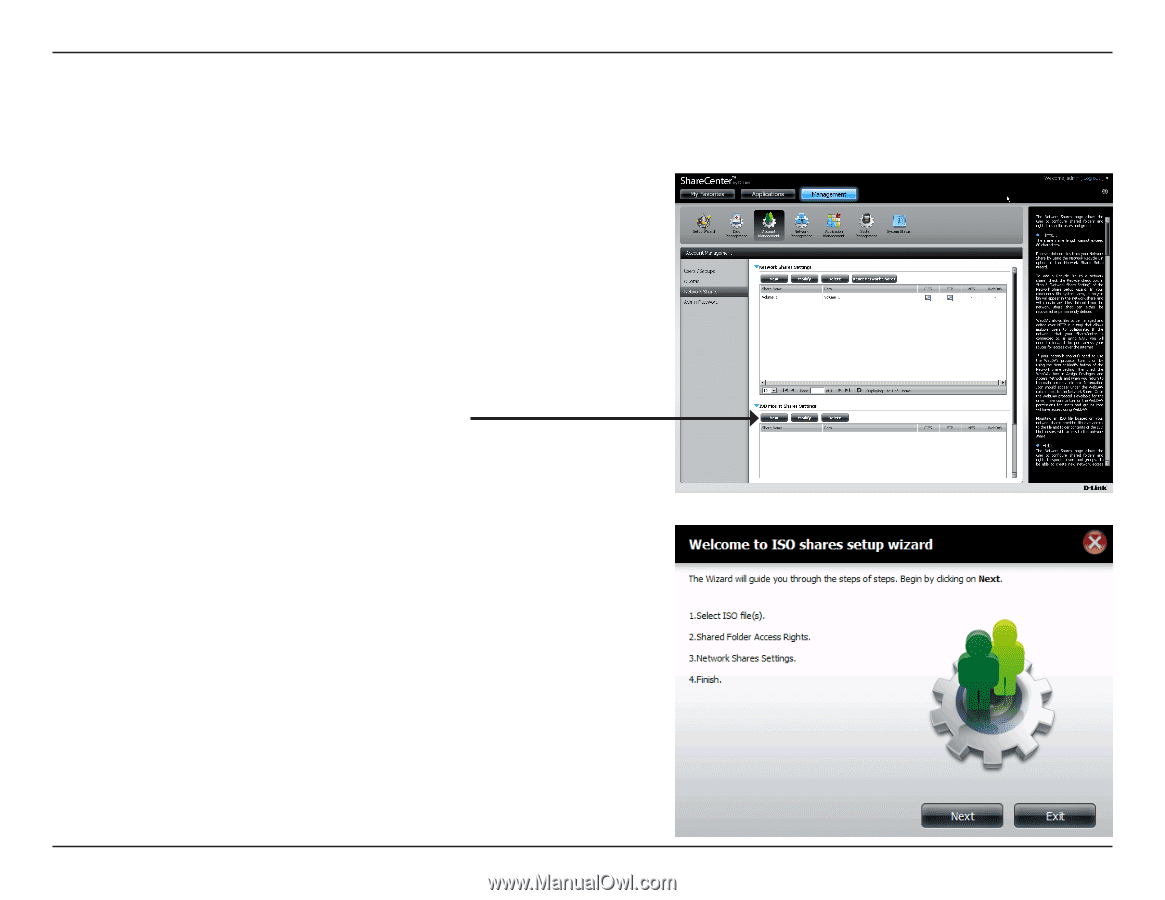
Section 4 - Configuration Adding New ISO Mount Shares Wizard The following section will describe how to add a new ISO mount on the ShareCenter. To add an ISO Mount click on the New button. A wizard will launch as shown below: Click New to launch the ISO Share Setup Wizard Setup: This wizard will guide the user through the steps of setup. This wizard will allow you to: 1) Select an ISO file. 2) Share folder access rights. 3) Configure network access settings. 4) View a summary of the configuration before completing. Click on the Next button to continue to the next window. Click on the Exit button to discard the changes made and return to the Network Shares Page. D-Link ShareCenter DNS-320 User Manual 54
-
 1
1 -
2
-
3
-
4
-
5
-
6
-
7
-
8
-
9
-
10
-
11
-
12
-
13
-
14
-
15
-
16
-
17
-
18
-
19
-
20
-
21
-
22
-
23
-
24
-
25
-
26
-
27
-
28
-
29
-
30
-
31
-
32
-
33
-
34
-
35
-
36
-
37
-
38
-
39
-
40
-
41
-
42
-
43
-
44
-
45
-
46
-
47
-
48
-
49
-
50
-
51
-
 52
52 -
 53
53 -
 54
54 -
 55
55 -
 56
56 -
 57
57 -
 58
58 -
 59
59 -
 60
60 -
 61
61 -
 62
62 -
63
-
64
-
65
-
66
-
67
-
68
-
69
-
70
-
71
-
72
-
73
-
74
-
75
-
76
-
77
-
78
-
79
-
80
-
81
-
82
-
83
-
84
-
85
-
86
-
87
-
88
-
89
-
90
-
91
-
92
-
93
-
94
-
95
-
96
-
97
-
98
-
99
-
100
-
101
-
102
-
103
-
104
-
105
-
106
-
107
-
108
-
109
-
110
-
111
-
112
-
113
-
114
-
115
-
116
-
117
-
118
 |
 |
54
D-Link ShareCenter DNS-320 User Manual
Section 4 - Configuration
Setup:
Adding New ISO Mount Shares Wizard
The.following.section.will.describe.how.to.add.a.new.ISO.mount.on.the.ShareCenter±.To.add.an.ISO.Mount.click.on.the.
New
.button±.A.wizard.will.
launch.as.shown.below:
This.wizard.will.guide.the.user.through.the.steps.of.setup±
This.wizard.will.allow.you.to:
1).Select.an.ISO.file±
2).Share.folder.access.rights±
3).Configure.network.access.settings±
4).View.a.summary.of.the.configuration.before.completing±
Click.on.the.
Next
.button.to.continue.to.the.next.window±
Click.on.the.
Exit
.button.to.discard.the.changes.made.and.return.
to.the.Network.Shares.Page±
Click.
New
.to.launch.the.ISO.Share.Setup.Wizard