D-Link DP-311P Product Manual
D-Link DP-311P - Air Print Server Manual
 |
UPC - 790069257094
View all D-Link DP-311P manuals
Add to My Manuals
Save this manual to your list of manuals |
D-Link DP-311P manual content summary:
- D-Link DP-311P | Product Manual - Page 1
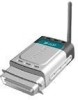
D-Link DP-311P Wireless Print Server Manual Building Networks for People - D-Link DP-311P | Product Manual - Page 2
Workstations 40 Networking Basics 42 Technical Specifications 59 Contacting Technical Support 61 Warranty and Registration 62 Appendix 1: DP-311P Printer Compatibility List 65 Appendix 2: Incompatible Printers List 66 Appendix 3: Upgrading the Firmware in Netware/ Windows/ Unix .......67 2 - D-Link DP-311P | Product Manual - Page 3
Package Contents Contents of Package: ! D-Link DP-311P Wireless Print Server ! Manual, PS Admin Utility and Warranty on CD ! Printed Quick Installation Guide If any of the above items are missing, please contact your reseller. System Requirements: ! Windows XP/2000/Me/98SE ! Apple Mac OS with - D-Link DP-311P | Product Manual - Page 4
DP-311P is an 802.11b-compliant wireless Print Server that supports both Infrastructure or Ad-Hoc wireless modes. With the DP-311P you have the ability and convenience of sharing a printer beyond the wired network. The DP-311P is also easily configurable using a Web Browser or Windows based setup - D-Link DP-311P | Product Manual - Page 5
to know the DP-311P 5V-2A Power inlet Plug the External Power Supply into this jack Parallel Port IEEE 1284 Bi-Directional Parallel Port with a centronics connector Frontview Power LED A solid Green light indicates a connection to a power supply Mode Switch Toggle UP to Configure; Toggle DOWN for - D-Link DP-311P | Product Manual - Page 6
network using the DP-311P. The DP-311P has a built- in Web-based management feature that allows users to easily configure and manage multiple print queues through TCP/IP. For a list of printers that are compatible with the DP-311P, please see the Appendix in this manual. The compatibility list - D-Link DP-311P | Product Manual - Page 7
in this manual. The subnet mask is 255.255.255.0. Restart the computer. Open your web browser and input the IP Address of your wireless print server. The default IP Address is 192.168.0.10. After you have completed the configuration: After you have finished configuring the DP-311P, in order - D-Link DP-311P | Product Manual - Page 8
control the Print Server's configuration through the tabs on the top of this main screen: Home, Configuration, Network, Tools, and Help. Home > Status This screen displays some basic information about the DP-311P and the printer attached to the DP-311P, if available. Home > Wireless This screen - D-Link DP-311P | Product Manual - Page 9
Using the Web Configuration (continued) Home > Network This screen displays the current TCP/IP settings; Netware settings and AppleTalk settings of the print server. Home > Management This screen displays the current SNMP settings of the print server. 9 - D-Link DP-311P | Product Manual - Page 10
name System Location: (optional) Input a location for the Print Server Password: Enter an Administrator password (3-8 characters) Re-type Password: Printer Port: Re-type the password (when accessing the DP-311P with password protection, the user name is admin, and the password will be whatever - D-Link DP-311P | Product Manual - Page 11
same chipset in peer to peer mode 802.11b Ad-Hoc: Connect to all compatibly configured 802.11b wireless clients in peer to peer mode Infrastructure: Connects to compatibly configured wireless AP or router in a WLAN Configuration > Wireless Select SSID or Manually Enter SSID Below: Channel: Data - D-Link DP-311P | Product Manual - Page 12
Configuration > Network TCP/IP Settings Obtain TCP/IP settings automatically (use DHCP/BOOTP): Use the following TCP/IP settings: Select this option to obtain settings automatically from your DHCP server Select this option to enter a Static IP Address, Subnet Mask and Gateway IP Address manually - D-Link DP-311P | Product Manual - Page 13
) Configuration > Network (continued) Netware General Settings Print Server Name: Input a name for the print server Polling Time: Logon Password: Enter the number of polling seconds (the minimum is 3; the maximum is 29 seconds) Enter the logon password NDS (Novell Directory Services) is - D-Link DP-311P | Product Manual - Page 14
Using the Web Configuration (continued) Configuration > Management SNMP (Simple Network Management Protocol) is a set of protocols for managing complex networks SNMP Community Settings Support HP WebJet Admin: Select Enable or Disable SNMP Community Name 1: Enter a name Access Right: Select - D-Link DP-311P | Product Manual - Page 15
Block) is a message format to share files, directories and devices. SMB Workgroup Name: SMB Shared Name Printer: Enter a name Enter the printer name Tools > Factory Default If you click Factory Reset you will lose all user-defined settings and you will have to re-configure the DP-311P! 15 - D-Link DP-311P | Product Manual - Page 16
. When you have found the firmware file on your hard drive, click Upgrade, in this screen, to complete the process. Click Print in this window to print a test page. Please refer to the Appendix in this manual for a list of supported printers. Tools > Print Test Help For more information, click on - D-Link DP-311P | Product Manual - Page 17
Address range as the DP-311P (192.168.0.x). For instructions on changing the IP Address, please refer to the Networking Basics section in this manual. The subnet mask is 255.255.255.0. Restart the computer. Open your web browser and input the IP Address of your wireless print server. The default IP - D-Link DP-311P | Product Manual - Page 18
Printing with Windows XP/2000 (continued) Change the mode to Infrastructure. Input or select the SSID of your wireless router or AP. Input WEP settings if applicable. Change the IP Address and change the other settings of the DP-311P to conform to your network. 1 After you have configured the DP- - D-Link DP-311P | Product Manual - Page 19
Printing with Windows XP/2000 (continued) For Windows XP: Go to Start > Printers and Faxes > Add a Printer Double-click on the "Add Printer" icon Click Next 19 - D-Link DP-311P | Product Manual - Page 20
Printing with Windows XP/2000 (continued) Select "Local Printer." Click Next Select "Create a new port." At the pull-down menu, highlight "Standard TCP/IP Port." Click Next Click Next 20 - D-Link DP-311P | Product Manual - Page 21
Printing with Windows XP/2000 (continued) Type in the IP address of the print server. (i.e. 192.168.0.10) The port name will automatically be filled in. Click Next Select "Custom." Then click "Settings." Click Settings Select "LPR" Enter "lp1" for the Queue Name. Click OK 21 - D-Link DP-311P | Product Manual - Page 22
Printing with Windows XP/2000 (continued) Click Next Click Finish In this window, scroll down to find your printer. (If it is not listed, insert the driver CD or diskette that came with your printer.) Click on "Have Disk." Then, scroll down and highlight the printer. Click Next 22 - D-Link DP-311P | Product Manual - Page 23
Printing with Windows XP/2000 (continued) At this screen, you can input a name for this printer. Click Next Yes Select "No" Click Next The printer is now ready for printing with Windows XP, on your network. Click Finish 23 - D-Link DP-311P | Product Manual - Page 24
Address range as the DP-311P (192.168.0.x). For instructions on changing the IP Address, please refer to the Networking Basics section in this manual. The subnet mask is 255.255.255.0. Restart the computer. Open your web browser and input the IP Address of your wireless print server. The default IP - D-Link DP-311P | Product Manual - Page 25
Printing with Windows 98SE/Me (continued) Configuration > Wireless Change the mode to Infrastructure. Input or select the SSID of your wireless router or AP. Input WEP settings if applicable. Configuration > Network Change the IP Address and change the other settings of the DP-311P to conform to - D-Link DP-311P | Product Manual - Page 26
Printing with Windows 98SE/Me (continued) Please insert the DP-311P CD into your CD-ROM drive and click Install PS Admin This picture will appear. Click Next Click Next 26 - D-Link DP-311P | Product Manual - Page 27
98SE/Me (continued) Select the program you want to install DP-311P PSAdmin is a windows based management utility, only Administrators need to install this program D-Link Print Monitor is the driver for print servers in Windows 95/98/Me.You will need to install this program Click Next Click Finish 27 - D-Link DP-311P | Product Manual - Page 28
Printing with Windows 98SE/Me (continued) Go to Start > Settings > Printer> Add printer or Go to Start> Control Panel> Printers Double click the Add Printer icon Click Next Select Local printer Click Next 28 - D-Link DP-311P | Product Manual - Page 29
Printing with Windows 98SE/Me (continued) Highlight the printer, as shown. If the desired printer is not on the list, click Have Disk and insert the printer driver disk that came with your printer to install the printer drivers Click Next Click Next Select No Click Finish Go to Start > Settings > - D-Link DP-311P | Product Manual - Page 30
Printing with Windows 98SE/Me (continued) After the printer installation is completed, right-click on the Printer icon. Select Properties > Details > Click Add Port HP LaserJet Series II HP LaserJet Series II Select Other > D-link Print Port Click OK 30 - D-Link DP-311P | Product Manual - Page 31
Printing with Windows 98SE/Me (continued) Select your DP-311P wireless print server Click OK 192.168.0.10 Click Apply > OK You have completed setting up your printer in Win 98SE/Me! HP LaserJet Series II 192.168.0.10 HP LaserJet Series II 31 - D-Link DP-311P | Product Manual - Page 32
Address range as the DP-311P (192.168.0.x). For instructions on changing the IP Address, please refer to the Networking Basics section in this manual. The subnet mask is 255.255.255.0. Restart the computer. Open your web browser and input the IP Address of your wireless print server. The default IP - D-Link DP-311P | Product Manual - Page 33
Printing in Mac OS X (continued) Change the mode to Infrastructure. Input or select the SSID of your wireless router or AP. Input WEP settings if applicable. Change the IP Address and change the other settings of the DP-311P to conform to your network. 1 After you have configured the DP-311P, set - D-Link DP-311P | Product Manual - Page 34
the instructions below for setting up the Print Server. After attaching the Print Server to your network using the directions provided in the Quick Installation Guide, change the IP Address of your Macintosh to access the Print Server's web configuration. Open your System Preferences window and - D-Link DP-311P | Product Manual - Page 35
of the Print Server is 192.168.0.10. Manually change your IP Address to 102.168.0.x, where x is any number between 1 and 254 (except 10 which is the IP Address of the Print Server.) The IP Addresses and Subnet Mask shown here are examples only Select the AppleTalk tab in this window and check - D-Link DP-311P | Product Manual - Page 36
Setting up Apple Talk or LPR Printing in Mac OS X (continued) To print, open a document and select File > Print from the menu Select Edit Printer List from the Printer dialog box Click Add Printer 36 - D-Link DP-311P | Product Manual - Page 37
Port Name of the Print Server will be displayed. The Port Name shown here is an example only Click on the Port to which the post-script printer is connected Then select the printer model from the dialog box displayed here. Click Add Printer and the Printer Port configuration is complete. Select the - D-Link DP-311P | Product Manual - Page 38
that is connected to the Print Server. The Port Name illustrated here is only an example. Select the printer model from the dialog box Click Add and the process is complete Close all Print Center windows, select the Printer Port that was just selected Click Print to print the document.Click Add and - D-Link DP-311P | Product Manual - Page 39
Name is unique among all of the network printers in your AppleTalk zone. The Port Names shown in this manual are examples only. Setting up the Print Server for AppleTalk Printing To set up your Print Server so that it can be used for AppleTalk printing: ! Make sure the AppleTalk protocol is enabled - D-Link DP-311P | Product Manual - Page 40
procedure for selecting a PostScript printer connected to your Print Server may vary slightly, depending on what printer driver version you are using. The procedure described below assumes you are using the LaserWriter 8. To choose a printer connected to your Print Server as your MacOS workstation - D-Link DP-311P | Product Manual - Page 41
listed, click Generic to use a generic printer description) If you wish to access this setting in the future, you can use the Setup button in the Chooser window The selected printer will become your computer's default printer. You may need to choose Page Setup in any applications you have open 41 - D-Link DP-311P | Product Manual - Page 42
Networking Basics Using the Network Setup Wizard in Windows XP In this section you will learn how to establish a network at home or work, using Microsoft Windows XP. Note: Please refer to websites such as http://www.homenethelp.com and http://www.microsoft.com/windows2000 for information about - D-Link DP-311P | Product Manual - Page 43
Networking Basics (continued) Please follow all the instructions in this window: In this window, select the best description of your computer. If your computer connects to the internet through a gateway/router, select the second option as shown. Click Next 43 - D-Link DP-311P | Product Manual - Page 44
Networking Basics (continued) Enter a Computer description and a Computer name (optional.) Click Next Enter a Workgroup name. All computers on your network should have the same Workgroup name. Click Next 44 - D-Link DP-311P | Product Manual - Page 45
Networking Basics (continued) Please wait while the Network Setup Wizard applies the changes. When the changes are complete, Click Next. Please wait while the Network Setup Wizard configures the computer. This may take a few minutes. 45 - D-Link DP-311P | Product Manual - Page 46
Networking Basics (continued) In this window, select the best option. In this example, Create a Network Setup Disk has been selected. You will run this disk on each of the computers on your network. Click Next Insert a disk into the Floppy Disk - D-Link DP-311P | Product Manual - Page 47
Basics (continued) Please wait while the Network Setup Wizard copies the files. Please read the information under Here's how in the screen below. After you complete the Network Setup Wizard you will use the Network Setup Disk to run the Network Setup Wizard once on each of the computers on - D-Link DP-311P | Product Manual - Page 48
. Click Yes to restart the computer. You have completed configuring this computer. Next, you will need to run the Net- work Setup Disk on all the other computers on your network. After running the Network Setup Disk on all your computers, your new wireless network will be ready to use. 48 - D-Link DP-311P | Product Manual - Page 49
Networking Basics (continued) How to assign a Name to your computer (continued) To name your computer, please follow these directions in Windows XP: ! Click Start (in the lower left corner of the screen) ! Right-click My Computer ! Select Properties and Click ! Select the Computer Name tab in - D-Link DP-311P | Product Manual - Page 50
the name of the Workgroup ! All computers on your network must have the same Workgroup name. ! Click OK How to find your IP Address in Windows XP The adapter-equipped computers in your network must be in the same IP Address range. To verify the IP Address of the adapter, please - D-Link DP-311P | Product Manual - Page 51
(continued) This window will appear. ! Click the Support tab ! Click Close Assigning a Static IP Address in Windows XP/2000 Note: Residential Gateways/Broadband Routers will automatically assign IP Addresses to the computers on the network, using DHCP (Dynamic Host Configuration Protocol) technology - D-Link DP-311P | Product Manual - Page 52
Networking Basics (continued) Assigning a Static IP Address in Windows XP/2000 (continued) ! Double-click Network Connections ! Right-click Local Area Connections ! Double-click Properties 52 - D-Link DP-311P | Product Manual - Page 53
IP Address in the Internet Protocol (TCP/IP)Properties window. ! Input your IP Address and subnet mask. ( server addresses. (Note: If you are entering a DNS server, you must enter the IP Address of the Default Gateway.) The DNS server information will be supplied by your ISP (Internet Service - D-Link DP-311P | Product Manual - Page 54
) To share an LPR printer (using a print server,) you will need a Print Server such as the DP311P. Please make sure that you have run the Network Setup Wizard on all the computers on your network. To share an LPR printer, please follow these directions: ! Go to Start > Printers and Faxes ! Click on - D-Link DP-311P | Product Manual - Page 55
Networking Basics (continued) Sharing an LPR Printer (continued) ! Select Create a new port ! From the pull-down menu, select Standard TCP/IP Port, as shown. ! Click Next ! Please read the instruc- tions on this screen ! Click Next ! Enter the Printer IP Address and the Port Name, as shown. ! Click - D-Link DP-311P | Product Manual - Page 56
Networking Basics Sharing an LPR printer (continued) ! In this screen, select Custom. ! Click Settings. ! Enter the Port Name and the Printer Name or IP Address. ! Select LPR. ! Enter a Queue Name (if your PrintServer/ Gateway has more than one port, you will need a Queue name.) ! Click OK. 56 - D-Link DP-311P | Product Manual - Page 57
screen will show you information about your printer. ! Click Finish. ! Select the printer you are adding from the list of Printers. ! Insert the printer driver disk that came with your printer. ! Click Have Disk. If the printer driver is already installed, do the following: ! Select Keep existing - D-Link DP-311P | Product Manual - Page 58
other computers on your network. ! Click Next. ! Select Yes, to print a test page. ! Click Next. This screen will display information about your printer. ! Click Finish to complete the addition of the printer. ! Please run the Add Printer Wizard on all the computers on your network in order to - D-Link DP-311P | Product Manual - Page 59
Japan) Modes- Ad-Hoc and Infrastructure (User-definable via Web management interface) Data Transmission Supports 64- and 128-bit (alphanumeric & hexadecimal) Network Protocol Support TCP/IP, IPX, NetBEUI, AppleTalk, LPR, SMB (over IP) *Maximum wireless signal rate based on IEEE Standard 802.11b - D-Link DP-311P | Product Manual - Page 60
Port- SizeWeightPower SupplyEMI CertificationsTemperatureHumidity- ARM7-based RISC microprocessor, operating at 50MHz 1Mbytes 2Mbytes SDRAM 1 DB-36-pin male Centronics port, supporting bi-directional communication 55mm x 93mm (2.16 inches x 3.66 inches) 3.30 oz., 0.20 lbs. 5V, 2A CE / FCC Class - D-Link DP-311P | Product Manual - Page 61
can find software updates and user documentation on the D-Link website. D-Link provides free technical support for customers within the United States and within Canada for the duration of the warranty period on this product. U.S. and Canadian customers can contact D-Link technical support through - D-Link DP-311P | Product Manual - Page 62
(90) days ("Warranty Period"), provided that the Software is properly installed on approved hardware and operated as contemplated in its documentation. D-Link further warrants that, during the Warranty Period, the magnetic media on which D-Link delivers the Software will be free of physical defects - D-Link DP-311P | Product Manual - Page 63
www.dlink.ca for detailed warranty information within Canada) D-Link may installation, installation and removal of the product for repair, and shipping costs; Operational adjustments covered in the operating manual software, firmware or other products or services provided by anyone other than D-Link - D-Link DP-311P | Product Manual - Page 64
(s) used for this equipment must be installed to provide a separation distance of at least eight inches (20 cm) from all persons. This equipment must not be operated in conjunction with any other antenna. Register your D-Link product online at http://support.dlink.com/register/ (08/05/2003) 64 - D-Link DP-311P | Product Manual - Page 65
Appendix 1: DP-311P Printer Compatibility List Brand Brother CANON CANON CANON CANON CITIZEN EPSON EPSON EPSON EPSON EPSON EPSON EPSON FUJITSU FUJITSU FUJITSU HP HP HP HP HP HP HP Panasonic STAR Kyocera LEXMARK NEC NEC NEC OKI Panasonic Panasonic STAR Printer's Name HL 1260 S520 BJC-4300 BJ-330 BJ - D-Link DP-311P | Product Manual - Page 66
Print 2050 12. Olivetti PG304 13. OKI Page 8W 14. HP Leaser Jet 1000 15. EPSON 5900L 16. Canon LBP 810 17. Samsung ML-1210 18. Epson 6100L 19. EpsonAcuLaser C900 20. EpsonAcuLaser C1000 Please note that the DP-311P: - Cannot support all GDI printers - Supports only Postscript printers - D-Link DP-311P | Product Manual - Page 67
feature in the DP-311P web browser based configuration utility, you can use one of the following Operating System specific procedures: 1 Before you proceed to upgrade the print server, check http:// support.dlink.com for the latest firmware upgrades, and download the latest firmware onto your hard - D-Link DP-311P | Product Manual - Page 68
3: Alternate Ways of Upgrading the Firmware in Netware / Windows / Unix (continued) Upgrading the print server from UNIX (Through TCP/IP) 1. Log in as root. 2. Ensure that the binary file is located in your current working directory. 3. Type "tftp
-
 1
1 -
 2
2 -
 3
3 -
 4
4 -
 5
5 -
 6
6 -
 7
7 -
8
-
9
-
10
-
11
-
12
-
13
-
14
-
15
-
16
-
17
-
18
-
19
-
20
-
21
-
22
-
23
-
24
-
25
-
26
-
27
-
28
-
29
-
30
-
31
-
32
-
33
-
34
-
35
-
36
-
37
-
38
-
39
-
40
-
41
-
42
-
43
-
44
-
45
-
46
-
47
-
48
-
49
-
50
-
51
-
52
-
53
-
54
-
55
-
56
-
57
-
58
-
59
-
60
-
61
-
62
-
63
-
64
-
65
-
66
-
67
-
68
 |
 |

Manual
Building Networks for People
Wireless Print Server
D-Link DP-311P