D-Link DSL-2750B Manual - Page 18
WPS, Step 1, Client Pin Code, Push Button - product guide
 |
View all D-Link DSL-2750B manuals
Add to My Manuals
Save this manual to your list of manuals |
Page 18 highlights
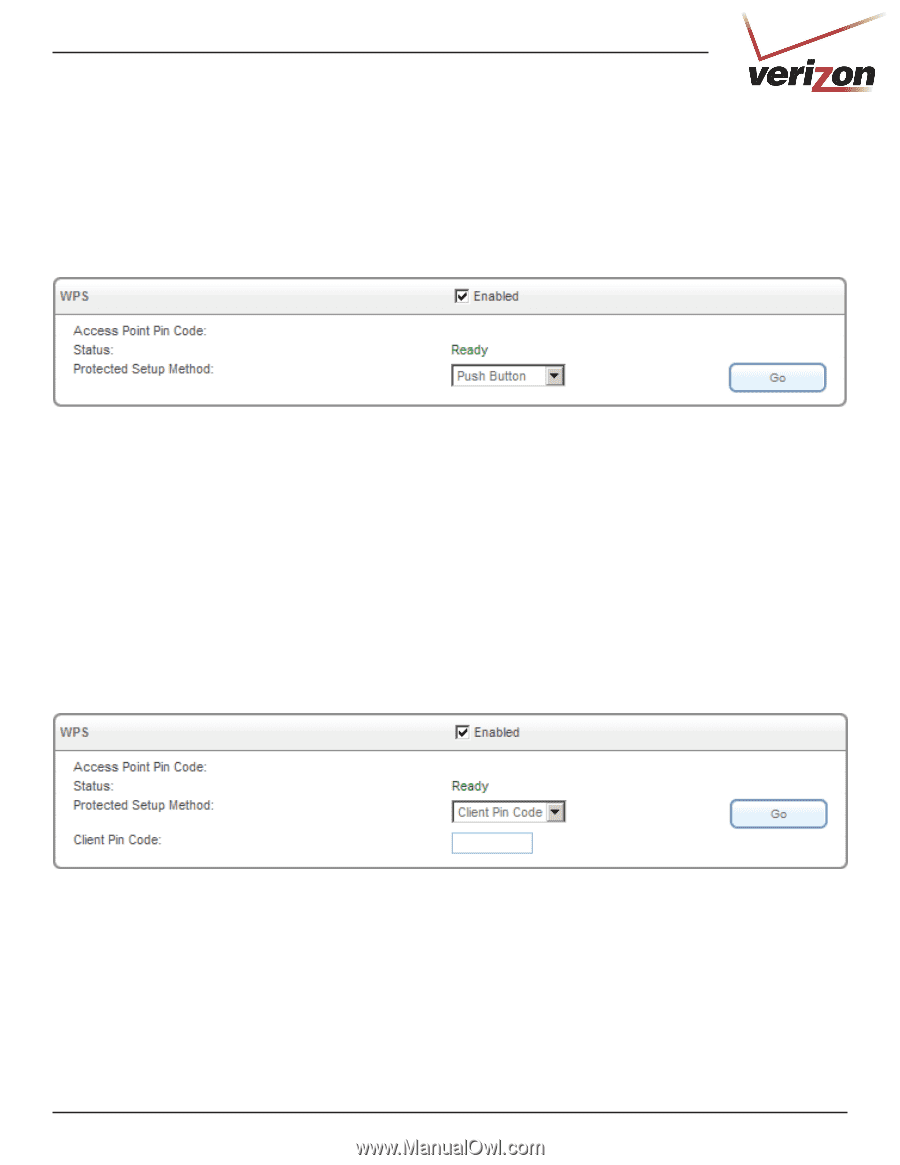
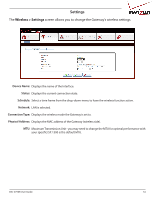
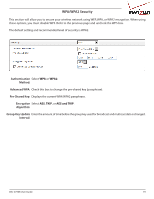
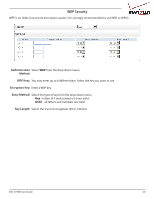
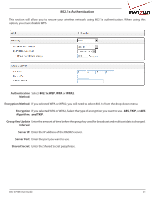
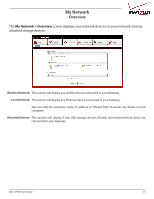
WPS Wi-Fi Protected Setup (WPS) System is a simplified method for securing your wireless network during the "Initial setup"as well as the"Add New Device"processes. The Wi-Fi Alliance (WFA) has certified it across different products as well as manufactures. The process is just as easy, as pressing a button for the Push-Button Method or correctly entering the 8-digit code for the Pin-Code Method. The time reduction in setup and ease of use are quite beneficial, while the highest wireless Security setting of WPA2 is automatically used. Push Button Step 1: Select Push Button from the drop-down and then click the Go button to start the WPS process. Step 2: Within 2 minutes, press the WPS button on your wireless client. Some clients may require you to launch its software utility and click a WPS button. Please refer to your wireless client's user guide for more information. Step 3: Allow 1-2 minutes for the devices to communicate. Once complete your client will connect to the gateway. Client PIN Code A PIN is a unique number that can be used to add the router to an existing network or to create a new network. You will need to get the PIN number from one of your wireless clients. Please refer to your wireless client's user guide for more information. Step 1: From your wireless client, write down the PIN and activate/start the WPS process. Step 2: Within 2 minutes from the Gateway, select Client Pin Code from the drop-down, enter the PIN number in the box, and then click the Go button. Step 3: Allow 1-2 minutes for the devices to communicate. Once complete your client will connect to the gateway. DSL-2750B User Guide 18
-
 1
1 -
2
-
3
-
4
-
5
-
6
-
7
-
8
-
9
-
10
-
11
-
12
-
 13
13 -
 14
14 -
 15
15 -
 16
16 -
 17
17 -
 18
18 -
 19
19 -
 20
20 -
 21
21 -
 22
22 -
 23
23 -
24
-
25
-
26
-
27
-
28
-
29
-
30
-
31
-
32
-
33
-
34
-
35
-
36
-
37
-
38
-
39
-
40
-
41
-
42
-
43
-
44
-
45
-
46
-
47
-
48
-
49
-
50
-
51
-
52
-
53
-
54
-
55
-
56
-
57
-
58
-
59
-
60
-
61
-
62
-
63
-
64
-
65
-
66
-
67
-
68
-
69
-
70
-
71
-
72
-
73
-
74
-
75
-
76
-
77
-
78
-
79
-
80
-
81
-
82
-
83
-
84
-
85
-
86
-
87
-
88
 |
 |