D-Link DSM-312 Manual
D-Link DSM-312 Manual
 |
View all D-Link DSM-312 manuals
Add to My Manuals
Save this manual to your list of manuals |
D-Link DSM-312 manual content summary:
- D-Link DSM-312 | Manual - Page 1
- D-Link DSM-312 | Manual - Page 2
herein are trademarks or registered trademarks of their respective companies. Copyright © 2012 by D-Link Systems, Inc. All rights reserved. This publication may not be reproduced, in whole or in part, without prior expressed written permission from D-Link Systems, Inc. D-Link DSM-312 User Manual i - D-Link DSM-312 | Manual - Page 3
-Definition Multimedia Interface are trademarks or registered trademarks of HDMI Licensing LLC. The Wi-Fi CERTIFIED Logo is a certification mark of the Wi-Fi Alliance. D-Link DSM-312 User Manual ii - D-Link DSM-312 | Manual - Page 4
MovieNite Apps 19 mydlink 20 Flingo 22 Configuration 23 System 23 Screen Saver 24 Maintenance 25 Playback 27 Video 28 Resolution 28 Audio 29 HDMI 29 Dolby DRC 30 Network 31 Wired (Ethernet 32 Wireless 33 Parental Control 37 D-Link Remote Control App 39 Using the Remote Control App - D-Link DSM-312 | Manual - Page 5
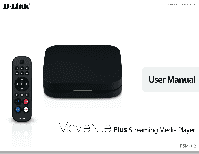
Section 1 - Product Overview Product Overview Package Contents • DSM-312 MovieNite™ Plus Streaming Media Player • Remote Control • Two AAA Batteries • Composite Audio/Video Cable • Power Adapter • Quick Installation Guide If any of the above items are missing, please contact your reseller. Note - D-Link DSM-312 | Manual - Page 6
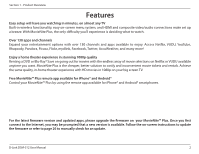
updated apps, please upgrade the firmware on your MovieNite™ Plus. Once you first connect to the Internet, you may be prompted that a new version is available. Follow the on-screen instructions to update the firmware or refer to page 26 to manually check for an update. D-Link DSM-312 User Manual 2 - D-Link DSM-312 | Manual - Page 7
Section 1 - Product Overview Hardware Overview LED 1 1 LED Solid green light indicates when the DSM-312 has a good connection to your network. The light will be amber during boot-up and if there is no connection to your network. D-Link DSM-312 User Manual 3 - D-Link DSM-312 | Manual - Page 8
end to your network 3 LAN Port (router, gateway or switch). If you would like to connect using a wireless connection, do not connect an Ethernet cable. 4 Power Receptor Connect the supplied power adapter here and the other end into an outlet or surge protector. D-Link DSM-312 User Manual 4 - D-Link DSM-312 | Manual - Page 9
Product Overview Remote Control Overview 1 Press to turn the DSM-312 on and off 2 Stop 3 Previous Button (function depends on app) 4 Forward Button (function depends on app) 5 Rewind Button 6 Play/Pause Button 7 Fast Forward Button 8 Directional Pad to navigate menus 9 OK/Enter Button 10 Press to - D-Link DSM-312 | Manual - Page 10
and ceilings between the wireless router/AP and other network devices to a minimum - each wall or ceiling can reduce your adapter's range from 3-90 feet (1-30 meters.) Position your devices so that the number of base transmits a signal even if the phone in not in use. D-Link DSM-312 User Manual 6 - D-Link DSM-312 | Manual - Page 11
type/quality of router can also affect your Internet/ network speeds. • Your home network may also affect speed and quality. Online gaming, large downloads or transfers, streaming from other sources, etc. while using your DSM-312 may cause your network to slow down. D-Link DSM-312 User Manual 7 - D-Link DSM-312 | Manual - Page 12
and install your MovieNite™ Plus Media Player directly to your TV: Step 1 Connect an HDMI cable (not included) to the HDMI port on the DSM-312 and the other end into an available HDMI input port on your TV. Note that HDMI is required for HD resolution. D-Link DSM-312 User Manual HDMI AV HDMI - D-Link DSM-312 | Manual - Page 13
white are for audio). Note: A composite connection made with the supplied A/V cable will not be capable of HD output to your TV. Also, do not connect the device through a VCR. Video signals fed through VCRs may select the correct video output. Skip to Step 3 on page 11. D-Link DSM-312 User Manual 9 - D-Link DSM-312 | Manual - Page 14
below to connect and install your MovieNite™ Plus Media Player to an A/V receiver*: Step 1 Connect an HDMI cable (not included) to the HDMI port on the DSM-312 and the other end into an available HDMI input port on your receiver. Note that HDMI is required for HD resolution. If you are unable to - D-Link DSM-312 | Manual - Page 15
an Ethernet cable (not included) to the LAN port on the DSM-312 and other end into your network (via router, gateway, or switch). If you want to use the built-in wireless adapter, do not connect the Ethernet cable. The on-screen setup wizard will allow you configure your wireless settings (refer to - D-Link DSM-312 | Manual - Page 16
Section 2 - Installation Step 5 You will see the MovieNite Plus screen appear. Follow the on-screen setup (if any) to configure your DSM-312 media player. You may manually change your settings by clicking the gear icon from the Home page. If you connected an Ethernet cable and you cannot connect, - D-Link DSM-312 | Manual - Page 17
Section 2 - Installation Wireless Setup Step 6 - If you did not connect an Ethernet cable, the DSM-312 will attempt to connect to a wireless network. A list of wireless networks in your area will appear. Select the network you want to connect to and press the OK button on your remote. If you do not - D-Link DSM-312 | Manual - Page 18
the OK button on your remote. Note: The password is case-sensitive and must be entered the same as on your router or access point. If DHCP is disabled on your router, from the Select Connection Mode screen, select Enter Static IP to manually enter the network settings for your DSM-312 (refer to - D-Link DSM-312 | Manual - Page 19
wireless network. Note: If for some reason the DSM-312 does not connect to your network, it may be out of range. Move the DSM-312 closer to your router or access point (in the same room) and repeat the setup steps. Once connected, try moving the DSM-312 back near your TV. D-Link DSM-312 User Manual - D-Link DSM-312 | Manual - Page 20
OK to enter the IP settings manually (see below). If DHCP is disabled on your router Step 1 - Select the IP box and press OK on your remote. Use the on-screen keyboard to enter an IP address for the DSM-312. Select Enter and then press the OK button on your remote. Step 2 - Repeat step 1 for (subnet - D-Link DSM-312 | Manual - Page 21
a selection. • Press the back button to back out of the current selection or page. • During the movie, you can use the forward, previous, stop, pause/play, rewind and fast-forward buttons. • Press the home button at any time to go to the MovieNite™ Plus Home page. D-Link DSM-312 User Manual 17 - D-Link DSM-312 | Manual - Page 22
selection. • Press the back button to back out of the current selection or page. • During music playback, you can use the forward, previous, stop, pause/play, rewind and fast-forward buttons. • Press the home button at any time to go to the MovieNite™ Plus Home page. D-Link DSM-312 User Manual 18 - D-Link DSM-312 | Manual - Page 23
• Use the up, down, left, and right arrow buttons to navigate through your selections and press the OK button to make a selection. • Press the back button to back out of the current selection. • Press the home button at any time to go to the MovieNite™ Plus Home page. D-Link DSM-312 User Manual 19 - D-Link DSM-312 | Manual - Page 24
3 - Applications mydlink Conveniently view your live mydlink-enabled network cameras on your TV using the mydlink app on your MovieNite™ Plus. Monitor what is happening in your home and keep an go back to the mydlink home page, press the back button on your remote. D-Link DSM-312 User Manual 20 - D-Link DSM-312 | Manual - Page 25
or tilt your camera. Select the 3 Pan/Tilt middle icon for your camera's "home" position. If your camera does not support pan/ tilt, these icons will not be displayed. 4 Camera Information Your camera name, model number, and its mydlink ID will be displayed here. D-Link DSM-312 User Manual 21 - D-Link DSM-312 | Manual - Page 26
will now appear in this list. Select a video and press OK to watch it. 6. During playback, press the OK button on your remote. You can skip videos or go back to the Queue. Note that the rewind and fast forward buttons on the remote currently do not work with this app. D-Link DSM-312 User Manual 22 - D-Link DSM-312 | Manual - Page 27
Configuration Your DSM-312 will automatically detect your network and TV settings. If you would like to manually configure your settings, upgrade firmware, and other advanced functions, navigate up to the gear icon on the home page and press the OK button. System The System screen will display - D-Link DSM-312 | Manual - Page 28
Section 4 - Configuration Screen Saver Select the amount of idle time before the screen saver will start (2, 5, or 10 minutes) or select Off to disable the screen saver. D-Link DSM-312 User Manual 24 - D-Link DSM-312 | Manual - Page 29
Select OK and press the OK button on your remote to start the reset process or select Cancel. Note: A factory reset will deactivate the account information for all of the apps. You will need to re-enter your account information by selecting the app from the Home page. D-Link DSM-312 User Manual 25 - D-Link DSM-312 | Manual - Page 30
there is a new firmware available, a message indicating an update is available will appear. Select OK to start the upgrade process. Do NOT turn the DSM-312 off during the upgrade process. If the firmware is up to date, select OK and press the OK button on your remote. D-Link DSM-312 User Manual 26 - D-Link DSM-312 | Manual - Page 31
this deactivation and then go to the Netflix or Vudu app to sign back in. Note: If you ever sell or give your DSM-312 to another user, remember to deactivate your Netflix and Vudu accounts. You can also perform a factory reset to deactivate all accounts (recommended). D-Link DSM-312 User Manual 27 - D-Link DSM-312 | Manual - Page 32
Section 4 - Configuration Video Resolution Select Resolution to change the screen resolution. Select Auto (recommended), NTSC (480i for older analog TVs), 480p, 720p, 1080i, or 1080p. Note: You must use an HDMI cable for 480p, 720p, 1080i, and 1080p resolutions. D-Link DSM-312 User Manual 28 - D-Link DSM-312 | Manual - Page 33
from the source. This option is required for 5.1 surround sound (Dolby Digital Plus). If your TV does not support Dolby Digital Plus, select Stereo. This will set the audio to 2-channel stereo. Enable if you are having audio issues with older, incompatible equipment. D-Link DSM-312 User Manual 29 - D-Link DSM-312 | Manual - Page 34
sounds. This is useful if you are watching a movie with loud explosions and you don't want to wake up others sleeping in another room without turning the volume down too much. By default this option is set to On. Select Off for a better sound experience (recommended). D-Link DSM-312 User Manual 30 - D-Link DSM-312 | Manual - Page 35
from wired to wireless (or vice-versa), press the right arrow button on your remote. Select Wired or Wireless and press the OK button on your remote. Refer to the next page to set up a wired (Ethernet) connection or skip to page 33 to connect to a wireless network. D-Link DSM-312 User Manual 31 - D-Link DSM-312 | Manual - Page 36
, the default gateway IP address (usually the IP address of your router), and a DNS server. To enter your settings, select a box using the arrow buttons and press the OK button to bring up the on-screen keyboard. Select Save Configuration and press OK on your remote. D-Link DSM-312 User Manual 32 - D-Link DSM-312 | Manual - Page 37
. Manual Connect - Enter the settings for your wireless network manually. You will need to know the SSID and security passphrase (if any). Refer to page 35. WPS - If your router or access point supports WPS, this is the easiest and most secure method. Refer to page 36. D-Link DSM-312 User Manual - D-Link DSM-312 | Manual - Page 38
is secure, you will be prompted to enter the security password. Use the on-screen keyboard and enter the password. Select Enter and then press the OK button on your remote. Note: The password is case-sensitive. Your DSM-312 will now connect to your wireless network. D-Link DSM-312 User Manual 34 - D-Link DSM-312 | Manual - Page 39
access point (case-sensitive). Step 4 - Click the Security box to select the type of encryption being used on your network (NONE, WEP, or WPA/WPA2). Step 5 - Select Connect and press the OK button on your remote. Your DSM-312 will now connect to your wireless network. D-Link DSM-312 User Manual 35 - D-Link DSM-312 | Manual - Page 40
can press to connect to the DSM-312. Please refer to your user manual for your wireless router or access point to make sure you understand how to enable WPS. Step 1 - Select WPS and press the OK button on your remote. Step 2 - Once this screen appears, press the WPS button on your router or access - D-Link DSM-312 | Manual - Page 41
password when you launch an app. Step 1 - Select Parental Control, select Enable, and then press the OK button on your remote. Step 2 - Select Change Password and press the OK button on your remote. Step 3 - Select Set Password and press the OK button on your remote. D-Link DSM-312 User Manual 37 - D-Link DSM-312 | Manual - Page 42
box. Once you select the 4-digit password, click the OK button. Step 5 - By default, all the apps are not password-protected. You can choose which apps you want to protect. Select the app and then click the right-arrow button. Select Locked and press the OK button. D-Link DSM-312 User Manual 38 - D-Link DSM-312 | Manual - Page 43
DSM-312 Media Player. Step 1 - From your smartphone, visit the Apple App Store or Google Play (Android) and search for "D-Link remote", or scan the QR codes below: Android iOS (Apple) Step 2 - Download and install the free app. Step 3 - Connect your smartphone using Wi-Fi to your wireless network - D-Link DSM-312 | Manual - Page 44
navigation button 5 The RIGHT navigation button 6 The DOWN navigation button 3 7 Rewind button 8 Play and Pause button 4 9 Fast Forward button 10 Back button 11 Press to go to the home page 12 Options Button (function depends on app) 6 7 10 D-Link DSM-312 User Manual 2 5 8 9 12 11 40 - D-Link DSM-312 | Manual - Page 45
• 480i on standard A/V (composite) and 2 channel stereo audio Network • Built-in 802.11n wireless (2.4GHz) (Wi-Fi) • Ethernet 10/100 Port Network Protocols • IPv4, ARP, UDP, ICMP • DHCP Client • DNS Client • HTTP Remote Device Support • MovieNite™ Plus remote app available for iPhone® and Android - D-Link DSM-312 | Manual - Page 46
Link at an Authorized D-Link Service Office. The replacement Link upon return to D-Link of the defective Hardware. All Hardware or part thereof that is replaced by D-Link, or for which the purchase price is refunded, shall become the property of D-Link upon replacement or refund. D-Link DSM-312 User Manual - D-Link DSM-312 | Manual - Page 47
considered defective, the customer must obtain a Return Material Authorization ("RMA") number by completing the RMA form. Enter the assigned Case ID Number at https://rma.dlink.com/ (USA only) or https://rma.dlink.ca (Canada only). D-Link DSM-312 User Manual 43 - D-Link DSM-312 | Manual - Page 48
or services provided by anyone other than D-Link; and Products that have been purchased from inventory clearance or liquidation sales or other sales in which D-Link, the sellers, or the liquidators expressly disclaim their warranty obligation pertaining to the product. D-Link DSM-312 User Manual - D-Link DSM-312 | Manual - Page 49
that you use only an Authorized D-Link Service Office. Improper or incorrectly performed maintenance or Link is a registered trademark of D-Link Corporation/D-Link Systems, Inc. Other trademarks or registered trademarks are the property of their respective owners. D-Link DSM-312 User Manual - D-Link DSM-312 | Manual - Page 50
radiate radio frequency energy and, if not installed and used in accordance with the instructions, may cause harmful interference to radio communication. However, there is no guarantee that ~ 5.25GHz frequency range, then it is restricted in indoor environment only. D-Link DSM-312 User Manual 46 - D-Link DSM-312 | Manual - Page 51
channels and/or operational frequency bands are country dependent and are firmware programmed at the factory to match the intended destination. The firmware setting is not accessible by the end user of Industry Canada. The required antenna impedance is 50 ohms. D-Link DSM-312 User Manual 47 - D-Link DSM-312 | Manual - Page 52
Appendix C - Registration Registration Product registration is entirely voluntary and failure to complete or return this form will not diminish your warranty rights. Version 1.0 June 14, 2012 D-Link DSM-312 User Manual 48
-
 1
1 -
 2
2 -
 3
3 -
 4
4 -
 5
5 -
 6
6 -
 7
7 -
8
-
9
-
10
-
11
-
12
-
13
-
14
-
15
-
16
-
17
-
18
-
19
-
20
-
21
-
22
-
23
-
24
-
25
-
26
-
27
-
28
-
29
-
30
-
31
-
32
-
33
-
34
-
35
-
36
-
37
-
38
-
39
-
40
-
41
-
42
-
43
-
44
-
45
-
46
-
47
-
48
-
49
-
50
-
51
-
52
 |
 |
