D-Link DWA-121 Product Manual
D-Link DWA-121 Manual
 |
View all D-Link DWA-121 manuals
Add to My Manuals
Save this manual to your list of manuals |
D-Link DWA-121 manual content summary:
- D-Link DWA-121 | Product Manual - Page 1
- D-Link DWA-121 | Product Manual - Page 2
® 7 Troubleshooting 48 Wireless Basics 50 Wireless Modes 54 Networking Basics 55 Check your IP address 55 Windows® XP/2000 Users 55 Windows 7/Vista® Users 55 Statically Assign an IP address 56 Windows® XP/2000 Users 56 Windows 7/Vista® Users 57 Technical Specifications 58 D-Link DWA-121 - D-Link DWA-121 | Product Manual - Page 3
Section 1 - Product Overview PProacdkuacgteOCvoentrevnietsw D-Link DWA-121 Wireless N 150 Pico USB Adapter Manual and Software on CD Quick Installation Guide System Requirements • A computer or laptop with an available USB 2.0 port • Windows® 7, Vista®, XP (Service Pack 2) • CD-ROM Drive • - D-Link DWA-121 | Product Manual - Page 4
. The D-Link Wireless Manager is included with this product to keep track of all your most frequently accessed networks. Compact in size, robust in speed the DWA-121 Wireless N 150 Pico USB Adapter is great for travel and a convenient solution for providing high performance wireless connectivity to - D-Link DWA-121 | Product Manual - Page 5
. • Position the DWA-121 almost anywhere in your workspace to achieve the best reception possible • Supports Infrastructure networks via an access point • User-friendly configuration and diagnostic utilities * Using a USB 1.1 port will adversely affect throughput. D-Link DWA-121 User Manual 5 - D-Link DWA-121 | Product Manual - Page 6
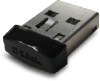
Section 1 - Product Overview Hardware Overview 1 1 USB Connector Used to connect the DWA-121 to your computer. D-Link DWA-121 User Manual 6 - D-Link DWA-121 | Product Manual - Page 7
all adapters. To remove any old software: Windows 7 users: Click Start > Control Panel > Uninstall Programs. Windows Vista/XP users: Click Start > Control Panel > Add or Remove Programs. Windows 2000 users: Click Start > Settings > Control Panel > Add or Remove Programs. D-Link DWA-121 User Manual - D-Link DWA-121 | Product Manual - Page 8
Ethernet adapters). From the desktop, right-click on the My Computer icon and select Manage. Then, click Device Manager. Scroll down the list and click the + sign to the left of Network Adapters. Right-click the adapter you would like to disable and select Disable. D-Link DWA-121 User Manual 8 - D-Link DWA-121 | Product Manual - Page 9
Section 2 - Installation Click Yes to disable the adapter. The adapter is now disabled. When disabled, a red X will be displayed. Disabling the adapter will not remove the drivers. If you would like to use the adapter, simply right-click it and select Enable. D-Link DWA-121 User Manual 9 - D-Link DWA-121 | Product Manual - Page 10
ceiling fans, lights, and home security systems), your wireless connection may degrade dramatically or drop completely. Make sure your 2.4GHz phone base is as far away from your wireless devices as possible. The base transmits a signal even if the phone in not in use. D-Link DWA-121 User Manual 10 - D-Link DWA-121 | Product Manual - Page 11
install the DWA-121 Wireless N 150 Pico USB Adapter into your computer before installing the driver software from the D-Link CD. Turn on the computer and Insert the D-Link DWA-121 Driver CD in your CD-ROM drive). When the autorun screen appears, click Install Drivers. D-Link DWA-121 User Manual 11 - D-Link DWA-121 | Product Manual - Page 12
Section 2 - Installation Please select your language from the list and click Next to continue. The InstallShield Wizard window will appear. D-Link DWA-121 User Manual 12 - D-Link DWA-121 | Product Manual - Page 13
the new folder or an existing folder that you would like the installation Wizard to add program icons to and then click Next. Insert the adapter into an available USB port on your computer. If the Found New Hardware Wizard appears, click Cancel. D-Link DWA-121 User Manual 13 - D-Link DWA-121 | Product Manual - Page 14
Section 2 - Installation Please wait while the installation wizard configures your new software installation. To manually connect to your wireless network, select Manually connect to a wireless network and then click Next. D-Link DWA-121 User Manual 14 - D-Link DWA-121 | Product Manual - Page 15
network, select Manually connect to a wireless network and then click Next. Enter the network name (SSID) manually. If you enter the SSID incorrectly, you will be directed to the site survey page. Click Scan to display the site survey page or click Next to continue. D-Link DWA-121 User Manual 15 - D-Link DWA-121 | Product Manual - Page 16
Section 2 - Installation Click the Scan button to display a list of wireless networks (site survey). Click on the network name (SSID) and click Next. Click Finish to continue. If you are prompted to reboot your computer, select Yes, I want to restart my computer now. D-Link DWA-121 User Manual 16 - D-Link DWA-121 | Product Manual - Page 17
point or wireless router nearby during setup. For more information on WPS, visit the Wi-Fi Alliance website at www.wi-fi.org. To begin the WPS setup, select the option the Use the WiFi Protected Setup (WPS) wizard for simplified Wireless connection and click Next. D-Link DWA-121 User Manual 17 - D-Link DWA-121 | Product Manual - Page 18
Section 2 - Installation Press the WPS button located on the right side of the Router/ Access point until it is lit and click on the virtual Connect Now button. Please wait while the Router/ Access point establishes connection. D-Link DWA-121 User Manual 18 - D-Link DWA-121 | Product Manual - Page 19
2 - Installation When this screen appears, you have successfully established connectivity. Click Finish to complete your setup. Press the WPS button located on the right side of the Router/Access point until it is lit and click on the virtual Connect Now button. D-Link DWA-121 User Manual 19 - D-Link DWA-121 | Product Manual - Page 20
to configure your new D-Link wireless adapter using the D-Link Utility as well as the Windows® XP Zero Configuration Utility and Vista WLAN Autoconfiguration. D-Link Wireless Connection Manager The D-Link DWA-121 uses the Wireless Connection Manager as the management software. The manager provides - D-Link DWA-121 | Product Manual - Page 21
up window will appear. Enter the security information to connect (refer to the Wireless Security section for more information). Activate Button: Select a wireless network profile from the drop-down menu and click Activate to connect. Allow up to 30 seconds to connect. D-Link DWA-121 User Manual 21 - D-Link DWA-121 | Product Manual - Page 22
by. Write down the number on the screen. Enter this number in your access point or wireless router. Please refer to the manufacture's manual for instructions. Once you click Next, you will have two minutes to enter this number in your access point or wireless router. D-Link DWA-121 User Manual 22 - D-Link DWA-121 | Product Manual - Page 23
Section 3 - Configuration The adapter will try to establish connectivity to your access point or wireless router. When this screen appears, you have successfully established connectivity. Click Finish to complete your setup. D-Link DWA-121 User Manual 23 - D-Link DWA-121 | Product Manual - Page 24
Section 3 - Configuration Press the WPS button located on the right side of the Router/Access point until it is lit and click on the virtual Connect Now button. D-Link DWA-121 User Manual 24 - D-Link DWA-121 | Product Manual - Page 25
to use a profile. Allow up to 30 seconds to connect to the wireless network. Profile Details: The Profile Details section will display information about the wireless network such as the network name (SSID), network type (Infrastructure), and if the network is secured. D-Link DWA-121 User Manual 25 - D-Link DWA-121 | Product Manual - Page 26
are connecting to a wireless router or access point, select Infrastructure. (Ad-hoc mode is not supported) Security Type: Select the type of security used. Please refer to the Wireless Security section for more information. OK Button: Click OK to save your settings. D-Link DWA-121 User Manual 26 - D-Link DWA-121 | Product Manual - Page 27
profile by selecting the profile and clicking the Modify button from the My Wireless Networks page. Profile Name: Enter a name for your profile (e.g. Home, Please refer to the Wireless Security section for more information. OK Button: Click OK to save your settings. D-Link DWA-121 User Manual 27 - D-Link DWA-121 | Product Manual - Page 28
Section 3 - Configuration Support If you need help, click the Support button. A panel will appear to the right of the utility which will display information about the utility. D-Link DWA-121 User Manual 28 - D-Link DWA-121 | Product Manual - Page 29
Section 3 - Configuration About The About screen gives you information about the Driver and Utility Versions of the DWA-121. D-Link DWA-121 User Manual 29 - D-Link DWA-121 | Product Manual - Page 30
area. Click on a network (displayed using the SSID) and click the Connect button. If you get a good signal but cannot access the Internet, check you TCP/IP settings for your wireless adapter. Refer to the Networking Basics section in this manual for more information. D-Link DWA-121 User Manual 30 - D-Link DWA-121 | Product Manual - Page 31
area. Click on a network (displayed using the SSID) and click the Connect button. If you get a good signal but cannot access the Internet, check you TCP/IP settings for your wireless adapter. Refer to the Networking Basics section in this manual for more information. D-Link DWA-121 User Manual 31 - D-Link DWA-121 | Product Manual - Page 32
XP Windows XP users may use the built-in wireless utility (Zero Configuration Utility). The following instructions are for Service Pack 2 users. If you are using another company's utility or Windows 2000, please refer to the user manual of your wireless adapter for help with connecting to a wireless - D-Link DWA-121 | Product Manual - Page 33
on your wireless router or access point. WPA/WPA2 incorporates user authentication through the Extensible Authentication Protocol (EAP). EAP is built on a more secure public key encryption system to ensure that only authorized network users can access the network. D-Link DWA-121 User Manual 33 - D-Link DWA-121 | Product Manual - Page 34
the Show text in the password field box to see the passphrase. Unchecking it will hide it. 4. Click OK to connect to the network. Allow up to 30 seconds to connect. If you would like to create a new network and enter the WPA-PSK settings, refer to the next page. D-Link DWA-121 User Manual 34 - D-Link DWA-121 | Product Manual - Page 35
profile and click Modify. 2. Select WPA/WPA2-Personal under Set Security Option. 3. Select TKIP or AES. 4. Enter the passphrase exactly as it is on your wireless router or access point. 5. Click OK to connect to the network. Allow up to 30 seconds to connect. D-Link DWA-121 User Manual 35 - D-Link DWA-121 | Product Manual - Page 36
wireless adapter. If you are joining an existing network, you will need to know the security key or passphrase being used. 1. Click on the wireless icon in your system tray (lower-right corner). 2. The utility will display any available wireless networks in your area. D-Link DWA-121 User Manual - D-Link DWA-121 | Product Manual - Page 37
you get a good signal but cannot access the Internet, check your TCP/IP settings for your wireless adapter. Refer to the Networking Basics section in this manual for more information. 4. The following window appears while your computer tries to connect to the router. D-Link DWA-121 User Manual 37 - D-Link DWA-121 | Product Manual - Page 38
also connect by pushing the WPS button on the router. It may take 20-30 seconds to connect to the wireless network. If the connection fails, please verify that the security settings are correct. The key or passphrase must be exactly the same as on the wireless router. D-Link DWA-121 User Manual 38 - D-Link DWA-121 | Product Manual - Page 39
used. 1. Open the Windows Vista® Wireless Utility by right-clicking on the wireless computer icon in your system tray (lower right corner of screen). Select Connect to a network. 2. Highlight the wireless network (SSID) you would like to connect to and click Connect. D-Link DWA-121 User Manual 39 - D-Link DWA-121 | Product Manual - Page 40
passphrase that is on your router and click Connect. It may take 20-30 seconds to connect to the wireless network. If the connection fails, please verify that the security settings are correct. The key or passphrase must be exactly the same as on the wireless router. D-Link DWA-121 User Manual 40 - D-Link DWA-121 | Product Manual - Page 41
Open the Windows XP Wireless Utility by right-clicking on the wireless computer icon in your system tray (lower-right corner of screen). Select View Available Wireless Networks. 2. Highlight the wireless network (SSID) you would like to connect to and click Connect. D-Link DWA-121 User Manual 41 - D-Link DWA-121 | Product Manual - Page 42
WPA-PSK passphrase and click Connect. It may take 20-30 seconds to connect to the wireless network. If the connection fails, please verify that the WPA-PSK settings are correct. The WPA-PSK passphrase must be exactly the same as on the wireless router or access point. D-Link DWA-121 User Manual 42 - D-Link DWA-121 | Product Manual - Page 43
familiar with using a RADIUS server and setting up certificates. 1. Open the Wireless Connection Manager by double-clicking on the D-Link icon on your desktop. Click on New to create a new profile or (es) of your RADIUS servers. 8. Click OK to save your settings. D-Link DWA-121 User Manual 43 - D-Link DWA-121 | Product Manual - Page 44
illustrated in Windows® XP. If you have a different operating system, the screenshots on your computer will look similar to the following examples.) 1. How do I know if my adapter is installed properly? Go to Start > My Computer > Properties. Select the Hardware Tab. D-Link DWA-121 User Manual 44 - D-Link DWA-121 | Product Manual - Page 45
121 USB Adapter. Select Properties to check that the drivers are installed properly. Look under Device Status to check that the device is working properly. Click OK to continue. D-Link DWA-121 Wireless N 150 Pico USB Adapter D-Link DWA-121 Wireless N 150 Pico USB Adapter D-Link DWA-121 User Manual - D-Link DWA-121 | Product Manual - Page 46
Section 5 - Troubleshooting 2. The computer does not recognize the DWA-121 Wireless N 150 Pico USB Adapter. Make sure that the DWA-121 Wireless USB Adapter is properly seated in the computer's USB port. If Windows does not detect the hardware upon insertion of the adapter, try a different port. Also - D-Link DWA-121 | Product Manual - Page 47
AP (Infrastructure) when connecting to an access point. Double-click on the WLAN icon in the taskbar > click on Configuration to change the settings for the wireless adapter. If Security is enabled, make sure that the correct encryption keys are entered on both the DWA-121 and the access point - D-Link DWA-121 | Product Manual - Page 48
Section 5 - Troubleshooting Windows® 7 Troubleshooting Go to Start > Computer > Properties. Select the Device Manager D-Link DWA-121 User Manual 48 - D-Link DWA-121 | Product Manual - Page 49
- Troubleshooting Click the + sign next to Network Adapters. Right-click on D-Link DWA-121 Wireless N 150 Pico USB Adapter. Select Properties to check that the drivers are installed properly. Look under Device Status to check that the device is working properly. Click OK to continue. D-Link DWA-121 - D-Link DWA-121 | Product Manual - Page 50
Ethernet adapter cards. Under many circumstances, it may be desirable for mobile network devices to link to a conventional Ethernet LAN in order to use servers, printers or an Internet connection supplied through the wired LAN. A Wireless Router is a device used to provide this link. D-Link DWA-121 - D-Link DWA-121 | Product Manual - Page 51
WLAN the speed and wireless operation range are both less than WLAN, but in return it doesn't use nearly as much power which makes it ideal for personal devices, such as mobile phones, PDAs, headphones, laptops, speakers, and other devices that operate on batteries. D-Link DWA-121 User Manual 51 - D-Link DWA-121 | Product Manual - Page 52
almost everyone is using it, whether it's for home, office, business, D-Link has a wireless solution for it. Home • Gives everyone at home broadband access • Surf the • Share Internet connection and printer with multiple computers • No need to dedicate office space D-Link DWA-121 User Manual 52 - D-Link DWA-121 | Product Manual - Page 53
operate on same frequency. Security Don't let your next-door neighbors or intruders connect to your wireless network. Secure your wireless network by turning on the WPA security feature on the router. Refer to product manual for detail information on how to set it up. D-Link DWA-121 User Manual 53 - D-Link DWA-121 | Product Manual - Page 54
. All the wireless devices, or clients, will connect to the wireless router or access point. An Ad-Hoc* network contains only clients, such as laptops with wireless USB Adapters. All the adapters must be in Ad-Hoc mode to communicate. * Not supported with the DWA-121. D-Link DWA-121 User Manual 54 - D-Link DWA-121 | Product Manual - Page 55
the IP address, subnet mask, and default gateway of your adapter. If the address is 0.0.0.0, check your adapter installation, security settings, and the settings on your router. Some firewall software programs may block a DHCP request on newly installed adapters. D-Link DWA-121 User Manual 55 - D-Link DWA-121 | Product Manual - Page 56
Windows XP - Click on Start > Control Panel. Make sure you are in Classic View. Double-click on the Network Connections icon. Windows 2000 - From the desktop, right-click My Network Places > Properties. • Right-click on the Local Area Connection which represents your D-Link wireless network adapter - D-Link DWA-121 | Product Manual - Page 57
Windows Vista, click on Manage network connections along the left panel in the window. For Windows 7, click on Change adapter settings. • Right-click on the Wireless Network Connection which represents your D-Link wireless network adapter OK to save your settings. D-Link DWA-121 User Manual 57 - D-Link DWA-121 | Product Manual - Page 58
802.11n • IEEE 802.11g Bus Type • USB 2.0 (1.1 compatible) Security • WPA/WPA2 - at HT 40 Operating Voltage • 5 VDC +/- 10% Operating Temperature • 0 to 40 ºC (32 to 104 ˚F) Operating Humidity • 10% to 90% maximum (non-condensing) Dimensions • wireless signal range. D-Link DWA-121 User Manual 58 - D-Link DWA-121 | Product Manual - Page 59
support, please have the following ready: • Model number of the product (e.g. DWA-121) • Hardware Revision (located on the label on the adapter (e.g. rev A1)) • Serial Number (s/n number located on the label on the adapter). You can find software updates and user documentation on the D-Link - D-Link DWA-121 | Product Manual - Page 60
for the defective Hardware will be refunded by D-Link upon return to D-Link of the defective Hardware. All Hardware or part thereof that is replaced by D-Link, or for which the purchase price is refunded, shall become the property of D-Link upon replacement or refund. D-Link DWA-121 User Manual 60 - D-Link DWA-121 | Product Manual - Page 61
contemplated in its documentation. D-Link further warrants that, during the Software Warranty Period, the magnetic media on which D-Link delivers the Software will be free of physical defects. The and entering the assigned Case ID Number at https:// rma.dlink.com/. D-Link DWA-121 User Manual 61 - D-Link DWA-121 | Product Manual - Page 62
software, firmware or other products or services provided by anyone other than D-Link; and Products that have been purchased from inventory clearance or liquidation sales or other sales in which D-Link , FITNESS FOR A PARTICULAR PURPOSE AND NONINFRINGEMENT. D-Link DWA-121 User Manual 62 - D-Link DWA-121 | Product Manual - Page 63
from D-Link Corporation/D-Link Systems, Inc., as stipulated by the United States Copyright Act of 1976 and any amendments thereto. Contents are subject to change without prior notice. Copyright 2008-2010 by D-Link Corporation/D-Link Systems, Inc. All rights reserved. D-Link DWA-121 User Manual 63 - D-Link DWA-121 | Product Manual - Page 64
desktop or laptop computers with side mounted USB ports which can provide 2 cm separation distance Connect the equipment into an outlet on a circuit different from that to which the receiver is connected the specific operating instructions for satisfying RF Link office. D-Link DWA-121 User Manual 64 - D-Link DWA-121 | Product Manual - Page 65
forth for an uncontrolled environment. End users must follow the specific operating instructions for satisfying RF exposure compliance. This equipment should be installed and operated with les interférences pouvant perturber le bon fonctionnement de ce périphérique. D-Link DWA-121 User Manual 65 - D-Link DWA-121 | Product Manual - Page 66
Appendix F - Registration Registration Product registration is entirely voluntary and failure to complete or return this form will not diminish your warranty rights. Version 1.0 October 5, 2010 D-Link DWA-121 User Manual 66
-
 1
1 -
 2
2 -
 3
3 -
 4
4 -
 5
5 -
 6
6 -
 7
7 -
8
-
9
-
10
-
11
-
12
-
13
-
14
-
15
-
16
-
17
-
18
-
19
-
20
-
21
-
22
-
23
-
24
-
25
-
26
-
27
-
28
-
29
-
30
-
31
-
32
-
33
-
34
-
35
-
36
-
37
-
38
-
39
-
40
-
41
-
42
-
43
-
44
-
45
-
46
-
47
-
48
-
49
-
50
-
51
-
52
-
53
-
54
-
55
-
56
-
57
-
58
-
59
-
60
-
61
-
62
-
63
-
64
-
65
-
66
 |
 |
