D-Link DWA-556 Product Manual
D-Link DWA-556 Manual
 |
UPC - 790069300325
View all D-Link DWA-556 manuals
Add to My Manuals
Save this manual to your list of manuals |
D-Link DWA-556 manual content summary:
- D-Link DWA-556 | Product Manual - Page 1
- D-Link DWA-556 | Product Manual - Page 2
(PBC 14 Manual Connect 16 Configuration 18 D-Link Wireless Connection Manager 18 Wireless Networks 19 My Wireless Networks 20 Support 23 About 24 Connect to a Wireless Network 25 Using Windows® 7 25 Using Windows Vista 26 Using Windows® XP 27 D-Link DWA-556 User Manual Wireless Security - D-Link DWA-556 | Product Manual - Page 3
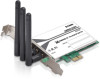
DWA-556 Xtreme N® Desktop PCI Express Adapter Three Antennas Low Profile Bracket CD with drivers and software If any of the above items are missing, please contact your reseller. System Requirements • A desktop computer with an available 64-bit PCI Express slot • Windows® 7, Vista®, XP (Service - D-Link DWA-556 | Product Manual - Page 4
- Product Overview Introduction The D-Link Xtreme N® Desktop PCI Express Adapter (DWA-556) is an 802.11n client device that delivers unrivaled wireless performance for your desktop computer. With the DWA-556, you can add or upgrade your Desktop PC's wireless connectivity without having to purchase - D-Link DWA-556 | Product Manual - Page 5
* - Enable wireless connectivity on your Desktop PC computer with the DWA-556.With the performance of D-Link's Xtreme N® line of wireless products, the DWA-556 delivers an unsurpassed wireless experience. Perform multiple network tasks at once with the speed provided by this Wireless Adapter - D-Link DWA-556 | Product Manual - Page 6
Section 1 - Product Overview Hardware Overview LEDs 1 1 WLAN LED A solid light indicates that wireless is ready. This LED blinks during wireless data transmission. D-Link DWA-556 User Manual 6 - D-Link DWA-556 | Product Manual - Page 7
all adapters. To remove any old software: Windows 7 users: Click Start > Control Panel > Uninstall Programs. Windows Vista/XP users: Click Start > Control Panel > Add or Remove Programs. Windows 2000 users: Click Start > Settings > Control Panel > Add or Remove Programs. D-Link DWA-556 User Manual - D-Link DWA-556 | Product Manual - Page 8
the desktop, right-click on the My Computer icon and select Properties. Click the Hardware tab and then click Device Manager. Scroll down the list and click the + sign to the left of Network Adapters. Right-click the adapter you would like to disable and select Disable. D-Link DWA-556 User Manual - D-Link DWA-556 | Product Manual - Page 9
Section 2 - Installation Click Yes to disable the adapter. The adapter is now disabled. When disabled, a red X will be displayed. Disabling the adapter will not remove the drivers. If you would like to use the adapter, simply right-click it and select Enable. D-Link DWA-556 User Manual 9 - D-Link DWA-556 | Product Manual - Page 10
ceiling fans, lights, and home security systems), your wireless connection may degrade dramatically or drop completely. Make sure your 2.4GHz phone base is as far away from your wireless devices as possible. The base transmits a signal even if the phone in not in use. D-Link DWA-556 User Manual 10 - D-Link DWA-556 | Product Manual - Page 11
install the DWA-556 Desktop PCI Express Adapter into your computer before installing the driver software from the D-Link CD. When the "Add New Hardware" wizard appears, click Cancel. Turn on the computer and Insert the D-Link DWA-556 Driver CD in the CD-ROM drive. The step-by-step instructions that - D-Link DWA-556 | Product Manual - Page 12
Section 2 - Installation The InstallShield Wizard window will appear. Click Next to continue. By default setup will install to the default location: C:\Program Files\D-Link\DWA-556, where C: represents the drive letter of your hard drive. To install to a different location click Browse and specify - D-Link DWA-556 | Product Manual - Page 13
may take 1-2 minutes. The Wireless Connection Wizard will now appear. If you want to manually connect to a wireless network, refer to page 14. The following instructions will connect you to a wireless network using Wi-Fi® Protected Setup (WPS). Click Next to continue. D-Link DWA-556 User Manual 13 - D-Link DWA-556 | Product Manual - Page 14
virtual button as shown in the screenshot. Press the WPS button on your access point or wireless router within 2 minutes to establish connectivity. When this screen appears, you have successfully connected to your wireless network. Click Finish to complete your setup. D-Link DWA-556 User Manual 14 - D-Link DWA-556 | Product Manual - Page 15
Section 2 - Installation Click Finish to complete your setup. D-Link DWA-556 User Manual 15 - D-Link DWA-556 | Product Manual - Page 16
select Manually connect to a wireless network and then click Next. Enter the network name (SSID) manually. If you enter the SSID incorrectly, you will automatically be brought to the site survey page. Click Scan to display the site survey page. Click Next to continue. D-Link DWA-556 User Manual 16 - D-Link DWA-556 | Product Manual - Page 17
display a list of wireless networks (site survey). Click on the network name (SSID) and click Next. Please enter the encryption key and click Next. Click Finish to continue. If you are prompted to reboot your computer, select Yes, I want to restart my computer now. D-Link DWA-556 User Manual 17 - D-Link DWA-556 | Product Manual - Page 18
wireless adapter. Clicking on the Wireless Connection Manager icon on the desktop will start the Configuration. If you are using Windows® 7, Vista®, or XP, please skip to pages 25, 26 or 27 respectively. Double-click the Wireless Connection Manager icon on your desktop. D-Link DWA-556 User Manual - D-Link DWA-556 | Product Manual - Page 19
up window will appear. Enter the security information to connect (refer to the Wireless Security section for more information). Activate Button: Select a wireless network profile from the drop-down menu and click Activate to connect. Allow up to 30 seconds to connect. D-Link DWA-556 User Manual 19 - D-Link DWA-556 | Product Manual - Page 20
profile. Allow up to 30 seconds to connect to the wireless network. Profile Details: The Profile Details section will display information about the wireless network such as the network name (SSID), network type (Infrastructure or AdHoc), and if the network is secured. D-Link DWA-556 User Manual 20 - D-Link DWA-556 | Product Manual - Page 21
, select Infrastructure. If you are connecting to another wireless client such as an adapter, select Ad-Hoc. Set Security: Select the type of security used. Please refer to the Wireless Security section for more information. OK Button: Click OK to save your settings. D-Link DWA-556 User Manual 21 - D-Link DWA-556 | Product Manual - Page 22
Home, Office, Coffee Shop). SSID: Displays the SSID of the network. Network Type: Displays the network type. Set Security: Select the type of security used. Please refer to the Wireless Security section for more information. OK Button: Click OK to save your settings. D-Link DWA-556 User Manual 22 - D-Link DWA-556 | Product Manual - Page 23
Section 3 - Configuration Support If you need help, click the Support button. A panel will appear to the right of the utility which will display information about the utility. D-Link DWA-556 User Manual 23 - D-Link DWA-556 | Product Manual - Page 24
Section 3 - Configuration About The About screen gives you information about the Firmware and Utility Versions of the DWA-556. D-Link DWA-556 User Manual 24 - D-Link DWA-556 | Product Manual - Page 25
area. Click on a network (displayed using the SSID) and click the Connect button. If you get a good signal but cannot access the Internet, check your TCP/IP settings for your wireless adapter. Refer to the Networking Basics section in this manual for more information. D-Link DWA-556 User Manual 25 - D-Link DWA-556 | Product Manual - Page 26
area. Click on a network (displayed using the SSID) and click the Connect button. If you get a good signal but cannot access the Internet, check the TCP/IP settings for your wireless adapter. Refer to the Networking Basics section in this manual for more information. D-Link DWA-556 User Manual 26 - D-Link DWA-556 | Product Manual - Page 27
area. Click on a network (displayed using the SSID) and click the Connect button. If you get a good signal but cannot access the Internet, check the TCP/IP settings for your wireless adapter. Refer to the Networking Basics section in this manual for more information. D-Link DWA-556 User Manual 27 - D-Link DWA-556 | Product Manual - Page 28
wireless router or access point. WPA/WPA2-Enterprise incorporates user authentication through the Extensible Authentication Protocol (EAP). EAP is built on a more secure public key encryption system to ensure that only authorized network users can access the network. D-Link DWA-556 User Manual - D-Link DWA-556 | Product Manual - Page 29
Show text in the password field box to see the passphrase. Unchecking it will hide it. 4. Click OK to connect to the network. Allow up to 30 seconds to connect. If you would like to create a new network and enter the WPA/WPA2-Personal settings, refer to the next page. D-Link DWA-556 User Manual 29 - D-Link DWA-556 | Product Manual - Page 30
click Modify. 2. Select WPA/WPA2-Personal under Set Security Option. 3. Select TKIP or AES, or Auto. 4. Enter the passphrase exactly as it is on your wireless router or access point. 5. Click OK to connect to the network. Allow up to 30 seconds to connect. D-Link DWA-556 User Manual 30 - D-Link DWA-556 | Product Manual - Page 31
wireless adapter. If you are joining an existing network, you will need to know the security key or passphrase being used. 1. Click on the wireless icon in your system tray (lower-right corner). 2. The utility will display any available wireless networks in your area. D-Link DWA-556 User Manual - D-Link DWA-556 | Product Manual - Page 32
you get a good signal but cannot access the Internet, check your TCP/IP settings for your wireless adapter. Refer to the Networking Basics section in this manual for more information. 4. The following window appears while your computer tries to connect to the router. D-Link DWA-556 User Manual 32 - D-Link DWA-556 | Product Manual - Page 33
also connect by pushing the WPS button on the router. It may take 20-30 seconds to connect to the wireless network. If the connection fails, please verify that the security settings are correct. The key or passphrase must be exactly the same as on the wireless router. D-Link DWA-556 User Manual 33 - D-Link DWA-556 | Product Manual - Page 34
. 1. Open the Windows Vista® Wireless Utility by right-clicking on the wireless computer icon in your system tray (lower right corner of screen). Select Connect to a network. 2. Highlight the wireless network (SSID) you would like to connect to and click Connect. D-Link DWA-556 User Manual 34 - D-Link DWA-556 | Product Manual - Page 35
passphrase that is on your router and click Connect. It may take 20-30 seconds to connect to the wireless network. If the connection fails, please verify that the security settings are correct. The key or passphrase must be exactly the same as on the wireless router. D-Link DWA-556 User Manual 35 - D-Link DWA-556 | Product Manual - Page 36
Open the Windows® XP Wireless Utility by right-clicking on the wireless computer icon in your system tray (lower-right corner of screen). Select View Available Wireless Networks. 2. Highlight the wireless network (SSID) you would like to connect to and click Connect. D-Link DWA-556 User Manual 36 - D-Link DWA-556 | Product Manual - Page 37
click Connect. It may take 20-30 seconds to connect to the wireless network. If the connection fails, please verify that the WPA/WPA2-Personal settings are correct. The WPA/WPA2-Personal passphrase must be exactly the same as on the wireless router or access point. D-Link DWA-556 User Manual 37 - D-Link DWA-556 | Product Manual - Page 38
up certificates. 1. Open the Wireless Connection Manager by double-clicking on the D-Link icon on your desktop. Click on New to create on the network to request authentication from the RADIUS server in the network. All the devices on the network must use the settings. D-Link DWA-556 User Manual 38 - D-Link DWA-556 | Product Manual - Page 39
illustrated in Windows® XP. If you have a different operating system, the screenshots on your computer will look similar to the following examples.) 1. How do I know if my adapter is installed properly? Go to Start > My Computer > Properties. Select the Hardware Tab. D-Link DWA-556 User Manual 39 - D-Link DWA-556 | Product Manual - Page 40
Section 5 - Troubleshooting Click the + sign next to Network Adapters. Right-click on D-Link DWA-556 Desktop PCI Express Adapter. Select Properties to check that the drivers are installed properly. D-Link DWA-556 Wireless Desktop PCI Express Adapter Look under Device Status to check that the - D-Link DWA-556 | Product Manual - Page 41
Section 5 - Troubleshooting 2. I cannot connect to the access point or the wireless router. • Make sure that the SSID on the DWA-556 Desktop PCI Express Adapter is exactly the same as the SSID on the Access Point or wireless router. • Move the DWA-556 and Access Point or Wireless router into the - D-Link DWA-556 | Product Manual - Page 42
- Troubleshooting 5. The computer does not recognize the DWA-556 Wireless Adapter. • Make sure that the DWA-556 Wireless Adapter is properly seated in the computer's PCI Express slot. • If Windows does not detect the hardware upon insertion of the adapter, make sure to completely remove drivers that - D-Link DWA-556 | Product Manual - Page 43
the network. 7. How can I troubleshoot distance issues using the DWA-556? • Move the DWA-556 and Access Point or Wireless router into the same room and then test the wireless connection. • Change the channel of the Access Point. • Move devices within the line of sight. D-Link DWA-556 User Manual - D-Link DWA-556 | Product Manual - Page 44
Section 5 - Troubleshooting Windows® 7 Troubleshooting Go to Start > Computer > Properties. Select the Device Manager D-Link DWA-556 User Manual 44 - D-Link DWA-556 | Product Manual - Page 45
Troubleshooting Click the + sign next to Network Adapters. Right-click on D-Link DWA-556 Desktop PCI Express Adapter. Select Properties to check that the drivers are installed properly. Look under Device Status to check that the device is working properly. Click OK to continue. D-Link DWA-556 User - D-Link DWA-556 | Product Manual - Page 46
Ethernet adapter cards. Under many circumstances, it may be desirable for mobile network devices to link to a conventional Ethernet LAN in order to use servers, printers or an Internet connection supplied through the wired LAN. A Wireless Router is a device used to provide this link. D-Link DWA-556 - D-Link DWA-556 | Product Manual - Page 47
up to 30 miles to serve places like manufacturing plants, industrial locations, college and high school campuses, airports, golf courses, and many other outdoor venues. Wireless Personal Area Network (WPAN) D-Link DWA-556 User Manual 47 - D-Link DWA-556 | Product Manual - Page 48
speakers, and other devices that operate on batteries. Who uses wireless? Wireless technology as become so popular in recent years that almost everyone network from home • Share Internet connection and printer with multiple computers • No need to dedicate office space D-Link DWA-556 User Manual 48 - D-Link DWA-556 | Product Manual - Page 49
on same frequency. Security Don't let your next-door neighbors or intruders connect to your wireless network. Secure your wireless network by turning on the WPA or WEP security feature on the router. Refer to product manual for detail information on how to set it up. D-Link DWA-556 User Manual 49 - D-Link DWA-556 | Product Manual - Page 50
the IP address, subnet mask, and default gateway of your adapter. If the address is 0.0.0.0, check your adapter installation, security settings, and the settings on your router. Some firewall software programs may block a DHCP request on newly installed adapters. D-Link DWA-556 User Manual 50 - D-Link DWA-556 | Product Manual - Page 51
Network Connections icon. Windows® 2000 - From the desktop, right-click My Network Places > Properties. • Right-click on the Local Area Connection which represents your D-Link wireless network adapter (or other adapter) which will be connected OK to save your settings. D-Link DWA-556 User Manual 51 - D-Link DWA-556 | Product Manual - Page 52
network connections along the left panel in the window. For Windows 7, click on Change adapter settings. • Right-click on the Local Area Connection which represents your D-Link wireless network adapter which will be connected to your network OK to save your settings. D-Link DWA-556 User Manual 52 - D-Link DWA-556 | Product Manual - Page 53
throughput will vary. Network conditions and environmental factors, including volume of network traffic, building materials and construction, and network overhead, lower actual data throughput rate. Environmental factors will adversely affect wireless signal range. D-Link DWA-556 User Manual 53 - D-Link DWA-556 | Product Manual - Page 54
asked questions and answers to technical issues. For customers within the United States: Phone Support: (877) 453-5465 Internet Support: http://support.dlink.com For customers within Canada: Phone Support: (800) 361-5265 Internet Support: http://support.dlink.ca D-Link DWA-556 User Manual 54 - D-Link DWA-556 | Product Manual - Page 55
Link at an Authorized D-Link Service Office. The replacement Link upon return to D-Link of the defective Hardware. All Hardware or part thereof that is replaced by D-Link, or for which the purchase price is refunded, shall become the property of D-Link upon replacement or refund. D-Link DWA-556 User Manual - D-Link DWA-556 | Product Manual - Page 56
the product is not registered. • The customer must obtain a Case ID Number from D-Link Technical Support at 1-877-453-5465, who will attempt to assist the customer in resolving any suspected defects and entering the assigned Case ID Number at https:// rma.dlink.com/. D-Link DWA-556 User Manual 56 - D-Link DWA-556 | Product Manual - Page 57
a receipt, no warranty service will be done. The Number from D-Link Technical Support at 1-800-361 https://rma.dlink.ca/. • manuals or accessories in the shipping package. D-Link will only replace the defective portion of the product and will not ship back any accessories. D-Link DWA-556 User Manual - D-Link DWA-556 | Product Manual - Page 58
software, firmware or other products or services provided by anyone other than D-Link; and Products that have been purchased from inventory clearance or liquidation sales or other sales in which D-Link, PERFORMANCE OF THE PRODUCT IS WITH THE PURCHASER OF THE PRODUCT. D-Link DWA-556 User Manual 58 - D-Link DWA-556 | Product Manual - Page 59
. Copyright ©2008-2010 by D-Link Corporation/D-Link Systems, Inc. All rights reserved. CE Mark Warning: This is a Class B product. In a domestic environment, this product may cause radio interference, in which case the user may be required to take adequate measures. D-Link DWA-556 User Manual 59 - D-Link DWA-556 | Product Manual - Page 60
used in accordance with the instructions, may cause harmful interference firmware setting is not accessible by the end user. For detailed warranty information applicable to products purchased outside the United States, please contact the corresponding local D-Link office. D-Link DWA-556 User Manual - D-Link DWA-556 | Product Manual - Page 61
antenna having a maximum gain of 2 dB. Antenna having a higher gain is strictly prohibited per regulations of Industry Canada. The required antenna impedance is 50 ohms. D-Link DWA-556 User Manual 61 - D-Link DWA-556 | Product Manual - Page 62
Appendix F - Registration Registration Product registration is entirely voluntary and failure to complete or return this form will not diminish your warranty rights. Version 1.4 June 8, 2010 D-Link DWA-556 User Manual 62
-
 1
1 -
 2
2 -
 3
3 -
 4
4 -
 5
5 -
 6
6 -
 7
7 -
8
-
9
-
10
-
11
-
12
-
13
-
14
-
15
-
16
-
17
-
18
-
19
-
20
-
21
-
22
-
23
-
24
-
25
-
26
-
27
-
28
-
29
-
30
-
31
-
32
-
33
-
34
-
35
-
36
-
37
-
38
-
39
-
40
-
41
-
42
-
43
-
44
-
45
-
46
-
47
-
48
-
49
-
50
-
51
-
52
-
53
-
54
-
55
-
56
-
57
-
58
-
59
-
60
-
61
-
62
 |
 |
