D-Link DWL-P1012 Product Manual
D-Link DWL-P1012 - Power Injector - 185 Watt Manual
 |
UPC - 790069275548
View all D-Link DWL-P1012 manuals
Add to My Manuals
Save this manual to your list of manuals |
D-Link DWL-P1012 manual content summary:
- D-Link DWL-P1012 | Product Manual - Page 1
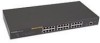
DWL-P1012 12-Port Web-Smart IEEE 802.3af Power over Ethernet Midspan Version 1.01 User's Guide - D-Link DWL-P1012 | Product Manual - Page 2
- D-Link DWL-P1012 | Product Manual - Page 3
the DWL-P1012 on a Desktop 4 Installing the DWL-P1012 on a Rack 5 Connecting Network Cables 6 Power on ...7 Identifying External Components 8 Front Panel Components 8 Rear Panel 9 LED Indicators 10 System LED 10 PoE Port Status LED 11 Management Port Status LED 11 Configuration 12 - D-Link DWL-P1012 | Product Manual - Page 4
15 Toolbar ...16 Configuring the DWL-P1012 17 Login ...17 Setup Menu 20 SNMP Setting 21 PoE Setting 25 Schedule 27 Port Group 29 SNTP 31 Device Status 32 System Setting 35 RTC Time 36 Trap Setting 38 Set Password 39 Backup Setting 39 Reset Setting 39 Logout 40 WARRANTY ...41 ii - D-Link DWL-P1012 | Product Manual - Page 5
of the smart functions of the Midspan through the web interface. Warranty information and FCC Declaration INTRODUCTION The DWL-P1012 Power over Ethernet Midspan injects power into data-carrying Ethernet cabling. The Midspan will add power to 12 ports respectively in a 10/100BASE-TX Ethernet - D-Link DWL-P1012 | Product Manual - Page 6
The DWL-P1012 features include: IEEE 802.3af Power over Ethernet compliant. Provides LED indicator for System and PoE status. Eliminates the need for AC outlets, local UPS and AC/DC adapters Web based Management for System and PoE power management. Supports SNMP protocol version 1 MIB support for - D-Link DWL-P1012 | Product Manual - Page 7
unpack its contents. The carton should contain the following items: ♦ One DWL-P1012 Web Smart PoE Midspan ♦ Four rubber feet with adhesive backing ♦ One AC power cord ♦ Mounting kit (two brackets and screws) ♦ CD-ROM (This User's Guide and Utility) If any item is found missing or damaged, please - D-Link DWL-P1012 | Product Manual - Page 8
Setup of the DWL-P1012 can be completed easily by following these steps: Install the Midspan on a sturdy, level surface that can support at least secured to the AC power port. Make sure that there is proper heat dissipation from and adequate ventilation around the Midspan. Leave at least 4 inches - D-Link DWL-P1012 | Product Manual - Page 9
Installing the DWL-P1012 on a Rack The DWL-P1012 can be mounted in a standard 19" rack. Use the following diagrams to guide you. Fasten the mounting brackets to the DWL-P1012 using the screws provided. With the brackets attached securely, you can mount the DWL-P1012 in a standard rack as shown on - D-Link DWL-P1012 | Product Manual - Page 10
series to an Ethernet switch/hub. The data outputs from the switch are connected to the Midspan. The Midspan delivers power over spare twisted pairs (pins 7/8 and pins 4/5) of the Category 5 cabling, without degrading the quality of data communications. The Management port may be connected directly - D-Link DWL-P1012 | Product Manual - Page 11
-through ports for all data pins (pins 1, 2, 3 and 6). Be certain to use Category 5 or higher cabling to ensure proper operation. This PoE Midspan is not compatible with Gigabit Ethernet, any Gigabit Ethernet Capable device will only link at 100Mbps Full Duplex when connected to the DWL-P1012. IEEE - D-Link DWL-P1012 | Product Manual - Page 12
that display the conditions of the DWL-P1012 and status of the network. A description of these LED indicators follows. Reset button: The Reset button is to reset all device settings back to factory defaults. Note: The Midspan supports PoE port priority management. When the available system - D-Link DWL-P1012 | Product Manual - Page 13
. The AC power connector is a standard three-pronged connector that supports the AC power cord. Plug in the female connector of the provided power cord into this socket, and the male side of the cord into a power outlet. The DWL-P1012 automatically adjusts its power setting to any supply voltage in - D-Link DWL-P1012 | Product Manual - Page 14
DWL-P1012 include Power, CPU, PoE status and Management port status. Refer to the appropriate section below for information on LED function and indication. System LED Power (PWR) On (green) : This LED will light green after the Midspan not provide power to any additional PoE PD inserted. Off : When - D-Link DWL-P1012 | Product Manual - Page 15
or device is unplugged from the PoE output port. Management Port Status LED Link/Act (green) On Blinking Off : When the Link/Act LED lights on, the respective port is successfully connected to an Ethernet network. : When the Link/Act LED is blinking, the port is transmitting or receiving data on - D-Link DWL-P1012 | Product Manual - Page 16
the DWL-P1012's PoE power management configuration. With the attached Web Management Utility, you can easily discover all DWLP1012 units on the network, assign them IP Addresses, change the administrative passwords and upgrade firmware. Installing the Web Management Utility Follow these instructions - D-Link DWL-P1012 | Product Manual - Page 17
Discovery List This is the list where you can discover all the Web management devices on the network. By pressing the "Discovery" button, you initiate the discovery process which will find any available Web Smart devices connected to the same LAN as the PC running the Utility and list them. Double - D-Link DWL-P1012 | Product Manual - Page 18
: Shows the Gateway set of the device. represent View Trap: The Trap function can receive and display the events that issue SNMP traps from the DWL-P1012 in the Monitor List. There is an indicator light on the "View Trap" button. When this indicator is green, there is no new trap message - D-Link DWL-P1012 | Product Manual - Page 19
you review and click on the event record. Add Item: To add a device to the Monitor List manually, enter the IP Address of the device that you want to monitor. Delete Item: To delete the device in the Monitor List. Note: In order to receive Trap information using the utility, the DWL-P1012 has - D-Link DWL-P1012 | Product Manual - Page 20
Change dialog when you need to change the password. Fill in the new and old passwords and press "Set" button to apply the password change immediately. Firmware Upgrade: If D-Link releases firmware to support new functions, the new firmware can be uploaded through here. Web Access: Double click - D-Link DWL-P1012 | Product Manual - Page 21
of the Monitor List in appointed filename and file path. Monitor Load: To manually load the setting file of the Monitor List. Exit: To exit the Web Management DWL-P1012 from the local LAN. This section indicates how to configure the Midspan to enable its smart functions including: SNMP Setting, PoE - D-Link DWL-P1012 | Product Manual - Page 22
IP address of the DWLP1012 is 192.168.0.1, so the manager PC should be set at 192.168.0.x (where x is a number between 2 and 254), and the default subnet mask is 255.255.255.0. Open a Java-enabled Web Browser, preferably Internet Explorer 6.0 or above. Enter the DWL-P1012 IP address http://192 - D-Link DWL-P1012 | Product Manual - Page 23
19 - D-Link DWL-P1012 | Product Manual - Page 24
the left side of the screen (see Below). Click on the setup item that you want to configure or monitor. There are eight options: SNMP, PoE, Schedule, Port Group, SNTP, Status, System, RTC Time, Trap, Password, Backup Settings and Reset Settings as shown in the Main Menu screen. 20 - D-Link DWL-P1012 | Product Manual - Page 25
defines both the format of the MIB specifications and the protocol used to access this information over the network. The DWL-P1012 supports SNMP version 1. In SNMP v.1, user authentication is accomplished using 'community strings', which function like passwords. The remote user SNMP application and - D-Link DWL-P1012 | Product Manual - Page 26
information are stored by the Midspan in the Management Information Base (MIB). The DWL-P1012 uses the standard MIBII Management Information any SNMP-based network management software. In addition, the DWL-P1012 also supports its own proprietary enterprise MIB as an extended Management Information - D-Link DWL-P1012 | Product Manual - Page 27
SNMP Community Group. Configure SNMP Trap: Trap authentication fail: When checked the Midspan will issue an SNMP Trap in the event of a failed login attempt. Add Trap: To create a recipient of SNMP traps generated by the DWL-P1012's SNMP agent, press "Add Trap" button. In the SNMP Trap Set window - D-Link DWL-P1012 | Product Manual - Page 28
a trap when booting up the system. Illegal Login: a trap when an incorrect password is use in a login attempt. The IP address of the source will be recorded. PoE Events: Monitoring the PoE ports status. PoE Power fail: a trap when the port's power source is fail. Power on/Power off: a trap when the - D-Link DWL-P1012 | Product Manual - Page 29
events. Press "Apply" to save changes. PoE Setting The PoE Setting screen shows the status of all PoE ports including PoE Enable, Power limit, Power current (Watt.), Power Voltage (V), Power current (mA.), Classification, Status, System budget power, Support total power, Remainder Power, The ratio - D-Link DWL-P1012 | Product Manual - Page 30
function. Power limit: This function allows one to manually set a port power current limitation to be given to the PD, to protect the DWL-P1012 and the connected device, the power limit function will disable the PoE function of the port when the power is over loaded. Select " - D-Link DWL-P1012 | Product Manual - Page 31
power is less than the PD requests, the Midspan will enforce PoE port priority management, the numerically lower port number will have a higher priority than the numerically higher port number, Port 1 > Port 2 > ... > Port 12. Schedule The DWL-P1012 is capable of enabling and disabling power to - D-Link DWL-P1012 | Product Manual - Page 32
applies to 'Time Setting' schedule profiles). Day/Time Grid: Select the hours during which the PoE port should be active during each day of the week respectively. The first checkbox in each row represents 12:00am to 12:59am, the second checkbox in each row represents 1:00am to 1:59am, all the way to - D-Link DWL-P1012 | Product Manual - Page 33
Group The advanced scheduling features of the DWL-P1012 rely on a port grouping mechanism that allows one to define groups of PoE ports. These groups are then assigned to a specific schedule profile which all members of that group adhere to. The default group cannot be modified or deleted and is - D-Link DWL-P1012 | Product Manual - Page 34
Click 'Delete Group' to remove an entire group. Select the check box next to the group to be deleted and click 'Apply' to remove. 30 - D-Link DWL-P1012 | Product Manual - Page 35
Time Protocol. When a valid DNS Server address is configured the DWL-P1012 can resolve DNS names for time servers prior to synchronization. an IPv4 address or Fully Qualified Domain Name of a time server with which the midspan will update. Click 'Apply' to save. To remove a time server from the - D-Link DWL-P1012 | Product Manual - Page 36
Status Click on the "Status" hyperlink to display the device status on this screen, it will show the System Status, SNMP Settings, PoE Status, Schedule Profiles, Port Grouping, SNTP Server and Daylight Savings Time info. This page will load upon a successful login to the WebUI. System Status SNMP - D-Link DWL-P1012 | Product Manual - Page 37
PoE Status Schedule Profiles Port Group SNTP Server 33 - D-Link DWL-P1012 | Product Manual - Page 38
SNTP Time Zone and DST Press "Refresh" when you need to renew the posted information. 34 - D-Link DWL-P1012 | Product Manual - Page 39
System Setting The System Setting includes the Web Server Port, System name, Location name, Login Timeout, IP Address, Subnet Mask, Gateway and DNS IP addresses. Through the Web Management Utility, you can easily recognize the - D-Link DWL-P1012 | Product Manual - Page 40
RTC Time The DWL-P1012 includes an integrated Real Time Clock to handle timekeeping duties in order for port scheduling to properly function. The time may be set using one of three methods: Manual Configuration, PC Time, and SNTP Synchronization. To manually configure the System Time select the year - D-Link DWL-P1012 | Product Manual - Page 41
an NTP server to retrieve the current time and date select 'SNTP Time' from the drop down menu. The DWL-P1012 will then contact the first SNTP server in the time server list in a top-down order to update the system time. The correct time should - D-Link DWL-P1012 | Product Manual - Page 42
the DWL-P1012 to monitor the selected Events through the Web Management Utility, configure the Trap IP Address of the manager where the trap should be sent. System Events: Monitoring the system's Status. Device Bootup: a trap when booting up the system. Illegal Login: a trap when a wrong password is - D-Link DWL-P1012 | Product Manual - Page 43
tool for the manager to secure the management interface of the DWL-P1012, use this function to change the password. If you forget the password, press the "Reset" button in the front panel of the DWL-P1012 for 10-15 Seconds. All current settings such as Port Settings, SNMP, etc. will be lost and the - D-Link DWL-P1012 | Product Manual - Page 44
Logout Clicking the logout Hyperlink will log you out of the web-based administrative interface. You will be redirected to the beginning log-in page. 40 - D-Link DWL-P1012 | Product Manual - Page 45
during the Warranty Period at no charge to the original owner or to refund at DLink's sole discretion. Such repair or replacement will be rendered by D-Link at an Authorized D-Link Service Office. The replacement Hardware need not be new or have an identical make, model or part. D-Link may in - D-Link DWL-P1012 | Product Manual - Page 46
during the Warranty Period, the magnetic media on which D-Link delivers the Software will be free of physical defects. D-Link's sole obligation shall be to replace the non-conforming Software (or defective media) with software that substantially conforms to D-Link's functional specifications for the - D-Link DWL-P1012 | Product Manual - Page 47
covered in the operating manual for the product, and normal maintenance; Damage that occurs in shipment, due to act of God, failures due to power surge, and cosmetic damage; Any hardware, software, firmware or other products or services provided by anyone other than D-Link; Products that have been - D-Link DWL-P1012 | Product Manual - Page 48
WARRANTY SERVICE) RESULTING FROM THE USE OF THE PRODUCT, RELATING TO WARRANTY SERVICE, OR ARISING OUT OF ANY BREACH OF THIS LIMITED WARRANTY, EVEN IF D-LINK D-LINK UNDER THIS WARRANTY IS LIMITED TO THE PURCHASE PRICE OF THE PRODUCT COVERED BY THE WARRANTY. THE FOREGOING EXPRESS WRITTEN WARRANTIES AND - D-Link DWL-P1012 | Product Manual - Page 49
foregoing limitations and exclusions may not apply. This limited warranty provides specific legal rights and the product owner may also have other rights which vary from state to state. Trademarks: D-Link is a registered trademark of D-Link Systems, Inc. Other trademarks or registered trademarks are - D-Link DWL-P1012 | Product Manual - Page 50
radio frequency energy and, if not installed and used in accordance with the instructions, may cause harmful interference to radio communication. However, there is no experienced radio/TV technician for help. For detailed warranty outside the United States, please contact corresponding local - D-Link DWL-P1012 | Product Manual - Page 51
the United States and within Canada for the duration of the warranty period on this product. U.S. and Canadian customers can contact D-Link technical support through our website, or by phone. Tech Support for customers within the United States: D-Link Technical Support over the Telephone: (877) 453
-
 1
1 -
 2
2 -
 3
3 -
 4
4 -
 5
5 -
 6
6 -
 7
7 -
8
-
9
-
10
-
11
-
12
-
13
-
14
-
15
-
16
-
17
-
18
-
19
-
20
-
21
-
22
-
23
-
24
-
25
-
26
-
27
-
28
-
29
-
30
-
31
-
32
-
33
-
34
-
35
-
36
-
37
-
38
-
39
-
40
-
41
-
42
-
43
-
44
-
45
-
46
-
47
-
48
-
49
-
50
-
51
 |
 |

DWL-P1012
12-Port Web-Smart IEEE 802.3af
Power over Ethernet Midspan
Version 1.01
User’s Guide