D-Link EBR-2310 Product Manual
D-Link EBR-2310 - EN Broadband Router Manual
 |
UPC - 790069288661
View all D-Link EBR-2310 manuals
Add to My Manuals
Save this manual to your list of manuals |
D-Link EBR-2310 manual content summary:
- D-Link EBR-2310 | Product Manual - Page 1
- D-Link EBR-2310 | Product Manual - Page 2
Firmware Upgrade 32 System Check 33 Device Information 34 Log 35 Stats 36 Support 37 Troubleshooting 38 Assigning a Static IP Address 42 Adding and Sharing Printers in Windows® XP ....... 45 Adding a local printer 45 Sharing a Network Printer 51 Sharing an LPR Printer 55 D-Link EBR-2310 - D-Link EBR-2310 | Product Manual - Page 3
Table of Contents Networking Basics 60 Check your IP address 60 Statically Assign an IP address 61 Technical Specifications 62 Contacting Technical Support 63 Warranty 64 Registration 66 D-Link EBR-2310 User Manual 3 - D-Link EBR-2310 | Product Manual - Page 4
PPraocdkuacgteOCvoenrtevnietsw • EBR-2310 Ethernet Broadband Router • Power Adapter • Ethernet Cable • Manual on CD System Requirements • Ethernet-based Cable or DSL Modem • Computers with Windows®, Macintosh®, or Linux-based operating systems with an installed Ethernet adapter • Internet - D-Link EBR-2310 | Product Manual - Page 5
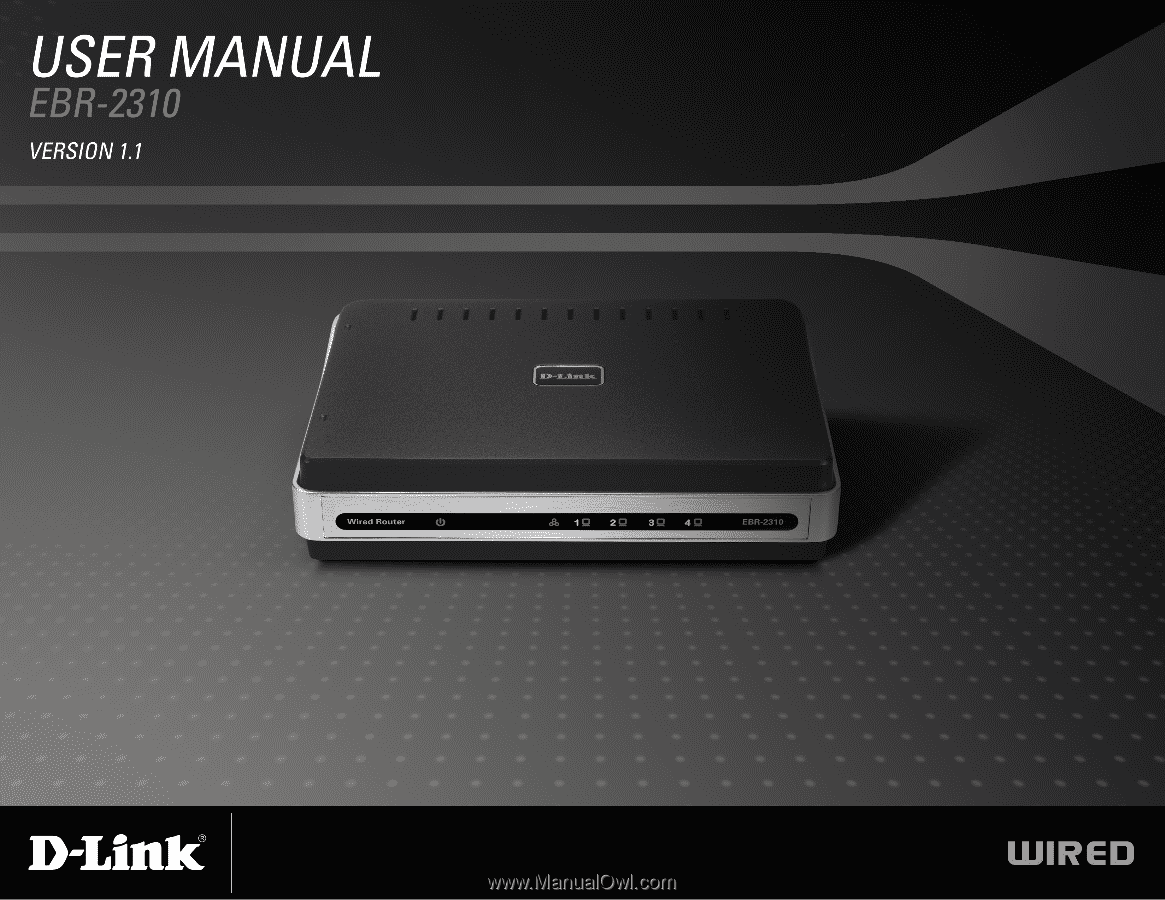
The D-Link Express EtherNetwork EBR-2310 is a 4-port Ethernet Broadband Router. The D-Link EBR-2310 enables users to quickly and easily share a high speed Internet connection. The D-Link EBR-2310 also incorporates many advanced features, traditionally found in more expensive routers. The EBR-2310 is - D-Link EBR-2310 | Product Manual - Page 6
- All of the networked computers can retrieve TCP/IP settings automatically from the EBR-2310. • Web-Based Management - EBR-2310 is configurable through any network computer's web browser using Netscape or Internet Explorer. • Port Forwarding Supported - Enables you to expose WWW, FTP and other - D-Link EBR-2310 | Product Manual - Page 7
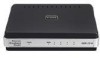
Front Panel WAN WAN status indicator will light Green when there is good physical WAN connection. Power Power indicator will light Green. LAN Link/Act. Link status indicators light Green. The LED flickers when the corresponding port is sending or receiving data. D-Link EBR-2310 User Manual 7 - D-Link EBR-2310 | Product Manual - Page 8
adapter to the power port and the other end into your power outlet. Reset Used to restore the EBR-2310 back to factory default settings. *All ports (both LAN & WAN) are Auto-MDIX. All ports auto-sense cable types to accommodate Straight-through or Cross-over cable. D-Link EBR-2310 User Manual 8 - D-Link EBR-2310 | Product Manual - Page 9
- Product Overview Technology Introduction Introduction to Broadband Router Technology A router is a device that forwards data packets from a source to a destination. Routers forward data packets using IP addresses and not a MAC address. A router will forward data from the Internet to a particular - D-Link EBR-2310 | Product Manual - Page 10
settings to factory defaults, please follow these steps: 1. Leave the device powered on, do not disconnect the power 2. Press the reset button and hold (use a paper-clip) 3. Keep the button pressed about 10 seconds 4. Release the button The EBR-2310 will then automatically reboot itself. D-Link EBR - D-Link EBR-2310 | Product Manual - Page 11
from the outlet, and keep your hands dry when you install the hardware. Network Settings To use the EBR-2310 correctly, you have to properly configure the network settings of your computers.The default IP address of the EBR-2310 is 192.168.0.1, and the default subnet mask is 255.255.255.0. These - D-Link EBR-2310 | Product Manual - Page 12
and press "Enter." The default IP address of the EBR-2310 is 192.168.0.1 For example: http://192.168.0.1 After the connection is established, the logon screen will pop up. To log in as an administrator, enter the username of "admin" and the password (there isn't a default password, leave it blank - D-Link EBR-2310 | Product Manual - Page 13
Section 3 - Configuration Setup Wizard You may run the setup wizard to quickly setup your router. Click Setup Wizard to launch the wizard. Click Launch Internet Connection Setup Wizard to begin. Click Next to continue. D-Link EBR-2310 User Manual 13 - D-Link EBR-2310 | Product Manual - Page 14
Section 3 - Configuration Create a new password and then click Next to continue. Select your time zone from the drop-down menu and then click Next to continue. Select the type of Internet connection you use and then click Next to continue. D-Link EBR-2310 User Manual 14 - D-Link EBR-2310 | Product Manual - Page 15
subnet mask, gateway, and DNS server addresses. Note: Make sure to remove your PPPoE software from your computer. The software is no longer needed and will not work through a router. If you selected PPTP, enter your PPTP username and password. Click Next to continue. D-Link EBR-2310 User Manual 15 - D-Link EBR-2310 | Product Manual - Page 16
. Click Connect to save your settings. Once the router is finished rebooting, click Continue. Please allow 1-2 minutes to connect. Close your browser window and reopen it to test your Internet connection. It may take a few tries to initially connect to the Internet. D-Link EBR-2310 User Manual 16 - D-Link EBR-2310 | Product Manual - Page 17
ISP. Primary DNS Enter the Primary DNS server IP address Address: assigned by your ISP. Secondary DNS This is optional. Address: MTU: Maximum Transmission Unit - you may need to change the MTU for optimal performance with your specific ISP. 1492 is the default MTU. D-Link EBR-2310 User Manual 17 - D-Link EBR-2310 | Product Manual - Page 18
Addresses: Enter the Primary DNS (Domain Name Server) server IP address assigned by your ISP. Secondary DNS Address: This is optional. MTU: Maximum Transmission Unit - you may need to change the MTU for optimal performance with your specific ISP. 1500 is the default MTU. D-Link EBR-2310 User Manual - D-Link EBR-2310 | Product Manual - Page 19
and password. This option is typically used for DSL services. Make sure to remove your PPPoE software from your computer. The software is no longer needed and will not work through a router. PPPoE: Select Dynamic (most common) or Static. Select Static if your ISP assigned you the IP address, subnet - D-Link EBR-2310 | Product Manual - Page 20
Setup PPTP Choose PPTP (Point-to-Point-Tunneling Protocol ) if your ISP uses a PPTP connection. Your ISP will provide you with a username and password. This option is typically used for DSL services. PPTP: Select Dynamic (most common) or Static. Select Static if your ISP assigned you the IP address - D-Link EBR-2310 | Product Manual - Page 21
Internet Setup L2TP Choose L2TP (Layer 2 Tunneling Protocol) if your ISP uses a L2TP connection.Your ISP will provide you with a username and password. This option is typically used for DSL services. L2TP: Select Dynamic (most common) or Static. Select Static if your ISP assigned you the IP address - D-Link EBR-2310 | Product Manual - Page 22
can use the "Clone MAC Address" button to copy the MAC address of the Ethernet Card installed by your ISP and replace the WAN MAC address with the MAC address of the router. It is not recommended that you change the default MAC address unless required by your ISP. D-Link EBR-2310 User Manual 22 - D-Link EBR-2310 | Product Manual - Page 23
the IP address of the computer on your local network that you want to allow the incoming service to. Start Port/ Enter the port or ports that you want to open. End Port: If you want to open 1 port, enter the same port in both boxes. Traffic Type: Select TCP, UDP, or ANY. D-Link EBR-2310 User Manual - D-Link EBR-2310 | Product Manual - Page 24
port or a range of ports. Firewall Port: This is the port number on the WAN side that will be used to access the application. You may define a single port or a range of ports. You can use a comma to add multiple ports or port ranges. Traffic Type: Select TCP, UDP, or ANY. D-Link EBR-2310 User Manual - D-Link EBR-2310 | Product Manual - Page 25
below. MAC Address: Enter the MAC address you would like to filter. To find the MAC address on a computer, please refer to the Networking Basics section in this manual. DHCP Client: Select a DHCP client from the drop-down menu and click - D-Link EBR-2310 | Product Manual - Page 26
word, the site will not be accessible and the web page will not display. To use this feature, enter the text string to be blocked and click Save Settings. The text to be blocked will appear in the list block (or allow). Any URL with the keyword in it will be blocked. D-Link EBR-2310 User Manual 26 - D-Link EBR-2310 | Product Manual - Page 27
: through the router to your VPN client. Enable L2TP Check this box to allow L2TP VPN traffic to pass Passthrough: through the router to your VPN client. Enable IPSec Check this box to allow IPSec VPN traffic to pass Passthrough: through the router to your VPN client. D-Link EBR-2310 User Manual 27 - D-Link EBR-2310 | Product Manual - Page 28
will not allow the WBR2310 to respond to pings. Blocking the Ping may provide some extra security from hackers. Check the box to allow the WAN port to be "pinged". WAN select to You may set the port speed of the WAN port streams: through the router from the Internet. D-Link EBR-2310 User Manual 28 - D-Link EBR-2310 | Product Manual - Page 29
(*) into this field would present a security risk and is not recommended. Port: The port number used to access the WBR-1310. Example: http://x.x.x.x:8080 whereas x.x.x.x is the WAN IP address of the WBR-1310 and 8080 is the port used for the Web-Management interface. D-Link EBR-2310 User Manual 29 - D-Link EBR-2310 | Product Manual - Page 30
Year, Month, Day, Hour, Minute, and Second. Click Set Time. Time Zone: Select the Time Zone from the drop-down menu. Daylight Saving: To select Daylight Saving time manually, select enabled or disabled, and enter a start date and an end date for daylight saving time. D-Link EBR-2310 User Manual 30 - D-Link EBR-2310 | Product Manual - Page 31
the settings that were in effect at the time the router was shipped from the factory. Any settings that have not been saved will be lost, including any rules that you have created. If you want to save the current router configuration settings, use the Save button above. D-Link EBR-2310 User Manual - D-Link EBR-2310 | Product Manual - Page 32
drive. Browse: After you have downloaded the new firmware, click Browse in this window to locate the firmware update on your hard drive. Click Save Settings to complete the firmware upgrade. D-Link EBR-2310 User Manual 32 - D-Link EBR-2310 | Product Manual - Page 33
ficantly reduces service calls and returns by allowing users to easily troubleshoot their cable connections. Ping Test: The Ping Test is used to send Ping packets to test if a computer is on the Internet. Enter the IP Address that you wish to Ping, and click Ping. D-Link EBR-2310 User Manual 33 - D-Link EBR-2310 | Product Manual - Page 34
will be displayed. Use Disconnect to drop the PPPoE connection and use Connect to establish the PPPoE connection. LAN: Displays the MAC address and the private (local) IP settings for the router. WAN: Displays the MAC address and the public IP settings for the router. D-Link EBR-2310 User Manual - D-Link EBR-2310 | Product Manual - Page 35
Section 3 - Configuration First Page: View the first page of the log. Last Page: View the last page of the log. Previous: View the previous page. Next: View the next page. Clear: Clear the log. Log D-Link EBR-2310 User Manual 35 - D-Link EBR-2310 | Product Manual - Page 36
Section 3 - Configuration Stats The screen below displays the Traffic Statistics. Here you can view the amount of packets that pass through the WBR-2310 on both the WAN and the LAN ports. The traffic counter will reset if the device is rebooted. D-Link EBR-2310 User Manual 36 - D-Link EBR-2310 | Product Manual - Page 37
Section 3 - Configuration Support D-Link EBR-2310 User Manual 37 - D-Link EBR-2310 | Product Manual - Page 38
having problems. (The examples below are illustrated in Windows® XP. If you have a different operating system, the screenshots on your computer will look similar to the following examples.) 1. Why can't I access the web-based configuration utility? When entering the IP address of the D-Link router - D-Link EBR-2310 | Product Manual - Page 39
to hold the button down for 10 seconds. Release the button and the router will go through its reboot process. Wait about 30 seconds to access the router. The default IP address is 192.168.0.1. When logging in, the username is admin and leave the password box empty. D-Link EBR-2310 User Manual 39 - D-Link EBR-2310 | Product Manual - Page 40
Section 5 - Troubleshooting 3. Why can't I connect to certain sites or send and receive emails when connecting through my router? If you are having a problem sending or receiving email, or syntax: ping [url] [-f] [-l] [MTU value] Example: ping yahoo.com -f -l 1472 D-Link EBR-2310 User Manual 40 - D-Link EBR-2310 | Product Manual - Page 41
tab and click the WAN button. • To change the MTU enter the number in the MTU field and click the Apply button to save your settings. • Test your email. If changing the MTU does not resolve the problem, continue changing the MTU in increments of ten. D-Link EBR-2310 User Manual 41 - D-Link EBR-2310 | Product Manual - Page 42
/Router you will not need to assign Static IP Addresses. If you are not using a DHCP capable Gateway/Router, or you need to assign a Static IP Address, please follow these instructions: • Go to Start • Double-click on Control Panel • Double-click on Network Connections D-Link EBR-2310 User Manual - D-Link EBR-2310 | Product Manual - Page 43
A - Assigning a Static IP Address • Right-click on Local Area Connections. • Double-click Properties • Highlight Internet Protocol(TCP/IP) • Click Properties • Select Use the following IP address in the Internet Protocol (TCP/IP) Properties window (shown below.) D-Link EBR-2310 User Manual 43 - D-Link EBR-2310 | Product Manual - Page 44
be the same for all the computers on the network.) • Input your DNS server addresses. (Note: If you are entering a DNS server, you must enter the IP Address of the Default Gateway.) The DNS server information will be provided by your ISP (Internet Service Provider.) D-Link EBR-2310 User Manual 44 - D-Link EBR-2310 | Product Manual - Page 45
through a Gateway/Router,) use the Add Printer Wizard, you can find the directions below: First, make sure that you have run the Network Setup Wizard on all of the computers on your network. We will show you 3 printer to one computer. • Go to Start> Printers and Faxes D-Link EBR-2310 User Manual 45 - D-Link EBR-2310 | Product Manual - Page 46
Appendix B - Adding and Sharing Printers in Windows® XP • Click on Add a printer • Click Next D-Link EBR-2310 User Manual 46 - D-Link EBR-2310 | Product Manual - Page 47
detect and install my Plug and Play printer if it has been selected.) • Click Next • Select Use the following port: • From the pull-down menu select the correct port for your printer (Most computers use the LPT1: port, as shown in the illustration.) • Click Next D-Link EBR-2310 User Manual 47 - D-Link EBR-2310 | Product Manual - Page 48
and click Have Disk.) • At this screen, you can change the name of the printer (optional.) • Click Next • SelectYes, to print a test page. A successful printing will confirm that you have chosen the correct driver. • Click Next D-Link EBR-2310 User Manual 48 - D-Link EBR-2310 | Product Manual - Page 49
Appendix B - Adding and Sharing Printers in Windows® XP This screen gives you information about your printer. (The printer will begin to print a test page) Click Finish When the test page has printed, Click OK D-Link EBR-2310 User Manual 49 - D-Link EBR-2310 | Product Manual - Page 50
Appendix B - Adding and Sharing Printers in Windows® XP • Go to Start> Printers and Faxes A successful installation will display the printer icon as shown at right. You have successfully added a local printer. D-Link EBR-2310 User Manual 50 - D-Link EBR-2310 | Product Manual - Page 51
C - Sharing a Network Printer Sharing a Network Printer After you have run the Network Setup Wizard on all the computers on your network, you can run the Add Printer Wizard on on your network: • Go to Start> • Printer and Faxes • Click on Add a Printer • Click Next D-Link EBR-2310 User Manual 51 - D-Link EBR-2310 | Product Manual - Page 52
Appendix C - Sharing a Network Printer • Select Network Printer • Click Next • Select Browse for a printer • Click Next • Select the printer you would like to share. • Click Next D-Link EBR-2310 User Manual 52 - D-Link EBR-2310 | Product Manual - Page 53
Appendix C - Sharing a Network Printer • Click Finish To check for proper installation: • Go to Start > Printers and Faxes D-Link EBR-2310 User Manual 53 - D-Link EBR-2310 | Product Manual - Page 54
name • Run the Add Printer Wizard on all the computers on your network. • Make sure you have already run the Network Setup Wizard on all the network computers. After you run the Add Printer Wizard on all the computers in the network, you can share the printer. D-Link EBR-2310 User Manual 54 - D-Link EBR-2310 | Product Manual - Page 55
a print server,) you will need a Print Server such as the DP-101P+. Please make sure that you have run the Network Setup Wizard on all the computers The screen to the right will display. • Click Next • Select Local printer... • Click Next • Select Create a new port D-Link EBR-2310 User Manual 55 - D-Link EBR-2310 | Product Manual - Page 56
Appendix D - Sharing an LPR Printer • From the pull-down menu, select Standard TCP/IP Port, as shown. • Click Next • Please read the instructions on this screen. • Click Next • Enter the Printer IP Address and the Port Name, as shown. • Click Next D-Link EBR-2310 User Manual 56 - D-Link EBR-2310 | Product Manual - Page 57
D - Sharing an LPR Printer • In this screen, select Custom. • Click Settings • Enter the Port Name and the Printer Name or IP Address. • Select LPR • Enter a Queue Name (if your Print-Server/Gateway has more than one port, you will need a Queue name.) • Click OK D-Link EBR-2310 User Manual 57 - D-Link EBR-2310 | Product Manual - Page 58
about your printer. • Click Finish • Select the printer you are adding from the list of Printers. • Insert the printer driver disk that came with your printer. • Click Have Disk If the printer driver is already installed, • Select Keep existing driver • Click Next D-Link EBR-2310 User Manual 58 - D-Link EBR-2310 | Product Manual - Page 59
Next • Select Yes, to print a test page. • Click Next This screen will display information about your printer. • Click Finish to complete the addition of the printer the Network Setup Wizard on all the computers on your network before you run the Add Printer Wizard. D-Link EBR-2310 User Manual 59 - D-Link EBR-2310 | Product Manual - Page 60
E - Networking Basics Networking Basics Check your IP address After you install your new D-Link adapter, by default, the TCP/IP settings should be set to obtain an IP address from a DHCP server (i.e. wireless router) automatically. To verify your IP address, please follow the steps below. Click on - D-Link EBR-2310 | Product Manual - Page 61
. Set Default Gateway the same as the LAN IP address of your router (192.168.0.1). Set Primary DNS the same as the LAN IP address of your router (192.168.0.1).The Secondary DNS is not needed or you may enter a DNS server from your ISP. Step 5 Click OK twice to save your settings. D-Link EBR-2310 - D-Link EBR-2310 | Product Manual - Page 62
802.3 10Base-T Ethernet 95% maximum (non-condensing) • IEEE 802.3u 100Base-TX Fast Ethernet • IEEE 802.3 Nway Auto-Negotiation Power Input • External power Supply VPN Pass Through / • Local Network - 10/100 Operating Temperature 32*F to 131*F (0*C to 55*C) D-Link EBR-2310 User Manual 62 - D-Link EBR-2310 | Product Manual - Page 63
453-5465 24 hours a day, seven days a week. Internet Support: http://support.dlink.com [email protected] For customers within Canada: Phone Support: (800) 361-5265 Monday to Friday 7:30am to 9:00pm EST Internet Support: http://support.dlink.ca email:[email protected] D-Link EBR-2310 User Manual 63 - D-Link EBR-2310 | Product Manual - Page 64
to abuse, accident, alteration, modification, tampering, negligence, misuse, faulty installation, lack of reasonable care, repair or service in any way that is not contemplated in the documentation for the product, or if the model or serial number has been altered, D-Link EBR-2310 User Manual 64 - D-Link EBR-2310 | Product Manual - Page 65
OF THE APPLICABLE WARRANTY PERIOD SET FORTH ABOVE. EXCEPT AS installed and used in accordance with the instructions, may cause harmful interference to radio communication. However, there is no guarantee that interference will not occur in a particular installation Link EBR-2310 User Manual 65 - D-Link EBR-2310 | Product Manual - Page 66
Appendix I - Registration Registration Product registration is entirely voluntary and failure to complete or return this form will not diminish your warranty rights. Version 1.1 01/26/2006 D-Link EBR-2310 User Manual 66
-
 1
1 -
 2
2 -
 3
3 -
 4
4 -
 5
5 -
 6
6 -
 7
7 -
8
-
9
-
10
-
11
-
12
-
13
-
14
-
15
-
16
-
17
-
18
-
19
-
20
-
21
-
22
-
23
-
24
-
25
-
26
-
27
-
28
-
29
-
30
-
31
-
32
-
33
-
34
-
35
-
36
-
37
-
38
-
39
-
40
-
41
-
42
-
43
-
44
-
45
-
46
-
47
-
48
-
49
-
50
-
51
-
52
-
53
-
54
-
55
-
56
-
57
-
58
-
59
-
60
-
61
-
62
-
63
-
64
-
65
-
66
 |
 |