DELPHI SA10085 User Guide - Page 19
Roady2 Installation - accessories
 |
UPC - 689604157787
View all DELPHI SA10085 manuals
Add to My Manuals
Save this manual to your list of manuals |
Page 19 highlights
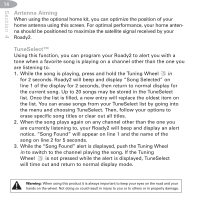
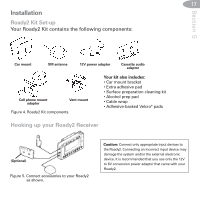
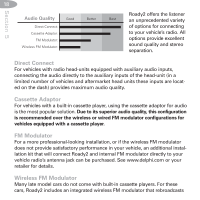
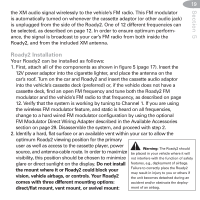
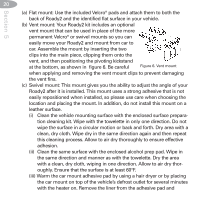
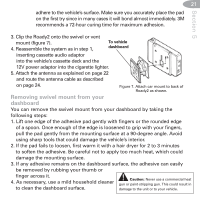
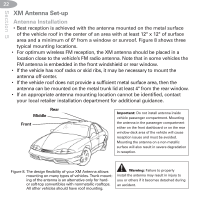
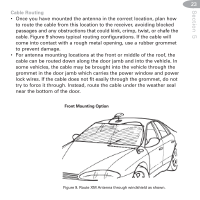
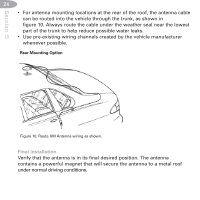
Section 5 19 the XM audio signal wirelessly to the vehicle's FM radio. This FM modulator is automatically turned on whenever the cassette adaptor (or other audio jack) is unplugged from the side of the Roady2. One of 12 different frequencies can be selected, as described on page 12. In order to ensure optimum performance, the signal is broadcast to your car's FM radio from both inside the Roady2, and from the included XM antenna. Roady2 Installation Your Roady2 can be installed as follows: 1. First, attach all of the components as shown in figure 5 (page 17). Insert the 12V power adaptor into the cigarette lighter, and place the antenna on the car's roof. Turn on the car and Roady2 and insert the cassette audio adaptor into the vehicle's cassette deck (preferred) or, if the vehicle does not have a cassette deck, find an open FM frequency and tune both the Roady2 FM modulator and the vehicle's FM radio to that frequency, as described on page 12. Verify that the system is working by tuning to Channel 1. If you are using the wireless FM modulator feature, and static is heard on all frequencies, change to a hard wired FM modulator configuration by using the optional FM Modulator Direct Wiring Adapter described in the Available Accessories section on page 29. Disassemble the system, and proceed with step 2. 2. Identify a hard, flat surface or an available vent within your car to allow the optimum Roady2 viewing position for the primary user as well as access to the cassette player, power Warning: The Roady2 should source, and antenna-cable route. In order to maximize be placed in your vehicle where it will visibility, this position should be chosen to minimize not interfere with the function of safety glare or direct sunlight on the display. Do not install the mount where it or Roady2 could block your vision, vehicle airbags, or controls. Your Roady2 comes with three different mounting options: features, e.g., deployment of airbags. Failure to correctly place the Roady2 may result in injury to you or others if the unit becomes detached during an accident and/or obstructs the deploy- direct/flat mount, vent mount, or swivel mount: ment of an airbag.
-
 1
1 -
2
-
3
-
4
-
5
-
6
-
7
-
8
-
9
-
10
-
11
-
12
-
13
-
 14
14 -
 15
15 -
 16
16 -
 17
17 -
 18
18 -
 19
19 -
 20
20 -
 21
21 -
 22
22 -
 23
23 -
 24
24 -
25
-
26
-
27
-
28
-
29
-
30
-
31
-
32
 |
 |