Danby DPAC8399 User Guide - Page 12
°C 50°F to 30°C 88°F. - hose
 |
View all Danby DPAC8399 manuals
Add to My Manuals
Save this manual to your list of manuals |
Page 12 highlights
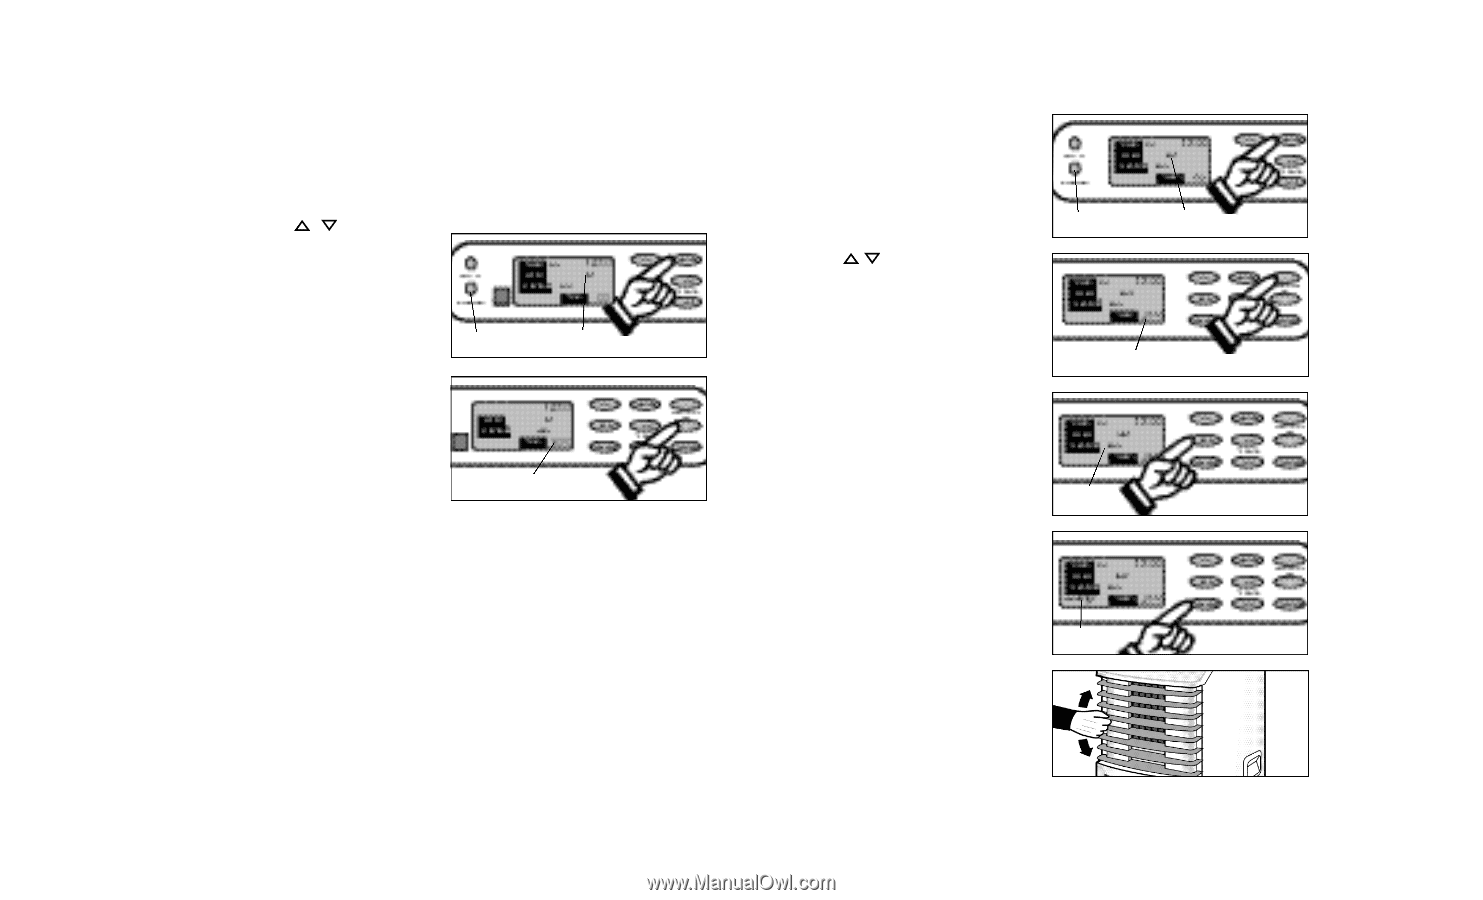
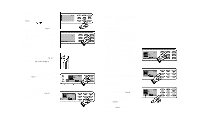
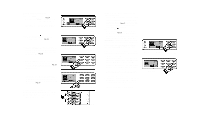
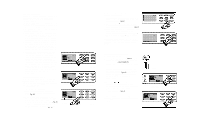
DRY(Dehumidifier) Operating Instructions 1) Press the I/O (on/off) key pad to switch on the unit. 2) Press the MODE key until the word DRY (Dehumidifying) is displayed in the LCD display window. Fig. 17. Each depression of the MODE key will advance to a different mode setting (Cool-Heat-Dry-Fan). 3) Press the appropriate or key to set a dehumidifying temperature between 10°C (50°F) to 30°C (88°F). Fig. 18. The green indicator light will come on indicating the dehumidifying mode is operational (there may be a slight delay of 10-30 seconds before the cycle begins, this is normal). IMPORTANT: The temperature selected should always be set a few degrees lower than the room ambient temperature, to ensure normal dehumidifying operation. However, it is not recommended to operate your Dehumidifier, below temperatures of 15.5°C (60°F), this could result in icing-up conditions of the evaporator coils, minimizing efficiency. Under the dehumidifying mode, you cannot select a fan speed. The fan motor operates at a pre-set speed, which registers as MED in the LCD window. 4) Condensed water will be accumulated in the water tank. When the tank is full, the unit will sound a signal (8 beeps) and the Water Full indicator light start flashing. At this time the dehumidification process will immediately stop. However, the fan motor will continue to operate (this is normal). Carefully remove the water tank from the cabinet and dispose of the water. Replace the water tank back to it's original position (in cabinet) and the Dehumidifying process will automatically resume. It may take 3-5 minutes for the compressor to re-start. This is normal. 5) This unit also has provisions for a continuous "drain" option (for basement applications having a floor drain). The required drain hose extension is not included with this unit. It can be purchased through any local Hardware Store. Drain Hose Specifications: Standard garden hose. Green Light Dry Mode Temperature Fig. 17 Fig. 18 Instrucciones para la operación de la calefacción 1) Oprima la tecla I/O (encendido/apagado) para encender la unidad. Oprima la tecla de MODO hasta que la palabra HEAT (CALOR) aparezca en la ventana de visualización de cristal líquido (LCD según sus siglas en inglés). Figura 20. Cada vez que se oprima la tecla de MODO, se adelantará a una graduación de modo diferente. (Frío-Seco-Calor-Ventilación). La luz indicadora roja se iluminará indicando que el modo de "Calefacción" está funcionando (es posible que se requieran unos 5 a 10 segundos antes de que el ciclo comience, esto es normal). 2) Oprima la tecla o correspondiente para seleccionar una graduación de temperatura adecuada entre 17°C (63°F) y 30°C (88°F). Figura 21. Luz roja Modo de calefacción 3) Oprima la tecla FAN (VENTILADOR) para seleccionar la graduación de velocidad del ventilador que se desea (Baja-Alta). Su selección aparecerá en la ventana LCD. Cada vez que se oprima la tecla del ventilador, se alternará entre las diferentes graduaciones de velocidad del ventilador. Figura 22. Temperatura 4) Oprima la tecla SWING (OSCILACIÓN) para activar la opción de oscilación automática de aire (el símbolo "air swing" aparecerá en la ventana LCD). Figura 23. Para desactivar la opción de oscilación de aire, oprima nuevamente la tecla SWING. 5) Para ajustar la dirección de la corriente de aire (hacia arriba/hacia abajo solamente), ajuste cualquiera de las láminas horizontales tipo persiana (excluyendo la lámina superior e inferior), y las láminas restantes se ajustarán automáticamente a la posición determinada. Figura 24. La calefacción se detiene automáticamente cuando se obtiene la temperatura determinada. La luz "roja" indicadora de modo se apagará. La calefacción vuelve a comenzar cuando la temperatura de la habitación cae por debajo de la graduación de temperatura determinada. Velocidad del ventilador Oscilación del aire Fig. 20 Fig. 21 Fig. 22 Fig. 23 Fig. 24
-
 1
1 -
2
-
3
-
4
-
5
-
6
-
 7
7 -
 8
8 -
 9
9 -
 10
10 -
 11
11 -
 12
12 -
 13
13 -
 14
14 -
 15
15 -
 16
16 -
 17
17 -
18
-
19
-
20
-
21
-
22
-
23
-
24
-
25
-
26
-
27
-
28
-
29
-
30
-
31
-
32
-
33
-
34
-
35
-
36
 |
 |