Danby DPAC8399 User Guide - Page 9
Key Pad Functions, Temperature Conversion Chart, Graduación del RELOJ DE ENCENDIDO, AUTOMÁTICO
 |
View all Danby DPAC8399 manuals
Add to My Manuals
Save this manual to your list of manuals |
Page 9 highlights
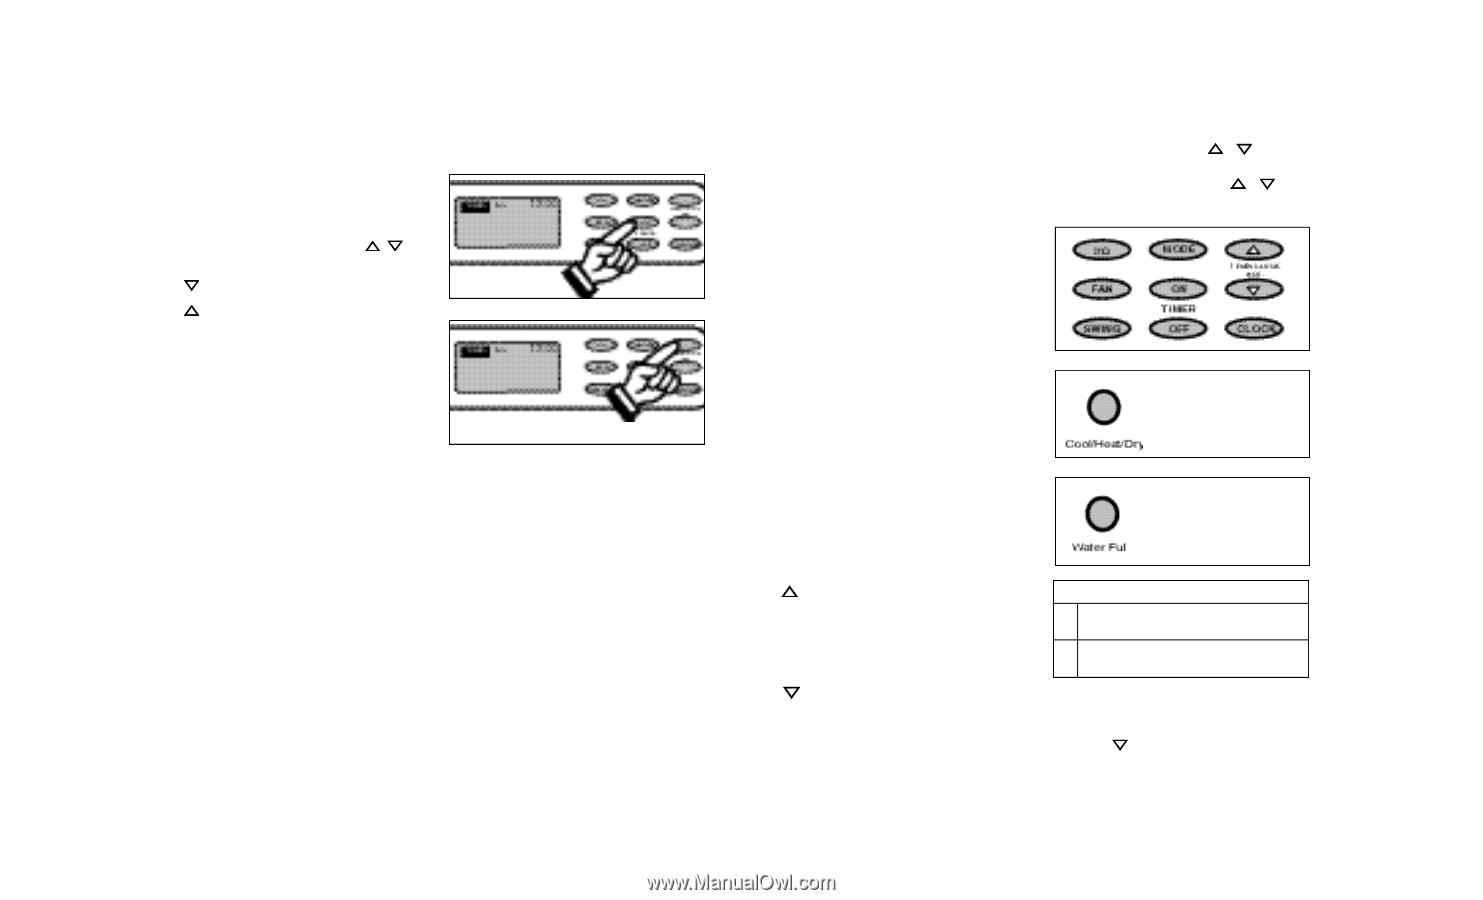
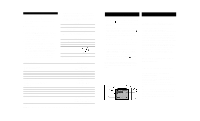
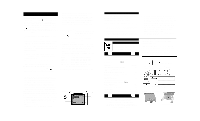
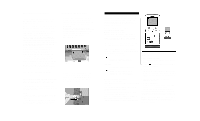
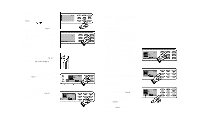
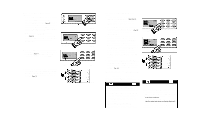
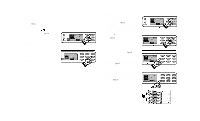
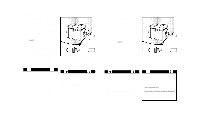
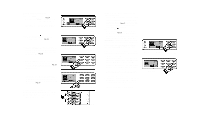
Graduación del RELOJ DE ENCENDIDO AUTOMÁTICO (continúa) 5) Ahora se han registrado todas las graduaciones. APAGUE LA UNIDAD USANDO ELCONMUTADOR I/O. 6) Para graduar el reloj de ENCENDIDO AUTOMÁTICO, la unidad deberá estar en la posición "off" (apagada) o sea no funcionando. 7) Oprima la tecla de TIMER-ON (RELOJ DE ENCENDIDO AUTOMÁTICO) para iniciar la secuencia de tiempo de ENCENDIDO AUTOMÁTICO. Figura 32. La ventana de visualización indicará TIMER ON y la palabra ON (ENCENDIDO) centelleará durante 5 segundos. Oprima la tecla o para seleccionar la hora deseada de encendido automático. Figura 32a. La tecla disminuirá la graduación del horario automático en incrementos de 10 minutos. La tecla aumentará la graduación del horario automático en incrementos de 10 minutos. Cuando haya establecido el horario deseado (la hora centelleará en la ventana de visualización) oprima la tecla CLOCK (RELOJ) para registrar el programa de RELOJ DE ENCENDIDO AUTOMÁTICO. La palabra ON dejará de centellear y permanecerá encendida (RELOJ DE ENCENDIDO AUTOMÁTICO) indicando que se ha graduado el programa. La graduación del reloj de la hora del día regresará inmediatamente a la ventana de visualización. IMPORTANTE: La hora deseada para el RELOJ DE ENCENDIDO AUTOMÁTICO se debe registrar dentro de un período de 5 segundos (después de oprimir la tecla TIMER-ON) ya que de lo contrario la hora seleccionada no quedará registrada y el sistema regresará automáticamente a la graduación corriente del reloj de la hora del día. Si esto sucede, se deberá repetir el paso número 7. La unidad se encenderá automáticamente cuando el reloj de la hora del día indique la hora de ENCENDIDO AUTOMÁTICO especificada (la señal de TIMER ON desaparecerá de la ventana de visualización). Para cancelar o reemplazar el programa de RELOJ DE ENCENDIDO AUTOMÁTICO, simplemente encienda la unidad antes de la hora en que el ENCENDIDO AUTOMÁTICO está programado para funcionar (la señal de TIMER ON desaparecerá de la ventana de visualización). Se puede verificar la hora seleccionada para ENCENDIDO AUTOMÁTICO en cualquier momento (antes de que se inicie el programa), simplemente oprimiendo la tecla de TIMER ON. La hora seleccionada aparecerá (centelleará) provisoriamente (reemplazando la hora del día) por unos 5 segundos. Fig. 32 Fig. 32a Key Pad Functions Fig. 5 The control panel on this unit "illuminates" automatically when any key pad is depressed. This "illumination" feature will "self-deactivate" (turn-off) automatically approx. 30 seconds after the last key pad is depressed. I/O: Power Switch On / Off. MODEIndicator Lights: Illuminate under the different mode settings Fig. 6; COOL Mode: Green Light DRY (Dehumidifier) Mode: Green Light HEAT Mode: Red Light FAN Mode: No indicator light Green Light: Remains on while compressor is operating. Green light turns off when desired temperature is achieved. Applicable to both Air Conditioner and Dehumidifier. Red Light: Remains on while heater is operating. Red light turns off when desired temperature is achieved. Water Full Indicator Light: Flashes red when the water level of the water tank exceeds the maximum set level or if the water tank is not correctly positioned in the cabinet. Fig. 7. FAN: Selects Low-Medium-High fan speeds. Fan Options: Cooling (3 speeds) Low-Medium-High Heating (2 speeds) Low-High Dry - Dehumidifying (1 speed) Medium. Fan (3 speeds) Low-Medium-High Temp/Clock Adjustments: : Used to adjust (forward) Time of Day Clock settings (1 min. increments). Used to adjust (forward) Temperature settings (1°C increments). Used to adjust (forward) Temperature settings (2°F increments). Used to adjust (forward) Auto-Timer settings (10 min. increments) : Used to adjust (backward) Time of Day Clock settings (1 min. increments). Used to adjust (backward) Temperature settings (1°C increments). Used to adjust (backward) Temperature settings (2°F increments). Used to adjust (backward) Auto-Timer settings (10 min. increments) SWING: Allows the vertical louver grills to oscillate back and forth automatically (70° Swing). CLOCK: Allows you to initiate and/or change the TIME OF DAY setting. TIMER ON: Used to initiate the AUTO ON start time program, in conjuction with the & key pads. TIMER OFF: Used to initiate the AUTO OFF stop time program, in conjuction with the & key pads. Fig. 5 Green light while cooling. Red light while heating. Green light while dehumidifying. Fig. 6 A warning signal of 8 beeps will sound and the Water Full indicator will flash every 0.5 seconds. Fig. 7 Temperature Conversion Chart °C 10 11 12 13 14 15 16 17 18 19 20 21 °F 50 52 54 55 57 59 61 63 64 66 68 70 °C 22 23 24 25 26 27 28 29 30 31 32 33 °F 72 73 75 77 79 81 82 84 86 88 90 91 NOTE: This appliance provides a feature that will allow you the option of setting "temperatures" in "Celsius" or "Fahrenheit". To change the temperature display on the main unit, press the (Temp/Clock) " " keypad & "Clock" keypad "simultaneously" to alternate between the˚C & ˚F scale Celisus scale allows adjustments in 1˚C increments. Farenheight scale allows adjustments in 2˚F increments.
-
 1
1 -
2
-
3
-
 4
4 -
 5
5 -
 6
6 -
 7
7 -
 8
8 -
 9
9 -
 10
10 -
 11
11 -
 12
12 -
 13
13 -
 14
14 -
15
-
16
-
17
-
18
-
19
-
20
-
21
-
22
-
23
-
24
-
25
-
26
-
27
-
28
-
29
-
30
-
31
-
32
-
33
-
34
-
35
-
36
 |
 |