Dell 1250C User's Guide - Page 85
The Operator Panel, The Tool Box, Printer Settings - color printer driver
 |
View all Dell 1250C manuals
Add to My Manuals
Save this manual to your list of manuals |
Page 85 highlights
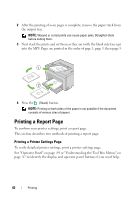
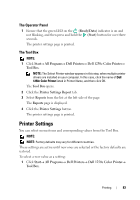
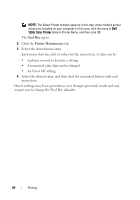
The Operator Panel 1 Ensure that the green LED on the (Ready/Data) indicator is on and not blinking, and then press and hold the (Start) button for over three seconds. The printer settings page is printed. The Tool Box NOTE: 1 Click Start All Programs Dell Printers Dell 1250c Color Printer Tool Box. NOTE: The Select Printer window appears in this step, when multiple printer drivers are installed on your computer. In this case, click the name of Dell 1250c Color Printer listed in Printer Name, and then click OK. The Tool Box opens. 2 Click the Printer Settings Report tab. 3 Select Reports from the list at the left side of the page. The Reports page is displayed. 4 Click the Printer Settings button. The printer settings page is printed. Printer Settings You can select menu items and corresponding values from the Tool Box. NOTE: NOTE: Factory defaults may vary for different countries. These settings are active until new ones are selected or the factory defaults are restored. To select a new value as a setting: 1 Click Start All Programs Dell Printers Dell 1250c Color Printer Tool Box. Printing 83
-
 1
1 -
2
-
3
-
4
-
5
-
6
-
7
-
8
-
9
-
10
-
11
-
12
-
13
-
14
-
15
-
16
-
17
-
18
-
19
-
20
-
21
-
22
-
23
-
24
-
25
-
26
-
27
-
28
-
29
-
30
-
31
-
32
-
33
-
34
-
35
-
36
-
37
-
38
-
39
-
40
-
41
-
42
-
43
-
44
-
45
-
46
-
47
-
48
-
49
-
50
-
51
-
52
-
53
-
54
-
55
-
56
-
57
-
58
-
59
-
60
-
61
-
62
-
63
-
64
-
65
-
66
-
67
-
68
-
69
-
70
-
71
-
72
-
73
-
74
-
75
-
76
-
77
-
78
-
79
-
 80
80 -
 81
81 -
 82
82 -
 83
83 -
 84
84 -
 85
85 -
 86
86 -
 87
87 -
 88
88 -
 89
89 -
 90
90 -
91
-
92
-
93
-
94
-
95
-
96
-
97
-
98
-
99
-
100
-
101
-
102
-
103
-
104
-
105
-
106
-
107
-
108
-
109
-
110
-
111
-
112
-
113
-
114
-
115
-
116
-
117
-
118
-
119
-
120
-
121
-
122
-
123
-
124
-
125
-
126
-
127
-
128
-
129
-
130
-
131
-
132
-
133
-
134
-
135
-
136
-
137
-
138
-
139
-
140
-
141
-
142
-
143
-
144
-
145
-
146
-
147
-
148
-
149
-
150
-
151
-
152
-
153
-
154
-
155
-
156
-
157
-
158
-
159
-
160
-
161
-
162
-
163
-
164
-
165
-
166
-
167
-
168
-
169
-
170
-
171
-
172
-
173
-
174
 |
 |