Dell 1320c User Guide - Page 132
Installing Printer Drivers - windows 7 driver
 |
UPC - 662919013061
View all Dell 1320c manuals
Add to My Manuals
Save this manual to your list of manuals |
Page 132 highlights
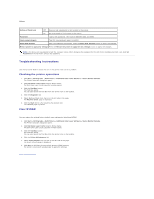
back to contents page Installing Printer Drivers Personal Printer Setup Network Printer Setup Troubleshooting Instructions Personal Printer Setup 1. Insert the Drivers and Utilities CD into your computer to start Easy Setup Navigator. NOTE: If the CD does not automatically launch, click Start® Run, and then type D:\setup_assist.exe (where D is the drive letter of your CD), and then click OK. 2. Press Software Installation to launch the installation software. 3. Select Personal Installation, and then click Next. 4. Click Install. 5. Follow the instructions that appear on the Found New Hardware Wizard dialog box to install the printer driver on your computer. 6. When the Completing the Found New Hardware Wizard dialog box appears, click Finish. 7. Select either Typical Installation or Custom Installation from the installation wizard, and then click Install. If you select Custom Installation, you can select the specific software you want to install. 8. Click Finish to exit the wizard when the Congratulations! screen appears. To print a test page, click Print Test Page to print a test page. USB Printing A local printer is a printer attached to your computer or a print server using a USB. If your printer is attached to a network and not your computer, see "Network Printer Setup" on page 163. Network Printer Setup Printing and Checking the System Settings Page Before installing the printer driver on your computer, print the System Settings page to check your printer's IP address. 1. Print the Printer Settings page. a. Click Start® All Programs® Dell Printers® Additional Color Laser Software® Status Monitor Console. The Printer Selection dialog box opens. b. Click Dell Color Laser 1320c listed in Printer Name. The Dell Color Laser 1320c Launcher window opens. c. Click the Tool Box button. The Tool Box opens. You can also launch the Tool Box from the printer icon on the taskbar. d. Click the Printer Settings Report tab. e. Select Reports from the list at the left side of the page. The Reports page is displayed. f. Click the Start button for Printer Settings. The printer settings page is printed. 2. Verify the IP address. a. Click Start® All Programs® Dell Printers® Additional Color Laser Software® Status Monitor Console. The Printer Selection dialog box opens. b. Click Dell Color Laser 1320c listed in Printer Name. The Dell Color Laser 1320c Launcher window opens. c. Click the Tool Box button. The Tool Box opens. You can also launch the Tool Box from the printer icon on the taskbar. d. Click the Printer Settings Report tab.
-
 1
1 -
2
-
3
-
4
-
5
-
6
-
7
-
8
-
9
-
10
-
11
-
12
-
13
-
14
-
15
-
16
-
17
-
18
-
19
-
20
-
21
-
22
-
23
-
24
-
25
-
26
-
27
-
28
-
29
-
30
-
31
-
32
-
33
-
34
-
35
-
36
-
37
-
38
-
39
-
40
-
41
-
42
-
43
-
44
-
45
-
46
-
47
-
48
-
49
-
50
-
51
-
52
-
53
-
54
-
55
-
56
-
57
-
58
-
59
-
60
-
61
-
62
-
63
-
64
-
65
-
66
-
67
-
68
-
69
-
70
-
71
-
72
-
73
-
74
-
75
-
76
-
77
-
78
-
79
-
80
-
81
-
82
-
83
-
84
-
85
-
86
-
87
-
88
-
89
-
90
-
91
-
92
-
93
-
94
-
95
-
96
-
97
-
98
-
99
-
100
-
101
-
102
-
103
-
104
-
105
-
106
-
107
-
108
-
109
-
110
-
111
-
112
-
113
-
114
-
115
-
116
-
117
-
118
-
119
-
120
-
121
-
122
-
123
-
124
-
125
-
126
-
 127
127 -
 128
128 -
 129
129 -
 130
130 -
 131
131 -
 132
132 -
 133
133 -
 134
134 -
 135
135 -
 136
136 -
 137
137
 |
 |