Dell 1320c User Guide - Page 91
Toner smears or print comes off Toner spots appear on the printing is blurred.
 |
UPC - 662919013061
View all Dell 1320c manuals
Add to My Manuals
Save this manual to your list of manuals |
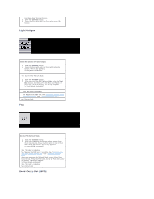
Page 91 highlights
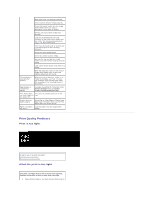
3. If the print is too light, Select Refresh Mode from the list. Press the Start(1)-(4) buttons. CAUTION: Using the Refresh Mode consumes extra toner. 4. After you complete the Refresh Mode, select Chart Print from the list. Press the Print with A4(3) or Print with Letter(C) button for 4 Colors Configuration Chart. "Printing" appears. Is the problem recovered? Yes. The task is complete. No. The PHD unit is old or damaged. Replace the PHD unit. Try the spare PHD unit, if possible. 1. Replace the PHD unit. See "Replacing the PHD (Print Head Device) Unit" and "Installing the PHD Unit". 2. After you replace the PHD unit, click the Tool Box button. 3. Press the Print with A4(3) or Print with Letter(C) button. Is the problem recovered? Yes. The PHD unit is old or damaged. Replace the PHD unit. No. Contact Dell. Contact Dell. Toner smears or print comes off page. If you are printing on an uneven print surface, change the paper type setting in the printer driver. For example, change the plain paper to thick. 1. Press [Printing Preferences], and then click the Paper Tray tab. Verify that the correct print media is being used. 1. See "Print Media Sizes and Support." Try the spare PHD unit, if possible. 1. Replace the PHD unit. See "Replacing the PHD (Print Head Device) Unit" and "Installing the PHD Unit". 2. After you replace the PHD unit, print paper. "Printing" appears. Is the problem recovered? Yes. The PHD unit is old or damaged. Replace the PHD unit. No. Return to step 1. Try the spare fuser, if possible. 1. Replace the fuser. See "Removing the Used Fuser" and "Installing a New Fuser". 2. After you replace the fuser, print paper. "Printing" appears. Is the problem recovered? Yes. The fuser is old or damaged. Replace the fuser. No. Contact Dell. Toner spots appear on the page/printing is blurred.
-
 1
1 -
2
-
3
-
4
-
5
-
6
-
7
-
8
-
9
-
10
-
11
-
12
-
13
-
14
-
15
-
16
-
17
-
18
-
19
-
20
-
21
-
22
-
23
-
24
-
25
-
26
-
27
-
28
-
29
-
30
-
31
-
32
-
33
-
34
-
35
-
36
-
37
-
38
-
39
-
40
-
41
-
42
-
43
-
44
-
45
-
46
-
47
-
48
-
49
-
50
-
51
-
52
-
53
-
54
-
55
-
56
-
57
-
58
-
59
-
60
-
61
-
62
-
63
-
64
-
65
-
66
-
67
-
68
-
69
-
70
-
71
-
72
-
73
-
74
-
75
-
76
-
77
-
78
-
79
-
80
-
81
-
82
-
83
-
84
-
85
-
 86
86 -
 87
87 -
 88
88 -
 89
89 -
 90
90 -
 91
91 -
 92
92 -
 93
93 -
 94
94 -
 95
95 -
 96
96 -
97
-
98
-
99
-
100
-
101
-
102
-
103
-
104
-
105
-
106
-
107
-
108
-
109
-
110
-
111
-
112
-
113
-
114
-
115
-
116
-
117
-
118
-
119
-
120
-
121
-
122
-
123
-
124
-
125
-
126
-
127
-
128
-
129
-
130
-
131
-
132
-
133
-
134
-
135
-
136
-
137
 |
 |