Dell 1815dn Owners Manual
Dell 1815dn - All-in-one Laser Printer Manual
 |
UPC - 000061100008
View all Dell 1815dn manuals
Add to My Manuals
Save this manual to your list of manuals |
Dell 1815dn manual content summary:
- Dell 1815dn | Owners Manual - Page 1
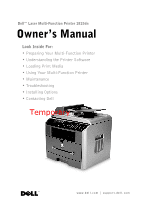
-Function Printer 1815dn Owner's Manual Look Inside For: • Preparing Your Multi-Function Printer • Understanding the Printer Software • Loading Print Media • Using Your Multi-Function Printer • Maintenance • Troubleshooting • Installing Options • Contacting Dell Temporary www.dell.com | support.dell - Dell 1815dn | Owners Manual - Page 2
- Dell 1815dn | Owners Manual - Page 3
231622 64 21 4220710 866-851-1760 902120385 08 587 705 81 0848 335 599 0870 907 4574 NOTE: If your country is not listed, contact your Dell distributor to order supplies. Toner cartridge Part number Dell Standard Capacity Toner Cartridgea NF485 Dell High Capacity Toner Cartridge RF223 a. Dell - Dell 1815dn | Owners Manual - Page 4
4 - Dell 1815dn | Owners Manual - Page 5
Dell Inc. is strictly forbidden. Trademarks used in this text: Dell, DELL logo, Dell ScanCenter and Dell Toner Management System are trademarks of Dell Inc.; Microsoft and Windows Dell Inc. disclaims any proprietary interest in trademarks and trade names other than its own. Model Laser MFP 1815dn - Dell 1815dn | Owners Manual - Page 6
6 - Dell 1815dn | Owners Manual - Page 7
Swedish 14 Turkey 14 Understanding Your Multi-Function Printer 15 Front View 15 Rear View 16 1 Preparing Your Multi-Function Printer Unlocking the Scanner 19 Using the Operator Panel 20 Common Keys 20 Key Pad 20 Dell Laser MFP 1815dn Menu Functions 21 Changing the Display Language 22 - Dell 1815dn | Owners Manual - Page 8
26 Attaching Cables 26 Printing the Network Configuration Page 27 Run the Installation Software 28 2 Understanding the Printer Software Software Overview 31 Installing Dell Software For Local Printing 32 Windows XP 32 Windows 2000 33 Windows 98 33 Windows Me 34 Assigning an IP Address - Dell 1815dn | Owners Manual - Page 9
Printing Copies on Both Sides of Paper 55 Changing the Default Settings 56 Scanning 57 Knowing the Scan Menu 58 Scanning to an Application 58 Scanning Using Network Scan 59 Scanning to the USB Memory Key 60 Scanning Using the Windows Image Acquisition (WIA) Driver 63 Scanning and Sending an - Dell 1815dn | Owners Manual - Page 10
the Toner Cartridge 78 Cleaning Your Multi-Function Printer 80 Cleaning the Exterior 80 Cleaning the Interior 80 Cleaning the Scanner 81 Cleaning the Drum 82 6 Troubleshooting Clearing Jams in the ADF 83 Clearing Jams in the Paper Paths 85 Paper Feed Jam (tray 1 85 Paper Feed Jam (optional - Dell 1815dn | Owners Manual - Page 11
Total Satisfaction Return Policy (Canada Only 128 Dell Software and Peripherals (Canada Only 128 1-Year End-User Manufacturer Guarantee (Latin America and the Caribbean Only 129 Angreskjema For Norske Forbrukere 130 Dell™ Printer Consumables Limited Warranties 132 Consumables Limited Warranty - Dell 1815dn | Owners Manual - Page 12
Directive sur la mise au rebut des appareils électriques et électroniques (WEEE 145 Richtlinie für Abfall von elektrischen und elektronischen Geräten (WEEE) . 146 Direttiva Rifiuti di apparecchiature elettriche ed elettroniche (WEEE). . . . . 146 Direktivet for kassert elektrisk og elektronisk - Dell 1815dn | Owners Manual - Page 13
damage. • Your product uses a laser. CAUTION: Use of controls or adjustments instructions, to a professional service person. • This product is designed to meet safety standards with the use of specific Dell-authorized components. The safety features of some parts may not always be obvious. Dell - Dell 1815dn | Owners Manual - Page 14
Czech Danish Dutch Finnish French German Hebrew Italian Iberian Portugese Spanish Norwegian Polish Ruaaian Swedish Turkey 14 - Dell 1815dn | Owners Manual - Page 15
4 Document Cover Open to place a document on the scanner glass. 5 Document Glass Place a document for copying, scanning, or sending faxes. 6 Document Output Tray Hold the document as it exits the ADF. 7 Operator Panel Operate the printer. 8 Output Tray Hold paper as it exits the front of the - Dell 1815dn | Owners Manual - Page 16
you want to: 9 Front Cover Access the toner cartridge. 10 Express Service Code Identify your printer while using support.dell.com or contacting technical support. Enter the Express Service Code to direct your call when contacting technical support. The Express Service Code is not available in - Dell 1815dn | Owners Manual - Page 17
telephone socket (EXT) ( ) and insert the supplied terminator. 23 Control Board Cover Open to install the optional memory card. 24 Power Receptacle Supply power to the printer. 25 Power Switch Turn the print on. 26 Rear Cover Open to remove the paper jams and use the rear output slot. 17 - Dell 1815dn | Owners Manual - Page 18
18 - Dell 1815dn | Owners Manual - Page 19
1 Preparing Your Multi-Function Printer Unlocking the Scanner 1 Remove the label completely from the scanner module by gently pulling it. The scan unlock switch automatically moves FORWARD to the unlock position. NOTE: To confirm the scanner is unlocked, open the scanner cover and make sure the blue - Dell 1815dn | Owners Manual - Page 20
Panel If you have not already done so, follow the steps on the Setup Diagram (poster) to complete the hardware installation. Use the printer operator panel to scan, copy, and fax. Common keys Key pad Common Keys Press: ➊ ➎ ➍ ➎ Key Pad ➊ ➋ ➌ Press: ➊ ➋ ➌ To: Return to the upper - Dell 1815dn | Owners Manual - Page 21
Dell Laser MFP 1815dn Menu Functions 1. Paper Setting Paper Size Paper Type 2. Copy Defaults # of Copies Zoom Contrast Quality Select Tray Duplex 3. Fax Defaults Contrast Resolution Ring to Answer 3. Fax Defaults MSG Confirm Auto Report Auto Reduction Discard Size Receive Code DRPD Mode Duplex - Dell 1815dn | Owners Manual - Page 22
ID, containing your telephone number and name or company name, will be printed at the top of each page sent from your printer. 1 Press Scroll ( or ) to highlight Menu and press Select ( ). 2 Press Scroll ( or ) to highlight Machine Setup and press Select ( ). 3 Press Select ( ) to access Machine - Dell 1815dn | Owners Manual - Page 23
Number Keypad to Enter Characters As you perform various tasks, you may need to enter names and numbers. For example, when you set up your printer, you should enter your name or your company's name and telephone number. When you store fax numbers in memory, you may also enter the corresponding - Dell 1815dn | Owners Manual - Page 24
code 9 and then press Pause ( ) before entering the telephone number. A "-" appears on the display to indicate when a pause is entered. Setting the Time and Date The time and date are printed on all faxes. NOTE: You may need to change the correct time and date if loss of power to the printer - Dell 1815dn | Owners Manual - Page 25
Add Person and press Select ( ). 4 Enter a name and press Select ( ). For details about how to enter names, see "Using the Number Keypad to Enter Characters" on page 23. 5 Enter a one and press Select ( ). 3 Press Scroll ( or ) to highlight Add Group and press Select ( ). 4 Enter a group name and - Dell 1815dn | Owners Manual - Page 26
all print jobs on the network, follow these instructions to attach the printer to a print server. NOTE: For additional network set-up configurations, see the User's Guide. Attaching Cables 1 Make sure the printer is powered off and unplugged. 2 Connect one end of a standard category 5 Unshielded - Dell 1815dn | Owners Manual - Page 27
and wait 30 seconds. Power on the printer again, and it should reset and show Warming Up Please Wait. Printing the Network Configuration Page The Network Configuration page shows how the network interface card on your printer is configured. 1 Press Scroll ( or ) to highlight Menu and press Select - Dell 1815dn | Owners Manual - Page 28
your Administrator user name and password, and then click OK. • Manually enter or browse for the clients or servers and click Add. • When you are finished adding remote computers, click Next. 4 Select the network printer you want to install. If you do not see your printer listed, click Update to - Dell 1815dn | Owners Manual - Page 29
replacement toner cartridges, just click the Dell supplies link right from your Web browser. NOTE: The Dell Printer Configuration Web Tool is not available when the printer is locally attached to a print server. To launch the Dell Printer Configuration Web Tool, type the network printer IP address - Dell 1815dn | Owners Manual - Page 30
30 Preparing Your Multi-Function Printer - Dell 1815dn | Owners Manual - Page 31
printer as a printer in Windows, you must install the printer driver(s). For information about installing the printer drivers in Windows, see "Installing Dell Software For Local Printing" on page 32. • Dell Printer Configuration Web Tool- enables you to monitor the status of your network printer - Dell 1815dn | Owners Manual - Page 32
is complete, print a test page. Click Finish and close the wizard. You are now ready to print. If you did not cancel the hardware wizards, refer to the following instruction for installing the printer driver for your operating system. Windows XP: 1 Make sure that the printer is connected to your - Dell 1815dn | Owners Manual - Page 33
, and then click Next through the wizard screens. 3 The scanner driver is automatically loaded first from D:\1815\Scan\WINXP2K\p3scan.inf, wizard, click Add New Hardware Wizard from the Windows taskbar. 9 Click Next. Search for the best driver for your device (Recommended) is selected. 10 Click Next - Dell 1815dn | Owners Manual - Page 34
the IP address, a DHCP or BOOTP server must exist on the network. To configure the IP address manually, you can use the supplied drivers and utilities CD. Print the Network Configuration page of the printer to see the current network configuration and MAC address. You will need this information to - Dell 1815dn | Owners Manual - Page 35
printer to the network. To add the printer to the network, enter the port name and an existing IP address for the printer. 9 The screen displays the printer drivers installed on your computer. You can change the printer name, set this printer as a default to be shared on the network. Click Next. 10 - Dell 1815dn | Owners Manual - Page 36
using the drivers and utilities CD or Windows uninstall. NOTE: Close all programs before uninstalling software, and restart your computer after completing the uninstall process. 1 From the Start menu, select Programs or All Programs → DELL → DELL Printers → Dell Laser MFP 1815 → Dell MFP Software - Dell 1815dn | Owners Manual - Page 37
Dimensions Paper Tray Bypass Tray Y- indicates Support Print Media Size A4 A5 A6 JIS B5 ISO B5 Letter Legal Executive Oficio Folio (tray 1 and optional tray 2) 8.27 x 11.7 in. Y Y (210 x 297 mm) 5.83 x 8.27 in. Y Y (148 x 210 mm) 4.13 x 5.85 in. Y Y (105 x 148.5 mm) 7.17 x 10.1 in - Dell 1815dn | Owners Manual - Page 38
Y- indicates Support Print Media Size Envelope 7-3/4 (Monarch) Envelope COM-10 Envelope DL Envelope C5 Envelope C6 Custom Dimensions Paper Tray ( Y Y Duplex Printing - Print Media Supported Print Media Paper Card Stock Transparencies Labels Dual-web and Integrated Labels Envelopes Paper Tray - Dell 1815dn | Owners Manual - Page 39
stock-maximum Index Bristol (grain short)a Tag Cover Transparencies Laser printer Print Media Weight Tray 1 and Optional Tray 2 60-90 g/m2 grain long (16-24 lb bond) - Labels-maximum Paper - Dual-web paper - Polyester - Vinyl - Integrated Forms Pressure- sensitive area (must enter - Dell 1815dn | Owners Manual - Page 40
page 47 for the paper used in copying and faxing, or Paper Tab on the User's Guide for PC-printing. To load paper: 1 Pull open the paper tray and remove it from the printer. 2 If you load paper that is longer than a standard (Letter or A4) size, such as Legal paper, press and unlatch the guide lock - Dell 1815dn | Owners Manual - Page 41
level surface. 4 Insert the paper stack into the paper tray with the side to be printed on, facing down. 5 Do not exceed the maximum stack height indicated by the paper limit marks on the both inside walls of the tray. NOTE: Overloading the paper tray may cause paper jams. Loading Print Media 41 - Dell 1815dn | Owners Manual - Page 42
size, adjust the front paper length guide so that it lightly touches the paper stack. 7 Pinch the paper width guide, as shown, and move it towards the stack of paper until it lightly touches the side of the stack. NOTE: Improper adjustment of paper guides can result in paper jams. 42 Loading - Dell 1815dn | Owners Manual - Page 43
8 Insert and slide the paper tray back into the printer. 9 Set the paper type and size. See "Setting the Paper Size and Type" on page 47 for copying and faxing or Paper Tab on the User's Guide for PC-printing. Using the Bypass Tray Use the bypass tray to print manual duplex, transparencies, labels, - Dell 1815dn | Owners Manual - Page 44
and unfold the paper support extension, as shown. 2 If you are using paper, flex or fan the edge of the paper stack to separate the pages before loading. For transparencies, hold them by the edges and avoid touching the print side. Oils from your fingers can cause print quality problems. 3 Load the - Dell 1815dn | Owners Manual - Page 45
will result in a paper jam or skew. 5 After loading paper, set the paper type and size for the bypass tray. See "Setting the Paper Size and Type" on page 47 for copying and faxing or Paper Tab on the User's Guide for PC-printing. NOTE: The settings made from the printer driver override the settings - Dell 1815dn | Owners Manual - Page 46
machine. 6 After printing, fold away the paper support extension and close the bypass tray. You can load up to: 250 sheets of plain paper in the paper tray 5 sheets of envelope in the bypass tray Make sure: The paper is designed for use with laser printers. • The stamp location is in the upper - Dell 1815dn | Owners Manual - Page 47
below about how much paper the printer output trays can hold: Output Location front output tray (face down) rear output slot (face up) Capacity 150 sheets of plain paper 1 sheet of paper Setting the Paper Size and Type Setting the Paper Size After loading paper in the paper tray or the bypass - Dell 1815dn | Owners Manual - Page 48
for color or gray scale images, use the scanner glass instead of the ADF. 1 Lift and open the document cover. 2 Place the document face down on the scanner glass and align it with the registration guide on the top left corner of the glass. 3 Close the document cover. 48 Loading Print Media - Dell 1815dn | Owners Manual - Page 49
one on top) into the ADF for scanning, copying, and faxing. The ADF is recommended for loading multiple page documents. 1 Place the document(s) face up on the ADF with the top edge of the documents in first. 2 Adjust the document guides to the correct document size. Make sure that the bottom of the - Dell 1815dn | Owners Manual - Page 50
50 Loading Print Media - Dell 1815dn | Owners Manual - Page 51
or 10/100 Base-TX network interface card. When you print a file from a Macintosh computer, you can use the PostScript driver by installing the PPD file. Refer to the User's Guide. Printing in Linux Your printer supports Linux systems with Dell's MFP driver package. Refer to the User's Guide. Using - Dell 1815dn | Owners Manual - Page 52
, TXT, PDF, and PRN file formats are supported. NOTE: Only English TXT files, PDF files generated by this printer, and TIFF 6.0 files are available. 1 Insert Copy # of Copies Zoom Contrast Quality Select Tray Layout Duplex Copy Defaults Refer to the following copy settings. Setting the Basic Copy - Dell 1815dn | Owners Manual - Page 53
job may be canceled and return to their default status. Or, they automatically return to their default status after copying. Number of Copies You glass or from 25 percent to 100 percent from the ADF. Note that the zoom rate available is different depending on Using Your Multi-Function Printer 53 - Dell 1815dn | Owners Manual - Page 54
document, see "Placing Documents on the Scanner Glass" on page 48 or "Loading Documents Into the ADF" on page 49. 2 Customize the copy settings paper loaded in the printer. Clone Copying (available via scanner glass only): Prints multiple image copies from the original document on a single page - Dell 1815dn | Owners Manual - Page 55
are pressed for 30 seconds. Poster Copying (available via scanner glass only): Prints an image onto nine sheets of paper (3 by 3). You can paste the printed pages together to make one poster-size document. Each portion is scanned and printed one by one. NOTE: You cannot adjust the copy size for - Dell 1815dn | Owners Manual - Page 56
Off: Prints in normal mode. • Long Edge: Prints pages to read like a book. • Short Edge: Prints pages to read by flipping over like a note pad. Start ( ) to begin copying. Your printer prints on both sides of paper automatically. Changing the Default Settings The copy options, including contrast, - Dell 1815dn | Owners Manual - Page 57
software from the drivers and utilities CD, you can start scanning images using either the operator panel or applications such as Dell ScanCenter, PaperPort and Adobe PhotoShop on your computer, or through the network using Network Scan, which allows you to scan a document on your printer as a JPEG - Dell 1815dn | Owners Manual - Page 58
, and OCR. • MS Paint: Sends the scanned image to Microsoft Paint. • Email: Sends the scanned image to your default email program on the computer. A new message window opens with the image attached. • My Documents: Saves the scanned image in the My Documents folder on the computer. • PaperPort - Dell 1815dn | Owners Manual - Page 59
is optional. You can select the default password option. 5 When you have added your printer to the network, Click Finish. Your printer appears on the Dell Network Scan Manager window and you can now scan through the network. Scanning Using Network Scan Using Network Scan you can scan a document from - Dell 1815dn | Owners Manual - Page 60
on a USB memory key. There are two ways of doing this: you can scan to the USB memory key using the default settings, or you can manually select your own settings. You can also format the USB memory key or check the available memory space. See the User's Guide. 60 Using Your Multi-Function Printer - Dell 1815dn | Owners Manual - Page 61
password settings, your printer may not automatically detect it. For details about these features, see the User's Guide which came with your USB memory key. Scanning Using the Default Settings The following table shows the default Scanner Glass" on page 48 or "Loading Documents Into the ADF" on page - Dell 1815dn | Owners Manual - Page 62
key into the USB memory port on your printer. 2 Load the document(s) face up with top edge in first into the ADF. OR Place a single document face down on the document glass. For details about loading a document, see "Placing Documents on the Scanner Glass" on page 48 or "Loading Documents Into the - Dell 1815dn | Owners Manual - Page 63
. Scanning Using the Windows Image Acquisition (WIA) Driver Your printer also supports the WIA driver for scanning images. WIA is one of the standard components provided by Microsoft Windows XP and works with digital cameras and scanners. Unlike the TWAIN driver, the WIA driver allows you to scan - Dell 1815dn | Owners Manual - Page 64
See the User's Guide. 1 Make sure that your printer is connected to a network. 2 Load the document(s) face up with top edge in first into the ADF. OR Place a single document face down on the document glass. For details about loading a document, see "Placing Documents on the Scanner Glass" on page 48 - Dell 1815dn | Owners Manual - Page 65
: A computer connection is not required for faxing. It is possible to begin typing the number on the number pad without first selecting fax mode. The printer will automatically switch to fax mode when the fourth digit is entered on the number pad. Knowing the Fax Menu Fax Fax to: Phone Book - Dell 1815dn | Owners Manual - Page 66
resolution supported by the receiving device. Sending a Fax Automatically 1 Load the document(s) face up with top edge in first into the ADF. OR Place a single document face down on the document glass. For details about loading a document, see "Placing Documents on the Scanner Glass" on page 48 - Dell 1815dn | Owners Manual - Page 67
document, see "Placing Documents on the Scanner Glass" on page 48 or "Loading Documents Into the ADF" on page 49. 2 Press Scroll ( or fax job at any time while sending the fax. Receiving a Fax NOTE: The Dell Laser MFP 1815dn cannot receive color faxes. 1 Press Scroll ( or ) to highlight Fax and - Dell 1815dn | Owners Manual - Page 68
address. When you select this option, you should choose whether the printer prints out the incoming faxes. • All: Allows you to forward to highlight Menu and press Select ( ). 2 Press Scroll ( or ) to highlight Fax Defaults and press Select ( ). 3 Press Scroll ( or ) to display the desired menu item - Dell 1815dn | Owners Manual - Page 69
reduce the size of the document to fit the size of paper loaded in the printer. Select On if you want to automatically reduce the incoming document. With this feature set to Off, the printer cannot reduce the document to fit onto one page. The document is divided and printed in actual size on two - Dell 1815dn | Owners Manual - Page 70
the Receive Code. The Receive Code is preset to *9* at the factory. Settings Duplex: You can set the printer to print received faxes on both sides of paper. The available options are Off, Long Edge, and Short Edge. Using Fax Features The following fax features are available. See the User's Guide - Dell 1815dn | Owners Manual - Page 71
is enabled only if the fax is sent manually and if the remote machine supports color fax reception. NOTICE: The fax machine automatically stores faxes in the memory if faxes are received while copying, printing, or running out of consumables (paper and toner). Faxes are printed once the machine is - Dell 1815dn | Owners Manual - Page 72
Using an Answering Machine Line Telephone Answering Device Line Phone Dell Laser MFP 1815dn Figure 1 You can connect a telephone answering device (TAD) directly to the back of your printer as shown in Figure 1. Set your printer to Ans/Fax mode and set the Ring to Answer to a digit greater than - Dell 1815dn | Owners Manual - Page 73
a fax. • To fax via the computer modem, follow the instructions provided with your computer modem and fax application. • Refer to the DELL Laser MFP 1815dn User's Guide if you want to capture images using your printer and Dell ScanDirectTM and send images using your fax application with the computer - Dell 1815dn | Owners Manual - Page 74
74 Using Your Multi-Function Printer - Dell 1815dn | Owners Manual - Page 75
quality problems and paper feed problems resulting from worn parts. The following items should be replaced after you have printed the specified number of pages. Item Yield (Average) ADF rubber pad Transfer roller Approx. 20,000 pages Approx. 70,000 pages Fuser unit Approx. 80,000 pages Tray - Dell 1815dn | Owners Manual - Page 76
rubber pad from the ADF, as shown. 4 Insert a new ADF rubber pad into place. 5 Align the left end of the ADF roller with the slot and push the right end of the ADF roller into the right slot. Rotate the bushing on the right end of the roller toward the ADF. 6 Close the ADF cover. 76 Maintenance - Dell 1815dn | Owners Manual - Page 77
Printer Configuration Web Tool and click the toner supplies link. 1 Double-click the Dell Toner Reorder Program icon on your desktop. OR 2 From the Start menu, click Programs or All Programs → DELL → DELL Printers → DELL Laser MFP 1815 → Dell Toner Reorder Program. The Order Toner Cartridges window - Dell 1815dn | Owners Manual - Page 78
. CAUTION: For best results, use Dell toner cartridges. Print quality and printer reliability are not guaranteed if you do not use Dell supplies. To replace the toner cartridge: 1 Open the front cover. 2 Pull the toner cartridge out. 3 Remove the new toner cartridge from its bag. 78 Maintenance - Dell 1815dn | Owners Manual - Page 79
the toner cartridge by the handle and slowly insert the cartridge into the opening in the printer. 6 Tabs on the sides of the cartridge and corresponding grooves within the printer will guide the cartridge into the correct position until it locks into place completely. 7 Close the front cover - Dell 1815dn | Owners Manual - Page 80
print quality problems, such as smearing or toner specks. Clean inside the printer to prevent these problems. 1 Power the printer off and unplug the power cord. Specify the length of time it takes for the printer to cool down. 2 Open the front cover and lightly pull the toner cartridge straight out - Dell 1815dn | Owners Manual - Page 81
white cotton black. 5 Reinsert the toner cartridge and close the front cover. 6 Plug in the power cord and power the printer on. Cleaning the Scanner Keeping the scanner and ADF glass clean ensure the highest quality copies and sent faxes. Dell recommends cleaning the scanner at the start of each - Dell 1815dn | Owners Manual - Page 82
Document Cover 3 ADF Glass 4 Scanner Glass 4 Wipe the underside of the white document cover and white sheet until it is clean and dry. 5 Close the document cover. Cleaning the Drum If there are streaks or spots on your print, the Organic Photo Conductor (OPC) drum of the toner cartridge may require - Dell 1815dn | Owners Manual - Page 83
. NOTE: To prevent document jams, use the document glass for thick, thin or mixed documents. 1 Remove the remaining documents from the ADF. If the document is jammed in the paper feed area: a Open the ADF cover. b Remove the document by gently pulling it out. c Close the ADF cover. Then reload the - Dell 1815dn | Owners Manual - Page 84
If the document is jammed in the paper exit area: a Open the document cover and turn the release knob to remove the misfed documents from the document output tray. b Close the document cover. Then load the documents back into the ADF. 2 If you cannot see the paper or the paper does not move when - Dell 1815dn | Owners Manual - Page 85
jam. Operator Panel Message Location of Jam Go to Paper Jam 0 Open Front Door Paper Jam 1 Cartridge Area Pager Jam 2 Open Rear Door Paper Feed Jam (tray 1) Paper Feed Jam (optional tray 2) Bypass Tray Jam Fuser Area Jam Paper Exit Jam page 85, page 86, or page 87. page 88. page 89. Duplex jam - Dell 1815dn | Owners Manual - Page 86
information, see "Fuser Area Jam" on page 88. 4 Insert the paper tray into the printer until it snaps into place. Printing automatically resumes. Paper Feed Jam (optional tray 2) 1 Pull the optional tray 2 open. 2 Remove the jammed paper from the printer. If you cannot see the paper in this area - Dell 1815dn | Owners Manual - Page 87
4 Pull the jammed paper straight up and out. 5 Insert the trays back into the printer. Printing automatically resumes. Bypass Tray Jam 1 If the paper is not feeding properly, pull the jammed paper out of the printer. 2 Open and close the front cover to resume printing. Troubleshooting 87 - Dell 1815dn | Owners Manual - Page 88
Fuser Area Jam NOTICE: The fuser area is hot. Take care when removing paper from the printer. 1 Open the front cover and lightly pull the toner cartridge straight out. 2 Remove the jammed paper by gently pulling it straight out. 3 Replace the toner cartridge and close the front cover. Printing - Dell 1815dn | Owners Manual - Page 89
Jam 1 Open and close the front cover. The jammed paper automatically exits the printer. If the paper does not exit, go to the next step. 2 Gently pull the jammed paper out of the output tray. 3 If you do not see the jammed paper in the output tray or the jammed paper does not move when pulled, open - Dell 1815dn | Owners Manual - Page 90
, the rear cover stopper, and fully open the rear cover, as shown. 6 Unfold the duplex guide fully. 7 While pushing the fuser lever to the right, open the fuser door. NOTICE: Make sure to unfold the duplex guide before opening the fuser door or you may damage the fuser door. 90 Troubleshooting - Dell 1815dn | Owners Manual - Page 91
to loosen the paper, and then remove the jammed paper. 9 Return the levers, fuser door, duplex guide, and rear cover stopper to their original position. 10 Close the rear cover. 11 Open and close the front cover. Printing automatically resumes. Duplex Jam Duplex Jam 0 1 Pull the duplex unit out of - Dell 1815dn | Owners Manual - Page 92
2 Remove the jammed paper from the duplex unit. If the paper does not come out with the duplex unit, remove the paper from the bottom of the printer. 3 Push the duplex unit to the printer. CAUTION: If you do not push the duplex unit in correctly, a paper jam may occur. 92 Troubleshooting - Dell 1815dn | Owners Manual - Page 93
Duplex Jam 1 1 Open the rear cover. 2 Unfold the duplex guide fully. 3 Pull the jammed paper out. 4 Return the duplex guide and close the rear cover. 5 Open and close the front cover. Printing automatically resumes. Troubleshooting 93 - Dell 1815dn | Owners Manual - Page 94
that the recommended print side of print materials is facing down in the paper tray and facing up in the bypass tray. • Ensure that the duplex unit is installed correctly. More Troubleshooting For more information about error messages or printing problems, see the User's Guide. 94 Troubleshooting - Dell 1815dn | Owners Manual - Page 95
to 192 MB. Remove the preinstalled memory DIMM before upgrading the memory. NOTE: Your printer supports only Dell DIMMs. Order Dell DIMMs online at www.dell.com. 1 Power the printer off and unplug all cables from the printer. 2 Grab the control board cover and open it. Installing Options 95 - Dell 1815dn | Owners Manual - Page 96
3 Completely open the latches on each side of the DIMM slot and remove the preinstalled memory DIMM. 4 Remove a new memory DIMM from its antistatic package. 5 Holding the - Dell 1815dn | Owners Manual - Page 97
PS printer driver, see "Installing Dell Software For Local Printing" on page 32. 2 Click the Windows Start menu. 3 For Windows 98/Me/NT 4.0/2000, select Settings and then Printers. For Windows XP, select Printers and Faxes. 4 Select the Dell Laser MFP 1815 PS printer. 5 Right-click the printer icon - Dell 1815dn | Owners Manual - Page 98
Installing an Optional Tray 2 You can increase the paper handling capacity of your printer by installing an optional tray 2. This tray holds 250 sheets of paper. 1 Power the printer off and unplug all cables from the printer. 2 Remove the packing tape and the tape fastening the optional tray 2 cable - Dell 1815dn | Owners Manual - Page 99
tray 2. 5 Connect the cable into the connector on the back of the printer. 6 Load paper in the optional tray 2. For information about loading paper in this tray, see "Using the Paper Tray" on page 40. 7 Reconnect the power cord and printer cable, and turn the printer on. Installing Options 99 - Dell 1815dn | Owners Manual - Page 100
you must configure the properties of the printer driver. To access the properties of the printer driver: 1 Click the Windows Start button. 2 For Windows 98/Me/NT 4.0/2000, click Settings and point to Printers. For Windows XP, click Printers and Faxes. 3 Click the Dell Laser MFP 1815 printer. 4 Right - Dell 1815dn | Owners Manual - Page 101
If you need help with a technical problem, Dell is ready to assist you. 1 Call technical support from a telephone near or at the printer so that technical support can assist you with any necessary procedures. When calling Dell, use your Express Service Code to help expedite the routing of your - Dell 1815dn | Owners Manual - Page 102
they are listed. NOTE: In certain countries, support specific to Dell XPS™ portable computers is available at a separate telephone dell.com E-mail for servers and EMC® storage products: [email protected] Customer Care Technical Support Technical Support Services Sales General Support Area Codes - Dell 1815dn | Owners Manual - Page 103
Country Code City Code Department Name or Service Area, Website and E-Mail Address Australia (Sydney) Website: support.ap.dell.com International Access Code: 0011 E-mail: support.ap.dell.com/contactus Country Code: 61 General Support City Code: 2 Austria (Vienna) Website: support.euro.dell - Dell 1815dn | Owners Manual - Page 104
) Online Order Status: www.dell.ca/ostatus International Access Code: 011 AutoTech (automated Hardware and Warranty Support) Customer Service (Home Sales/Small Business) Customer Service (med./large business, government) Customer Service (printers, projectors, televisions, handhelds, digital - Dell 1815dn | Owners Manual - Page 105
Access Code Country Code City Code China (Xiamen) Country Code: 86 City Code: 592 Colombia Costa Rica Department Name or Service Area, Website and E-Mail Address Technical Support website: support.dell.com.cn Technical Support E-mail: [email protected] Customer Care E-mail: [email protected] - Dell 1815dn | Owners Manual - Page 106
Country (City) International Access Code Country Code City Code Department Name or Service Area, Website and E-Mail Address Czech Republic (Prague) Website: support.euro.dell.com International Access Code: 00 E-mail: [email protected] Country Code: 420 Technical Support Customer Care Fax - Dell 1815dn | Owners Manual - Page 107
(Langen) International Access Code: 00 Country Code: 49 City Code: 6103 Department Name or Service Area, Website and E-Mail Address Website: support.euro.dell.com Home and Small Business Technical Support for XPS portable computers only Technical Support for all other Dell computers Customer Care - Dell 1815dn | Owners Manual - Page 108
Website: support.euro.dell.com International Access Code: 00 Technical Support Country Code: 30 Gold Service Technical Support Switchboard Gold Service Switchboard Sales Fax Grenada General Support Guatemala General Support Guyana General Support Hong Kong Website: support.ap.dell.com - Dell 1815dn | Owners Manual - Page 109
Access Code: 00 Country Code: 353 City Code: 1 Italy (Milan) International Access Code: 00 Country Code: 39 City Code: 02 Jamaica Department Name or Service Area, Website and E-Mail Address Website: support.euro.dell.com E-mail: [email protected] Technical Support for XPS portable - Dell 1815dn | Owners Manual - Page 110
Code Country Code City Code Department Name or Service Area, Website and E-Mail Address Japan (Kawasaki) Website: support.jp.dell.com International Access Code: 001 Technical Support (servers) Country Code: 81 Technical Support outside of Japan (servers) City Code: 44 Technical Support - Dell 1815dn | Owners Manual - Page 111
Access Code: 00 Country Code: 60 City Code: 4 Website: support.euro.dell.com Support Home/Small Business Sales Corporate Sales Customer Care Fax Technical Support Customer Service (Xiamen, China) Transaction Sales (Xiamen, China) Website: support.ap.dell.com Technical Support (Dell Precision - Dell 1815dn | Owners Manual - Page 112
Customer Service Main Montserrat Netherlands Antilles Netherlands (Amsterdam) International Access Code: 00 Country Code: 31 City Code: 20 New Zealand International Access Code: 00 Country Code: 64 Nicaragua General Support General Support Website: support.euro.dell.com Technical Support for XPS - Dell 1815dn | Owners Manual - Page 113
Access Code Country Code City Code Department Name or Service Area, Website and E-Mail Address Norway (Lysaker) Website: support.euro.dell.com International Access Code: 00 Technical Support for XPS portable computers only Country Code: 47 Technical Support for all other Dell products - Dell 1815dn | Owners Manual - Page 114
Country (City) International Access Code Country Code City Code Department Name or Service Area, Website and E-Mail Address Singapore (Singapore) Website: support.ap.dell.com International Access Code: 005 Country Code: 65 Technical Support (Dimension, Inspiron, and Electronics and Accessories) - Dell 1815dn | Owners Manual - Page 115
City Code: 22 Department Name or Service Area, Website and E-Mail Address Website: support.euro.dell.com Home and Small Business Technical Support Customer Care Sales Switchboard Fax Corporate Technical Support Customer Care Switchboard Fax Website: support.euro.dell.com Technical Support for XPS - Dell 1815dn | Owners Manual - Page 116
Country (City) International Access Code Country Code City Code Department Name or Service Area, Website and E-Mail Address Taiwan Website: support.ap.dell.com International Access Code: 002 E-mail: [email protected] Country Code: 886 Technical Support (OptiPlex, Latitude, Inspiron, - Dell 1815dn | Owners Manual - Page 117
Country (City) International Access Code Country Code City Code U.K. (Bracknell) International Access Code: 00 Country Code: 44 City Code: 1344 Uruguay Department Name or Service Area, Website and E-Mail Address Website: support.euro.dell.com Customer Care website: support.euro.dell.com/uk/en/ECare - Dell 1815dn | Owners Manual - Page 118
Website and E-Mail Address U.S.A. (Austin, Texas) Automated Order-Status Service International Access Code: 011 AutoTech (portable and desktop computers) Country Code: 1 Hardware and Warranty Support (Dell TV, Printers, and Projectors) for Relationship customers Consumer (Home and Home Office - Dell 1815dn | Owners Manual - Page 119
Dell may invoice parts of an order separately. Your order is subject to cancellation by Dell, at Dell's sole discretion. Unless you and Dell have agreed to a different discount, Dell's standard pricing policy for Dell™-branded systems, which include both hardware and services in one discounted price - Dell 1815dn | Owners Manual - Page 120
discretion, credit for partial returns may be less than invoice or individual component prices due to bundled or promotional pricing. 7 Changed or Discontinued Product. Dell's policy is one of ongoing update and revision. Dell may revise and discontinue Product at any time without notice to you and - Dell 1815dn | Owners Manual - Page 121
end-user customer's-Dell-branded hardware products, including Dell- instructions - Failure to follow the product instructions or failure to perform preventive maintenance - Problems caused by using accessories, parts, or components not supplied by Dell • Products with missing or altered Service - Dell 1815dn | Owners Manual - Page 122
be connected. • Other add-on hardware carries the longer of either a 1-year limited warranty for new parts and a 90-day limited warranty for reconditioned parts or, for both new and reconditioned parts, the reminder of the warranty for the Dell computer on which such parts are installed. The limited - Dell 1815dn | Owners Manual - Page 123
us at the relevant number listed in the following table. Please also have your Dell Service Tag or order number available. Individual Home Consumers: U.S. Only Technical Support 1-800-624-9896 Customer Service 1-800-624-9897 Individual Home Consumers who purchased through an Employee Purchase - Dell 1815dn | Owners Manual - Page 124
end-user customer's-Dell-branded hardware products, including Dell- instructions - Failure to follow the product instructions or failure to perform preventive maintenance - Problems caused by using accessories, parts, or components not supplied by Dell • Products with missing or altered Service - Dell 1815dn | Owners Manual - Page 125
if we repair or replace a warranted product or any parts. Dell may change the terms and availability of limited warranties, at Dell Service Tag or order number available. Individual Home Consumers; Home Office and Small Business Customers: Canada Only Technical Support and Customer Service - Dell 1815dn | Owners Manual - Page 126
to that contract for details on how to obtain service. Dell's service contracts can be found online at www.dell.ca or by calling Customer Care at 1-800-847-4096. If you purchased through us a service contract with one of our third-party service providers, please refer to that contract (mailed to you - Dell 1815dn | Owners Manual - Page 127
or the return is a direct result of a Dell error, a restocking fee of 15% may be charged on hardware, accessories, peripherals, parts and unopened software still in its/their sealed package. How to Return: To return products, you must contact Dell customer service (www.dell.com/us/en/gen/contact.htm - Dell 1815dn | Owners Manual - Page 128
price. If you are an end-user customer who bought reconditioned or refurbished products from Dell, you may return them to Dell be in as-new condition, and all of the manuals, floppy disk(s), CD(s), power cables, and other of Dell computers, nor do we test or guarantee all of the products we sell on - Dell 1815dn | Owners Manual - Page 129
and/or any rights resulting from other contracts concluded by the end user with Dell and/or any other seller. Dell World Trade LP One Dell Way, Round Rock, TX 78682, USA Dell Computadores do Brasil Ltda (CNPJ No. 72.381.189/0001-10) Avenida Industrial Belgraf, 400 92990-000 - Eldorado do Sul - RS - Dell 1815dn | Owners Manual - Page 130
angrerett mv. ved fjernsalg og salg utenfor fast utsalgssted (angrerettloven) § 10. Skal brukes ved fjernsalg og salg utenfor fast utsalgssted av varer. navn Dell A/S Selgerens adresse Amager Strandvej 60-64, 2300 Kjøpenhavn, Danmark Telefonnr. 23 16 23 57 E-postadresse [email protected] - Dell 1815dn | Owners Manual - Page 131
Skjema A (bokmål) side 2 av 2. Angrefristens Utgangspunkt Opplysningene i henhold til angrerettloven kapittel 3 er mottatt på foreskreven måte når kravene i § 9 jf. § 7 er oppfylt og dette skjemaet er mottatt ferdig utfylt med de opplysningene selgeren skal fylle ut. Se utdrag fra §§ 9 og 7 - Dell 1815dn | Owners Manual - Page 132
warranty for printer consumables (ink cartridges, toner cartridges, photo print packs, and photo paper) for Dell-branded printers, for YOU. THIS WARRANTY COVERAGE TERMINATES IF YOU SELL OR OTHERWISE TRANSFER THIS PRODUCT TO ANOTHER PARTY. DELL DOES NOT ACCEPT LIABILITY BEYOND THE REMEDIES PROVIDED - Dell 1815dn | Owners Manual - Page 133
of users of Software installed on a network server will exceed the number of licenses, you must purchase additional licenses until the number of licenses equals the number of users before allowing additional users to use the Software. If you are a commercial customer of Dell or a Dell affiliate - Dell 1815dn | Owners Manual - Page 134
Dell and its suppliers, and your exclusive remedy, shall be (a) return of the price , or service or modification by someone other than Dell. Any replacement users acquire the software and documentation with only those rights set forth herein. Contractor/manufacturer is Dell Products, L.P., One Dell - Dell 1815dn | Owners Manual - Page 135
branch circuits. If necessary, consult a Dell Support representative or an experienced radio/television technician for additional suggestions. For additional regulatory information, see the owner's manual or user's guide for your computer. Dell™ products are designed, tested, and classified - Dell 1815dn | Owners Manual - Page 136
if not installed and used in accordance with the manufacturer's instruction manual, may cause interference with radio and television reception. This Function Printer • Model number: Dell Laser MFP 1815dn • Company name: Dell Inc. Worldwide Regulatory Compliance & Environmental Affairs One Dell Way - Dell 1815dn | Owners Manual - Page 137
is subject to state tariffs. There are no user serviceable parts on the modem contained in your printer. If your telephone equipment causes harm to the telephone network, the telephone company will notify you in advance that service may be temporarily discontinued. If advance notice is not practical - Dell 1815dn | Owners Manual - Page 138
telecommunications network protective, the user's satisfaction. Before installing this equipment, users should may not prevent degradation of service in some situations. Repairs to information is provided in compliance with IC regulations: Dell Inc. One Dell Way Round Rock, TX 78682 USA 512-338- - Dell 1815dn | Owners Manual - Page 139
European Union, Class B This Dell device is classified for use in a typical Class B domestic environment. A "Declaration of Conformity" in accordance with the preceding directives and standards has been made and is on file at Dell Inc. Products Europe BV, Limerick, Ireland. Appendix 139 - Dell 1815dn | Owners Manual - Page 140
140 Appendix - Dell 1815dn | Owners Manual - Page 141
Appendix 141 - Dell 1815dn | Owners Manual - Page 142
142 Appendix - Dell 1815dn | Owners Manual - Page 143
Consumption: Output voltage: Output current: Dell Inc. One Dell Way Round Rock, TX 78682 Dell Computer de México, S.A. de Dell Computer de México, S.A. de C.V. al Cuidado de Kuehne & Nagel de México S. de R.L. Avenida Soles No. 55 Col. Peñon de los Baños 15520 México, D.F. Dell Laser MFP 1815dn - Dell 1815dn | Owners Manual - Page 144
(EPA) ENERGY STAR® requirements as configured when shipped by Dell. The proper operation of the function Dell recommends that customers dispose of their used computer hardware, monitors, printers, and other peripherals in an environmentally sound manner. Potential methods include reuse of parts - Dell 1815dn | Owners Manual - Page 145
en egnet facilitet for at muliggøre genbrug. For information om hvordan dette produkt genbruges ansvarligt i dit land, bedes du gå til: www.dell.com/recyclingworldwide. Richtlijn WEEE, afdanken van elektrische en elektronische apparaten In de Europese Unie geeft dit label aan dit product niet via - Dell 1815dn | Owners Manual - Page 146
operazioni di recupero e riciclaggio. Per informazioni sulle procedure di riciclaggio responsabile di questo prodotto nel proprio Paese, visitare: www.dell.com/recyclingworldwide. Direktivet for kassert elektrisk og elektronisk utstyr (WEEE) I den Europeiske Unionen angir dette merket at produktet - Dell 1815dn | Owners Manual - Page 147
instalação apropriada para recolha e reciclagem. Para obter informações sobre como reclicar este produto de forma responsável em seu país, visite: www.dell.com/recyclingworldwide. Directiva sobre el deshecho de material eléctrico y electrónico (WEEE) En la Unión Europea, esta etiqueta indica que la - Dell 1815dn | Owners Manual - Page 148
148 Appendix - Dell 1815dn | Owners Manual - Page 149
scanner, 81 clearing document jams, 83 paper jams, 85 computer modem, 73 contacting, Dell, 102 copying, 52 canceling, 54 contrast, 53 default setting, 56 duplex, 55 number of pages , 34 J jam, clearing document, 83 paper, 85 L loading document ADF, 49 scanner glass, 48 loading, paper in the bypass - Dell 1815dn | Owners Manual - Page 150
key, 60 using network scan, 59 WIA driver, 63 software installing local, 32 network, 35 overview, 31 speed dial, setting, 25 supplies, ordering, 77 support contacting Dell, 101-102 T time and date setting, 24 toner cartridge ordering, 3, 77 replacing, 78 troubleshooting, 83 U uninstalling, software
-
 1
1 -
 2
2 -
 3
3 -
 4
4 -
 5
5 -
 6
6 -
 7
7 -
8
-
9
-
10
-
11
-
12
-
13
-
14
-
15
-
16
-
17
-
18
-
19
-
20
-
21
-
22
-
23
-
24
-
25
-
26
-
27
-
28
-
29
-
30
-
31
-
32
-
33
-
34
-
35
-
36
-
37
-
38
-
39
-
40
-
41
-
42
-
43
-
44
-
45
-
46
-
47
-
48
-
49
-
50
-
51
-
52
-
53
-
54
-
55
-
56
-
57
-
58
-
59
-
60
-
61
-
62
-
63
-
64
-
65
-
66
-
67
-
68
-
69
-
70
-
71
-
72
-
73
-
74
-
75
-
76
-
77
-
78
-
79
-
80
-
81
-
82
-
83
-
84
-
85
-
86
-
87
-
88
-
89
-
90
-
91
-
92
-
93
-
94
-
95
-
96
-
97
-
98
-
99
-
100
-
101
-
102
-
103
-
104
-
105
-
106
-
107
-
108
-
109
-
110
-
111
-
112
-
113
-
114
-
115
-
116
-
117
-
118
-
119
-
120
-
121
-
122
-
123
-
124
-
125
-
126
-
127
-
128
-
129
-
130
-
131
-
132
-
133
-
134
-
135
-
136
-
137
-
138
-
139
-
140
-
141
-
142
-
143
-
144
-
145
-
146
-
147
-
148
-
149
-
150
 |
 |
www.dell.com | support.dell.com
Dell™ Laser Multi-Function Printer 1815dn
Owner’s Manual
Look Inside For:
• Preparing Your Multi-Function Printer
• Understanding the Printer Software
• Loading Print Media
• Using Your Multi-Function Printer
• Maintenance
• Troubleshooting
• Installing Options
• Contacting Dell
Temporary