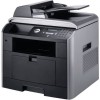
Dell 1815dn Firmware Upgrade
Dell 1815dn - All-in-one Laser Printer Manual
 |
UPC - 000061100008
View all Dell 1815dn manuals
Add to My Manuals
Save this manual to your list of manuals |
Dell 1815dn manual content summary:
- Dell 1815dn | Firmware Upgrade - Page 1
Click Yes. 6. A Self Extractor window appears and indicates C:\DELL\DRIVERS\R126886 files were extracted. 7. Click OK. 8. Follow the on-screen installation instructions in the window. Steps to upgrade Dell 1815dn USB Connected Printer 1. Locate the file name "Dell1815dn_V1.03.02.06_AutoUpgrade.exe - Dell 1815dn | Firmware Upgrade - Page 2
Figure 1 5. Click the "F/W Update" button. 6. At this point, the utility will begin to download the firmware to your printer. See Figure 2. Figure 2 7. Once the firmware has been sent, a message stating, "Update Complete!" will be displayed. See Figure 3. Figure 3 WARNING: Even though the "Update - Dell 1815dn | Firmware Upgrade - Page 3
Dell 1815dn Network Connected Printer 1. Download the "Dell1815dn_V1.03.02.06_smdall.hd " file from support site on www.dell. The printer's IP address appears near the bottom of the page. 3. Open up your internet browser and key in the IP address of your printer. Click on "Printer Settings" - Dell 1815dn | Firmware Upgrade - Page 4
4. Then click on the "Update Print Server Firmware". See Figure 5. Figure 5 5. After clicking on the link, it will prompt you to enter your printer's network password. The user name is admin, and by default, the password is 4455. Click OK after entering. See Figure 6. Figure 6 - Dell 1815dn | Firmware Upgrade - Page 5
6. After clicking on OK, you will see the Update Firmware page. Click on Browse to locate your "Dell1815dn_V1.03.02.06_smdall.hd" file. See Figure 7. Figure 7 7. After locating your firmware, click on the Update Printer Firmware button. You should see the Flash Upgrade message. See Figure 8. - Dell 1815dn | Firmware Upgrade - Page 6
may take several minutes and during this time, do not turn off your printer or computer or disconnect any cables during the update process. Doing this will corrupt the memory and the printer will be permanently damaged. 8. The printer re-booted and the LCD panel shows "Ready" message. 9. You have

Updating Firmware on the Dell Laser Printer MFP 1815dn
NOTICE: Do not turn off your printer or computer, or disconnect any cables during this operation.
Doing this will corrupt the memory and the printer will be permanently damaged.
USB-Connected Printers
Dell 1815dn Firmware information
Firmware zippack name
:
R126886.exe
Firmware File Name
:
Dell1815dn_V1.03.02.06_AutoUpgrade.exe
1.
Double-click the new icon on the desktop labeled R126886.EXE.
2.
The Self-Extractor window appears.
3.
Click OK or Continue.
4.
The Self-Extracting Driver Installation window appears and prompts to extract files to
C:\DELL\DRIVERS\R126886.
5.
Leave all of the default settings and click Unzip or OK. If the directory doesn't exist, you'll
be prompted to create one. Click Yes.
6.
A Self Extractor window appears and indicates C:\DELL\DRIVERS\R126886 files were
extracted.
7.
Click OK.
8.
Follow the on-screen installation instructions in the window.
Steps to upgrade Dell 1815dn USB Connected Printer
1.
Locate the file name “
Dell1815dn_V1.03.02.06_AutoUpgrade.exe”
typically this should be
located at C:\DELL\DRIVERS\R126886 if not select the location where you downloaded
the file.
2.
Connect your PC to Dell1815dn via USB.
3.
Double-Click the “
Dell1815dn_V1.03.02.06_AutoUpgrade.exe
” icon to launch the
Firmware Update Utility.
4.
When the Firmware Update Utility launches, select the “Local (USB)” option. See Figure 1.


