Dell 2355DN User Guide
Dell 2355DN Manual
 |
View all Dell 2355DN manuals
Add to My Manuals
Save this manual to your list of manuals |
Dell 2355DN manual content summary:
- Dell 2355DN | User Guide - Page 1
Dell™ 2355dn Laser MFP User's Guide - Dell 2355DN | User Guide - Page 2
DellTM 2355dn Laser MFP User's Guide Click the links to the left for information on the features, options, and operation of your printer. For information on other documentation included with your printer, see "Finding Information". To order replacement toner cartridges or supplies from Dell: 1 - Dell 2355DN | User Guide - Page 3
and the YOURS IS HERE logo are trademarks of Dell Inc.; Intel, Pentium, and Celeron are registered trademarks of Intel Corporation in the U.S. and other countries; Microsoft, Windows, Windows Server, MS-DOS , Windows Vista, and Windows 7 are either trademarks or registered trademarks of Microsoft - Dell 2355DN | User Guide - Page 4
19 10 15 1. DADF 2. Document width guides 3. Document input tray 4. Document output tray 5. Operator panel 6. Output tray (face down) 7. MPF (Multi purpose feeder) 8. Front cover 9. Tray 1 10. Optional tray 2 11. USB memory port 12. Paper output extension 13. Document glass 14. Toner cartridge 15 - Dell 2355DN | User Guide - Page 5
available in all countries. • Latest drivers for my printer Dell Support Website: support.dell.com • Answers to technical service The Dell Support Website provides several online tools, including: and support questions • Solutions - Troubleshooting hints and tips, articles from • Documentation - Dell 2355DN | User Guide - Page 6
the PS3 Font list 27 Setting up the hardware 27 Installing the Toner Cartridge 29 Loading Paper 31 Making Connections 34 Connecting the Telephone Line 34 Connecting the Printer Cable 37 Powering On the Printer 39 Setting fax setup sequence 39 Dell 2355dn Laser MFP Menu Functions 40 - Dell 2355DN | User Guide - Page 7
49 Printer Status 50 Printer Settings 50 Printer Server Settings 50 Fax Settings 50 Email Settings 51 Copy Printer Settings 55 Printing Statistics 55 Set Password 55 Wireless 55 Online Help 55 Installing Software in Microsoft® Windows® Operating System 56 Installing Dell Software for - Dell 2355DN | User Guide - Page 8
Uninstalling Software 65 Using the Dell Toner Management System 66 Printer Status Monitor 66 Printer Settings Utility 67 The Directory Section 68 The Fax Setting Section 69 The Setting Section 69 The Layout Section 69 The Paper Option Section 69 The Graphic Section 69 The Emulation Section - Dell 2355DN | User Guide - Page 9
Size 96 MPF 97 Bypass Mode 97 Tray Mode 97 Printing Printing a Document 100 Canceling a Print Job 102 Printer Settings 103 Basic Tab 104 Paper Tab 105 Graphic Tab 107 Advanced Tab 110 Dell Tab 111 Using a Presets Setting 112 Using Help 112 Printing Multiple Pages on One Sheet of the - Dell 2355DN | User Guide - Page 10
Special Copy Features 134 ECO Copying 135 Book Copying 135 Collate Copying 136 Auto Fit Copying 136 Clone Copying 137 Poster Copying 137 ID Copying 138 2-up or 4-up copying (N-up 139 Printing Copies on Both Sides of Paper 139 Changing the Default Settings 140 Scanning Scanning Overview - Dell 2355DN | User Guide - Page 11
in Dell Scan Manager 146 Scanning to a PC Application 148 Scanning and Sending an Email 149 Scanning and Sending to SMB Server 150 Scanning and Sending to FTP Server 151 Scanning and Sending Custom Email 152 Scan to Fax Server 153 Scanning Using the Windows Image Acquisition (WIA) Driver 154 - Dell 2355DN | User Guide - Page 12
Editing Group Numbers 169 Printing Address Book 170 Changing Default Settings 170 Networking About Sharing the Printer on a Network 172 Locally-shared Printer 172 Wired Network-connected Printer 172 Printing Across a Network 172 Setting Up the Locally Shared Printer 172 In Windows 2000/XP - Dell 2355DN | User Guide - Page 13
195 Speed Dialing 195 Group Dialing 197 Searching for a Number in the Memory 200 Printing a Phonebook List 201 Other Ways to Fax 201 Sending a Delayed Fax 201 Sending a Priority Fax 202 Adding Documents to a Scheduled Fax 203 Canceling a Scheduled Fax 203 Fax Forward to E-mail addresses - Dell 2355DN | User Guide - Page 14
a Document 218 Changing Printer Settings 218 Printing Multiple Pages on One Sheet of Paper 219 Duplex Printing 220 Scanning 222 Linux Getting Started 224 Installing the MFP Driver 224 System Requirements 224 Installing the MFP Driver 225 Uninstalling the MFP Driver 231 Using the Unified - Dell 2355DN | User Guide - Page 15
Toner Cartridge 254 Cleaning the Drum 256 Replacement Parts 256 Ordering Supplies 257 Troubleshooting Clearing Jams in the DADF 260 Clearing Jams in the Paper Tray 264 Paper Feed Jam (tray 1 265 Paper Feed Jam (optional tray 2 266 MPF Jam 268 Fuser Area Jam 268 Paper Exit Jam 269 Duplex - Dell 2355DN | User Guide - Page 16
Fax Problems 290 Copying Problems 292 Scanning Problems 293 Global address problems 294 Common Windows Problems 294 Common Linux Problems 295 Common Macintosh Problems 297 Troubleshooting PostScript (PS) Errors 298 Installing Accessories Precautions When Installing Printer Accessories 300 - Dell 2355DN | User Guide - Page 17
16 - Dell 2355DN | User Guide - Page 18
and the telephone line cord may differ according to your country's specifications. b The Software and Documentation CD contains Dell printer drivers, Scan drivers, Printer Settings Utility, Set IP, Macintosh driver, Linux driver, Dell Toner Management System, SmarThru Office and a User's Guide. 17 - Dell 2355DN | User Guide - Page 19
carton and packing material in case the printer needs to be repacked. 4 Remove the packing tape from the front, back, and sides of the printer. 5 Remove the label completely from the scanner module by gently pulling it. The scan unlock switch should move forward to the unlock position as the label - Dell 2355DN | User Guide - Page 20
( ) position. If the latch is not in the unlocked position, reach under the operator panel and pull it forward. If the scan switch is locked, you cannot copy or scan. NOTE: When you are moving the printer or do not intend to use it for a long period of time, move the switch BACKWARD to the - Dell 2355DN | User Guide - Page 21
printer. The following illustrations show the standard Dell 2355dn Laser MFP and an optional tray 2 attached: Front View DADF (Duplex Automatic Document Feeder) cover document width guides document input tray operator panel (See "Operator Panel Button Functions".) USB memory port paper output - Dell 2355DN | User Guide - Page 22
View USB port rear door (open for face up output) power switch power receptacle control board cover optional tray 2 cable locking unit slotb network port optional tray 2 cable connector telephone line socket (Line) extension telephone socket (EXT)a a If you want to connect the extension phone - Dell 2355DN | User Guide - Page 23
shows the jobs currently running and in queue. You can copy both sides of an ID Card, such as a driver's license, to a single side of paper. Gives detailed information about machine's info., reports, troubleshooting guide, and quick reference guide. Fax Keys Press: To: Dial/Enter number. 22 - Dell 2355DN | User Guide - Page 24
print quality by redistributing the toner. • The toner cartridge is totally empty. Remove the old toner cartridge and install a new one. • A paper jam has occurred. • There is no paper in the tray. Load paper in the tray. • The machine has stopped due to a major error. Check the display message. 23 - Dell 2355DN | User Guide - Page 25
on the control panel allows user-friendly operation of the machine. Once you press the home icon ( ) on the screen, it shows the home screen. • Copy: Enters the copy menu. • Scan: Enters the scan menu. • Fax: Enters the fax menu. • Setup: You can browse current machine settings or change machine - Dell 2355DN | User Guide - Page 26
for better usability to the user. Touch the input area where you need to enter alphabet characters, numbers, diacritical marks, or special Enters a blank between characters. Also, you can insert a pause in the fax number. A "," appears on the display. • : Toggles between lowercase keys and - Dell 2355DN | User Guide - Page 27
the feature you want. 4 If you want to change shortcut name, press when the confirmation window appears and enter the new name using the keyboard. Otherwise, press . Setting the Default Settings The default settings are used unless they are changed by using the operator panel. To create your - Dell 2355DN | User Guide - Page 28
Dell 2355dn Laser MFP Laser printer supports the PCL and PS fonts. If you want to see the PCL and PS font list, follow these steps: Printing the PCL Font list covers and trays. The area should be well-ventilated and away from direct sunlight or sources of heat, cold, and humidity. Do not set the - Dell 2355DN | User Guide - Page 29
enclosed items. 3 Remove the tape holding the machine tightly. 4 Install the print cartridge. 5 Load paper. See "Loading Paper". 6 Make sure that all the cables are connected to the printer. 7 Turn the printer on. NOTE: When you move the printer, do not tilt or turn it upside down. Otherwise, the - Dell 2355DN | User Guide - Page 30
to distribute the toner evenly inside the cartridge. NOTE: If toner comes into contact with your clothing, wipe the toner off with a dry cloth and wash your clothing in cold water. Hot water sets toner into fabric. 3 Holding the toner cartridge by the handle, slide it into the printer until it locks - Dell 2355DN | User Guide - Page 31
4 Close the front cover. 30 - Dell 2355DN | User Guide - Page 32
Paper Type" and "Setting the Paper Size" for the paper used in copying and faxing, or "Paper Tab" for computer printing. Load the paper: 1 Pull the paper tray out of the printer. 2 If you load paper that is longer than a standard (Letter or A4) size, such as Legal paper, press and unlatch the guide - Dell 2355DN | User Guide - Page 33
3 Slide in the paper length guide until it rests against the end of the paper stack. For paper smaller than Letter size, adjust the rear paper length guide so that it lightly touches the paper stack. 4 Pinch the paper width guide, and move it towards the stack of paper until it touches the side of - Dell 2355DN | User Guide - Page 34
facing down. 7 Do not exceed the maximum stack height indicated by the paper limit marks on both the inside walls of the tray. NOTE: Overloading the paper tray may cause paper jams. NOTE: Improper adjustment of paper guides can result in paper jams. 8 Slide the paper tray back into the printer. 33 - Dell 2355DN | User Guide - Page 35
and size. For more information, see "Setting the Paper Type" and "Setting the Paper Size". Making Connections Connecting the Telephone Line RJ11 telephone line socket (Line) To the wall jack 1 Plug one end of a telephone line cord into the RJ11 telephone line socket (FAX) and the other end into an - Dell 2355DN | User Guide - Page 36
phone or Telephone answering device (TAD): If connecting a FAX using an answering machine or telephone answering device (TAD): Computer Telephone Answering Device NOTE: Set rings to answer to digit greater than the "Ring to Answer" setting for the telephone answering device (TAD). If connecting - Dell 2355DN | User Guide - Page 37
to answer to digit greater than the "Ring to Answer" setting for the telephone answering device (TAD). NOTE: For additional information, see "Using an Answering machine" or "Using a Computer Modem". NOTE: Phone adaptor not supplied for - Dell 2355DN | User Guide - Page 38
to a network instead of your computer, skip this step and go on to "Connecting the printer to the Network". NOTE: USB cables are sold separately. Contact Dell to purchase a USB cable. NOTE: Connecting the printer to the USB port of the computer requires a certified USB cable. You will need to buy - Dell 2355DN | User Guide - Page 39
the other end of the cable to an available USB port on the computer, not the USB keyboard. Connecting the printer to the Network 1 Ensure that the printer, computer, and any other attached devices are powered off and unplugged. 2 Connect one end of a standard category 5 Unshielded Twisted Pair - Dell 2355DN | User Guide - Page 40
the Time and Date". 4 When fax setup confirmation window appears, select or . If you selected , your printer restores the fax settings as default. If you selected : a Your printer prints out a Fax Setup Help Report. b Enter the machine ID. See "Setting the Printer ID". c Select the receive - Dell 2355DN | User Guide - Page 41
Copy Fax Server On Hook Dial ID Copy USB Redial N -Up Copy Setup Job Status Machine Setup Maintenance Troubleshooting Language Default Setting Paper Setup Tray Behavior Email/Fax List Reports Fax Setup Email Setup Network Setup Initial Setup Restore Options Job Management Clear Drum Fax - Dell 2355DN | User Guide - Page 42
to select Op-panel Menu Tree. The Op-panel menu page prints out. Setting the Machine ID You can set the machine ID and fax number which will be printed at the top of each page. If you have installed the fax multi-line kit, you need to select a line first, follow these steps: 1 Press Setup Machine - Dell 2355DN | User Guide - Page 43
the duration for which the printer waits after a job is settings you want. 6 Press the home icon ( ) to return to the Standby mode. NOTE: Available setting range is from 5 min. to 120 min. (factory default : 30 min.) and you can also access this mode from the EWS (Printer Settings Print Settings - Dell 2355DN | User Guide - Page 44
and Date The time and date are printed on all faxes. NOTE: It may be necessary to reset the correct time and date if loss of power to the printer occurs. To set the time and date: 1 Press Setup Machine Setup from the home screen. 2 Press the Next ( ) button. 3 Press the up/down - Dell 2355DN | User Guide - Page 45
such as a dial tone or a fax tone. With this option set to Comm. the speaker is on until volume. For the error volume, you can select Off, Low, Med, and High. • Selection: You can set the selection volume for 5 Press the left/right arrows to select Manual. 6 Enter the Start Date and End Date each using - Dell 2355DN | User Guide - Page 46
mode. Changing the Default Mode You can set the default values for copy, fax, scan, and home window. 1 Press Setup Setting the Time Out Option You can set the time the printer waits before it restores the default copy or fax settings if you do not start copying or faxing after changing the settings - Dell 2355DN | User Guide - Page 47
On. 6 Press the home icon ( ) to return to the Standby mode. Setting the Timing of Toner Low Alert You can customize the level to alert toner low or toner empty. If the current toner amount drops below the setting level, the printer will display a warning message on the operator panel. 1 Press Setup - Dell 2355DN | User Guide - Page 48
mode. Ignoring the Toner Low Message (Only for Fax) When the toner cartridge has almost reached its estimated cartridge life, the printer shows the toner empty message and continues printing except incoming faxes. In this case, incoming faxes are saved in memory. However, you can set the machine to - Dell 2355DN | User Guide - Page 49
printer drivers in Windows, see "Installing Software in Microsoft® Windows® Operating System". • Dell Printer Configuration Web Tool- enables you to monitor the status of your network printer without leaving your desk. • Printer Settings Utility- allows you to set up fax phonebook and the printer - Dell 2355DN | User Guide - Page 50
known as the printer Embedded Web Service, lets you monitor the status of your network printer without leaving your desk. You can also view and/or change the printer configuration settings, monitor the toner level, and order replacement toner cartridges by clicking on the Dell supplies link right - Dell 2355DN | User Guide - Page 51
toner cartridges. Printer Settings Change the printer settings, view the printer settings status, and update the print server firmware. NOTE: Configuration Menu blocks the user from altering the operator panel setting unless the correct password is entered. Printer Server Settings This menu supports - Dell 2355DN | User Guide - Page 52
to carry out fax server settings. Default Scan Resolution Select the default scanning resolution. Default Select the file format of an attachment. Attachment Type Default [From:] Enter your email address. Address Default [To:] Address Enter the recipient's email address. Customization Field - Dell 2355DN | User Guide - Page 53
Sets the timeout period from 30 to 120 seconds. Reply Address Designates the reply e-mail address sent with each E-mail Alert. Secure Email Connection with SSL/TLS Supports the POP3 server port number up to 15 alphanumeric characters. POP3 User Namea Specifies the POP3 account user name.Up to 63 - Dell 2355DN | User Guide - Page 54
Alerts for List 2 • Supply Alert: Select the check box to receive an E-Mail Alert for consumables. • Paper Handling Alert: Select the check box to receive an E-Mail Alert for paper handling. • Toner Low: Select the check box to receive an E-Mail Alert for toner low. • Toner Almost Empty: Select the - Dell 2355DN | User Guide - Page 55
number of LDAP search results does not of Search Results have a limit. It shall be 5 ~ 100 entries. Search Timeout Sets the timeout period from 5 to 100 seconds. LDAP Referral Check if it is necessary. Search Name Order • Choose Common Name if user id has "cn=" form. • Choose Email - Dell 2355DN | User Guide - Page 56
trends, such as paper usage and the types of jobs being printed. Set Password Dell Printer Configuration Web Tool (Embedded Web Service) can be locked by setting password. When any of the printer settings are changed using this tool, it will prompt for User name and Password. Locking Operator Panel - Dell 2355DN | User Guide - Page 57
". NOTE: For Microsoft Windows® 2000, Windows® XP, Windows Server® 2003 Server® 2008, Windows Vista®, Windows 7 and Windows Server® 2008 R2, the system administrator should install Dell software. Supported Operating Systems • Windows 2000 Professional or Advanced Server • Windows XP Home edition or - Dell 2355DN | User Guide - Page 58
System" CD, the No Printer Found screen appears. Follow the instructions on the screen to install the software. 2 Insert the "Installing Software in Microsoft® Windows® Operating System" CD. NOTE: For Windows Vista/Windows 7/Server 2008 R2, click Continue when the User Account Control screen appears - Dell 2355DN | User Guide - Page 59
Typical Installation to install the software and the User's Guide. If you select Custom Installation, select the components to be installed. You can also change the destination folder. Click Next. NOTE: If your printer is not connected to the computer, the following printer not founder windows will - Dell 2355DN | User Guide - Page 60
Software in Microsoft® Windows® Operating System" CD. NOTE: For Windows Vista/Windows 7/Server 2008 R2, click Continue when the User Account Control screen appears. NOTE: If user has disabled auto continue, then please open setup.exe from CD root folder. 3 Select Set IP Address. The list of printers - Dell 2355DN | User Guide - Page 61
you want to assign an MAC address to. The printer's MAC address can be found on the Configuration page for the printer. 5 When you finish setting the IP address for the printer, exit the program. Installing Dell Software for Network Printing When you connect your printer to the network, you must - Dell 2355DN | User Guide - Page 62
want to install the drivers on this computer for network operation, select Local Installation, and then click Next. If you want to install the Dell software on remote computers or network servers on the same network, select Remote Installation. The domain administrator's ID and password are required - Dell 2355DN | User Guide - Page 63
to install the printer on a server, select the I am setting up this printer on a server check box. 6 The screen displays the printer drivers installed on your computer. You can change the printer name, set the printer to be shared on the network, and set the printer as the default printer. Click - Dell 2355DN | User Guide - Page 64
Next. If you select Typical Installation, go to step 9. 8 Select the components to be installed, and you can also change the destination folder. Click Next. 9 When the printer installation is complete, you may print a test page. Click Finish to complete the installation and close the wizard. You - Dell 2355DN | User Guide - Page 65
NOTE: For information about installing the wireless network interface card and configuring the network parameters, refer to Wireless Network Quick Install Guide. 64 - Dell 2355DN | User Guide - Page 66
"Installing Software in Microsoft® Windows® Operating System" CD or the Windows uninstall option. NOTE: Close all programs before uninstalling software, and then restart your computer after uninstalling the software. 1 From the Start menu, select Programs Dell Printers Dell 2355dn Laser MFP Dell MFP - Dell 2355DN | User Guide - Page 67
. See "Minimum Requirements". NOTE: Help me on Printer Status Monitor window will show you the printer troubleshooting guide. Click Help me to show animation details about the error condition. Or From the Start menu, select Programs Printer Status Monitor. Dell Printers Dell 2355dn Laser MFP 66 - Dell 2355DN | User Guide - Page 68
Dell Printers Dell 2355dn Laser MFP Printer Settings Utility. The Printer Settings Utility window opens. 2 The Printer Settings Utility window provides several features; Directory (Phonebook, Address Book), Fax Setting, and Setting. For further details, click the button. To use the default settings - Dell 2355DN | User Guide - Page 69
. Allows you to edit a selected Phonebook entry. Modify a selected Deletes a selected Phonebook entry. Phonebook entry. Phonebook entries Retrieve the Phonebook entries from the printer to the Printer Settings Utility. Downloads the Phonebook entries from the Printer Settings Utility to the - Dell 2355DN | User Guide - Page 70
Setup, Toll Save, and Default Output Options. . Enter your printer ID. Enter your fax number. Click to send this cover page to the printer. The Setting Section Click the Setting section and select the power save from the drop-down list. You can select Power Save, Toner Save, and Emulation Type - Dell 2355DN | User Guide - Page 71
Page. Firmware Update Utility You can update your printer's firmware using the Firmware Update Utility. 1 From the Start menu, select Programs Dell Printers Dell 2355dn Laser MFP Firmware Update Utility. 2 Download the latest firmware. Click http://support.dell.com. 3 If your printer is connected - Dell 2355DN | User Guide - Page 72
5 Click Update Firmware. 71 - Dell 2355DN | User Guide - Page 73
Start menu, select Programs Dell Printers Dell 2355dn Laser MFP Set IP Address. 4 Click in the SetIP window to open the TCP/IP configuration window. 5 Enter the network card's MAC address, IP address, subnet mask, default gateway, and then click Apply NOTE: when you enter the MAC address, enter it - Dell 2355DN | User Guide - Page 74
Paper Handling Print Media Guidelines Storing Print Media Identifying Print Media Sources and Specifications Selecting an Output Location Loading Print Media in the Paper Tray Using the MPF (Multi purpose feeder) Setting the Paper Size Setting the Paper Type Setting the Paper Tray Tray Behavior - Dell 2355DN | User Guide - Page 75
with the printer before buying large quantities. When loading paper, note the recommended print side on the paper package, and load the paper accordingly. See "Loading Print Media in the Paper Tray" and "Using the MPF (Multi purpose feeder)" for detailed loading instructions. Paper Characteristics - Dell 2355DN | User Guide - Page 76
media, consider the weight, fiber content, and color. Use only paper which can withstand these temperatures without discoloring, bleeding, or releasing hazardous emissions. Check with the paper manufacturer or vendor to determine whether the paper you have chosen is acceptable for laser printers. 75 - Dell 2355DN | User Guide - Page 77
a weight less than 60 g/m2 (16 lb) • Multiple-part forms or documents Selecting Paper Proper paper loading helps prevent jams and ensures trouble-free printing. To help avoid jams or poor print quality: • Always use new, undamaged paper. • Before loading paper, know the recommended print side of the - Dell 2355DN | User Guide - Page 78
that are not affected by the resin in the toner or the silicone in the fuser. Inks that are oxidation-set or oil-based should meet these requirements; latex inks might not. If you are in doubt, contact your paper supplier. Preprinted papers such as letterheads must be able to withstand temperatures - Dell 2355DN | User Guide - Page 79
chosen is acceptable for laser printers. Page orientation is important when printing on a letterhead paper. Use the following table for help when loading a letterhead paper in the print media sources. Print Media Source Top of Page Print Side Portrait tray 1 (standard tray) Print side face down - Dell 2355DN | User Guide - Page 80
of pre-punched paper. • Paper should be punched at the paper manufacturer and not drilled into paper already packaged in a ream. Drilled paper can cause jams when multiple sheets feed through the printer. • Prepunched paper can include more paper dust than standard paper. Your printer may require - Dell 2355DN | User Guide - Page 81
in laser printers. • For best performance, use envelopes made from 75 g/m2 (20 lb bond) paper. jams, do not use envelopes that: - Have excessive curl or twist - Are stuck together or damaged in any way - Contain windows the envelope supplier. • Adjust the width guide to fit the width of the envelopes - Dell 2355DN | User Guide - Page 82
pressure levers down. This instruction will be especially helpful for DL and C5 size envelopes. • A combination of high humidity (over 60%) and the high printing temperatures may seal the envelopes. Labels Your printer can print on many labels designed for use with laser printers. These labels are - Dell 2355DN | User Guide - Page 83
of any card stock you are considering using with the printer before purchasing a large quantity: • Be aware that preprinting, perforation, and creasing can significantly affect the print quality and cause print media handling or jamming problems. • Avoid using card stock that may release hazardous - Dell 2355DN | User Guide - Page 84
the print media sizes that you can select from the paper size menu and supported weights. NOTE: If you use a print media size not listed, select the next larger size. Media Input Capacity Papera Paper Tray (tray 1 and optional tray 2) MPFb Plain paper 250 sheets of 75 g/m2 bond (20 lb) 50 sheet - Dell 2355DN | User Guide - Page 85
Support Dimensions Paper Tray (tray 1 MPF and optional tray 2) Print Media Size JIS B5 7.17 x 10.1 in. Y Y (182 x 257 mm) ISO B5 6.93 x 9.84 in. Y Y (176 x 250 mm) Letter 8.5 x 11 in. Y Y (215.9 x 279.4 mm) Legal 8.5 x 14 in. Y Y (215.9 x 355.6 mm) Executive 7.25 x 10 - Dell 2355DN | User Guide - Page 86
Card stock-maximum (grain long)a Card stock-maximum (grain short)a Transparenciesb Xerographic or business paper Index Bristol Tag Cover Index Bristol Tag Cover Laser printer Print Media Weight Tray 1 and Optional Tray 2 60-90 g/m2 grain long (16-24 lb bond) - MPF 60-135 g/m2 grain long (16 - Dell 2355DN | User Guide - Page 87
Print Media Type Print Media Weight Labels-maximum Paper Tray 1 and Optional Tray 2 - Dual-web paper - Polyester - Vinyl - Integrated Forms Pressure- - sensitive area (must enter the printer first) Paper base (grain long) Envelopes 100% Sulfite, - Cotton Content wood-free or up - Dell 2355DN | User Guide - Page 88
use the output tray, ensure that the rear door is closed. To use the rear door, open it. NOTE: If paper coming out of the output tray has problems, such as excessive curl, try printing to the rear door. NOTE: To avoid paper jams, do not open or close the rear door while the printer is printing - Dell 2355DN | User Guide - Page 89
extension to keep the print media from falling off the output tray. Printing to the Rear Door (Face up) Using the rear door, the paper comes out of the printer face up. Printing from the MPF to the rear door provides a straight paper path. Using the rear door might improve the output quality with - Dell 2355DN | User Guide - Page 90
can load approximately 250 sheets of plain paper in the tray 1 or the optional tray 2. If you purchased the optional tray 2, see "Installing an Optional Tray 2" for installing instructions. For faxing, you can use A4, letter or legal paper only. For copying or printing, you can use many different - Dell 2355DN | User Guide - Page 91
" to avoid paper jams and print quality problems. NOTE: Flatten any curl on postcards, envelopes and labels before loading them into the MPF. To use the MPF: 1 Open the MPF and unfold the paper support extension, as shown. 2 If you are using paper, flex or fan the edge of the paper stack to separate - Dell 2355DN | User Guide - Page 92
. • Card stock: load them with the print side up and the short edge entering the printer first. • Pre printed paper: the printed side should be facing down with an uncurled edge toward the printer. 4 Squeeze the width guide and adjust it to the width of the print material. Do not force too much, or - Dell 2355DN | User Guide - Page 93
5 After loading paper, set the paper type and size for the MPF. See "Setting the Paper Type" for copying and faxing or "Paper Tab" for Computer printing. NOTE: The settings made from the printer driver override the settings on the operator panel. CAUTION: Ensure that the rear door opens when you - Dell 2355DN | User Guide - Page 94
icon ( ) to return to the Standby mode. Setting the Paper Type After loading paper in the paper tray or the MPF, you need to set the paper type from the operator panel. This setting will apply to Fax and Copy modes. For faxing, you can only set the paper type to the Plain mode. For Computer printing - Dell 2355DN | User Guide - Page 95
tray and paper that you want to use for a printing job. Paper size and paper tray are adjusted here. Setting the Tray linking If tray 1 and tray 2 are filled with letter size paper, when tray1 is empty return to the Standby mode. Setting the Default Tray You can select the tray you want to use for - Dell 2355DN | User Guide - Page 96
printer uses paper in the tray which you have already set in Printer properties. In this mode the MPF is treated as another paper tray. Instead of treating MPF as first preference paper source, printer pulls paper from the tray that matches the size and type. The first preference goes to the default - Dell 2355DN | User Guide - Page 97
to link the trays. Set the paper size and type for each tray. To disable tray linking you can either choose unique paper size/type for each tray or using operator panel to disable tray linking. NOTE: You can use this feature in print, copy, and fax job. NOTE: To prevent a paper jam, do not open - Dell 2355DN | User Guide - Page 98
. Tray Mode In this mode the MPF is treated as another paper tray. Instead of treating MPF as first preference paper source, printer pulls paper from the tray that matches the size and type. The first preference goes to the default source. NOTE: You can use this feature in print, copy, and fax job - Dell 2355DN | User Guide - Page 99
98 - Dell 2355DN | User Guide - Page 100
Printing Printing a Document Printer Settings Printing Multiple Pages on One Sheet of the Paper Fitting Your Document to a Selected Paper Size Printing Posters Change Percentage of Your Document Printing Booklets Printing on Both Sides of Paper Using Watermarks Using Overlays - Dell 2355DN | User Guide - Page 101
(PCL) or PostScript (PS) printer driver. When you install the Dell software, your printer automatically installs the PCL printer driver. Installing the PS printer driver is optional. See "Installing Dell Software for Local Printing". The drivers provided with your printer allow a wide variety of - Dell 2355DN | User Guide - Page 102
Ensure that your printer is selected. ▲ Windows XP 3 Select the printer driver that you want to use from the Print window. 4 To take advantage of the printer features provided by your printer, click Preferences or Properties, depending on the program or operating system in the above window and go to - Dell 2355DN | User Guide - Page 103
: You can access this window simply by double-clicking the printer icon at the bottom right corner of the Windows desktop. 1 From the Windows Start button. 2 For Windows 2000, click Settings and point to Printers. For Windows XP/Server 2003, click Printers and Faxes. For Windows Vista/Server 2008 - Dell 2355DN | User Guide - Page 104
a printer driver, see "Printing a Document". The User's Guide shows the Printing Preferences window of the PCL printer driver on Windows XP. NOTE: Most Windows applications override settings you specified in the printer driver. Change all of the print settings available in the software application - Dell 2355DN | User Guide - Page 105
includes advanced printing options, such as Multiple Pages Per Side and Poster Printing. ➊ The preview image ➋ shows the sample page with the settings you currently specified. ➌ ➍ Property horizontal coordinates. This feature is available only when using the PostScript (PS) driver. 104 - Dell 2355DN | User Guide - Page 106
means you can select that certain option but it is no recommended, and ( ) mark means you cannot select that option due to the printer's setting or environment. ➊ ➋ ➌ ➍ ➎ ➏ Property ➊ Copies Description Copies allows you to choose the number of copies to be printed. You can enter up to 999. 105 - Dell 2355DN | User Guide - Page 107
Size option allows you to choose the size of paper loaded in the paper tray. If the required size is not listed in the Size box, click Edit.... When the Custom Paper Size Setting window appears, set the paper size and click OK. The setting appears on the list so that you can select it. Enter the - Dell 2355DN | User Guide - Page 108
Graphic Tab Use the following graphic options to adjust the print quality for your specific printing needs. Click the Graphic tab to display the properties shown below. ➊ ➋ 107 - Dell 2355DN | User Guide - Page 109
option is selected, the driver downloads any fonts as graphics. When printing documents with high graphic content and relatively few TrueType fonts, printing performance (speed) may be enhanced in this setting. Use Printer Fonts When Use Printer Fonts is checked, the printer uses the fonts that are - Dell 2355DN | User Guide - Page 110
quality. NOTE: You also change Toner Save in the Printer Settings Utility. ➌ Graphic Controller This feature is available only when using the PostScript (PS) driver. Negative Effect: allows users to print a negative of image by reversing the values for black and white. ➍ PostScript Options This - Dell 2355DN | User Guide - Page 111
a background image of text to print on each page of your document. See "Using Watermarks". This feature is available only when using the PostScript (PS) driver. Overlays are often used to take the place of preprinted forms and letterhead - Dell 2355DN | User Guide - Page 112
of print, the printer prints out the first copy of print and continues to print the rest of them. • Confidential: You can set the password not to delete the print data file by mistake. User ID You can enter the user name with combination of alphabets and numbers. This information will be displayed - Dell 2355DN | User Guide - Page 113
you selected. To delete a saved setting, select it from the Presets drop-down list and click Delete ( ). You can also restore the printer driver's default settings by selecting Printer Default from the list. Using Help Click the from the upper-right corner of the window and click on any option you - Dell 2355DN | User Guide - Page 114
Multiple Pages on One Sheet of the Paper 1 2 You can select the number of pages to print on a single sheet of paper print settings from your software application, access the printer properties. 2 From the Basic tab, choose Multiple Pages Per Side on the Type drop-down list. 3 Select the number of - Dell 2355DN | User Guide - Page 115
. Change Percentage of Your Document You can scale your print job on a page. 1 When you change the print settings from your software application, access the printer properties. 2 From the Paper tab. 3 Enter the scaling rate in the Percentage input box. You can also click the or button. 4 Select - Dell 2355DN | User Guide - Page 116
fine details on a small document. A 1 When you change the print settings from your software application, access the printer properties. 2 From the Paper tab. 3 Select the paper size you want from the Fit to Page. 4 Select the paper source, size, and type. 5 Click OK and print the document. 115 - Dell 2355DN | User Guide - Page 117
9, or 16 sheets of paper, for the purpose of pasting the sheets together to form one poster-size document. 1 When you change the print settings from your software application, access the printer properties. 2 From the Basic tab, select Poster Printing in the Type drop-down list. 3 Select the page - Dell 2355DN | User Guide - Page 118
produce a booklet. 8 9 1 When you change the print settings from your software application, access the printer properties. 2 From the Basic tab, select Booklet Printing in the Type drop-down list. NOTE: The Booklet Printing option is not available for all paper sizes. In order to find out the - Dell 2355DN | User Guide - Page 119
envelopes, or thick paper. Damage to the printer and paper jamming might result. NOTE: To use the double-sided printing, you can use only the following paper size: A4, Letter, Legal and Folio. 1 When you change the print settings from your software application, access the printer properties. 2 From - Dell 2355DN | User Guide - Page 120
printer prints on both sides of the paper list. Using an Existing Watermark 1 When you change the print settings from your software application, access the printer properties. 2 Click the Advanced tab and select a watermark on the Watermark drop-down list. It appears in the preview image window - Dell 2355DN | User Guide - Page 121
settings from your software application, access the printer properties. 2 Click the Advanced tab and click Edit... in the Watermark section. The Edit Watermarks window -down list. Editing a Watermark 1 When you change the print settings from your software application, access the printer properties. - Dell 2355DN | User Guide - Page 122
you want to edit from the Current Watermarks list and change the watermark message and options. 4 Click Update to save the changes. 5 Click OK. Deleting a Watermark 1 When you change the print settings from your software application, access the printer properties. 2 Click the Advanced tab and click - Dell 2355DN | User Guide - Page 123
are often used to take the place of preprinted forms and letterhead paper. Rather than using preprinted letterhead, you can create an overlay containing 2 When you change the print settings from your software application, access the printer properties. 3 Click the Advanced tab and click Edit... - Dell 2355DN | User Guide - Page 124
window, type a name of up to eight characters in the File name box. Select the destination path, if necessary. (The default is C:\FormOver). 6 Click Save. You can see the name in the Overlay List settings from your software application, access the printer properties. 3 Click the Advanced tab. 123 - Dell 2355DN | User Guide - Page 125
the Text drop-down list, select Edit... from the list and click Load. window cancels the use of the overlay page. If this box is empty and an overlay has been selected, the overlay will be automatically printed with your document. 7 Click OK or Yes until the printing starts. The overlay is downloaded - Dell 2355DN | User Guide - Page 126
overlays that are no longer used. 1 In the printer properties window, click the Advanced tab. 2 Click Edit... in the Overlay section. 3 Select the overlay you want to delete from the Overlay List box. 4 Click Delete. 5 When a confirming message window appears, click Yes. 6 Click OK until you exit - Dell 2355DN | User Guide - Page 127
126 - Dell 2355DN | User Guide - Page 128
Copying Loading Paper for Copying Selecting the Paper Tray Preparing a Document Loading an Original Document Making Copies Setting Copy Options Using Special Copy Features Printing Copies on Both Sides of Paper Preparing a Document - Dell 2355DN | User Guide - Page 129
tray 2, the Tray2 (option) menu item will not appear on the display. 5 Press the home icon ( ) to return to the Standby mode. Preparing a Document You can use the document glass or the DADF (Duplex Automatic Document Feeder) to load an original document for copying, scanning and sending a fax - Dell 2355DN | User Guide - Page 130
the document glass. NOTE: To get the best scan quality, especially for color or gray scale images, use the document glass instead of the DADF. NOTE: If you use duplex copy features, see "Printing Copies on Both Sides of Paper". To load the document in the DADF: 1 Place the document(s) face up on the - Dell 2355DN | User Guide - Page 131
2 Adjust the document width guides to the correct document size. Ensure that the bottom of the document stack matches the paper size marked on the document input tray. For detailed guidelines for preparing an original document, see "Preparing a Document". To load the document in the document glass: - Dell 2355DN | User Guide - Page 132
up with the top edge in first into the DADF. OR Place a single document face down on the document glass. For details about loading a document, see "Loading an Original Document". 2 Customize the copy settings including the number of copies, copy size, the contrast, and the image quality by using - Dell 2355DN | User Guide - Page 133
, all of the options you have set for the current copy job will be canceled and return to their default status. Or, they automatically return to their default status after copying. Number of Copies You can select the number of copies from 1 to 500. 1 Press Copy from the home screen. 2 Enter the - Dell 2355DN | User Guide - Page 134
Contrast. 4 Press the left/right arrows to select the contrast you want. Original Size You can set the size of a copied image, when you copy original documents from the documents glass or the DADF. 1 Press Copy from the home screen. 2 Press the Next ( ) button. 3 Press the up/down arrows to select - Dell 2355DN | User Guide - Page 135
copy. See "Book Copying". • Collate Copy: Prints output in sets to match the sequence of originals. See "Collate Copying". • Auto Fit Copy: Automatically reduces or enlarges the original image to fit on the paper currently loaded in the printer. See "Auto Fit Copying". • Clone Copy: Prints multiple - Dell 2355DN | User Guide - Page 136
ECO Copying You can cut toner consumption and paper usage. To make the ECO copying: 1 Load the document(s) face up with top edge in first into the DADF. OR Place a single document face down on the document glass. For details about loading a document, see "Loading an Original Document". 2 Press Copy - Dell 2355DN | User Guide - Page 137
DADF. OR Place a single document face down on the document glass. For details about loading a document, see "Loading an Original Document". 2 Press Copy from the home screen. 3 Press the left/right arrows to select Collate Copy. 4 If necessary, customize the copy settings including number of copies - Dell 2355DN | User Guide - Page 138
from the home screen. 3 Press the left/right arrows to select Poster Copy. 4 If necessary, customize the copy settings including number of copies, contrast, original type, and original size by pressing Options. See "Setting Copy Options". 5 Press to go to the upper menu. 6 Press Start ( ). (on the - Dell 2355DN | User Guide - Page 139
shown, and close the scanner lid. 3 Press the Next ( ) button. 4 If necessary, customize the copy settings including number of copies, contrast, original type, and original size by pressing Options. See "Setting Copy Options". 5 Press Start ( ). (on the touch screen or the operator panel) 6 Turn the - Dell 2355DN | User Guide - Page 140
can set the printer to print copies on both sides of paper. 1 Load the documents to be copied in the DADF. For details about loading a document, see "Loading an Original Document". 2 Press Copy from the home screen 3 Press the Options or Next ( ) button. 4 Press the up/down arrows to select Duplex - Dell 2355DN | User Guide - Page 141
the paper. This function produces exactly the same print out from the originals. 6 If necessary, customize the copy settings including the number of copies, copy size, contrast, and image quality. See "Setting Copy Options". 7 Press Start ( ) to begin copying. Changing the Default Settings The copy - Dell 2355DN | User Guide - Page 142
Sending to FTP Server Scanning and Sending Custom Email Scan to Fax Server Scanning Using the Windows Image Acquisition (WIA) Driver Scanning to the USB Memory Managing the USB Memory Scan to Email Setup Scanning by a network connection Setting up Address Book Group Numbers Changing Default Settings - Dell 2355DN | User Guide - Page 143
Dell 2355dn Laser MFP to convert pictures and text into editable images on your computer. After you install the software from the Software and Documentation CD, you can scanning images using SmarThru Office on your computer, or through the network using Dell Scan Manager, which enables you to scan - Dell 2355DN | User Guide - Page 144
SmarThru Office help. The SmarThru Office help window appears; you can view on screen help Office icon SmarThru Office launcher. in the tray area of the Windows taskbar to activate the NOTE: Follow the Office. c When your computer asks you to confirm your selection, read the statement and click OK. - Dell 2355DN | User Guide - Page 145
and location to send scanned data. NOTE: Click Advanced button to set more scan options. 4 Set scan settings and click Scan. Printing 1 Click the SmarThru icon in the tray area of the Windows taskbar to active the SmarThru Office launcher. 2 Click the printing icon to open the faxing window. 144 - Dell 2355DN | User Guide - Page 146
. 1 Click the SmarThru Office icon SmarThru Office launcher. in the tray area of the Windows taskbar to active the 2 Click the faxing icon to open the printing window. 3 Set fax settings and click Send Fax. • Select Fax Machine: Choose whether the machine is connected locally or via network - Dell 2355DN | User Guide - Page 147
delete the folders in which documents scanned to computer are saved in Dell Scan Manager program. NOTE: Dell Scan Manager program can only be used in the Window system. 1 From the Start menu, select Programs Dell Printers Dell 2355dn Laser MFP Dell Scan Manager. 2 Press Properties. You can add the - Dell 2355DN | User Guide - Page 148
3 In the Set Scan Button window, select the scan setting option. • Scan Destination: You can change the add or delete application programs and file format. • Scan Property: You can change the saving destination, resolution, color, and scan size. 4 Press OK after the setting is done. 147 - Dell 2355DN | User Guide - Page 149
to your default email program on the computer. A new message window opens with the image attached. • My Document: Saves the scanned image in the My Documents folder on the computer. NOTE: You can add more TWAIN-compliant software for scanning, such as Adobe Photoshop, from the Dell Scan Manager. See - Dell 2355DN | User Guide - Page 150
window opens. Adjust the scan settings and scan. For details, please refer to the user's guide of the application. NOTE: If you selected My Document scanned image is saved in computer's My Document → My Pictures → Dell folder. NOTE: You can use Twain driver to scan quickly in Dell Scan Manager - Dell 2355DN | User Guide - Page 151
the Next ( ) button. 5 Show the SMB server list you entered in the Embedded Web Service. Select the destination SMB server. You can select up to five destinations. 6 If necessary, customize the scan settings including original size, scan color, scan format, duplex, and image quality by using Options - Dell 2355DN | User Guide - Page 152
the Next ( ) button. 5 Show the FTP server list you entered in the Embedded Web Service. Select the destination FTP server. You can select up to five destinations. 6 If necessary, customize the scan settings including original size, scan color, scan format, duplex, and image quality by using Options - Dell 2355DN | User Guide - Page 153
pop up keyboard to enter your email addresses. • To/Cc/Bcc: Enter the recipient's email address using Direct Input or Email List. • Subject: Title of the email. 6 If necessary, customize the scan settings including original size, scan color, scan format, duplex, and image quality by using Options - Dell 2355DN | User Guide - Page 154
the remote fax phone number using Direct Input or Fax List. 5 If necessary, customize the scan settings including original size, scan color, scan format, duplex, and image quality by using Options. 6 Press Start ( ). (on the touch screen or the operator panel) The printer begins scanning and then - Dell 2355DN | User Guide - Page 155
(WIA) Driver Your printer also supports the WIA driver for scanning images. WIA is one of the standard components provided by Microsoft Windows XP/Server 2003/Server 2008/Vista/7 and works with digital cameras and scanners. Unlike the TWAIN driver, the WIA driver enables you to scan an image - Dell 2355DN | User Guide - Page 156
available memory space. CAUTION: If your USB memory has certain features, such as security settings and password settings, your printer may not automatically detect it. For details about these features, see the User's Guide which came with your USB memory key. Plugging in a USB memory key The USB - Dell 2355DN | User Guide - Page 157
Scanning Using the Default Settings 1 Insert the USB memory key into the USB memory port on your printer. NOTE: Insert the USB memory key as soon as the pop-up window appears. 2 Load the document(s) face up with top edge in first into the DADF. OR Place a single document face down on the document - Dell 2355DN | User Guide - Page 158
100, 200, 300, 600 Color Color, Gray, Mono Format JPEG, BMP, TIFF, PDF, Single-TIFF, Multi-TIFF Duplex Off, Short Edge, Long Edge NOTE: 600 dpi resolution is available in color scanning only when additional memory DIMM is installed. 1 Press Scan from the home screen. 2 Press the left/right - Dell 2355DN | User Guide - Page 159
image file that you scanned and saved on your USB memory stick. 1 Insert the USB memory key into the USB memory port on your printer. NOTE: Insert the USB memory key as soon as the pop-up window appears. OR Press the button from the home screen. 2 Press File Manage. 3 Press the mark next - Dell 2355DN | User Guide - Page 160
key. TIFF, BMP, JPEG, PDF, and PRN file formats are supported. NOTE: PDF files generated by this printer, and TIFF 6.0 files are available. 1 Insert the USB memory key into the USB memory port on your printer. NOTE: Insert the USB memory key as soon as the pop-up window appears. OR Press the - Dell 2355DN | User Guide - Page 161
printer reminds an authorized user about log off each time an email transmission is completed. • User Lists: You can set add user or delete user. - Add Users: Enables you to add a user's login name, register login ID, and password. Login ID and password is needed when using the email. - Delete Users - Dell 2355DN | User Guide - Page 162
the printer to forward all of the outgoing or incoming faxes to specified e-mail addresses. See "Fax Forward to E-mail addresses". Control Access You can protect the Email Setup feature with a passcode. a If you want to use the host name in SMTP server, you must set the DNS server first. Scanning - Dell 2355DN | User Guide - Page 163
default port number is 25. 4 Put a check mark in SMTP Requires Authentication to require authentication. 5 Enter your SMTP Server Login Name, SMTP Server Password, SMTP Server Connection Timeout, and Maximun Message Size. 6 Click Submit. Setting up an SMB server To scan and send an image as an email - Dell 2355DN | User Guide - Page 164
Enter the server port number, from 1 to 65535. The default port number is 389. 5 Enter Search Root Directory. The top search level of the LDAP directory tree. 6 Enter your Login Name, Password, Maximun Number of Search Results, and Search Timeout. See "Email Settings" for network parameters. . NOTE - Dell 2355DN | User Guide - Page 165
the number of LDAP search results does not have of Search Results limit. It shall be 5 ~ 100 entries. Search Timeout Sets the timeout period from 5 to 100 seconds. LDAP Referral Check if it is necessary. Search Name Order • Choose Common Name if user id has "cn=" form. • Choose Email - Dell 2355DN | User Guide - Page 166
only when DNS server is correctly set up. Available Options for Email Alert Option Description Email Alert IP Address or Host Sets the IP address or Host name. Setup Name Primary SMTP Gateway Sets the primary SMTP gateway. SMTP Port Number Specifies the SMTP port number. This must be 25 or - Dell 2355DN | User Guide - Page 167
can be used. If specifying more than one address, separate them using commas. POP3 User Passworda Specifies the POP3 account password up to 31 alphanumeric characters. Email Alert Email List 1~2 Setup Sets acceptable e-mail addresses for the E-Mail Alert feature up to 255 alphanumeric characters - Dell 2355DN | User Guide - Page 168
as the URL in a browser and click Go to access the web site of your machine. 2 Click Email Settings → Address Book. 3 Click Local Address Book. 4 Click Add. 5 Select a location number and enter the user name and e-mail address you want. 6 Click Submit. NOTE: You can also click Import and obtain your - Dell 2355DN | User Guide - Page 169
you to use a group dial number setting to send a document to all destinations in the group. You can set up to 50 (1 through 50) group dial numbers. Configuring group email numbers You can set up Address Book with the email addresses you use frequently via Embedded Web Service and then easily and - Dell 2355DN | User Guide - Page 170
10 Press until confirmation window appears. 11 Press or . 12 Press the home icon ( ) to return to the Standby mode. Deleting a Group Number 1 Press Setup Machine Setup from the home screen. 2 Press the Next ( ) button. 3 Press the up/down arrows to select Email/Fax List. 4 Press Email List - Dell 2355DN | User Guide - Page 171
paper. 1 Press Setup Machine Setup from the home screen. 2 Press the Next ( ) button. 3 Press the up/down arrows to select Email/Fax List. 4 Press Email List Print. A list showing your e-mail address and group e-mail address prints out. Changing Default Settings You can set up default scan settings - Dell 2355DN | User Guide - Page 172
Networking About Sharing the Printer on a Network Setting Up the Locally Shared Printer Setting Up a Network-connected Printer - Dell 2355DN | User Guide - Page 173
to install the Dell 2355dn Laser MFP software on each computer that prints documents using the printer. Setting Up the Locally Shared Printer You can connect the printer directly to a selected computer, which is called the "host computer," on the network. Your printer can be shared by other users on - Dell 2355DN | User Guide - Page 174
press Continue on the next dialog box. 5 For Windows 2000, check the Shared As box. For Windows XP/Server 2003/Server 2008/Vista/ 7 / Server 2008 R2, check the Share this printer box. 6 Fill in the Share Name field. 7 Click Additional Drivers, and select the operating systems of all network clients - Dell 2355DN | User Guide - Page 175
fully installed on each client computer. Network clients retain control of driver modifications. The client computer handles the print job processing. 1 For Windows 2000, click the Start button → Settings → Printer. For Windows XP/Server 2003, click the Start button and point to Printers and Faxes - Dell 2355DN | User Guide - Page 176
to verify printer installation. When a test page prints successfully, printer installation is complete. To print a test page: 1 For Windows 2000, click the Start button → Settings → Printer. For Windows XP/Server 2003, click the Start button and point to Printers and Faxes. For Windows Vista/Server - Dell 2355DN | User Guide - Page 177
(Optional) Network Operating System • Windows: WinNT4.0/2000/XP(32/64bits)/Vista(32/64bits)/2003 Server(32/64bits)/2008 Server(32/64bits)/7/ Server 2008 R2 • Novell NetWare NDPS services via TCP/IP & IPP on 5.x, 6.x, • Mac OS 10.3 ~ 10.6 • Various Linux OS • UNIX(TBD, SUN 8,9,10, HP-UX 11i, IBM - Dell 2355DN | User Guide - Page 178
shows how the network interface card on your printer is configured. The default settings are suitable for most applications. 1 Press Setup Network Settings. The Network Configuration page prints out. Setting Network Protocols When you first install and power up the printer, all supported network - Dell 2355DN | User Guide - Page 179
. • Dynamic Addressing BOOTP/DHCP (default): TCP/IP address is assigned automatically by a DHCP or BOOTP server on your network. NOTE: Only the system administrator can set the IP address forTCP/IP (IPv6). Setting TCP/IP To enter the TCP/IP setting from your printer's operator panel, take the - Dell 2355DN | User Guide - Page 180
to its default settings. 1 Press Setup Machine Setup from the home screen. 2 Press the Next ( ) button. 3 Press the up/down arrows to select Network Setup. 4 Press the up/down arrows to select Clear Settings. 5 Press when the confirmation window appears. 6 Power the printer off and - Dell 2355DN | User Guide - Page 181
180 - Dell 2355DN | User Guide - Page 182
Faxing Setting the Printer ID Setting the Time and Date Setting Daylight Savings Time Changing the Clock Mode Setting Sounds Toll Save Mode Setting up the Fax System Sending a Fax Receiving a Fax Automatic Dialing Other Ways to Fax Additional Features Fax Data Back-up - Dell 2355DN | User Guide - Page 183
Setting the Printer ID In most countries, you are required by law to indicate your fax number on any fax you send. The printer ID, containing your telephone number and name or company name, will be printed at the top of each page sent from your printer. 1 Press Setup Machine Setup from the home - Dell 2355DN | User Guide - Page 184
Day Light Saving. 5 Press the left/right arrows to select Manual. 6 Enter the Start Time and End Time each using the up/down arrows. 7 Press the home icon ( ) to return to the Standby mode. Changing the Clock Mode You can set your printer to display the current time using either the 12-hours - Dell 2355DN | User Guide - Page 185
through the speaker, such as a dial tone or a fax tone. With this option set to Comm. which means Comm., the speaker is on until Conflict: Adjusts the conflict volume. For the error volume, you can select Off, Low, Med, and High. • Selection: You can set the selection volume for when pressing the - Dell 2355DN | User Guide - Page 186
select Default Setting. 4 Press the up/down arrows to select the Fax Default Common fax. You can select the original document type to enhance the quality of a document. You can set the dial mode for your machine to either tone dialing or pulse dialing. You can specify the number of times the printer - Dell 2355DN | User Guide - Page 187
Redial Attempt MSG Confirm Auto Report Auto Reduction Description You can select the default fax receiving mode. • Fax mode (automatic receive mode): The printer answers an incoming call and automatically goes into receive mode. The number of rings before the printer answers can be set in the Ring - Dell 2355DN | User Guide - Page 188
Size Receive Code DRPD Mode Tray Print Duplex Description When receiving a document as long as or longer than the paper installed in your printer, you can set the printer to discard any excess at the bottom of the page. If the received page is outside the margin you set, it will print on two - Dell 2355DN | User Guide - Page 189
Use the Quality setting to improve the output quality of the original or to scan photographs. 1 Press Fax from the home fax is enabled only if the remote printer supports color fax reception and you send the fax manually. In this mode, the memory transmission is not available. NOTE: Faxes scanned - Dell 2355DN | User Guide - Page 190
the DADF (Duplex Automatic Document Feeder). OR Place a single document face down on the document glass. For details about loading a document, see "Loading an Original Document". 2 Press Fax Manual Send from the home screen. 3 Press the Next ( ) button. 4 Press the Direct Input or Fax List. 5 If - Dell 2355DN | User Guide - Page 191
Automatically You need to set fax phone number from the Setup Machine Setup Next ( ) Default Setting Fax Default Auto Send before following the next steps. 1 Load the document(s) face up with top edge in first into the DADF (Duplex Automatic Document Feeder). OR Place a single document face down on - Dell 2355DN | User Guide - Page 192
sending your fax, an error message appears on the display. For a listing of error messages and their meanings, see "Clearing LCD Error Messages". If you receive an error message, press to clear the message and try to send the document again. You can set your printer to print a confirmation report - Dell 2355DN | User Guide - Page 193
the touch screen or the operator panel) 6 When the printer establishes contact with the receiving machine, it dials the number and sends the fax. Receiving a Fax NOTE: The Dell 2355dn Laser MFP can print mono faxes only. If a color formatted fax is received, the data will be automatically changed to - Dell 2355DN | User Guide - Page 194
Receiving Faxes The instructions for loading paper in the paper tray are the same whether you are printing, faxing, or copying, except that faxes can only be printed on Letter-, A4-, or Legal-sized paper. For details about loading paper, see "Loading Paper". For details about setting the paper type - Dell 2355DN | User Guide - Page 195
the up/down arrows to select the Fax Default Common. 5 Press the up/down arrows to select DRPD Mode. 6 Press the left/right arrows to select Set. 7 Call your fax number from another telephone. It is not necessary to place the call from a fax machine. 8 When your printer begins to ring, do not answer - Dell 2355DN | User Guide - Page 196
printing, or run out of paper or toner, your printer stores incoming faxes in the memory. As soon as you finish copying, printing, or resupply the consumables, the printer automatically prints the fax. Automatic Dialing Speed Dialing You can store up to 400 frequently dialed numbers in one, two or - Dell 2355DN | User Guide - Page 197
to go to the upper menu. 9 Press or when the confirmation window appears. 10 Press the home icon ( ) to return to the Standby mode. Sending a Fax using a Speed Number 1 Load the document(s) face up with top edge in first into the DADF. OR Place a single document face down on the document glass - Dell 2355DN | User Guide - Page 198
: You cannot include one group dial number within another group dial number. Setting Group Dial 1 Press Setup Machine Setup from the home screen. 2 Press the Next ( ) button. 3 Press the up/down arrows to select Email/Fax List. 4 Press Fax List View List 5 Press Group. 6 Press the button Add - Dell 2355DN | User Guide - Page 199
the up/down arrows to select Email/Fax List. 4 Press Fax List View List 5 Press Group. 6 Press the up/down arrows to select the group dial number you want to edit. OR Press the button Search. Search the group or number name which is currently stored in the group. 7 Press the Name and edit the - Dell 2355DN | User Guide - Page 200
"Adjusting the Document Resolution" 5 Press the Next ( ) button. 6 Press the up/down arrows to select the group dial number you want. OR Press the button Search. Searches the fax number which currently stored in phonebook. When the keyboard pops up, enter name. 7 Press Start ( ). (on the touch - Dell 2355DN | User Guide - Page 201
Setup Machine Setup from the home screen. 3 Press the Next ( ) button. 4 Press the up/down arrows to select Email/Fax List. 5 Press Fax List View List. 6 Press Individual or Group. 7 Press the button. 8 Press A to Z or Z to A. You can search upwards or downwards through the entire memory in - Dell 2355DN | User Guide - Page 202
the up/down arrows to select Email/Fax List. 4 Press Fax List Print. A list showing your speed dial and group dial entries prints out. Other Ways to Fax Sending a Delayed Fax You can set your printer to store and then send a fax at a later time. You need to set start time from the Setup Machine - Dell 2355DN | User Guide - Page 203
5 Press the Direct Input and enter the remote fax phone number using the keyboard. OR Press the Fax List and select speed dial you want. 6 If necessary, adjust the document contrast and resolution to suit your fax needs. See "Adjusting the Document Contrast" or "Adjusting the Document Resolution" - Dell 2355DN | User Guide - Page 204
fax phone number using the keyboard. OR Press the Fax List and select speed dial you want. 6 If necessary, adjust the document contrast and resolution to suit your fax or to begin sending the fax immediately. 7 After storing, the printer displays the numbers of total pages and added pages - Dell 2355DN | User Guide - Page 205
window appears. The selected job is canceled. Fax Forward to E-mail addresses You can set the printer to forward all outgoing or incoming faxes to the e-mail addresses. 1 Press Setup Machine Setup from the home screen. 2 Press the Next ( ) button. 3 Press the up/down arrows to select Email - Dell 2355DN | User Guide - Page 206
keyboard. 7 Re-enter the passcode again and press OK. 8 Press Close when the confirmation window appears. 9 Press the home icon ( ) to return to the Standby mode. When a fax is received in the secure receiving mode, your printer stores it into memory and displays Secure Receive to let you know that - Dell 2355DN | User Guide - Page 207
shows all of the numbers currently stored in the printer's memory as speed dial and group dial numbers. You can print this Phonebook list; see "Printing a Phonebook List". Email Address Book Report This report shows information about the Email address list. Out-going Fax Report This report shows - Dell 2355DN | User Guide - Page 208
: Network Settings list • Fax List: Phonebook list • Email Address Book: Email Address Book list • Out-going Fax: Sent fax report • In-coming Fax: Received fax report • Scheduled Jobs: Scheduled job information • MSG Confirm: Message confirmation • Junk Fax List: Junk fax number lists • Email: Sent - Dell 2355DN | User Guide - Page 209
You can set the number of the remote fax machine to which the faxes are forwarded. You can set your printer to forward incoming faxes to another fax number during a specified time period. When a fax arrives at your printer, it is stored in the memory. Then, the printer dials the fax number that you - Dell 2355DN | User Guide - Page 210
. You can select 33.6, 28.8, 14.4, 12.0, 9.6, or 4.8 kbps. Setup Wizard Frequently used functions are gathered for users to set fax settings easily. a You can set the printer to forward all outgoing or incoming faxes to specified e-mail addresses. Refer to "Fax Forward to E-mail addresses". 209 - Dell 2355DN | User Guide - Page 211
an Answering machine Line Telephone Answering Device Line Phone Dell 2355dn Laser MFP Figure 1 You can connect a telephone answering device (TAD) directly to the back of your printer as shown in Figure 1. Set your printer to Ans/Fax mode and set the Ring to Answer to a digit greater than the - Dell 2355DN | User Guide - Page 212
images using your printer and Dell ScanDirect and send them using your fax application with the computer modem. Fax Data Back-up The Dell 2355dn Laser MFP has 4 MB (Approx. 200 pages at ITU-T #1 Chart) back-up memory. If there are no paper or no toner left during the fax receiving, the received - Dell 2355DN | User Guide - Page 213
212 - Dell 2355DN | User Guide - Page 214
Macintosh Installing Software for Macintosh Setting Up the Printer Printing Scanning - Dell 2355DN | User Guide - Page 215
with the PPD file that allows you to use the PostScript driver, for printing on a Macintosh computer. Verify the following before you install the printer software: Operating System Mac OS X 10.4 or lower Mac OS X 10.5 Mac OS X 10.6 Requirements CPU • Power PC G4/G5 • Intel processors • 867MHz or - Dell 2355DN | User Guide - Page 216
the MAC_Twain folder. 6 Double-click the Installer icon. 7 Enter the password and click OK. 8 Click Continue. 9 Click Install. 10 After the installation is finished, click Quit. UnInstall the scan driver 1 Insert the Software and Documentation CD which came with your printer into the CD-ROM drive - Dell 2355DN | User Guide - Page 217
instructions on "Installing Software for Macintosh" to install the PPD and Filter files on your computer. 2 Open the Applications folder Utilities, and Print Setup Utility. For MAC OS 10.5 ~10.6, open System Preferences from the Applications folder, and click Print & Fax. 3 Click Add on the Printer - Dell 2355DN | User Guide - Page 218
instructions on "Installing Software for Macintosh" to install the PPD and Filter files on your computer. 2 Open the Applications folder Utilities, and Print Setup Utility. For MAC OS 10.5 ~ 10.6, open System Preferences from the Applications folder, and click Print & Fax. 3 Click Add on the Printer - Dell 2355DN | User Guide - Page 219
printer software setting paper size, orientation, scaling, and other options and click OK. Ensure that your printer is selected. ▲ Mac OS 10.4 4 Open the File menu and click Print. 5 Choose the number of copies you want and indicate which pages you want to print. 6 Click Print when you finish setting - Dell 2355DN | User Guide - Page 220
. You can print multiple pages on one sheet of paper. Select Layout from the Presets drop-down list to access the following features. For details, see "Printing Multiple Pages on One Sheet of the Paper" and "Duplex Printing". ▲ Mac OS 10.4 Printing Multiple Pages on One Sheet of Paper You can print - Dell 2355DN | User Guide - Page 221
Therefore, if you need multiple copies of a document and you want those copies on both sides of the paper, you must print them one at a time, as separate print jobs. 1 From your Macintosh application, select Print from the File menu. 2 Select the Layout. ▲ Mac OS 10.4 3 Select a binding orientation - Dell 2355DN | User Guide - Page 222
Printer Features Setting The Printer Features tab provides options for selecting the paper type and adjusting print quality. Select Printer Features from the drop-down list to access the following features: ▲ Mac OS 10.4 Reverse Duplex Printing Allows you to select general print order compare to - Dell 2355DN | User Guide - Page 223
as Adobe Photoshop. NOTE: Scan process differ according to TWAIN-compliant software. Please refer to the user's guide of the software. NOTE: When scanning does not operate, update Mac OS to the latest version. Scanning operates properly in Mac OS 10.3.9 or higher and Mac OS 10.4.7 or higher. 222 - Dell 2355DN | User Guide - Page 224
Linux Getting Started Installing the MFP Driver Using the Unified Driver Configurator Configuring Printer Properties Printing a Document Scanning a Document - Dell 2355DN | User Guide - Page 225
the MFP software: all required packages will be carried onto your system and installed automatically; this is possible on a wide set of the most popular Linux clones. Installing the MFP Driver System Requirements Supported OS • RedHat Enterprise Linux WS 4, 5 (32/64bit) • Fedora 4, 5, 6, 7, 8, 9, 10 - Dell 2355DN | User Guide - Page 226
Driver 1 Ensure that you connect your multi-function to your computer. Turn both the computer and the printer on. 2 When the Administrator Login window appears, type in root in the Login field and enter the system password. NOTE: You must log in as a super user (root) to install the printer software - Dell 2355DN | User Guide - Page 227
4 Installation is started. When the installation is almost complete, the Add printer wizard appears automatically. Click Next. 5 If you connect your printer using the USB cable, the following window appears. Select your printer from the drop-down list and click Next. 226 - Dell 2355DN | User Guide - Page 228
OR If you connect your printer using the network cable, the following window appears. Check the Network printer, and select your printer from the drop-down list. Click Next. 227 - Dell 2355DN | User Guide - Page 229
6 If you connect your printer using the USB cable, you should choose a port you will use with your printer. After choosing the port, click Next. OR If you connect your printer using the network cable, skip to the next step. 7 Select the driver and click Next. 228 - Dell 2355DN | User Guide - Page 230
8 Enter your printer's name, location, description and click Next. 9 Click Finish to complete installation. 229 - Dell 2355DN | User Guide - Page 231
Click to configure the printer's settings. Click to print a test page. 10 When the following window appears, click Finish. The installation program has added the Unified Driver Configurator desktop icon and Dell MFP group to the system menu for your convenience. If you have any difficulties, consult - Dell 2355DN | User Guide - Page 232
the MFP Driver 1 When the Administrator Login window appears, type in root in the Login field and enter the system password. NOTE: You must log in as a super user (root) to install the printer software. If you are not a super user, ask your system administrator. 2 Insert the Software and - Dell 2355DN | User Guide - Page 233
also click the Startup Menu icon and select Dell MFP and then Unified Driver Configurator. 2 Press each button on the Modules pane to switch to the corresponding configuration window. Printers Configuration button Scanners Configuration button MFP Ports Configuration button You can use the onscreen - Dell 2355DN | User Guide - Page 234
of the Unified Driver Configurator window. Switches to Printer configuration. Shows all of the installed printer. Shows the status, model name and URI of your printer. You can use the following printer control buttons: • Refresh: renews the available printers list. • Add Printer: allows you to - Dell 2355DN | User Guide - Page 235
Classes Tab The Classes tab shows a list of available printer classes. Shows all of the printer classes. Shows the status of the class and the number of printers in the class. • Refresh: Renews the classes list. • Add Class...: Allows you to add a new printer class. • Remove Class: Removes the - Dell 2355DN | User Guide - Page 236
Scanners Configuration In this window, you can monitor the activity of scanner devices, view a list of installed Dell MFP devices, change device properties, and scan images. Switches to Scanners configuration. Shows all of the installed scanners. Shows the vendor, model name and type of your - Dell 2355DN | User Guide - Page 237
window, you can view the list of available MFP ports, check the status of each port and release a port that is stalled in busy state when its owner Dell printer and scanner drivers. The drivers address their devices via so-called MFP ports. The current status of any MFP port can be viewed via the MFP - Dell 2355DN | User Guide - Page 238
parallel or vice versa while in use, you must re-configure the printer port in this tab. • Driver: allows you to view or select another printer driver. By clicking Options, you can set the default device options. • Jobs: shows the list of print jobs. Click Cancel Job to cancel the selected job and - Dell 2355DN | User Guide - Page 239
from any such application. 1 From the application you are using, select Print from the File menu. 2 Select Print directly using lpr. 3 In the LPR GUI window, select the model name of your machine from the Printer list and click Properties. Click. 4 Change the printer and print job properties. 238 - Dell 2355DN | User Guide - Page 240
top of the window. • General: allows you to change the paper size, the paper type, and the orientation of the documents, enables the duplex feature, adds start and end banners, and changes the number of pages per sheet. • Text: allows you to specify the page margins and set the text options, such - Dell 2355DN | User Guide - Page 241
the LPR GUI window, select your printer from the list, and change the printer and print job properties. For details about the properties window, see "Printing a Document". 3 Click OK to start printing. Scanning a Document You can scan a document using the Unified Driver Configurator window. 1 Double - Dell 2355DN | User Guide - Page 242
the document to be scanned face up into the DADF or face down on the document glass. 6 Click Preview in the Scanner Properties window. The document is scanned and the image preview appears in the Preview Pane. Drag the pointer to set the image area to be scanned. 7 Change the scan options in the - Dell 2355DN | User Guide - Page 243
". You can restore the default setting for the scan options by clicking Default. 8 When you have finished, click Scan to start scanning. The status bar appears on the bottom left of the window to show you the progress of the scan. To cancel scanning, click Cancel. 9 The scanned image appears in the - Dell 2355DN | User Guide - Page 244
time you open the Scanner Properties window, the saved setting is automatically selected for the scan job. To delete a Job Type setting: 1 Select the setting you want to delete from the Job Type drop-down list. 2 Click Delete. The setting is deleted from the list Using the Image Editor The Image - Dell 2355DN | User Guide - Page 245
Allows you to scale the image size; you can enter the size manually, or set the rate to scale proportionally, vertically, or horizontally. Allows you to rotate the image; you can select the number of degrees from the drop-down list. Allows you to flip the image vertically or horizontally. Allows you - Dell 2355DN | User Guide - Page 246
Maintenance Clearing the printer NVRAM Backing up Data Cleaning Your Printer Maintaining the Toner Cartridge Replacement Parts Ordering Supplies - Dell 2355DN | User Guide - Page 247
Paper Setting options to the factory default. • Tray Behavior: Restores all of the Tray Behavior options to the factory default. • Copy Default: Restores all of the copy options to the factory default. • Fax Default: Restores all of the Fax Setup options to the factory default. • Scan Default - Dell 2355DN | User Guide - Page 248
failure. Backup helps you protect your Email/Fax List entries and the system settings by storing them as backup files on a USB memory key. NOTE: In case of the phonebook, you can save the phonebook in csv file format. So that you can confirm or modify the phone list in your computer. Backing up - Dell 2355DN | User Guide - Page 249
To maintain the print quality, follow the cleaning procedures below, each time the toner cartridge is replaced or if print quality problems occur. NOTE: Do not touch the transfer roller located under the toner cartridge when cleaning inside the printer. Oil from your fingers may cause print quality - Dell 2355DN | User Guide - Page 250
away any dust and spilled toner from the toner cartridge area and the toner cartridge cavity. CAUTION: Do not touch the transfer roller inside the printer. Oil from your fingers may cause print quality problems. transfer roller 4 Locate the long strip of glass Laser Scanning Unit (LSU) inside the - Dell 2355DN | User Guide - Page 251
5 Reinsert the toner cartridge and close the front cover. 6 Plug in the power cord and power the printer on. 250 - Dell 2355DN | User Guide - Page 252
quality copies, scans, and sent faxes. Dell recommends cleaning the scanner at the start of each day and during the day, as needed. NOTE: If there are lines present on copied or faxed documents, check your scanner and DADF glass for any particles. 1 Slightly dampen a soft lint-free cloth or paper - Dell 2355DN | User Guide - Page 253
Maintaining the Toner Cartridge Storing the Toner Cartridge Store the toner cartridge in the original packaging until you are ready to install it. Do not store the toner cartridge in: • Temperatures greater than 40° C (104° F) • An environment with extreme changes in humidity or temperature • Direct - Dell 2355DN | User Guide - Page 254
to avoid touching this area. 4 Holding the toner cartridge by the handle and slowly insert the cartridge into the opening in the printer. 5 Tabs on the sides of the cartridge and corresponding grooves within the printer will guide the cartridge into the correct position until it locks into place - Dell 2355DN | User Guide - Page 255
the cover is surely closed. Replacing the Toner Cartridge When the toner eventually runs out, only blank pages print when a print job or copy job are sent. The toner-related message saying that the toner is empty may appear on the display. In that case the incoming faxes are only saved in the memory - Dell 2355DN | User Guide - Page 256
to avoid touching this area. 5 Holding the toner cartridge by the handle and slowly insert the cartridge into the opening in the printer. 6 Tabs on the sides of the cartridge and corresponding grooves within the printer will guide the cartridge into the correct position until it locks into place - Dell 2355DN | User Guide - Page 257
problems and paper feed problems resulting from worn parts. The following items should be replaced after you have printed the specified number of pages. Item Yield (Average) DADF rubber pad Approx. 20,000 pages Transfer roller Approx. 70,000 pages Fuser unit Approx. 80,000 pages Tray - Dell 2355DN | User Guide - Page 258
2 From the Start menu, select Programs Dell Printers Dell 2355dn Laser MFP Toner Reorder. The Order Toner Cartridges window appears. Dell 2355dn Laser MFP Go to premier.dell.com or www.premier.dell.com to order supplies online. If ordering by phone, call the number that appears under the Order by - Dell 2355DN | User Guide - Page 259
NOTE: Refer to the following table to order toner cartridges. Toner cartridge Part number Dell Standard Capacity Toner Cartridge (3,000 pagesa) CR963 Dell High Capacity Toner Cartridge (10,000 pagesa) YTVTC a ISO standard page coverage in accordance with ISO/IEC 19752 testing methodology. 258 - Dell 2355DN | User Guide - Page 260
Troubleshooting Clearing Jams in the DADF Clearing Jams in the Paper Tray Clearing LCD Error Messages Solving Problems - Dell 2355DN | User Guide - Page 261
a warning message appears on the display. NOTE: To prevent document jams, use the document glass for thick, thin or mixed documents. 1 Remove the remaining documents from the DADF. If the document is jammed in the paper feed area: a Open the DADF cover. b Remove the document by gently pulling it out - Dell 2355DN | User Guide - Page 262
a Open the DADF cover. b Open the document input tray upwards and pull the document gently out of the DADF. c Remove the document by gently pulling it out. 261 - Dell 2355DN | User Guide - Page 263
d Close the DADF cover and the document input tray. Then load the documents back into the DADF. If the document is jammed in the duplex path: a Open the DADF cover. b Open the DADF inner cover. 262 - Dell 2355DN | User Guide - Page 264
c Remove the document by gently pulling it out. d Close the DADF inner cover and the DADF cover. Then load the documents back into the DADF. 2 If you cannot see the paper or cannot pull the jammed paper out, open the document cover. 3 Remove the document from the feed area by carefully pulling it - Dell 2355DN | User Guide - Page 265
Jam (optional tray 2) Paper jam in MPF Paper Feed Jam (MPF) "Paper Feed Jam (tray 1)" "Paper Feed Jam (optional tray 2)" "MPF Jam" Paper jam inside of machine Fuser Area Jam "Fuser Area Jam". Paper jam in exit area between the fuser and exit area Jam "Paper Exit Jam". Paper jam in duplex - Dell 2355DN | User Guide - Page 266
Paper Feed Jam (tray 1) 1 Open and close the front cover. The jammed paper automatically exits the printer. If the paper does not exit, go to the next step. 2 Pull the paper tray open. 3 Remove the paper by gently pulling it straight out. 265 - Dell 2355DN | User Guide - Page 267
the paper does not move when pulled, check the fuser area. For more information, see "Fuser Area Jam". 4 Insert the paper tray into the printer until it snaps into place. Printing automatically resumes. Paper Feed Jam (optional tray 2) 1 Pull the optional tray 2 open. 2 Remove the jammed paper from - Dell 2355DN | User Guide - Page 268
If you cannot see the paper in this area or the paper does not move when pulled, go to the next step. 3 Pull the tray 1 half way out. 4 Pull the paper straight up and out. 5 Insert the trays back into the printer. Printing automatically resumes. 267 - Dell 2355DN | User Guide - Page 269
MPF Jam 1 If the paper is not feeding properly, pull the paper out of the printer. 2 Open and close the front cover to resume printing. Fuser Area Jam NOTICE: The fuser area is hot. Take care when removing paper from the printer. 1 Open the front cover and lightly pull the toner cartridge straight - Dell 2355DN | User Guide - Page 270
3 Replace the toner cartridge and close the front cover. Printing automatically resumes. Paper Exit Jam 1 Open and close the front cover. The jammed paper automatically exits the printer. If the paper does not exit, go to the next step. 2 Gently pull the paper out of the output tray. 269 - Dell 2355DN | User Guide - Page 271
3 If you cannot see the paper in the output tray or the paper does not move when pulled, open the rear door. 4 If you see the jammed paper, push the two blue pressure levers down and remove the paper. Skip to step 9. If you do not see the paper, go to the next step. 5 Fully open the rear - Dell 2355DN | User Guide - Page 272
6 Unfold the duplex guide fully. 7 While pushing the fuser lever to the right, open the fuser door. NOTE: Ensure that to unfold the duplex guide before opening the fuser door or you may damage the fuser door. 271 - Dell 2355DN | User Guide - Page 273
8 Pull the jammed paper out. If the jammed paper does not move when you pull, push the two blue pressure levers up to loosen the paper, and then remove it. 9 Return the fuser door, and duplex guide to their original position. 10 Close the rear door. 11 Open and close the front cover. Printing - Dell 2355DN | User Guide - Page 274
Duplex Jam Duplex Jam 0 1 Pull the duplex unit out of the printer. 2 Remove the jammed paper from the duplex unit. If the paper does not come out with the duplex unit, remove the paper from the bottom of the printer. 273 - Dell 2355DN | User Guide - Page 275
3 Push the duplex unit to the printer. 4 Open and close the front cover. Printing automatically resumes. CAUTION: If you do not push the duplex unit correctly, paper jam may occur. Duplex Jam 1 1 Open the rear door. 2 Unfold the duplex guide fully. 3 Pull the jammed paper out. 274 - Dell 2355DN | User Guide - Page 276
Return the duplex guide and close the rear door. 5 Open and close the front cover. Printing automatically resumes. Tips for Avoiding Paper Jams By selecting the correct paper types, most paper jams can be avoided. When a paper jam occurs, follow the steps outlined in "Clearing Jams in the Paper Tray - Dell 2355DN | User Guide - Page 277
port. DADF paper jam at entry The loaded document has jammed in the DADF paper jam at exit DADF. DADF paper jam in duplex path DADF Rev. Jam Duplex Fan1 Locked Duplex Fan2 Locked A problem has occurred in the duplex unit. Suggested solutions • Try again. If the problem persists, please wait for - Dell 2355DN | User Guide - Page 278
printing. Paper jam in duplex path Paper has jammed during duplex printing. Suggested solutions Check duplex unit. Clear the jam. See "Duplex Jam 0". Clear the jam. See "Duplex Jam 1". Email Job is completed with error : DNS Error There is a problem in DNS. Configure the DNS setting. Email Job - Dell 2355DN | User Guide - Page 279
the POP3 setting. Fax Unit Error A problem has occurred in the fax unit. Unplug the power cord and plug it back in. If the problem persists, please call for service. Fax Job is completed with The receiving fax number is classified as junk Change the Junk Fax Setup option. error fax number - Dell 2355DN | User Guide - Page 280
The toner cartridge you have installed is not Install a Dell-genuine toner cartridge, for your printer. designed for your printer. IP Conflict The IP address is used by another user. Check the IP address or obtain a new IP address. Load the following media There is no paper in the tray. in - Dell 2355DN | User Guide - Page 281
. Change the server settings. The engine in your printer is checking some Please wait a few minutes. problems. A problem has occurred in the SMPS unit. The document output tray is full. The toner cartridge is not installed. Toner did not supply enough. Toner cartridge error. Unplug the power - Dell 2355DN | User Guide - Page 282
message Toner Almost Empty Replace Toner Now Toner Exhausted Toner Low Tray 2 Open Unusable Device USB Job is completed with error : Not supported file type Meaning Suggested solutions The toner cartridge is empty. Replace the toner cartridge with a new one. See "Replacing the Toner Cartridge - Dell 2355DN | User Guide - Page 283
If the problem persists, contact Dell. Paper Feeding Problems Condition Suggested solutions Paper is jammed during printing. Clear the paper jam. See "Clearing Jams in the Paper Tray". Paper sticks together. • Ensure that there is not too much paper in the paper tray. The paper tray can hold - Dell 2355DN | User Guide - Page 284
button Settings → Printers. Right-click the Dell 2355dn Laser MFP printer icon and select Set as Default Printer. Check the printer for the following: • The front or rear door is not closed. • Paper is jammed. • No paper is loaded. • The toner cartridge is not installed. If a printer system error - Dell 2355DN | User Guide - Page 285
necessary, replace the toner cartridge. The file may have blank pages. Check the file to ensure that it does not contain blank pages. Some parts, such as the Contact a service representative. controller or the board, may be defective. The illustrations print The setting in the software Print the - Dell 2355DN | User Guide - Page 286
or smeared defects may indicate that the toner cartridge needs cleaning. See "Cleaning the Interior". • The surface of the LSU part inside the printer may be dirty. Clean the LSU (see "Cleaning the Interior"). • The paper may not meet specifications; for example, the paper is too moist or too rough - Dell 2355DN | User Guide - Page 287
AaBbCc Toner smear • If black vertical streaks appear on the page, the drum inside the toner cartridge has probably been scratched. Install a new toner cartridge. See "Replacing the Toner Cartridge". • If white vertical streaks appear on the page, the surface of the LSU part inside the printer may - Dell 2355DN | User Guide - Page 288
page, print a cleaning sheet several times to clean the cartridge; see "Cleaning the Drum". After the printout, if you still have the same problems, install a new toner cartridge. See "Replacing the Toner Cartridge". • Parts of the printer may have toner on them. If the defects occur on the back of - Dell 2355DN | User Guide - Page 289
". Black pages A • The toner cartridge may not be installed properly. Remove the cartridge and reinsert. • The toner cartridge may be defective and need replacing. Install a new toner cartridge. See "Replacing the Toner Cartridge". • The printer may require repair. Contact a service representative - Dell 2355DN | User Guide - Page 290
toner cartridge. See "Replacing the Toner Cartridge". • If the problem persists, the printer may require repair. Contact a service representative. If the printed paper is curled or the paper does not feed into the printer: • Turn over the stack of paper in the paper tray. Also try rotating the paper - Dell 2355DN | User Guide - Page 291
paper in the paper tray. • Check to see if the display shows Memory Full. The Receiving fax has blank spaces or is received in poor-quality. • A noisy phone line can cause line errors. • Check your printer by making a copy. Receiving faxes are too light. The printer might be running out of toner - Dell 2355DN | User Guide - Page 292
received at the other fax being out of paper. machine. • A fax might be in memory because it is waiting to redial a busy number, other jobs that are ahead of it are waiting to be sent, or the fax is set up for a delayed send. Send faxes have a shading at the DADF (Flat-bed) scan size might be - Dell 2355DN | User Guide - Page 293
the paper tray. Replace the paper in the tray with a fresh supply. If necessary, check/adjust the paper guides. • Ensure that the paper is the proper paper weight. 75 g/m2 (20 lb) bond paper is recommended. • Check for copy paper or pieces of copy paper remaining in the printer after a paper jam has - Dell 2355DN | User Guide - Page 294
documents that use more toner. • The document cover may be left open while copies are being made. Scanning Problems Condition Suggested solutions The printer cable may be improperly connected or the power may be off. • The scanner driver is not installed or an operating environment is not set - Dell 2355DN | User Guide - Page 295
user can test server operation with other queries. Common Windows Problems Condition Suggested solutions "File in Use" message appears Exit all software applications. Remove all software from the StartUp Group, then during installation. restart Windows. Reinstall the printer driver. "General - Dell 2355DN | User Guide - Page 296
information on Mac OS error messages. Common Linux Problems Condition The printer doesn't print. Suggested solutions • Check if the printer driver is installed in your system. Open MFP configurator and switch to the Printers tab in Printers configuration window to look at the list of available - Dell 2355DN | User Guide - Page 297
turned on. • Check if the scanner driver for your printer is installed in your system. Open MFP Configurator, switch to Scanners configuration, then press Drivers. Ensure that driver with a name corresponding to your printer's name is listed in the window. • Check if the MFP port is not busy. Since - Dell 2355DN | User Guide - Page 298
a document The resolution setting in the printer driver may not be matched with the one in Acrobat in Macintosh with Acrobat Reader. Reader 6.0 or higher, colors print incorrectly. NOTE: Refer to Mac OS User's Guide that came with your computer for further information on Mac OS error messages. 297 - Dell 2355DN | User Guide - Page 299
the software application expected a setup or PS header file to be sent to the printer. The optional tray 2 is not The printer driver has not been selected in the driver. configured to recognize the optional tray 2. Open the PostScript driver properties, select the Device Options tab, and set - Dell 2355DN | User Guide - Page 300
Installing Accessories Precautions When Installing Printer Accessories Installing Printer Memory Installing an Optional Tray 2 Installing Wireless Network interface card - Dell 2355DN | User Guide - Page 301
. Additional 256 MB can be installed. Do not remove preinstalled memory. Just add one more DIMM in the DIMM socket. NOTE: Your printer supports only Dell DIMMs. Order Dell DIMMs online at www.dell.com. 1 Power the printer off and unplug all cables from the printer. 2 Grasp the control board cover - Dell 2355DN | User Guide - Page 302
notches and grooves illustrated above may not match those on an actual DIMM and its slot. 6 Replace the control board cover. 7 Reconnect the power cord and printer cable, and turn the printer on. After installing the memory DIMM, printer drivers will automatically configure the updated memory. 301 - Dell 2355DN | User Guide - Page 303
an Optional Tray 2 You can increase the paper handling capacity of your printer by installing an optional tray 2. This tray holds 250 sheets of paper. 1 Power the printer off and unplug all cables from the printer. 2 Remove the packing tape and the tape fastening the optional tray 2 cable from - Dell 2355DN | User Guide - Page 304
the connector on the back of the printer. 6 Load paper in the optional tray 2. For information about loading paper in this tray, see "Loading Paper". 7 Reconnect the power cord and cables and then power the printer on. After installing the optional tray 2, printer drivers will automatically sense - Dell 2355DN | User Guide - Page 305
network interface card to enable the use of the printer in wireless network environments. For information about installing the network printer server, see the network printer server user's guide. For information about installing the wireless network interface card and configuring the network - Dell 2355DN | User Guide - Page 306
Specifications General Specifications Scanner and Copier Specifications Printer Specifications Facsimile Specifications Paper Specifications - Dell 2355DN | User Guide - Page 307
1 sheet (face up) Paper tray (tray 1 and optional tray 2): Plain paper (60-90 g/m2, 16-24 lb) MPF: Plain paper, Transparencies, Labels, Card, Post card (60-163 g/m2, 16-43 lb), Envelopes (75-90 g/m2, 20-24 lb) Duplex printing: Plain paper (75-90 g/m2, 20-24 lb) 1-piece toner cartridge system 110-127 - Dell 2355DN | User Guide - Page 308
Item Toner cartridge lifeb Description Dell Standard Capacity Toner Cartridge life: 3,000 pages Dell High Capacity Toner Cartridge life: 10,000 pages Printer dimension (W x D x H) 18.3 x 17.5 x 18.1 in. (465 x 445 x 460 mm) Random Access Memory DDR2 SDRAM 256 MB(Basic) / 512 MB(Max) Weight - Dell 2355DN | User Guide - Page 309
7 ipm (image per minute for letter), 6 ipm for A4 MDMC at Photo mode: 4 cpm Paper size Letter, A4, Legal, Folio, Executive, A5, A6, B5 Zoom rate document glass, DADF: 25%-400% Multiple copies 1-500 pages Copy mode (=Original Type) Text, Text&Photo, Photo a FCOT is measured based on internal - Dell 2355DN | User Guide - Page 310
), XP 32 bit (Home & Pro), Server 2003 & 2008, Vista 32bit / 64bit (Starter, Home Basic, Home Premium, Ultimate, Enterprise & Business), Windows 7, Server 2008 R2 • Various Linux OS • Mac OS 10.3 ~ 10.6 • Novell NetWare NDPS services via TCP/IP & IPP on 5.x, 6.x • Bonjour discovery supported • SAP - Dell 2355DN | User Guide - Page 311
Item Description First Page Out Time (FPOT) From Standby mode: Less than or equal to 8.5 seconds From Sleep mode: Less than 24 seconds (Measured after less than 10 minutes in power save mode) 310 - Dell 2355DN | User Guide - Page 312
Modem speed Transmission speed Scanning speed Multiple page scan speed Maximum document length Paper size Resolution Back-up Memory Halftone Description ITU-T Group 3 Public Switched Telephone Network (PSTN) or behind PABX MH/MR/MMR (ECM Mode) and JPEG/JBIG for color fax transmission 33.6 Kbps - Dell 2355DN | User Guide - Page 313
that does not meet the guidelines outlined in this User's Guide can cause the following problems: • Poor print quality • Increased paper jams • Premature wear on the printer NOTE: Some paper may meet all of the guidelines in this guide and still not produce satisfactory results. This may be the - Dell 2355DN | User Guide - Page 314
in. (Legal) (216 x 356 mm) Transparency Labels Cards Same minimum and 138-146 g/m2 maximum paper sizes as listed above. 120-150 g/m2 105-163 g/m2 Envelopes 75-90 g/m2 a The printer supports a wide range of media sizes. b Capacity may vary depending on print materials' weight and thickness - Dell 2355DN | User Guide - Page 315
are unsure of what type of paper you are loading, such as bond or recycled paper, check the label on the package. The following problems may cause print quality deviations, jamming or even damage to the printer: Symptom Problem with paper Poor print quality or toner adhesion, Too moist, too rough - Dell 2355DN | User Guide - Page 316
4%-6% by weight 100-400 Sheffield Paper Output Capacity Output Location output tray (Face Down) rear door (Face Up) Capacity 150 sheets of 75 g/m2 bond (20 lb) paper 1 sheet of 75 g/m2 bond (20 lb) paper Printer and Paper Storage Environment Paper storage environmental conditions directly affect - Dell 2355DN | User Guide - Page 317
be too dry or too humid. • The best way to store an opened ream of paper is to rewrap it tightly in its moisture-proof wrapping. If the printer environment is subject to extremes, unwrap only the amount of paper to be used during the day's operation to prevent unwanted moisture changes. 316 - Dell 2355DN | User Guide - Page 318
133 default setting, 140 number of pages, 132 problem, 292 quality, 133 reduced/enlarged copy, 134 special features, 134 time out, setting, 45 D DADF (duplex automatic document feeder), loading, 129 date and time, setting, 43, 182 dayliging saving, setting, 44, 183 delayed fax, 201 DIMM, installing - Dell 2355DN | User Guide - Page 319
, 197 group number, email assigning, 168 deleting, 169 editing, 169 H help, 112 I ID card, special copy, 138 ID, setting, 182 installing memory, 300 toner cartridge, 29 IP, setting, 59 J jam, clearing document, 260 paper, 264 L layout properties, printing, 104 Linux installing driver, 225 printer - Dell 2355DN | User Guide - Page 320
, 119 priority fax, 202 problem, solve Windows, 294 problem, solving copying, 292 error messages, 276 faxing, 290 paper feeding, 282 printing, 283 printing quality, 285 PS errors, 298 scanning, 293 R rear output, 88 reduced/enlarged copying, 134 replacing toner cartridge, 254 reports, printing
-
 1
1 -
 2
2 -
 3
3 -
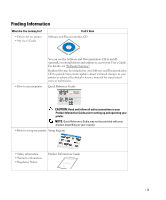 4
4 -
 5
5 -
 6
6 -
 7
7 -
8
-
9
-
10
-
11
-
12
-
13
-
14
-
15
-
16
-
17
-
18
-
19
-
20
-
21
-
22
-
23
-
24
-
25
-
26
-
27
-
28
-
29
-
30
-
31
-
32
-
33
-
34
-
35
-
36
-
37
-
38
-
39
-
40
-
41
-
42
-
43
-
44
-
45
-
46
-
47
-
48
-
49
-
50
-
51
-
52
-
53
-
54
-
55
-
56
-
57
-
58
-
59
-
60
-
61
-
62
-
63
-
64
-
65
-
66
-
67
-
68
-
69
-
70
-
71
-
72
-
73
-
74
-
75
-
76
-
77
-
78
-
79
-
80
-
81
-
82
-
83
-
84
-
85
-
86
-
87
-
88
-
89
-
90
-
91
-
92
-
93
-
94
-
95
-
96
-
97
-
98
-
99
-
100
-
101
-
102
-
103
-
104
-
105
-
106
-
107
-
108
-
109
-
110
-
111
-
112
-
113
-
114
-
115
-
116
-
117
-
118
-
119
-
120
-
121
-
122
-
123
-
124
-
125
-
126
-
127
-
128
-
129
-
130
-
131
-
132
-
133
-
134
-
135
-
136
-
137
-
138
-
139
-
140
-
141
-
142
-
143
-
144
-
145
-
146
-
147
-
148
-
149
-
150
-
151
-
152
-
153
-
154
-
155
-
156
-
157
-
158
-
159
-
160
-
161
-
162
-
163
-
164
-
165
-
166
-
167
-
168
-
169
-
170
-
171
-
172
-
173
-
174
-
175
-
176
-
177
-
178
-
179
-
180
-
181
-
182
-
183
-
184
-
185
-
186
-
187
-
188
-
189
-
190
-
191
-
192
-
193
-
194
-
195
-
196
-
197
-
198
-
199
-
200
-
201
-
202
-
203
-
204
-
205
-
206
-
207
-
208
-
209
-
210
-
211
-
212
-
213
-
214
-
215
-
216
-
217
-
218
-
219
-
220
-
221
-
222
-
223
-
224
-
225
-
226
-
227
-
228
-
229
-
230
-
231
-
232
-
233
-
234
-
235
-
236
-
237
-
238
-
239
-
240
-
241
-
242
-
243
-
244
-
245
-
246
-
247
-
248
-
249
-
250
-
251
-
252
-
253
-
254
-
255
-
256
-
257
-
258
-
259
-
260
-
261
-
262
-
263
-
264
-
265
-
266
-
267
-
268
-
269
-
270
-
271
-
272
-
273
-
274
-
275
-
276
-
277
-
278
-
279
-
280
-
281
-
282
-
283
-
284
-
285
-
286
-
287
-
288
-
289
-
290
-
291
-
292
-
293
-
294
-
295
-
296
-
297
-
298
-
299
-
300
-
301
-
302
-
303
-
304
-
305
-
306
-
307
-
308
-
309
-
310
-
311
-
312
-
313
-
314
-
315
-
316
-
317
-
318
-
319
-
320
 |
 |

Dell™ 2355dn Laser MFP
User’s Guide