Dell 430-3113 User Guide
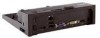
Dell 430-3113 - Simple Port Replicator Manual
 |
UPC - 880487211225
View all Dell 430-3113 manuals
Add to My Manuals
Save this manual to your list of manuals |
Dell 430-3113 manual content summary:
- Dell 430-3113 | User Guide - Page 1
Dell™ E-Port User's Guide Model PRO3X www.dell.com | support.dell.com - Dell 430-3113 | User Guide - Page 2
to hardware or loss of data and tells you how to avoid the problem. CAUTION: A CAUTION indicates a potential for property damage, personal injury written permission of Dell Inc. is strictly forbidden. Trademarks used in this text: Dell and the DELL logo are trademarks of Dell Inc. Other trademarks - Dell 430-3113 | User Guide - Page 3
Contents 1 About Your Dell™ E-Port 5 2 Using the Dell™ E-Port 9 Setting Up Your E-Port 9 Before You Dock for the First Time 9 Docking Your Laptop 10 Securing the E-Port 13 E-Port Laptop Power and Docking Status 14 Using the E-Port with Dual Monitors 15 Undocking Your Laptop 16 3 - Dell 430-3113 | User Guide - Page 4
4 Contents - Dell 430-3113 | User Guide - Page 5
About Your Dell™ E-Port The Dell™ E-Port supports the Dell E-Family laptop computers, but it is not compatible with any previous series laptop computers. The E-Port enables you to connect your laptop computer to the following external devices: Connector Description R J - 4 5 N E T W O R K C O N N - Dell 430-3113 | User Guide - Page 6
U S B O R E S ATA C O N N E C T O R - Connects and supports USB or Dell-powered E-Family or standard selfpowered eSATA devices. E - M O N I T O R S T A N D C O N N E C T O R - Connects to the monitor stand; available at Dell.com. 6 About Your Dell™ E-Port - Dell 430-3113 | User Guide - Page 7
1 10 9 8 7 6 5 4 2 3 1 network connector 3 USB connectors (3) 5 DisplayPort connector 7 VGA connector 9 USB or eSATA connector 2 audio connectors (2) 4 AC adapter connector 6 DVI connector 8 USB connectors (2) 10 E-Monitor stand connector About Your Dell™ E-Port 7 - Dell 430-3113 | User Guide - Page 8
8 1 battery bar adjuster 3 power button 5 docking light 7 lock/unlock switch 1 2 3 4 5 6 7 2 alignment mark 4 eject button 6 security cable slot 8 docking connector 8 About Your Dell™ E-Port - Dell 430-3113 | User Guide - Page 9
Dell™ E-Port CAUTION: Before you begin any of the procedures in this section, follow the safety instructions that shipped with your computer. Setting Up Your E-Port process: 1 Ensure that the laptop is not connected to the E-Port (docked). 2 Turn on the laptop. 3 Verify that your laptop operating - Dell 430-3113 | User Guide - Page 10
E-Port or the laptop. 2 1 1 AC adapter cable 2 AC adapter connector 1 Complete the steps in "Before You Dock for the First Time" on page 9. 2 Place the E-Port so that there is enough flat space in front of it to completely support the laptop when docked to the E-Port. 10 Using the Dell™ E-Port - Dell 430-3113 | User Guide - Page 11
not have a battery extending from the back of the laptop, extend the battery bar by sliding the battery bar adjuster to the right. Using the Dell™ E-Port 11 - Dell 430-3113 | User Guide - Page 12
push down on the laptop until it clicks into place in the docking connector. NOTICE: Do not pick up the laptop or the E-Port when the laptop is docked. Doing so can damage the connectors on the laptop and on the E-Port. 7 If the laptop was not already turned on, turn it on by - Dell 430-3113 | User Guide - Page 13
of metal-stranded cable with an attached locking device and associated key (available at Dell.com). For instructions on installing this kind of antitheft device, see the documentation that came with the device. The E-Port has the following security features: LOCK/UNLOCK SWITCH - Move the lock toward - Dell 430-3113 | User Guide - Page 14
undocked or no AC adapter connected Hibernate or Off Unit docked and AC adapter connected Hibernate or Off Unit docked using AC or battery power Standby Unit docked using AC On or battery power Power Button Light Off Off Breathing On Docking Light Off On On On 14 Using the Dell™ E-Port - Dell 430-3113 | User Guide - Page 15
VGA connector 3 DisplayPort connector 2 DVI connector The E-Port supports three video ouptut formats-VGA, DVI, and DisplayPort. You can use your E-Port for dual monitor display. Refer to the table below for using the E-Port with dual monitors. Monitor 1 connection DisplayPort DisplayPort DVI DVI - Dell 430-3113 | User Guide - Page 16
E-Port to unlock it. 2 Press the eject button to undock the laptop from the E-Port, then lift the laptop away from the E-Port. NOTICE: Do not pick up the laptop or the E-Port when the laptop is docked. Doing so can damage the connectors on the laptop and on the E-Port. 16 Using the Dell™ E-Port - Dell 430-3113 | User Guide - Page 17
) 210 mm (8.27 inches) I/O Connectors USB Audio Network Dell™ E-Family docking connector Video USB or eSATA connector E-Monitor stand connector six port; 10/100/1000 GB Ethernet one custom connector (Dell E-Family only) VGA, DVI, DisplayPort (HDMI via dongle) one connector supporting USB or Dell - Dell 430-3113 | User Guide - Page 18
System Level Operational Specifications Variable Minimum Temperature (system external) 0°C Temperature ramp rate 0°C/hr Humidity (non-condensing) 10% Humidity ramp rate Altitude 0 m (0 ft) Typical 25°C N/A N/A Maximum 35°C 10°C/hr 80% 20%/hr 3048 m (10,000 ft) System Level Non- - Dell 430-3113 | User Guide - Page 19
information, see the Regulatory Compliance Homepage on www.dell.com at the following location: www.dell.com/regulatory_compliance. • Warranty information • Terms and Conditions (U.S. only) • Safety instructions • Regulatory information • Ergonomics information • End User License Agreement - Dell 430-3113 | User Guide - Page 20
20 Finding Information - Dell 430-3113 | User Guide - Page 21
standard of the Video Electronics Standards Association (VESA) used for digital displays. docking device - provides port replication, cable management, and security features to adapt your laptop to a desktop workspace. driver - Software that allows the operating system to control a device such as - Dell 430-3113 | User Guide - Page 22
faster, serial version of the ATA (IDE) interface. serial connector - An I/O port often used to connect devices such as a handheld digital device or digital camera in to a 4-pin socket on your computer or in to a multi-port hub that plugs in to your computer. USB devices can be connected and
-
 1
1 -
 2
2 -
 3
3 -
 4
4 -
 5
5 -
 6
6 -
 7
7 -
8
-
9
-
10
-
11
-
12
-
13
-
14
-
15
-
16
-
17
-
18
-
19
-
20
-
21
-
22
 |
 |

www.dell.com | support.dell.com
Dell™ E-Port User’s Guide
Model PRO3X