Dell 5100cn Owner's Manual
Dell 5100cn - Color Laser Printer Manual
 |
UPC - 807027505897
View all Dell 5100cn manuals
Add to My Manuals
Save this manual to your list of manuals |
Dell 5100cn manual content summary:
- Dell 5100cn | Owner's Manual - Page 1
Dell™ Laser Printer 5100cn Owner's Manual Look Inside For: • Loading Paper • Setting Up for Local and Network Printing • Installing Printer Driver • Using Your Printer • Maintenance • Contacting Dell www.dell.com/supplies | support.dell.com - Dell 5100cn | Owner's Manual - Page 2
can order Printer Supplies online at www.dell.com/supplies or by phone. US Algeria Argentina Australia Austria Belgium Canada Caribbean Islands Chile Colombia Czech Republic Denmark Egypt Finland France Germany Ireland Israel Italy Japan Jordan Kuwait Lebanon Luxembourg 877-INK-2-YOU Contact your - Dell 5100cn | Owner's Manual - Page 3
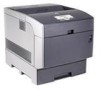
Dell™ Laser Printer 5100cn 1 2 9 3 8 5 7 4 6 1 Center output tray 2 Operator panel 3 Multipurpose feeder 4 Standard 500-sheet tray 5 Power switch 6 Power cable connector 7 Ethernet optional 500-sheet tray module, 1000-sheet tray module, and other additional options, see the User's Guide. 3 - Dell 5100cn | Owner's Manual - Page 4
your printer NOTICE: A NOTICE indicates either potential damage to hardware or loss of data and tells you how to avoid the problem. CAUTION: A CAUTION indicates a potential for property damage, personal injury, or death. Information in this document is subject to change without notice. © 2004 Dell - Dell 5100cn | Owner's Manual - Page 5
Contents Dell™ Laser Printer 5100cn 3 1 Loading Paper 11 Loading the Standard Tray 12 Loading the Multipurpose Feeder 15 Loading Envelopes ...17 2 Setting Up for Local Printing 19 Installing Printer Drivers 20 Connecting the Printer to the Computer Before Inserting the Drivers and Utilities CD - Dell 5100cn | Owner's Manual - Page 6
Tool 38 Software Update ...38 6 Maintenance 39 Replacing the Imaging Drum 40 Removing the Used Imaging Drum 40 Installing the New Imaging Drum 41 Replacing the Toner Cartridge 43 Removing the Used Toner Cartridge 43 Installing the New Toner Cartridge 44 Replacing the Transfer Roller 47 - Dell 5100cn | Owner's Manual - Page 7
(Latin America and the Caribbean Only 89 Dell Inc. Ink and Toner Cartridges Limited Warranties 91 Ink and Toner Cartridges Limited Warranty (U.S. and Canada Only 91 Ink and Toner Cartridges Limited Warranty (Latin America Only 91 Dell™ Software License Agreement 93 Limited Warranty ...93 - Dell 5100cn | Owner's Manual - Page 8
www.dell.com/supplies | support.dell.com 8 - Dell 5100cn | Owner's Manual - Page 9
than those described in the operating instructions, to a professional service person. • This product is designed to meet safety standards with the use of specific Dell-authorized components. The safety features of some parts may not always be obvious. Dell disclaims liability associated with use of - Dell 5100cn | Owner's Manual - Page 10
www.dell.com/supplies | support.dell.com 10 - Dell 5100cn | Owner's Manual - Page 11
Section 1 Loading Paper Loading the Standard Tray Loading the Multipurpose Feeder Loading Envelopes 1 Loading Paper - Dell 5100cn | Owner's Manual - Page 12
www.dell.com/supplies | support.dell.com Loading the Standard Tray Load the print media used for the majority of your print jobs in the standard 500-sheet tray. 1. Pull the tray out of the printer until it stops. Hold the tray with both hands, lift the front slightly, and remove it from the printer - Dell 5100cn | Owner's Manual - Page 13
3. Squeeze the length guide and slide it to the edge of the tray. 4. Before loading the print media, flex the sheets back and forth, and then fan them. Straighten the edges of the stack on a level surface. 5. Place the print media into the tray with the recommended print side face up. NOTE: Do not - Dell 5100cn | Owner's Manual - Page 14
www.dell.com/supplies | support.dell.com 6. Slide the width guides and length guide until they rest lightly against the edge of the print media stack. 7. Insert the tray into the printer, and push until it stops. 8. If you load any print media into the tray, configure the Paper Type settings for - Dell 5100cn | Owner's Manual - Page 15
feeder can use various other sizes and types of print media such as envelopes and transparencies. 1. Gently pull open the multipurpose feeder cover, and pull out the extension tray. 2. Slide the width guides to the edge of the tray. The width guides should be fully extended. Loading Paper 15 - Dell 5100cn | Owner's Manual - Page 16
value for the print media you have loaded. Select print media source, size, and type in your software program and select the print media size and type on the printer operator panel. For tips on recommended print media, solving printing problems, and clearing jams, see the User's Guide. 16 Loading - Dell 5100cn | Owner's Manual - Page 17
jams and damage to the printer. After loading envelopes, make sure the size and type setting for the multipurpose feeder is set to the correct value for the print media you have loaded. Select print media source, size, and type in your software program and select the print media size and type on - Dell 5100cn | Owner's Manual - Page 18
www.dell.com/supplies | support.dell.com 18 Loading Paper - Dell 5100cn | Owner's Manual - Page 19
2 Section 2 Setting Up for Local Printing Installing Printer Drivers Setting Up for Local Printing - Dell 5100cn | Owner's Manual - Page 20
/supplies | support.dell.com A local printer is a printer attached to your computer or a print server using a USB or parallel cable. If your printer is attached to a network and not your computer, see "Setting Up for Network Printing" on page 23. Installing Printer Drivers Connecting the Printer to - Dell 5100cn | Owner's Manual - Page 21
box, and then set the printer's options under Printer Configuration. Click Next. 5. Select either the Typical Installation or Custom Installation checkbox, and then click Next. If you select Custom Installation, you can select the specific software you want to install. 6. The Adobe License Agreement - Dell 5100cn | Owner's Manual - Page 22
www.dell.com/supplies | support.dell.com 22 Setting Up for Local Printing - Dell 5100cn | Owner's Manual - Page 23
3 Section 3 Setting Up for Network Printing Network Set-Up Setting Up for Network Printing - Dell 5100cn | Owner's Manual - Page 24
: For additional network set-up configurations, refer to your User's Guide. Disable Microsoft® Windows® XP Firewall Before Printer Software Installation NOTE: This step may not be necessary if you have Windows XP Service Pack 2 installed. If your printer is connected directly to a network and the - Dell 5100cn | Owner's Manual - Page 25
you want to set a printer as the default, select the printer and then click the Set this printer as default check box. 9. If you want to restrict color printing, select the appropriate Color Track option. Enter the password. 10. If the PS Driver is available and you want to install it, click on the - Dell 5100cn | Owner's Manual - Page 26
www.dell.com/supplies | support.dell.com 12. Select the software and documentation you want to install. You can specify the destination folder to install the Dell software and documentation. To change the destination folder, click Browse.... 13. Click Next. 14. For PostScript Driver Installation - Dell 5100cn | Owner's Manual - Page 27
4 Section4 Installing the Printer Driver or PPD File on Macintosh Computers Installing the AdobePS Printer Driver (Mac OS 9.x) Installing the PPD File (Mac OS X) Installing the Printer Driver or PPD File on Macintosh Computers - Dell 5100cn | Owner's Manual - Page 28
CD. 3. Open the Mac OS 9 folder. 4. Double click the desired language folder (for example, English) you want to install. 5. Double click Dell 5100cn Installer icon. 6. Select the way you want to install the program. • Select Full Installation to install the AdobePS printer driver and PPD file - Dell 5100cn | Owner's Manual - Page 29
location. 10. To use the options, see "Configuring Settings" on page 30. NOTE: When using a USB cable, Installable Options are automatically set up. You do not have to change the settings. Set Adobe Protocol as RAW in Configure-USB from operator panel of printer. Installing the Printer Driver or - Dell 5100cn | Owner's Manual - Page 30
Settings" on page 30. Configuring Settings 1. Click the icon of the desktop printer you created. 2. Click Printing on the menu bar, and select Change Setup. 3. Set the option menu item in Installable Options, and then click OK. 30 Installing the Printer Driver or PPD File on Macintosh Computers - Dell 5100cn | Owner's Manual - Page 31
Drivers and Utilities CD. 3. Double-click the Mac OS X folder, and then double-click the Dell 5100cn Installer icon. 4. Type the administrator's name and password, and then click OK. 5. Click Install. 6. Click Quit. Installation is complete. 7. Go to the next section to continue. Adding a Printer - Dell 5100cn | Owner's Manual - Page 32
Dell Laser Printer 5100cn is selected for the Model Name. If it is not selected, select it. NOTE: When setting up of printing using IPP, a cue name is made un-inputting (You do not have to type). 3. Click Add. Configure Settings All the optional accessories are verified as installed. Mac OS 10 - Dell 5100cn | Owner's Manual - Page 33
Section 5 Using Your Printer Changing Printer Settings Adjusting the Language Printing a Job Canceling a Job From the Printer Operator Panel Software Overview 5 Using Your Printer - Dell 5100cn | Owner's Manual - Page 34
www.dell.com/supplies | support.dell.com Changing Printer Settings NOTE: For detailed explanations of the menus, see the User's Guide. You can select menu items and corresponding values from the operator panel. When you first enter the printer menus from the operator panel, you see an asterisk (*) - Dell 5100cn | Owner's Manual - Page 35
then press . 10. Reenter the password to confirm the password that you entered, and then press . The password has been changed. NOTE: If you forget your password, turn off the printer. Then, while holding the Menu button, turn on the printer. This will recover the factory default menu settings. The - Dell 5100cn | Owner's Manual - Page 36
www.dell.com/supplies | support.dell.com Adjusting the Language To display a different language on you send a job to print, a small printer icon appears in the right corner of the taskbar. 1. Double-click the printer icon. A list of print jobs appears in the printer window. 2. Select the job you - Dell 5100cn | Owner's Manual - Page 37
with your printer to install a combination of software programs, depending on your operating system. The following software programs can only operate on Windows. They cannot operate on Macintosh, UNIX, or Linux. Printing Status Window The Printing Status Window alerts you when an error or warning - Dell 5100cn | Owner's Manual - Page 38
from the Printing Status window, the All Programs menu, or the desktop icon. You can also launch it from the Status Window when a toner error occurs. You can order consumables by phone or from the web. 1. Click Start →All Programs →Dell Printers →Dell Laser Printer 5100cn →Dell Supplies Management - Dell 5100cn | Owner's Manual - Page 39
Section 6 Maintenance Replacing the Imaging Drum Replacing the Toner Cartridge Replacing the Transfer Roller Replacing the Fuser and Separator Roller Cleaning the Automatic Density Control (ADC) Sensor 6 Maintenance - Dell 5100cn | Owner's Manual - Page 40
| support.dell.com Replacing the Imaging Drum CAUTION: Before performing any of the following procedures, read and follow the "CAUTION: SAFETY INSTRUCTIONS" on page 9. CAUTION: Never throw a used imaging drum into a fire. It could explode resulting in burns and injuries. Dell cartridges are - Dell 5100cn | Owner's Manual - Page 41
the transfer roller (black-colored roller). Scratches, dirt, or oil from your hands on the imaging drum or transfer roller may reduce the print quality. 1. Remove the protective cover from the imaging drum. 2. Holding the imaging drum by the handle with the flat part facing the back of the printer - Dell 5100cn | Owner's Manual - Page 42
cover on the imaging drum straight up to remove it. NOTICE: Do not touch the transfer roller (black-colored roller). Make sure that nothing touches or scratches the roller surface. Scratches or oil from your hands on the roller deteriorates print quality. 4. Close the imaging drum cover. 5. Close - Dell 5100cn | Owner's Manual - Page 43
by phone, see "Order Printer Supplies" on page 2. Dell recommends Dell-branded toner cartridges for your printer. Dell does not provide warranty coverage for problems caused by using accessories, parts, or components not supplied by Dell. CAUTION: Never throw used toner cartridges into a fire. The - Dell 5100cn | Owner's Manual - Page 44
www.dell.com/supplies | support.dell.com 3. Pull out the toner cartridge. Installing the New Toner Cartridge 1. Select the new toner cartridge whose color matches the cartridge carrier and remove it from its packaging. 44 Maintenance - Dell 5100cn | Owner's Manual - Page 45
2. Gently shake the cartridge to distribute the toner evenly. 3. Align the toner cartridge with the corresponding cartridge carrier in the printer and insert it. 4. Grip the levers at each end of the toner cartridge, then push down firmly to rotate the levers forward. Maintenance 45 - Dell 5100cn | Owner's Manual - Page 46
| support.dell.com 5. Pull the toner seal straight up to remove it. NOTE: Pull the toner seal straight up. Pulling the toner seal diagonally may tear the seal. NOTE: If it takes more than five seconds to remove the toner seal after inserting the toner cartridge in the printer, an error message - Dell 5100cn | Owner's Manual - Page 47
"Order Printer Supplies" on page 2. Dell recommends Dell transfer roller for your printer. Dell does not provide warranty coverage for problems caused by using accessories, parts, or components not supplied by Dell. Removing the Used Transfer Roller CAUTION: Never throw a used transfer roller into - Dell 5100cn | Owner's Manual - Page 48
www.dell.com/supplies | support.dell.com Installing the New Transfer Roller 1. Unpack a new transfer roller and grip the tabs as shown. 2. Align the arrow marks on the transfer roller to the marks on the printer, and gently push the roller into the printer. 48 Maintenance - Dell 5100cn | Owner's Manual - Page 49
3. To lock the transfer roller into the printer, push down the tabs until you hear a click. 4. Close the front cover. Maintenance 49 - Dell 5100cn | Owner's Manual - Page 50
| support.dell.com Replacing the Fuser and Separator Roller To avoid burns, do not replace the fuser immediately after printing, as the fuser gets very hot during this process. CAUTION: To avoid burns, never touch the fuser until at least 30 minutes after you have turned off the printer. CAUTION - Dell 5100cn | Owner's Manual - Page 51
3. Lift up the levers next to both ends of the fuser. 4. Grip the knobs and gently lift the fuser out of the printer. Maintenance 51 - Dell 5100cn | Owner's Manual - Page 52
www.dell.com/supplies | support.dell.com Installing the New Fuser 1. Unpack a new fuser, grip the fuser by the knobs, align it with the slots in the printer, and slowly push it in. 2. Completely push down the fuser by holding the knobs at both ends of the fuser until the levers next to both ends of - Dell 5100cn | Owner's Manual - Page 53
Removing the Used Separator Roller NOTE: Remove any print jobs from the tray before pulling the tray out of the printer. 1. Pull the tray out of the printer until it stops. Hold the tray with both hands, lift the front slightly, and remove it from the printer. 2. Press both tabs inward and hold - Dell 5100cn | Owner's Manual - Page 54
www.dell.com/supplies | support.dell.com 3. Gently raise the separator roller assembly, and slide it to the left. Installing the New Separator Roller 1. Align the holes of the new separator roller with the projections in the tray and slide the separator roller until it stops. Then, release your - Dell 5100cn | Owner's Manual - Page 55
2. Close the separator roller cover. 3. Replace the printer's tray into the printer. Maintenance 55 - Dell 5100cn | Owner's Manual - Page 56
"CAUTION: SAFETY INSTRUCTIONS" on page 9. When the printer's automatic density control (ADC) sensor is dirty, follow the procedure below to clean it. 1. Turn off the printer. 2. Push the front latch up and fully open the front cover. 3. Grip the tabs at both ends of the transfer roller and gently - Dell 5100cn | Owner's Manual - Page 57
control (ADC) sensor window with a clean dry cloth or cotton swab. NOTE: Do not allow anything hard to come in contact with the automatic density control (ADC) sensor window. Do not use excessive force to clean the window. 5. Replace the transfer roller. Grip the tabs as shown. Maintenance 57 - Dell 5100cn | Owner's Manual - Page 58
www.dell.com/supplies | support.dell.com 6. Align the arrow marks on the transfer roller to the marks on the printer, and gently push the roller into the printer. 7. To lock the transfer roller into the printer, push down the tabs until you hear a click. 8. Close the front cover. 58 Maintenance - Dell 5100cn | Owner's Manual - Page 59
9. Turn on the printer. Maintenance 59 - Dell 5100cn | Owner's Manual - Page 60
www.dell.com/supplies | support.dell.com 60 Maintenance - Dell 5100cn | Owner's Manual - Page 61
Section 7 Appendix Technical Assistance Automated Order-Status Service Contacting Dell U.S. Terms and Conditions of Sale Limited Warranties and Return Policy Dell Inc. Ink and Toner Cartridges Limited Warranties Dell™ Software License Agreement Regulatory 7 Appendix - Dell 5100cn | Owner's Manual - Page 62
If you need help with a technical problem, Dell is ready to assist you. 1. Call technical support from a telephone near or at the printer so that technical support can assist you with any necessary procedures. When calling Dell, use your Express Service Code to help expedite the routing of your - Dell 5100cn | Owner's Manual - Page 63
City) International Access Code Country Code City Code Anguilla Antigua and Barbuda Argentina (Buenos Aires) International Access Code: 00 Country Code: 54 City Code: 11 Aruba Department Name or Service Area, Website and E-Mail Address General Support General Support Website: www.dell.com.ar E-mail - Dell 5100cn | Owner's Manual - Page 64
/supplies | support.dell.com Country (City) International Access Code Country Code City Code Department Name or Service Area, Website and E-Mail Address Australia (Sydney) E-mail (Australia): [email protected] International Access Code: 0011 E-mail (New Zealand): [email protected] - Dell 5100cn | Owner's Manual - Page 65
large bus., government) Spare Parts Sales & Extended Service Sales Cayman Islands General Support Chile (Santiago) Sales, Customer Support, and Technical Support Country Code: 56 City Code: 2 Area Codes, Local Numbers, and Toll-Free Numbers 1-800-342-0671 toll-free: 800-10-0238 0800 90 3355 - Dell 5100cn | Owner's Manual - Page 66
| support.dell.com Country (City) International Access Code Country Code City Code China (Xiamen) Country Code: 86 City Code: 592 Colombia Costa Rica Department Name or Service Area, Website and E-Mail Address Technical Support website: support.dell.com.cn Technical Support E-mail: cn_support@dell - Dell 5100cn | Owner's Manual - Page 67
Access Code: 00 Country Code: 420 City Code: 2 Denmark (Copenhagen) International Access Code: 00 Country Code: 45 Dominica Dominican Republic Ecuador El Salvador Department Name or Service Area, Website and E-Mail Address Website: support.euro.dell.com E-mail: [email protected] Technical Support - Dell 5100cn | Owner's Manual - Page 68
www.dell.com/supplies | support.dell.com Country (City) International Access Code Country Code City Code Department Name or Service Area, Website and E-Mail Address Finland (Helsinki) Website: support.euro.dell.com International Access Code: 990 E-mail: [email protected] Country Code: 358 - Dell 5100cn | Owner's Manual - Page 69
: support.euro.dell.com International Access Code: 00 E-mail: support.euro.dell.com/gr/en/emaildell/ Country Code: 30 Technical Support Gold Service Technical Support Switchboard Gold Service Switchboard Sales Fax Grenada General Support Guatemala General Support Guyana General Support - Dell 5100cn | Owner's Manual - Page 70
dell.com/supplies | support.dell.com Country (City) International Access Code Country Code City Code India Ireland (Cherrywood) International Access Code: 16 Country Code: 353 City Code: 1 Italy (Milan) International Access Code: 00 Country Code: 39 City Code: 02 Jamaica Department Name or Service - Dell 5100cn | Owner's Manual - Page 71
Code Country Code City Code Department Name or Service Area, Website and E-Mail Address Japan (Kawasaki) Website: support.jp.dell.com International Access Code: 001 Technical Support (servers) Country Code: 81 Technical Support outside of Japan (servers) City Code: 44 Technical Support - Dell 5100cn | Owner's Manual - Page 72
www.dell.com/supplies | support.dell.com Country (City) International Access Code Country Code City Code Latin America Department Name or Service Area, Website and E-Mail Address Customer Technical Support (Austin, Texas, U.S.A.) Customer Service (Austin, Texas, U.S.A.) Fax (Technical Support and - Dell 5100cn | Owner's Manual - Page 73
Service Main Montserrat Netherlands Antilles Netherlands (Amsterdam) International Access Code: 00 Country Code: 31 City Code: 20 New Zealand International Access Code: 00 Country Code: 64 Nicaragua General Support General Support Website: support.euro.dell.com Technical Support Technical Support - Dell 5100cn | Owner's Manual - Page 74
www.dell.com/supplies | support.dell.com Country (City) International Access Code Country Code City Code Department Name or Service Area, Website and E-Mail Address Norway (Lysaker) Website: support.euro.dell.com International Access Code: 00 E-mail Support (portable computers): Country Code: - Dell 5100cn | Owner's Manual - Page 75
Customer Technical Support, Customer Service, and Sales (Penang, Malaysia) Spain (Madrid) Website: support.euro.dell.com International Access Code: 00 E-mail: support.euro.dell.com/es/es/emaildell/ Country Code: 34 Home and Small Business City Code: 91 Technical Support Customer Care - Dell 5100cn | Owner's Manual - Page 76
(City) International Access Code Country Code City Code Department Name or Service Area, Website and E-Mail Address Sweden (Upplands Vasby) Website: support.euro.dell.com International Access Code: 00 E-mail: [email protected] Country Code: 46 City Code: 8 E-mail Support for Latitude and - Dell 5100cn | Owner's Manual - Page 77
: 1344 Uruguay Department Name or Service Area, Website and E-Mail Address Area Codes, Local Numbers, and Toll-Free Numbers General Support 1-800-805-8035 General Support toll-free: 1-866-540-3355 Website: support.euro.dell.com Customer Care website: support.euro.dell.com/uk/en/ECare/Form - Dell 5100cn | Owner's Manual - Page 78
1-800-289-3355 or toll-free: 1-800-879-3355 Dell Outlet Store (Dell refurbished computers) toll-free: 1-888-798-7561 Software and Peripherals Sales toll-free: 1-800-671-3355 Spare Parts Sales toll-free: 1-800-357-3355 Extended Service and Warranty Sales toll-free: 1-800-247-4618 Fax toll - Dell 5100cn | Owner's Manual - Page 79
WILL BE OBLIGATED TO HONOR ANY SUCH WARRANTIES AND SERVICES, ONLY UPON DELL'S RECEIPT OF PAYMENT IN FULL FOR THE ITEM TO BE WARRANTED OR SERVICED. 5. Software. All software is provided subject to the license agreement that is part of the software package and you agree that you will be bound by such - Dell 5100cn | Owner's Manual - Page 80
or promotional pricing. 7. Changed or Discontinued Product. Dell's policy is one of ongoing update and revision. Dell may revise and discontinue OR FOR LOST OR CORRUPTED DATA OR SOFTWARE, OR THE PROVISION OF SERVICES AND SUPPORT. EXCEPT AS EXPRESSLY PROVIDED HEREIN, DELL WILL NOT BE LIABLE FOR - Dell 5100cn | Owner's Manual - Page 81
10. Applicable Law; Not For Resale or Export. You agree to comply with all applicable laws and regulations of the various states and of the United States. You agree and represent that you are buying only for your own internal use only, and not for resale or export. Dell a part of these its Code of - Dell 5100cn | Owner's Manual - Page 82
instructions - Failure to follow the product instructions or failure to perform preventive maintenance - Problems caused by using accessories, parts, or components not supplied by Dell • Products with missing or altered Service FOR USE, OR FOR LOST DATA OR LOST SOFTWARE. OUR LIABILITY WILL BE NO - Dell 5100cn | Owner's Manual - Page 83
warranty period is not extended if we repair or replace a warranted product or any parts. Dell may change the availability of limited warranties, at its discretion, but any changes will not be retroactive. What do I do if I need warranty service? Before the warranty expires, please call us at the - Dell 5100cn | Owner's Manual - Page 84
us. NOTE: Before you replace parts, make sure to back up the data on the hard drive(s) and any other storage device(s) in the product(s). We are not responsible for lost or corrupted data. What if I purchased a service contract? If your service contract is with Dell, service will be provided to you - Dell 5100cn | Owner's Manual - Page 85
software or an operating system that has been installed by Dell, parts may be returned within fourteen (14) days of the date on the packing slip or invoice. How to Return - To return products, e-mail or call Dell customer service us, make sure to back up the data on the hard drive(s) and any other - Dell 5100cn | Owner's Manual - Page 86
instructions - Failure to follow the product instructions or failure to perform preventive maintenance - Problems caused by using accessories, parts, or components not supplied by Dell • Products with missing or altered Service FOR USE, OR FOR LOST DATA OR LOST SOFTWARE. OUR LIABILITY WILL BE NO - Dell 5100cn | Owner's Manual - Page 87
your Dell Service Tag or order number available. Web Support support.dell.com/ replacement part, but we will not charge you for the replacement part as long as you return the original part to us within 30 days after we ship the replacement part to you. If we do not receive the original part - Dell 5100cn | Owner's Manual - Page 88
us. NOTE: Before you replace parts, make sure to back up the data on the hard drive(s) and any other storage device(s) in the product(s). We are not responsible for lost or corrupted data. What if I purchased a service contract? If your service contract is with Dell, service will be provided to you - Dell 5100cn | Owner's Manual - Page 89
from repaired products. Dell uses new and reconditioned parts made by various manufacturers in performing repairs and building replacement products. Exclusions This Guarantee does not apply to defects resulting from: improper or inadequate installation, use, or maintenance; actions or modifications - Dell 5100cn | Owner's Manual - Page 90
at the time of malfunction, including peripherals and software used. Otherwise, Dell may refuse the guarantee claim. Upon diagnosis of a warranted defect, Dell will make arrangements and pay for ground freight and insurance to and from Dell's repair/replacement center. The end user must ensure that - Dell 5100cn | Owner's Manual - Page 91
replace it with a comparable product or reimburse you for the cartridge purchase cost, at Dell's sole option. This limited warranty does not apply to ink or Toner Cartridges TRANSFER THIS PRODUCT TO ANOTHER PARTY. DELL FOR USE, OR FOR LOST DATA OR LOST SOFTWARE. DELL'S LIABILITY WILL BE NO MORE - Dell 5100cn | Owner's Manual - Page 92
cartridge is not available, Dell reserves the right, at its sole discretion, to choose between replacing it by a similar product or reimbursing you for the purchase cost. This limited warranty does not apply to ink or Toner Cartridges or otherwise transfer this product to a third party. Dell does not - Dell 5100cn | Owner's Manual - Page 93
from accident, abuse, misapplication, or service or modification by someone other than Dell. Any replacement disk is warranted for the remaining original warranty period or thirty (30) days, whichever is longer. Dell does NOT warrant that the functions of the Software will meet your requirements or - Dell 5100cn | Owner's Manual - Page 94
www.dell.com/supplies | support.dell.com FOR THE SOFTWARE AND ALL ACCOMPANYING WRITTEN MATERIALS. This limited warranty gives you specific legal rights; you may have others, which vary from jurisdiction to jurisdiction. IN NO EVENT SHALL DELL OR ITS SUPPLIERS BE LIABLE FOR ANY DAMAGES WHATSOEVER ( - Dell 5100cn | Owner's Manual - Page 95
Personal Communication Services (PCS). These licensed services, along with in a particular installation. If this equipment does cause interference with radio communications services, which can be circuits. If necessary, consult a Dell Technical Support representative or an experienced radio/television - Dell 5100cn | Owner's Manual - Page 96
www.dell.com/supplies | support.dell.com 96 Appendix - Dell 5100cn | Owner's Manual - Page 97
, 20 D Dell supplies management system , 38 Disable menus from the operator panel , 35 Drivers, Installing , 20 F Factory defaults, Restoring , 35 I Imaging drum Installing , 41 Replacing , 40 Installing Imaging drum , 41 PPD file , 31 Printer drivers For local printing , 20 on Macintosh , 27 Toner - Dell 5100cn | Owner's Manual - Page 98
www.dell.com/supplies | support.dell.com Software applications Software update , 38 Status monitor , 37 Toner re-order , 38 Software update , 38 Status monitor , 37 Supplies, Ordering , 2 T Toner cartridge Installing , 44 Replacing , 43 Toner re-order window, Using , 38 Toner, Ordering , 2 W
-
 1
1 -
 2
2 -
 3
3 -
 4
4 -
 5
5 -
 6
6 -
 7
7 -
8
-
9
-
10
-
11
-
12
-
13
-
14
-
15
-
16
-
17
-
18
-
19
-
20
-
21
-
22
-
23
-
24
-
25
-
26
-
27
-
28
-
29
-
30
-
31
-
32
-
33
-
34
-
35
-
36
-
37
-
38
-
39
-
40
-
41
-
42
-
43
-
44
-
45
-
46
-
47
-
48
-
49
-
50
-
51
-
52
-
53
-
54
-
55
-
56
-
57
-
58
-
59
-
60
-
61
-
62
-
63
-
64
-
65
-
66
-
67
-
68
-
69
-
70
-
71
-
72
-
73
-
74
-
75
-
76
-
77
-
78
-
79
-
80
-
81
-
82
-
83
-
84
-
85
-
86
-
87
-
88
-
89
-
90
-
91
-
92
-
93
-
94
-
95
-
96
-
97
-
98
 |
 |

www.dell.com/supplies | support.dell.com
Dell™ Laser Printer 5100cn
Owner’s Manual
Look Inside For:
• Loading Paper
• Setting Up for Local and Network Printing
• Installing Printer Driver
• Using Your Printer
• Maintenance
• Contacting Dell