Dell 944 Owner's Manual
Dell 944 Manual
 |
UPC - 896207999762
View all Dell 944 manuals
Add to My Manuals
Save this manual to your list of manuals |
Dell 944 manual content summary:
- Dell 944 | Owner's Manual - Page 1
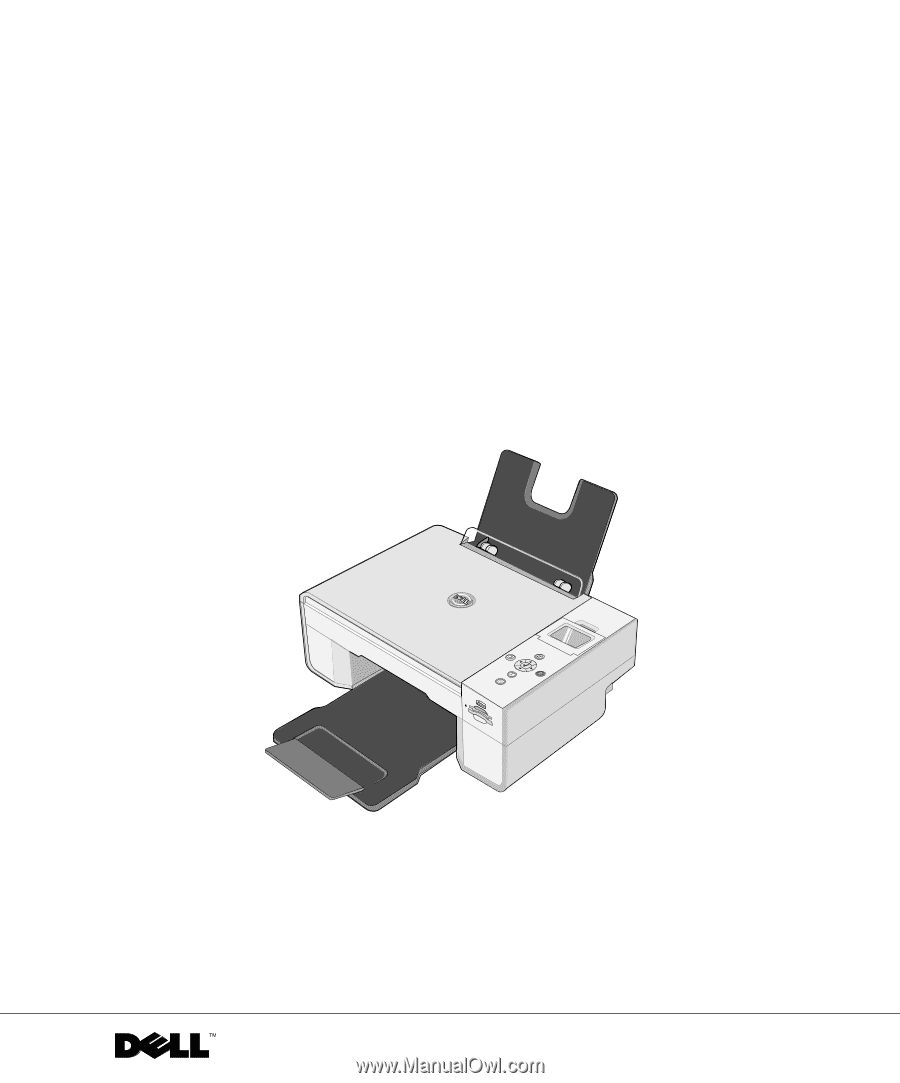
Dell™ Photo All-In-One Printer 944 Owner's Manual Look Inside For: • Ordering Supplies • Getting Started • Using the Printer • Understanding the Printer Software • Maintenance and Troubleshooting www.dell.com/supplies | support.dell.com - Dell 944 | Owner's Manual - Page 2
to order supplies. Your printer has been designed to print using the following print cartridges. Supply Item Standard Capacity black ink cartridge Standard Capacity color ink cartridge High Capacity black ink cartridge High Capacity color ink cartridge Photo ink cartridge Part number J5566 J5567 - Dell 944 | Owner's Manual - Page 3
printer. NOTICE: A NOTICE indicates either potential damage to hardware or loss of data and tells you how to avoid the problem Ink Management System are trademarks of Dell Inc.; Microsoft and Windows RIGHTS This software and documentation are Software clause at DFARS 252.227-7013 and - Dell 944 | Owner's Manual - Page 4
www.dell.com | support.dell.com - Dell 944 | Owner's Manual - Page 5
Parts 12 Setting Up Your Printer 14 Setting the Language on Your Printer 14 Resetting the Language on Your Printer 14 Using the Operator Panel 15 Operator Panel Menus 16 Loading Paper 23 Understanding the Automatic Paper Type Sensor 25 2 Printing Printing a Document 27 Printing Photos - Dell 944 | Owner's Manual - Page 6
47 Scanning Photos 48 Scanning Multiple Pages or Images 49 Scanning a Photo or Document Installing Microsoft Fax Console in Windows XP 57 Configuring Microsoft Fax Console (Windows XP) or Fax Service Management (Windows 2000 58 Faxing a Paper Document Using the Operator Panel 59 Faxing a Paper - Dell 944 | Owner's Manual - Page 7
Using Memory Card Manager 68 Dell Ink Management System 68 Removing and Reinstalling the Software 70 7 Ink Cartridge Maintenance Replacing Ink Cartridges 71 Aligning Ink Cartridges 74 Cleaning the Ink Cartridge Nozzles 76 8 Troubleshooting Setup Problems 77 Computer Problems 77 Contents 7 - Dell 944 | Owner's Manual - Page 8
General Problems 80 Fax Problems 80 Paper Problems 80 Error Messages and Lights 82 Improving Print Quality 84 9 Contacting Dell Technical Assistance 85 Automated Order-Status Service 86 Contacting Dell 86 10 Appendix U.S. Terms and Conditions of Sale 105 Limited Warranties and Return Policy - Dell 944 | Owner's Manual - Page 9
the use of specific Dell-authorized components. The safety features of some parts may not always be obvious. Dell disclaims liability associated with the use of non-Dell-authorized components. • Refer to your Owner's Manual for instructions on the proper way to clear paper jams. CAUTION: SAFETY - Dell 944 | Owner's Manual - Page 10
www.dell.com | support.dell.com 10 CAUTION: SAFETY INSTRUCTIONS - Dell 944 | Owner's Manual - Page 11
can use the Dell Photo AIO Printer 944 to do a variety of things. A few important things to note: • If your printer is connected to a computer, you can use either the printer operator panel or the printer software to create your projects. • You do need to connect your printer to a computer to scan - Dell 944 | Owner's Manual - Page 12
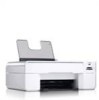
the Printer Parts 2 1 3 13 12 4 11 5 10 6 Number 1 2 3 7 Part: Paper support Paper guide Top cover 12 About Your Printer 89 Description: Part that supports loaded paper. Guide that helps the paper feed into the printer properly. Top of printer that holds your document or photo flat - Dell 944 | Owner's Manual - Page 13
9 10 11 12 13 Part: Paper exit tray Printer unit Ink cartridge carrier Scanner support USB connector Power connector Memory card slots PictBridge USB connector Scanner glass Operator panel Description: Tray that holds the paper as it exits the printer. NOTE: To extend the paper exit tray, pull the - Dell 944 | Owner's Manual - Page 14
.com Setting Up Your Printer NOTE: The Dell Photo AIO Printer 944 supports Microsoft® Windows® 2000, Windows XP, and Windows XP Professional x64. Follow the instructions on your Setting Up Your Printer poster to install the hardware and software. If you encounter problems during setup, see "Setup - Dell 944 | Owner's Manual - Page 15
scan, copy, and customize documents. The printer is on when the Power button is illuminated. 1 2 3 4 Number 1 Use the: LCD display 2 Menu button 3 Back button 8 7 6 5 To: Display scanning, copying, faxing, and printing options as well as status and error - Dell 944 | Owner's Manual - Page 16
www.dell.com | support.dell.com Number 4 Use the: Arrow buttons 5 Power button To: • Navigate menus and menu items. • Decrease/increase number of copies. • Change the selected mode. • Navigate photos on photo card or digital camera. Turn your printer on or off. 6 Cancel button 7 Start - Dell 944 | Owner's Manual - Page 17
3¼ in. • 3 x 5 in. • 3½ x 5 in. • 4 x 6 in. • 5 x 7 in. • 8 x 10 in. • 8½ x 11 in. • 8½ x 14 in. • A6 • A5 • B5 • A4 •L • 2L • Hagaki • 10 x 15 cm • 13 x 18 cm • Draft • Normal • Photo • Automatic* Press the Select button , and then use the Arrow buttons to adjust the brightness setting. About Your - Dell 944 | Owner's Manual - Page 18
www.dell.com | support.dell.com Copy menu item Blank Paper Size Paper Type Repeat Image Settings • 3 x 5 in. • 3½ x 5 in. • 4 x 6 in. • 10 x 15 cm • 5 x 7 in. • 13 x 18 cm • 8½ x 11 in. • 8½ x 14 in. • A6 • A5 • B5 • A4 •L • 2L • Hagaki • 6 x 8 cm • - Dell 944 | Owner's Manual - Page 19
card or USB memory key is inserted into the printer, the following options are available. Photo menu item View Photos or Print Save to Computer View Slideshow Print All X Photos Settings Press the Select button . For more information, see "Printing Photos From a Memory Card or USB Key" on page 32 - Dell 944 | Owner's Manual - Page 20
www.dell.com | support.dell.com Press the Menu button to access these other Photo menu items. Photo menu item Color Photo Size Quality Brightness Settings in • A4 • A5 • B5 • A6 • Hagaki • Draft • Normal • Photo • Automatic* Press the Select button , and then use the Arrow buttons to adjust the - Dell 944 | Owner's Manual - Page 21
Photo menu item Paper Size Paper Type Crop Rotate 90 Degrees Preview Red Eye Reduction Automatic Image Enhancement Sepia Tone Print * Factory default setting Settings • 3 x 5 in. • 3½ x 5 in. • 4 x Select button . Press the Select button . • On • Off* • On • Off* • On • Off* About Your Printer 21 - Dell 944 | Owner's Manual - Page 22
www.dell.com | support.dell.com Scan Mode The Scan submenu is only available if the printer is connected to a computer or a network adapter. If you choose Scan as the mode, you are prompted to choose the destination computer for the scanned document. You can scroll through the available - Dell 944 | Owner's Manual - Page 23
button . Press the Select button . 2 Center the paper on the paper support. 3 Adjust the paper guides so both are resting against the edges of the paper. NOTE: Do not pull on both paper guides simultaneously. When one paper guide is moved, the other adjusts accordingly. About Your Printer 23 - Dell 944 | Owner's Manual - Page 24
www.dell.com | support.dell.com NOTE: Do not force paper into the printer. The paper should be flat against the paper support surface, and the edges should be flush against both paper guides. Photo paper should be loaded short-edge first with the glossy/photo side facing up. 24 About Your Printer - Dell 944 | Owner's Manual - Page 25
load one of these paper types, the printer detects the paper type and automatically adjusts the Quality/Speed settings. Paper type Plain Transparency Glossy/photo Quality/Speed settings Black and Color Cartridges Installed Photo and Color Cartridges Installed Normal Photo Normal Photo Photo - Dell 944 | Owner's Manual - Page 26
OK. To turn off the automatic paper type sensor for all print jobs: 1 In Windows XP, click Start→ Control Panel→ Printers and Other Hardware→ Printers and Faxes. In Windows 2000, click Start→ Settings→ Printers. 2 Right-click the Dell Photo AIO Printer 944 icon. 3 Click Printing Preferences. 4 Click - Dell 944 | Owner's Manual - Page 27
your computer and printer, and make sure they are connected. 2 Load paper with the print side facing up. For more information, see "Loading Paper" on page 23 b On the Print Setup tab, select the print quality/speed, paper size, black and white or color printing, borderless printing, orientation, and - Dell 944 | Owner's Manual - Page 28
| support.dell.com Printing Photos 1 Load the photo paper with the print (glossy) side facing up. For more information, see "Loading Paper" on page 23. 2 It is recommended that you use a color cartridge and a photo cartridge for printing photos. For more information, see "Replacing Ink Cartridges - Dell 944 | Owner's Manual - Page 29
sure the print side is facing up. For more information, see "Loading Paper" on page 23. 2 It is recommended that you use a color cartridge and a photo cartridge for printing photos. For more information, see "Replacing Ink Cartridges" on page 71. 3 With your document open, click File→ Print. 4 To - Dell 944 | Owner's Manual - Page 30
). Printing Envelopes 1 Turn on your computer and printer, and make sure they are connected. 2 Load up to 10 envelopes with the stamp in the upper left corner. NOTE: You can load a single envelope into the paper support without removing plain paper. 3 With your document open, click File→ Print - Dell 944 | Owner's Manual - Page 31
Printing Photos From a PictBridge-Enabled Camera Your printer supports PictBridge-compatible cameras. 1 Insert one end of the USB cable into the camera. 2 Insert the other end of the USB cable into the PictBridge port on the front of the printer. NOTE: When your printer is not connected to a - Dell 944 | Owner's Manual - Page 32
From a Memory Card or USB Key Most digital cameras use a memory card to store photos. The Dell Photo AIO Printer 944 supports the following digital media: • CompactFlash Type I • CompactFlash Type II (MicroDrive) • Memory Stick • Memory Stick PRO • SmartMedia • Secure Digital • MultiMediaCard • xD - Dell 944 | Owner's Manual - Page 33
• DELL - 64 MB High Speed USB 2.0 Memory Key, Part Number 311-4339 When you insert a memory card or USB memory key, the Photo Mode menu is displayed. NOTE: Do not insert more than one memory card or USB memory key at a time. Photo Mode View Photos or Print Save to Computer View Slideshow Print All - Dell 944 | Owner's Manual - Page 34
press the Select button on the operator panel. The printer displays each photo on the memory card or USB memory key. Printing All Photos on Memory Card or USB Memory Key From the Photo Mode menu on the display, scroll to Print All X Photos, and then press the Select button on the operator panel - Dell 944 | Owner's Manual - Page 35
want to to preview the image. 10 Press the Start button to print. Rotating Photos 1 Insert a memory card or USB memory key into the printer. 2 Press the up or down Arrow buttons press the Select button . to highlight View Photos or Print, and then 3 Press the up or down Arrow buttons then press - Dell 944 | Owner's Manual - Page 36
com | support.dell.com Using Red Eye Reduction 1 Insert a memory card or USB memory key into the printer. 2 Press the Menu button . 3 Press the up or down Arrow buttons the left or right Arrow buttons until you see On for all photos, and then press the Select button . Red Eye Reduction will - Dell 944 | Owner's Manual - Page 37
Arrow buttons button . until you see Auto Image Enhance. until you see Off, and then press the Select Printing Photos in Sepia Tone 1 Insert a memory card or USB memory key into the printer. 2 Press the Menu button . 3 Press the up or down Arrow buttons until you see Sepia Tone Print. 4 Press - Dell 944 | Owner's Manual - Page 38
www.dell.com | support.dell.com 38 Printing - Dell 944 | Owner's Manual - Page 39
3 Copying Copying Documents Using the Operator Panel 1 Turn on your printer. 2 Load the paper. For more information, see "Loading Paper" on page 23. 3 Open the top cover. Copying 39 - Dell 944 | Owner's Manual - Page 40
www.dell.com | support.dell.com 4 Place the document you want to copy face down on the scanner glass. Make sure the upper left corner of the front of the document aligns with the arrow on the printer. 5 Close the top cover. 6 Press the Menu button to change copy settings. For more information - Dell 944 | Owner's Manual - Page 41
corner of the front of the document aligns with the arrow on the printer. 5 Close the top cover. 6 Click Start→ Programs or All Programs→ Dell Printers→ Dell Photo AIO Printer 944→ Dell All-In-One Center. The Dell All-In-One Center opens. 7 Select the number of copies (1-99) and color setting from - Dell 944 | Owner's Manual - Page 42
size. - Lighten or darken your document. - Reduce or enlarge your document. 9 When you are finished customizing your settings, click Copy Now. Copying Photos Using the Operator Panel 1 Turn on your printer. 2 Load photo paper with the print (glossy) side facing up. For more information, see "Loading - Dell 944 | Owner's Manual - Page 43
. 6 From the Copy Quality submenu, select Photo. For more information, see "Operator Panel Menus" on page 16. 7 Press the Start button . Copying Photos Using Your Computer 1 Turn on your computer and printer, and make sure they are connected. 2 Load photo paper with the print (glossy) side facing up - Dell 944 | Owner's Manual - Page 44
the upper left corner of the front of the photo aligns with the arrow on the printer. 5 Close the top cover. 6 Click Start→ Programs or All Programs→ Dell Printers→ Dell Photo AIO Printer 944→ Dell All-In-One Center. The Dell All-In-One Center opens. 7 Click Preview Now. 8 Adjust the dotted lines - Dell 944 | Owner's Manual - Page 45
Start→ Programs or All Programs→ Dell Printers→ Dell Photo AIO Printer 944→ Dell All-In-One Center. The Dell All-In-One Center opens. 2 Select a copy quantity and color. 3 Click See More Copy Settings to: - Choose a copy quality. - Select the blank paper size. - Select the original document size - Dell 944 | Owner's Manual - Page 46
www.dell.com | support.dell.com 46 Copying - Dell 944 | Owner's Manual - Page 47
front of the document aligns with the arrow on the printer. 4 Close the top cover. 5 Open the Dell All-In-One Center by clicking Start→ Programs or All Programs→ Dell Printers→ Dell Photo AIO Printer 944→ Dell All-In-One Center. The Dell All-In-One Center opens. NOTE: You can also open the Dell All - Dell 944 | Owner's Manual - Page 48
www.dell.com | support.dell.com 6 In the Send scanned image to: drop-down menu, Dell Printers→ Dell Photo AIO Printer 944→ Dell All-In-One Center. The Dell All-In-One Center opens. NOTE: You can also open the Dell All-In-One Center from the operator panel on your printer. When your printer is - Dell 944 | Owner's Manual - Page 49
your image, click Scan Now. When your document has finished processing, the selected program opens. Scanning Multiple Pages or Images 1 Turn on your computer and printer, and make sure they are connected. 2 Open the top cover. 3 Place the first sheet of the document you want to scan face down on the - Dell 944 | Owner's Manual - Page 50
to a network, you can scan photos or documents and have them sent to any computer on the network. NOTE: The computer must have the printer software installed. Use the Drivers and Utilities CD to install the printer software. 1 Turn on your printer and external network adapter, and make sure they are - Dell 944 | Owner's Manual - Page 51
button . 6 Press the Arrow buttons to scroll through the available computers until you find the one you want to send your photo or document to, and then press the Select button . NOTE: If your printer is connected locally, the Scan submenu does not appear, and the host computer is automatically - Dell 944 | Owner's Manual - Page 52
front of the document aligns with the arrow on the printer. 3 Close the top cover. 4 Open the Dell All-In-One Center by clicking Start→ Programs or All Programs→ Dell Printers→ Dell Photo AIO Printer 944→ Dell All-In-One Center. The Dell All-In-One Center opens. NOTE: You can also open the Dell All - Dell 944 | Owner's Manual - Page 53
1 Click Start→ Programs or All Programs→ Dell Printers→ Dell Photo AIO Printer 944→ Dell All-In-One Center. The Dell All-In-One Center opens. 2 In the Productivity Tools section, click Save an image on my computer. 3 Follow the instructions on your screen. E-mailing a Scanned Image or Document - Dell 944 | Owner's Manual - Page 54
Programs→ Dell Printers→ Dell Photo AIO Printer 944→ Dell All-In-One Center. The Dell All-In-One Center opens. 5 Click Preview Now. 6 In the Productivity Tools section, click E-mail an image to a friend. 7 In the What is being scanned? menu, make a selection. 8 Follow the instructions on the screen - Dell 944 | Owner's Manual - Page 55
Click Start→ Programs or All Programs→ Dell Printers→ Dell Photo AIO Printer 944→ Dell All-In-One Center. The Dell All-In-One Center opens. 6 Click Preview Now. 7 In the Productivity Tools section, select Enlarge or reduce an image. 8 Follow the instructions on the screen to select the size of your - Dell 944 | Owner's Manual - Page 56
www.dell.com | support.dell.com 56 Scanning - Dell 944 | Owner's Manual - Page 57
to have the printer attached to a computer that is equipped with a modem and has Microsoft Fax installed. Before you do anything else, check to see that the Microsoft Fax software is on your computer by clicking Start→ Programs or All Programs→ Accessories→ Communications. For Windows XP: • If you - Dell 944 | Owner's Manual - Page 58
www.dell.com | support.dell.com Configuring Microsoft Fax Console (Windows XP) or Fax Service Management (Windows 2000) To configure for fax: 1 Click Start→ Programs or All Programs→ Accessories→ Communications→ Fax→ Fax Console (Windows XP) or Fax Service Management (Windows 2000). 2 On the - Dell 944 | Owner's Manual - Page 59
or receive faxes. Faxing a Paper Document Using the Operator Panel 1 Turn on your printer and computer, and make sure installed. Contact your Internet Service Provider for information. 2 Place your document on the scanner glass, and make sure the upper left corner aligns with the arrow on the printer - Dell 944 | Owner's Manual - Page 60
filter installed. Contact your Internet Service Provider for information. 2 Place your document on the scanner glass, and make sure the upper left corner aligns with the arrow on the printer. 3 Click Start→ Programs or All Programs→ Dell Printers→ Dell Photo AIO Printer 944→ Dell All-In-One Center - Dell 944 | Owner's Manual - Page 61
Faxing Electronic Documents 1 With the file open, click File→ Print. 2 In the printer list, select Fax. 3 Click Print, and then follow the instructions on the screen. Receiving a Fax Using Fax Console or Fax Service Management 1 Make sure that an active telephone line is connected to the wall jack - Dell 944 | Owner's Manual - Page 62
www.dell.com | support.dell.com Viewing the Status of a Fax Using Fax Console or Fax Service Management 1 Click Start→ Programs or All Programs→ Accessories→ Communications→ Fax. 2 Click Fax Console or Fax Service Management. 3 The following folders appear: • Incoming - faxes currently being - Dell 944 | Owner's Manual - Page 63
, and convert photos and other types of images. • Dell Ink Management System™ - Warns you when your printer is running low on ink. • Memory Card Manager - Allows you to display, manage, edit, print, and save photos to your computer. Using the Dell All-In-One Center Understanding the Software 63 - Dell 944 | Owner's Manual - Page 64
• Access troubleshooting and maintenance information. • Preview images you want to print or copy. • Manage photos (copy them to folders, print them, perform creative copying). To access the Dell All-In-One Center: Click Start→ Programs or All Programs→ Dell Printers→ Dell Photo AIO Printer 944→ Dell - Dell 944 | Owner's Manual - Page 65
Recognition). • Modify an image with a photo editor. For more information click Help in the Dell All-In-One Center. Using Printing Preferences Printing Preferences allows you to change the various printer settings. You can change your printer settings in Printing Preferences depending on the - Dell 944 | Owner's Manual - Page 66
option but should not be selected if you have a photo cartridge installed. Media Type - Allows you to set the paper type manually, or have the printer sensor detect the paper type automatically. Paper Size - Select the size and type of paper. Print in black and white - Print your color images - Dell 944 | Owner's Manual - Page 67
Tab Maintenance Options Install Print Cartridges Clean Print Cartridges Align Print Cartridges Print a Test Page Network Support Using Dell Picture Studio In Dell Picture Studio, you can explore digital photography and learn how to organize, create, or print photos. There are three components to - Dell 944 | Owner's Manual - Page 68
→ Dell Photo AIO Printer 944→ Memory Card Manager. Dell Ink Management System Each time you print a job, a printing progress screen appears, which shows the progress of the print job as well as the amount of ink remaining and the approximate number of pages remaining in the cartridge. The page - Dell 944 | Owner's Manual - Page 69
Options, located on the Advanced tab of the Printing Preferences. The Reserve Tank dialog does not display again until after the low ink cartridge has been replaced. The Complete-A-Print check box is automatically reset when a new or different cartridge is installed. Understanding the Software 69 - Dell 944 | Owner's Manual - Page 70
→Dell Printers→Dell Photo AIO Printer 944→Uninstall Dell Photo AIO Printer 944. 2 Follow the instructions on the screen. 3 Restart your computer. 4 Insert the Drivers and Utilities CD, and then follow the instructions on the screen. If the installation screen does not appear: a In Windows XP, click - Dell 944 | Owner's Manual - Page 71
. Dell does not provide warranty coverage for problems caused by using accessories, parts, or components not supplied by Dell. 1 Turn on your printer. 2 Lift the printer unit, and position the scanner support between the tabs to hold it open. The ink cartridge carrier moves and stops at the loading - Dell 944 | Owner's Manual - Page 72
support.dell.com 3 Press down on the ink cartridge lever to raise each ink cartridge lid. 4 Remove the old ink cartridges. 5 Store the cartridges in an air-tight container, such as the storage unit you received with your photo cartridge, or dispose of them properly. 6 If you are installing new ink - Dell 944 | Owner's Manual - Page 73
). For photo printing, use a photo cartridge and a color cartridge. 7 Insert the new ink cartridges. Make sure the black or photo ink cartridge is secure in the left ink cartridge carrier, and the color ink cartridge is secure in the right ink cartridge carrier. Ink Cartridge Maintenance 73 - Dell 944 | Owner's Manual - Page 74
unit, and hold the scanner support up while lowering the printer unit until it is completely closed. Aligning Ink Cartridges Your printer automatically prompts you to align the ink cartridges when they are installed or replaced. To verify your ink cartridges are aligned, you can print an alignment - Dell 944 | Owner's Manual - Page 75
. To align the ink cartridges: 1 Load plain paper. For more information, see "Loading Paper" on page 23. 2 In Windows XP, click Start→ Control Panel→ Printers and Other Hardware→ Printers and Faxes. In Windows 2000, click Start→ Settings→ Printers. 3 Right-click the Dell Photo AIO Printer 944 icon - Dell 944 | Owner's Manual - Page 76
the ink cartridge nozzles: 1 Load plain paper. For more information, see "Loading Paper" on page 23. 2 In Windows XP, click Start→ Control Panel→ Printers and Other Hardware→ Printers and Faxes. In Windows 2000, click Start→ Settings→ Printers. 3 Right-click the Dell Photo AIO Printer 944 icon - Dell 944 | Owner's Manual - Page 77
, if using a computer. • If an error message appears on the operator panel display, write down the exact message. Setup Problems Computer Problems VER IF Y T H AT YOU R P RI N T ER I S C OM P AT I B L E W IT H Y OU R CO MP U T ER. The Dell Photo AIO Printer 944 supports Windows 2000 and Windows XP - Dell 944 | Owner's Manual - Page 78
| support.dell.com DETERMINE IF THE PRINTER SOFTWARE IS INSTALLED. Click Start→ Programs or All Programs→ Dell Printers→ Dell Photo AIO Printer 944. If the Dell Photo AIO Printer 944 does not appear in the list of programs, the printer software is not installed. Install the printer software. For - Dell 944 | Owner's Manual - Page 79
more information, see "Error Messages and Lights" on page 82. ENSURE YOU INSTALLED THE INK CARTRIDGES CORRECTLY AND REMOVED THE STICKER AND TAPE FROM EACH CARTRIDGE. MAKE SURE YOU LOADED THE PAPER CORRECTLY. For more information, see "Loading Paper" on page 23. ENSURE THE PRINTER IS NOT CONNECTED TO - Dell 944 | Owner's Manual - Page 80
MULTIPLE PAGES. For more information, see "Loading Paper" on page 23. MAKE SURE THE PAPER IS NOT WRINKLED, TORN OR DAMAGED. MAKE SURE THE PAPER IS AGAINST THE RIGHT SIDE OF THE PAPER SUPPORT AND THE P AP E R G U ID E R E S T S AG AI N S T T H E L E F T ED GE OF T H E P A P ER. 80 Troubleshooting - Dell 944 | Owner's Manual - Page 81
PAPER JAM. Using your printer and your computer • Follow the instructions on the screen for clearing the paper jam. Using your printer only If the paper jam is located in the paper support: 1 Turn off your printer. 2 Firmly grasp the paper and gently pull it from the printer. 3 Turn on your printer - Dell 944 | Owner's Manual - Page 82
. The memory card inserted in the printer is incorrectly formatted. A printhead carrier jam exists in the printer. The ink cartridges are installed in the wrong position. A black or photo cartridge is missing. A color cartridge is missing. If the LCD displays Error followed by a 4-digit number, an - Dell 944 | Owner's Manual - Page 83
. The attached device is not supported, or the PictBridge-enabled digital camera is not set to the correct USB mode. The paper in the printer is smaller than the selected Blank Paper Size. The ink cartridge is running low on ink. The Low Ink Error occurs when your ink cartridges reach levels of 25 - Dell 944 | Owner's Manual - Page 84
, try aligning or cleaning the ink cartridges. For more information on aligning, see "Aligning Ink Cartridges" on page 74. For more information on cleaning ink cartridges, see "Cleaning the Ink Cartridge Nozzles" on page 76. For additional solutions, go to support.dell.com. 84 Troubleshooting - Dell 944 | Owner's Manual - Page 85
Assistance If you need help with a technical problem, Dell is ready to assist you. 1 Call technical support from a telephone near or at the printer so that technical support can assist you with any necessary procedures. When calling Dell, use your Express Service Code to help expedite the routing of - Dell 944 | Owner's Manual - Page 86
check on the status of any Dell products that you have ordered, you can go to support.dell.com, or you can call the automated order-status service. A recording prompts you for the information needed to locate and report on your order. See "Contacting Dell" on page 86 for the telephone number - Dell 944 | Owner's Manual - Page 87
: [email protected] E-mail for servers and EMC: [email protected] Customer Care Tech Support Tech Support Services Sales Aruba General Support Australia (Sydney) E-mail (Australia): [email protected] International Access Code: 0011 E-mail (New Zealand): nz_tech_support - Dell 944 | Owner's Manual - Page 88
: 00 Customer Support, Technical Support Country Code: 55 Technical Support Fax City Code: 51 Customer Care Fax Sales British Virgin Islands General Support Brunei Customer Technical Support (Penang, Malaysia) Country Code: 673 Customer Service (Penang, Malaysia) Sales (Singapore) 88 - Dell 944 | Owner's Manual - Page 89
Support (Home Sales/Small Business) Technical Support (med./large bus., government) Sales (Home Sales/Small Business) Sales (med./large bus., government) Spare Parts Sales & Extended Service Sales Cayman Islands General Support Chile (Santiago) Sales, Customer Support, and Technical Support - Dell 944 | Owner's Manual - Page 90
592 Department Name or Service Area, Website and E-Mail Address Technical Support website: support.dell.com.cn Technical Support E-mail: cn_support@ South Large Corporate Accounts West Large Corporate Accounts Spare Parts General Support General Support Area Codes, Local Numbers, and Toll-Free - Dell 944 | Owner's Manual - Page 91
Code Country Code City Code Department Name or Service Area, Website and E-Mail Address Czech Republic (Prague) Website: support.euro.dell.com International Access Code: 00 E-mail: [email protected] Country Code: 420 Technical Support Customer Care Fax Tech Fax Switchboard Denmark - Dell 944 | Owner's Manual - Page 92
City Code: 6103 Department Name or Service Area, Website and E-Mail Address Website: support.euro.dell.com E-mail: support.euro.dell.com/fr/fr/emaildell/ Home and Small Business Technical Support Customer Care Switchboard Switchboard (calls from outside of France) Sales Fax Fax (calls from outside - Dell 944 | Owner's Manual - Page 93
/gr/en/emaildell/ Country Code: 30 Technical Support Gold Service Technical Support Switchboard Gold Service Switchboard Sales Fax Grenada General Support Guatemala General Support Guyana General Support Hong Kong Website: support.ap.dell.com International Access Code: 001 Technical - Dell 944 | Owner's Manual - Page 94
or Service Area, Website and E-Mail Address Website: support.euro.dell.com E-mail: [email protected] Technical Support U.K. Technical Support (dial only) Ireland Sales U.K. Sales (dial within U.K. only) Fax/Sales Fax Switchboard Website: support.euro.dell.com E-mail: support.euro.dell.com - Dell 944 | Owner's Manual - Page 95
Japan (Dell Precision, OptiPlex, and Latitude) Technical Support (PDAs, projectors, printers, routers) Technical Support outside of Japan (PDAs, projectors, printers, routers) Faxbox Service 24-Hour Automated Order Service Customer Care Business Sales Division (up to 400 employees) Preferred - Dell 944 | Owner's Manual - Page 96
Fax (Brussels, Belgium) Switchboard (Brussels, Belgium) Technical Support Customer Service (Xiamen, China) Transaction Sales (Xiamen, China) Website: support.ap.dell.com Technical Support (Dell Precision, OptiPlex, and Latitude) Technical Support (Dimension, Inspiron, and Electronics and Accessories - Dell 944 | Owner's Manual - Page 97
Code City Code Mexico International Access Code: 00 Country Code: 52 Department Name or Service Area, Website and E-Mail Address Customer Technical Support Sales Customer Service Main Montserrat Netherlands Antilles Netherlands (Amsterdam) International Access Code: 00 Country Code: 31 City - Dell 944 | Owner's Manual - Page 98
E-mail: [email protected] Country Code: 48 Customer Service Phone City Code: 22 Customer Care Sales Customer Service Fax Reception Desk Fax Switchboard Portugal Website: support.euro.dell.com International Access Code: 00 E-mail: support.euro.dell.com/pt/en/emaildell/ Country Code - Dell 944 | Owner's Manual - Page 99
@dell.com 09/091 Gold Queue Country Code: 27 Technical Support City Code: 11 Customer Care Sales Fax Switchboard Southeast Asian and Pacific Countries Customer Technical Support, Customer Service, and Sales (Penang, Malaysia) Area Codes, Local Numbers, and Toll-Free Numbers - Dell 944 | Owner's Manual - Page 100
41 City Code: 22 Department Name or Service Area, Website and E-Mail Address Website: support.euro.dell.com E-mail: support.euro.dell.com/es/es/emaildell/ Home and Small Business Technical Support Customer Care Sales Switchboard Fax Corporate Technical Support Customer Care Switchboard Fax Website - Dell 944 | Owner's Manual - Page 101
(OptiPlex, Latitude, and Dell Precision) Technical Support (PowerApp, PowerEdge, PowerConnect, and PowerVault) Customer Service (Penang, Malaysia) Corporate Sales Transaction Sales Trinidad/Tobago General Support Turks and Caicos Islands General Support Area Codes, Local Numbers, and Toll - Dell 944 | Owner's Manual - Page 102
Service Area, Website and E-Mail Address Area Codes, Local Numbers, and Toll-Free Numbers Website: support.euro.dell.com Customer Care website: support. Customer Care Home and Small Business Sales Corporate/Public Sector Sales Home and Small Business Fax General Support 0870 908 0500 0870 908 - Dell 944 | Owner's Manual - Page 103
-3355 Spare Parts Sales toll-free: 1-800-357-3355 Extended Service and Warranty Sales toll-free: 1-800-247-4618 Fax toll-free: 1-800-727-8320 Dell Services for the Deaf, Hard-of-Hearing, or Speech-Impaired toll-free: 1-877-DELLTTY (1-877-335-5889) U.S. Virgin Islands General Support 1-877 - Dell 944 | Owner's Manual - Page 104
www.dell.com | support.dell.com 104 Contacting Dell - Dell 944 | Owner's Manual - Page 105
of Sale These terms and conditions ("Agreement") apply to your purchase of computer systems and/or related products and/or services and support carrier selected by you is your responsibility. You must notify Dell within 30 days of the date of your invoice or acknowledgement if you believe any part - Dell 944 | Owner's Manual - Page 106
or exchange instructions and policies provided 's policy is one of ongoing update Parts used in repairing or servicing Product may be new, equivalent-to-new, or reconditioned. 8 Service and Support. Service offerings may vary from Product to Product. If you purchase optional services and support - Dell 944 | Owner's Manual - Page 107
DELL IS NOT LIABLE TO YOU FOR WARRANTIES, SUPPORT, OR SERVICE MADE BY OR PURCHASED FROM A THIRD PARTY .htm. 11 Governing Law. THIS AGREEMENT AND ANY SALES THERE UNDER SHALL BE GOVERNED BY THE LAWS OF THE of reference only and do not form a part of these terms and conditions, and no construction - Dell 944 | Owner's Manual - Page 108
.dell.com | support.dell.com Limited problems with electrical power - Servicing not authorized by Dell - Usage that is not in accordance with product instructions - Failure to follow the product instructions or failure to perform preventive maintenance - Problems caused by using accessories, parts - Dell 944 | Owner's Manual - Page 109
longer of either a 1-year limited warranty for new parts and a 90-day limited warranty for reconditioned parts or, for both new and reconditioned parts, the remainder of the warranty for the Dell computer on which such parts are installed. The limited warranty on all Dell-branded products begins - Dell 944 | Owner's Manual - Page 110
www.dell.com | support.dell.com When you contact us, we will issue service. If you purchased through us a service contract with one of our third-party service providers, please refer to that contract for details on how to obtain service. How will you fix my product? We use new and refurbished parts - Dell 944 | Owner's Manual - Page 111
and n series products purchased from the Small and Medium Business Sales Division may only be returned within fourteen (14) days from the date on the packing slip or invoice. • Application software or an operating system that has been installed by Dell may not be returned unless you return the - Dell 944 | Owner's Manual - Page 112
support.dell.com Dell™ Printer Consumables Limited Warranties The following section describes the limited warranty for printer consumables (ink cartridges, toner cartridges, photo print packs, and photo paper) for Dell-branded printers OR FOR LOST DATA OR LOST SOFTWARE. DELL'S LIABILITY WILL BE NO - Dell 944 | Owner's Manual - Page 113
Software. By opening or breaking the seal on the Software packet(s), installing or downloading the Software, or using the Software Software or copy the written materials accompanying the Software, but you may transfer the Software and all accompanying materials on a permanent basis as part of a sale - Dell 944 | Owner's Manual - Page 114
www.dell.com | support.dell.com Dell does NOT warrant that the functions of the Software will meet your requirements or that operation of the Software will be uninterrupted or error free. You assume responsibility for selecting the Software to achieve your intended results and for the use and - Dell 944 | Owner's Manual - Page 115
branch circuits. If necessary, consult a Dell Technical Support representative or an experienced radio/television technician for services. Using shielded cables ensures that you maintain the appropriate Electromagnetic Compatibility classification for the intended environment. For parallel printers - Dell 944 | Owner's Manual - Page 116
www.dell.com | support.dell.com 116 Appendix - Dell 944 | Owner's Manual - Page 117
error messages and flashing lights, 82 F faxing, 57 I ink cartridges aligning, 74 cleaning, 76 replacing, 71 M Maintenance tab, 67 multiple copies, 66 N nozzles, ink cartridge cleaning, 76 O operator panel copying with, 39 using, 15 P paper exit tray, 12 paper type sensor, 25 turning off, 25 photos - Dell 944 | Owner's Manual - Page 118
S software Dell All-In-One Center, 63 Printing Preferences, 65 reinstalling, 70 uninstalling, 70 support contacting Dell, 85 W warranty, 108, 114 118 Index
-
 1
1 -
 2
2 -
 3
3 -
 4
4 -
 5
5 -
 6
6 -
 7
7 -
8
-
9
-
10
-
11
-
12
-
13
-
14
-
15
-
16
-
17
-
18
-
19
-
20
-
21
-
22
-
23
-
24
-
25
-
26
-
27
-
28
-
29
-
30
-
31
-
32
-
33
-
34
-
35
-
36
-
37
-
38
-
39
-
40
-
41
-
42
-
43
-
44
-
45
-
46
-
47
-
48
-
49
-
50
-
51
-
52
-
53
-
54
-
55
-
56
-
57
-
58
-
59
-
60
-
61
-
62
-
63
-
64
-
65
-
66
-
67
-
68
-
69
-
70
-
71
-
72
-
73
-
74
-
75
-
76
-
77
-
78
-
79
-
80
-
81
-
82
-
83
-
84
-
85
-
86
-
87
-
88
-
89
-
90
-
91
-
92
-
93
-
94
-
95
-
96
-
97
-
98
-
99
-
100
-
101
-
102
-
103
-
104
-
105
-
106
-
107
-
108
-
109
-
110
-
111
-
112
-
113
-
114
-
115
-
116
-
117
-
118
 |
 |
www.dell.com/supplies | support.dell.com
Dell™ Photo All-In-One Printer 944
Owner’s Manual
Look Inside For:
• Ordering Supplies
• Getting Started
• Using the Printer
• Understanding the Printer Software
• Maintenance and Troubleshooting